Monday, December 31, 2012

Mad Tea Party Pop-Up

Last day of the year! I can't believe how fast this year went by. We have a 'Mad Hatters Tea Party' challenge at Simon Says Stamp and Show this week, it is an 'anything goes' challenge, so you can go wild. Don't miss the gorgeous DT projects!

I took this challenge quite literary, because we recently watched the Alice in Wonderland cartoon. To celebrate the last day of a fabulous year, I made a pop-up card full of surprises:

What better way to end a year full of stamps, dies and inky fingers than to make a colorful Mad Hatter's tea party pop-up card, with additional surprises on the front. I used Karen Burniston's Sizzix Party Phrase Pop 'n Cuts die, which was perfect for the theme of my card. It became a stage for my little tea party, which was attached on top of the pop-up, also as a pop-up, to add dimension. I used the Pop 'n Cuts base tray for my card and pop-up, but if you don't have the base tray, you can use the pop 'n cuts dies in your ordinary base tray too.

The background is manila cardstock with was inked with bright Distress Inks (Antique Linen, Barn Door, Mowed Lawn, Salty Oceans, Frayed Burlap, Gathered Twigs), and misted heavily with Biscotti Perfect Pearls, since New Year needs some shine. All my stamped images comes from the great TJ Designs Mad Hatter's Tea Party set, except from the script stamp, which is Hero Arts Old Letter Writing. I stamped the script stamp here and there, to fill out the area in between the other stamps.

The images were stamped on white cardstock and coloured with watercolour pencils.

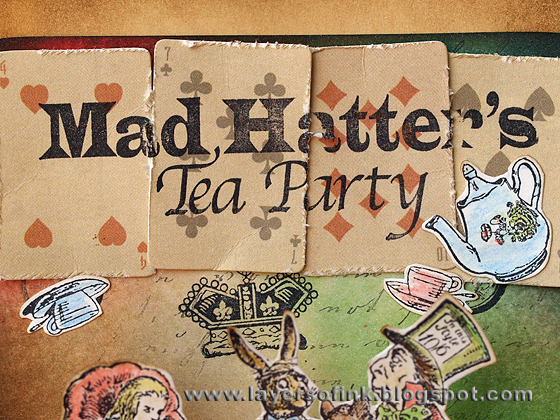
I found just the perfect little Kaiser playing cards and distressed the edges a bit. The sentiment was stamped on top with Archival Ink Jet Black.

I didn't add a lot of details to the text pop-up, only a little tea pot and cup. Since I wanted the word to stand out nicely, it was inked with Salty Ocean.

You can see the pop-up mechanism better on this photo. More stamping, the rabbit, and two more playing cards on the lower panel. I love the amount of space you get to decorate on a pop-up card.  

There are more fun elements on the front of the card. I used the great Opening Door die, also by Karen Burniston. The die both cuts and scores the door, and also has door panels (which I didn't use here, you can see them on this and this project), a handle and a key hole. I cut it from manila cardstock and from mat board, using only the frame from the mat board piece. It was inked with Antique Linen and Frayed Burlap and stamped with a Stamper's Anonymous Tim Holtz wood stamp using Pumice Stone ink. The door handle and key hole were inked with Brushed Pewter Distress Stain.

Alice looks pretty small when she stands there knocking on the door. What might she find on the inside?

An invitation, and of course a much smaller door. I cut the smaller door from manila cardstock, and scored one side, so that it can open.

And that is where you will find the Queen of Hearts!

Join us this week in our 'anything goes Mad Hatter' challenge, and you could be the lucky one to win a $50 gift voucher from our fabulous sponsor Simon Says Stamp.


Thank you for the visit! I hope you will have a Happy New Year full or creativity and crafting!!

Anna-Karin

Supplies:
Dies: Sizzix: 3-D Party Phrase Pop 'n Cuts insert, Opening Door & Wreath, Pop 'n Cuts Base Tray
Stamps: TJ Designs Mad Hatter's Tea Party; Hero Arts Old Letter Writing S4878; Stamper's Anonymous Tim Holtz Wallpaper & Wood
Surfaces: Ranger Manila cardstock; watercolour paper
Ink: Archival Ink Jet Black; Distress Ink: Antique Linen, Barn Door, Festive Berries, Broken China, Evergreen Bough, Frayed Burlap, Mowed Lawn, Peacock Feathers, Salty Ocean, Pumice Stone, Gathered Twigs, Vintage Photo
Stain: Distress Stain Brushed Pewter
Mist: Ranger Perfect Pearls Biscotti
Pencils: Derwent Watercolour pencils
Embellishments: Kaiser Playing Cards,

Saturday, December 29, 2012

CSI case file #52

I hope you had a lovely Christmas! Time for the last CSI: Color, Stories, Inspiration challenge of the year, and this is the gorgeous case file:

I made another double-pager, with photos from when I took this year's Christmas photos of my son:

He was a good poser this year, and I used several different photos, so everybody didn't get the same photo. From the evidence items I used: woodgrain, washers, metal-rimmed tags, newspaper print (sort of, more a dictionary stamp), kraft paper, circles, and number stickers. And from the testimony: inspired by 'gift', hand wrote my journaling on tags, and I was inspired by the "brown paper packages tied up with strings". I was also inspired by the packaging on the inspiration photos and used a die cut brown paper bag.

I used a dry embossed Core'dinations paper for the background and layered the photos on woodgrain paper, a bit of sparkly red paper, and a stamped scalloped border. The layout is about Anton's wish list this year, and his thoughts about the coming of Santa, I finished it on Christmas Eve, just a few hours before Santa did arrive (and was surprisingly enough not recognised). The camera die cut is on the layout, both because it was a photo shoot, and because one of the things Anton wished for was a camera, like mine, he'll have to wait a little bit longer for that though.

The journaling is written on tags tucked into the paper bag, I also added additional small photo there.

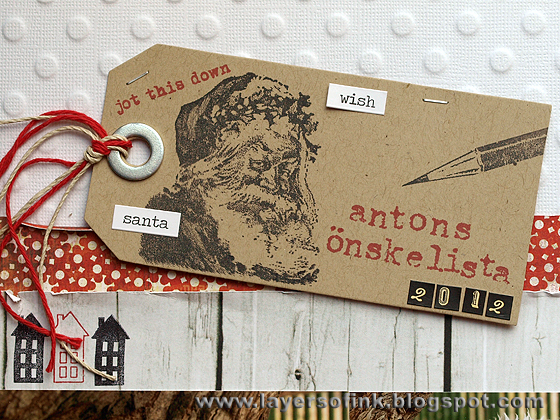
The tag was die cut from kraft cardstock, stamped with a vintage Santa, a pencil, and the title was stamped with alphabet stamps. I also used some Seasonal ChitChat stickers and number stickers for the year. I glued a little washer as a reinforcer to the tag.
The bag is die cut from kraft paper with Tim Holtz In the Bag die. Before assembling it, I stamped it with a car (Archival Ink Vermillion), photo strip road and of course the perfect sentiment stamp. Many cars was on top of the wish list. The washer was tied around the bag with a piece of string after assembly.

I found some really old metal-rimmed tag, and stamped one with 'Dear Santa', and the other with 'Anton is good' - something that he has said over and over for the past weeks, so that Santa really would know that he hasn't been naughty (which is a bit of a modification of the truth ;).

Thank you for the visit! I hope you will join us in the challenge, and don't miss all the wonderful layouts by DT and guests.

Anna-Karin

Supplies:
Dies: Sizzix: In the Bag, Tag & Tie, Vintage Alarm Clock & Camera set
Stamps: Stamper's Anonymous Tim Holtz: Classics #10, Classics #6, Mini Holidays, Mini Muse; Hero Arts: Spread Joy; Artistic Outpost: Secretary Pool
Surfaces: MME woodgrain paper; Bazzill kraft cardstock; Core'dinations dotted cardstock; BasicGrey red patterned paper
Ink: Archival Ink Jet Black and Vermillion
Embellishments: Tim Holtz Idea-ology ChitChat stickers; Authentique stickers; washers, metal-rimmed tags, twine


Monday, December 24, 2012

Merry Christmas Cards

Christmas Eve is the main family celebration day of Christmas in Sweden and was always one of my favourite days of the year. This week we don't have a challenge at Simon Says Stamp and Show, instead the team is sharing a special Christmas wish to all of you. Don't miss the wonderful projects posted by the team members (and read to the end of this post for a special Christmas offer).

One of the important parts of Christmas for me is making and sending Christmas cards. Making Christmas cards was also what got me into papercrafting about ten years ago. I wish I could see all the Christmas cards I've made in a big pile.

I love the idea of my cards travelling across the globe to their destinations.  I usually make every card different from the other, but this year I had to speed up the process a bit. The cards are still all different, but they have the same post card design and colouring method. I was happy to use a lot of my Christmas stamps.

I simply cut manila cardstock into post cards, coloured on both sides with Distress Stains (the quickest way to colour many cards). I used different combinations of stain, which was also a fun way of experimenting with how they would look together. All the cards have a bit of either Brushed Pewter or Tarnished Brass stain, since I love the metallic shine they give. You get six post card from one sheet of 12 inch manila cardstock, and since there are no embellishments, the cards don't cost much to make and are totally flat, making it easy to send them.

I like all my cards to be different, and I enjoy picking out which card will fit which recipient. I took out a lot of Christmas stamps and stamped the cards using different colours ink. All the cards have some stamping in black (Archival Jet Black), brown (Gathered Twigs) and one more colour.

The edges were inked and distressed.

I coloured all the cards in one session and stamped them in another. I think I used almost every single Stamper's Anonymous Tim Holtz Christmas stamp that I own.

On the back, I stamped post card at the top, and then used second generation stamping and a snowflake, star, music, or script stamp.

Here are some using Artistic Outpost stamps. I love how the Distress Stains makes every background unique.

And more with Artistic Outpost.

These were made with Hero Arts stamps. I made even more cards, but I think I am going to start boring you if I share them all.

We will be back on 31 January with a fabulous new challenge, you don't want to miss it. Simon Says Stamp also has an awesome Christmas gift for you, a special discount code: 40% OFF EVERYTHING IN OUR end of year sale category, coupon code: CLEAR40, now through December 31. There are over 1000 products to choose from, so don't miss it.

Wishing you all a Very Merry Christmas and a wonderful year 2013 full of crafting!

Anna-Karin

Supplies:
Surface: Ranger Manila cardstock
Stamps: Stamper's Anonymous Tim Holtz: Letter to Santa, Christmas Blueprint, Classics #10, Christmas Time, Mini Holidays, Mini Holidays 2, Mini Holidays 4, Holiday Wishes, Reindeer Flight, Winter Sketchbook, Classics #9; Hero Arts: Starry Sky S5448, Tiny Flakes CG387, Snowy Tree CG370,  Winter Scene, Spirit of the Season CG375, Winking Reindeer H5457; Artistic Outpost: Snowy Woods, Mid Winter, Ephemera Backgrounds
Ink: Archival Ink Jet Black, Olive; Distress Ink Gathered Twigs, Broken China, Victorian Velvet, Peeled Paint, Pumice Stone, Tumbled Glass, Stormy Sky, Vintage Photo, Frayed Burlap
Stain: Distress Stain: Antique Linen, Frayed Burlap, Vintage Photo, Tumbled Glass, Stormy Sky, Broken China, Victorian Velvet, Peeled Paint, Brushed Pewter, Tarnished Brass, Bundled Sage, Old Paper, Pumice Stone

Sunday, December 23, 2012

Grungeboard Tag

I had forgotten to share this Christmas tag, so here's a last minute tag, but using techniques that can be used for any theme.

Sticky-back canvas was adhered to grungeboard and the tag was die cut from that. It makes for a very sturdy tag. Roughen up the edges a bit. I stamped it with a script stamp, aiming for an imperfect impression. Then it was embossed and inked with an ink blending tool (this is about the maximum thickness for embossing in a Big Shot). I used Vintage Photo to ink it, the embossed parts picks up more of the ink, creating a nice texture.

The tree was white embossed on patterned paper and cut out. The holly leaves were die cut from color core cardstock, sanded and coated with a bit of Rock Candy Stickles. A left-over strip of tissue wrap was inked with Brushed Pewter Distress Stain, fringed and folded to form a border. A piece of Vintage Lace, tinsel and twine finished the border.

For the ornaments, I did a tape transfer using the pretty papers from Tim Holtz Holidays Past paper stash. Adhere clear tape to the patterned paper, place in water, rub off all the white of the paper on the back, adhere to foil tape, and then glue to the ornament with Glossy Accents. Finally, trim of all the excess and wrap a strip of aluminum tape around the top.

I did the same on this one, using a Poinsettia pattern from the same pack. The smaller patterns in the paper pad are perfect for this. 

Have a wonderful day!

Anna-Karin

Supplies:
Embossing folder: Sizzix Damask & Regal Flourishes
Stamps: Hero Arts: Many Branches Tree H5629, La Lettre K5344
Ink: Distress Ink: Vintage Photo; Archival Ink Jet Black
Stain: Brushed Pewter Distress Stain
Stickles: Rock Candy Distress Stickles
Surfaces: Tim Holtz Idea-ology grungeboard, Holidays Past paper stash, Terminology Tissue Wrap; Core'dinations Tim Holtz Color-core cardstock; Claudine Hellmuth sticky-back canvas; aluminium tape
Embellishments: Tim Holtz Idea-ology Fragments, Silver Tinsel Twine, Paper Twine

Saturday, December 22, 2012

CSI case file #51: Santa is coming

Hello! Only two more days to Christmas, and we have another lovely CSI case file. Don't miss checking out the wonderful inspiration by the DT and guests:


I scrapped some Christmas photos from last year:

From the evidence I used: snowflakes, glitter, rhinestones, circles, texture paste, wet and dry embossing and something shiny. I journaled on tags, and it is all about the sparkle of Christmas.

I used watercolour paper as the base for my layout. Heavy modeling paste was applied through stencils to create the stars and the circles. After they dried, I used my favourite way for quick colouring, distress stains. Tumbled Glass, Broken China and Brushed Pewter stains were applied to my craft sheet. I misted the watercolour paper heavily before dipping and dragging into the ink. It is hard to see on the photos, but the Brushed Pewter stain adds a great metallic shine.

When dry, a script and a dot stamp were silver embossed here and there on the background and it was splattered with just a little bit of Picket Fence distress stain (which had been transferred to a mini mister).

The flourishes were die cut from watercolour paper and coloured with Brushed Pewter stain. I made a tag booklet for the journaling and for additional photos. I had quite a few photos from my son's interaction with Santa. Swedish Santas come knocking on the door on the evening of Christmas Eve and hands out the gifts. Anton's first reaction to Santa was that he wore glasses, which was interesting since at this stage he was very interested in mommy and daddy's glasses. I think Santa is going to have a harder time hiding his identity this year. The tag book hangs from a swivel clasp, so it is easy to open and look through. The journaling is about the 'glasses' comment, Anton's interaction with Santa, and about the gifts he got, Thomas the train being a favourite, as well as his 'Laban' ghost which has become his pillow.

Inspired by the case file photo, I wanted to make some baubles. Mat board was covered with aluminium tape and baubles die cut from it. They were embossed in three different folders and coloured with alcohol inks (shades of pink and pearl), wiping some of it off from the embossed parts. I used crinkle ribbon to hang them from the page.

Here's a close up of the stars and the silver embossing.

Apart from the tag booklet, there is another interactive element on the layout, the super fun Door by Karen Burniston (also see this project of mine). The door was die cut once from watercolour paper, and then the frame and other details were die cut again from mat board, mounted on top. I smeared texture paste all over it (same technique that I used on my Winter Wonderland house). The wreath were coloured with Brushed Pewter stain.

Behind the door, there is another photo. It would also be a great place for journaling.

The Fancy Frame was die cut from mat board, and the frame part was coloured with Worn Lipstick Distress Stain and coated with Glossy Accents.

The other two ornaments, chit chat stickers were adhered on top.

I attached the swivel clasp with a brad, hitting the brad with a hammer to make it stick down firmly.

The lamppost was also die cut from mat board and got the same treatment as the door. A piece of mirror sheet was placed behind lamppost (inspired my December tag). I also added a bit of cheese cloth for extra texture.

Thank you for looking! I hope you will play along with us at CSI this week.

Anna-Karin

Supplies:
Stamps: Stamper's Anonymous Tim Holtz Classics #9, Tiny Textures
Ink: Alcohol Ink: Adirondack: Wild Plum, Pink Sherbet, Raspberry, Pearl; Versamark
Stain: Distress Stain: Brushed Pewter, Tumbled Glass, Broken China, Worn Lipstick
Embossing powder: Silver
Surface: Dalerl & Rowney watercolour paper; Sizzix Little Sizzles white mat board; Tim Holtz Idea-ology Mirror Sheet; aluminium tape
Stencils: Ranger Dyan Reaveley Dylusions Starry Starry Night; Crafter's Workshop Mini Paint Lids
Embellishments: Tim Holtz Idea-ology Swivel Clasps, Silver Tinsel Twine, Crinkle Ribbon, Tissue Tape, Seasonal Chit Chat stickers; Kaisercraft rhinestones; cheese cloth
Other: heavy modeling paste

Thursday, December 20, 2012

12 tags of 2012 December + pop-up card

Today I am sharing my versions of Tim Holtz 12 tags of 2012 December. Tim made two tags, and I tried to incorporate aspects of both on my projects. I ended up making two tags and one pop-up card, because I needed more Christmas cards and wanted to use more of the Christmas Blueprint stamps.

I used Barn Door, Fired Brick and Tarnished Brass Distress Stains for the background, love the deep red with the added shimmer. After drying them, I swept them through another pool of the Tarnished Brass stain, to add some more festive shine. Water was splattered on top for more texture. I thought the snowman would look cosy under a lamppost, which was cut from grungeboard covered with tissue tape and inked with Faded Jeans and Chipped Sapphire distress inks.

I backed the lamppost with a little piece of mirror sheet, but got some glossy accents smeared on it. To cover that up, I tested what would happen if it was coated with Crackle Accents. Pretty cool isn't it? Crackles started to form, but didn't go all the way in, and the accents also pulled just a little bit of the blue ink from the lamppost.

This stamped and embossed ticket comes from one of Tim's 12 tags of Christmas from two years ago (tag 2). He made a custom inked stamp pad. At the time, I made one for this ticket stamp and stamped and embossed a whole lot of them. I found them in a scrap box and thought they would fit well on this project.
 
Instead of using markers to colour the snowman, I used Distress Inks smeared on my craft sheet, lightly misted and applied with a paint brush. For me it is easier to control the ink this way and get the result I want (I got some harsher lines when trying it with the markers), perhaps because I am more used to it. Instead of using Rock Candy, as Tim did, I used Star Dust Stickles, for a bit more sparkle.

There wasn't space for a large Poinsettia here, instead I made one with three Mini Poinsettias.

I wanted to make a pop-up card too, and inked a #12 giant tag (the largest size from Ranger), with the same mix of stains. Folded in half it makes a great card. I stamped the toy soldier twice on watercolour paper, coloured with Distress Inks and water and just used the hat from the second soldier.

I love the Tattered Poinsettia die, if you want to, have a look at the tutorial I posted yesterday for a dimensional Poinsettia magnet. The Poinsettia here was made in the same way as Tim did, but instead of using tissue wrap, I tore and glued old book paper to grungepaper before die cutting the Tattered Poinsettia flowers, also adding a Mini Poinsettia. I used Peeled Paint, Barn Door, Aged Mahogany and Scattered Straw to ink it and then coated with Rock Candy Distress Stickles.

On the inside I used Karen Burniston's fun Raising Platform die, as well as the Fancy Frame die. The raising platform is a perfect place for a special sentiment. Check Karen's video, to see how to assemble the raising platform. The background was stamped with a music stamp, with Barn Door ink.

A strip of green kraft core cardstock was embossed with the Poinsettia Pattern folder, to fit with the Poinsettias on the card. I sanded-it and then misted with Biscotti.

The red label was inked same way as on the outside of the card, and the frame was die cut from Specialty Stamping cardstock and inked with Tarnished Brass. I also used some kraft-core cardstock, coordinating with the colour of the toy soldiers hat.

I had some left-over Poinsettias and placed them on the inside of the card.

I also made a second tag, because I wanted to make one with the tree Blueprint stamp. I coloured the tree as well as the baubles with Distress Inks and water and glued them to the tag, after having stamped the stamp on the tag too. I used Peeled Paint and Forest Moss for the tree.

On the tree, I used a bit of Antique Linen Distress Stickles, for a vintage gold look.

I die cut a star from a mirror sheet. Stamped a sentiment on top and adhered it above the tree (where there is a smaller star on the stamp). Love this stuff.

Another grungeboard and tissue wrap Poinsettia.

Thanks so much for looking!

Happy crafting!

Anna-Karin

Supplies:
Embossing folder: Sizzix Textured Poinsettia Pattern Set
Stamps: Stamper's Anonymous Tim Holtz: Christmas Blueprint, Christmas Time, Holiday Wishes, Odds and Ends; Hero Arts Holiday Sayings
Surfaces: Ranger manila tag, Specialty Stamping cardstock; Tim Holtz Idea-ology grungepaper and grungeboard, Composer tissue wrap, Mirror Sheets; Core'dinations Tim Holtz kraft-core cardstock
Ink: Archival Ink Jet Black; Distress Ink: Peeled Paint, Forest Moss, Fired Brick, Barn Door, Stormy Sky, Faded Jeans, Squeezed Lemonade, Evergreen Bough, Black Soot, Frayed Burlap, Chipped Sapphire
Stain: Distress Stain Barn Door, Fired Brick, Tarnished Brass
Glitter: Distress Stickles Rock Candy, Distress Stickles Antique Linen, Stickles Star Dust
Mist: Biscotti Perfect Pearls
Embellishments: Tim Holtz Idea-ology Silver Tinsel Twine, Crinkle Ribbon, Tissue Tape
Other: Ranger Glossy Accents, Crackle Accents