Thursday, September 30, 2021

Dry Embossed Metallic Card

Hi stampers! It is the last day of September and the grand finale of STAMPtember® at Simon Says Stamp. 

Please note: this post has affiliate links, for which I receive a small percentage of sales generated by the link, at no extra cost to you.

Layers of ink - Metallic Dry Embossing card by Anna-Karin Evaldsson.

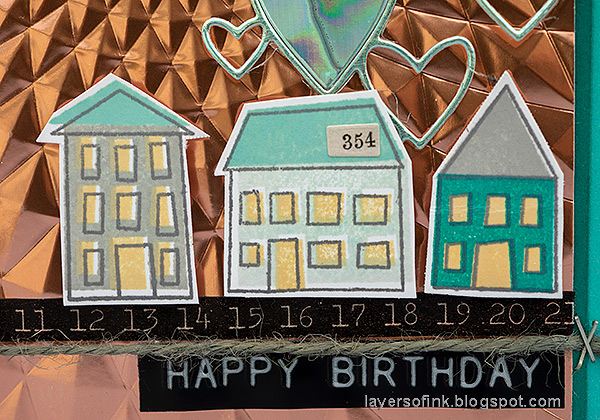
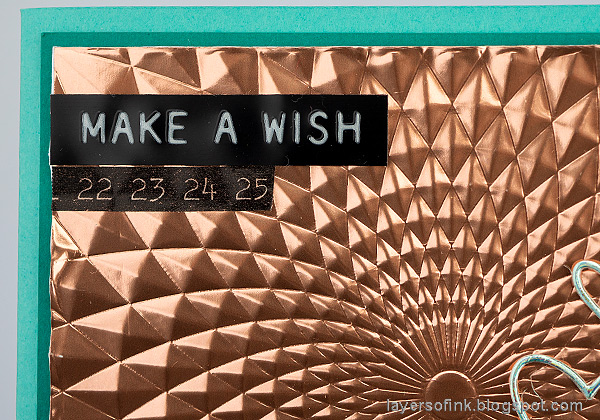
I made a quick and simple card with a metallic copper dry embossed background. It looks very interesting in real life, as light reflects on the embossed surface. I used the Simon Says Stamp Triangle Burst 3-D embossing folder

Layers of ink - Metallic Dry Embossing card by Anna-Karin Evaldsson.

For the background, I adhered Sizzix Rose Gold foil sheet to cardstock and then embossed it in the Triangle Burst folder. This is such a cool and intricate design. The Rose Gold color looks a lot like copper, which is one of my favorite metals.

Layers of ink - Metallic Dry Embossing card by Anna-Karin Evaldsson. Stamp Printmaking Houses.


Layers of ink - Metallic Dry Embossing card by Anna-Karin Evaldsson.

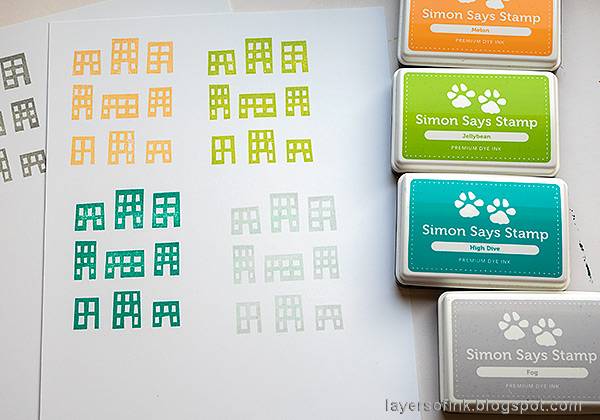
Start by stamping the solid houses.

Layers of ink - Metallic Dry Embossing card by Anna-Karin Evaldsson.

The add the roofs and windows in two steps.

Layers of ink - Metallic Dry Embossing card by Anna-Karin Evaldsson.

Finally stamp the outline. Don't worry if it isn't perfectly aligned since a little off-setting will add to the look.

Layers of ink - Metallic Dry Embossing card by Anna-Karin Evaldsson.

Adhere the houses with foam tape. Make a 'road' for them with Design Tape, a label sentiment sticker and a piece of twine.

Layers of ink - Metallic Dry Embossing card by Anna-Karin Evaldsson.

The embossed background was mounted on two shades of teal cardstock.

Layers of ink - Metallic Dry Embossing card by Anna-Karin Evaldsson.

For even more shine I die cut the Clipping Hearts from Aqua Holographic paper. For another example using the Triangle Burst folder, check out my Foxglove Tag.


STAMPtember® is almost over. Don't miss the grand finale today. There has also been a huge Simon Says Stamp release for STAMPtember®, with stamps, dies, stencils, inks and paper products.


Thank you so much for taking the time to stop by here today! 

Happy crafting!

Anna-Karin

Supplies:

* Please note: the links are affiliate links, for which I receive a small percentage of sales generated by the link, at no extra cost to you.

Wednesday, September 29, 2021

Textured Notebook Tutorial

Hi friends! Today I have a notebook/sketchbook tutorial to share with you, but you could also turn the cover into a card instead, or use the techniques for art journaling.

Please note: this post has affiliate links, for which I receive a small percentage of sales generated by the link, at no extra cost to you.

Layers of ink - Textured Vintage Notebook Tutorial by Anna-Karin Evaldsson. With Simon Says Stamp Document It stamp set.

My favorite part of this notebook/sketchbook is that you can almost not see which elements are stamped and which were a part of the patterned paper. Most are stamped and I had fun using the Simon Says Stamp Document It stamp set, which is one of the  Simon Says Stamp STAMPtember® release sets that I designed. 

Layers of ink - Textured Vintage Notebook Tutorial by Anna-Karin Evaldsson. Apply texture paste through stencil.

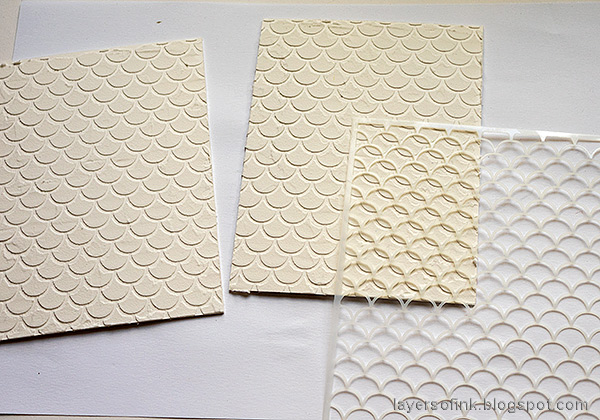
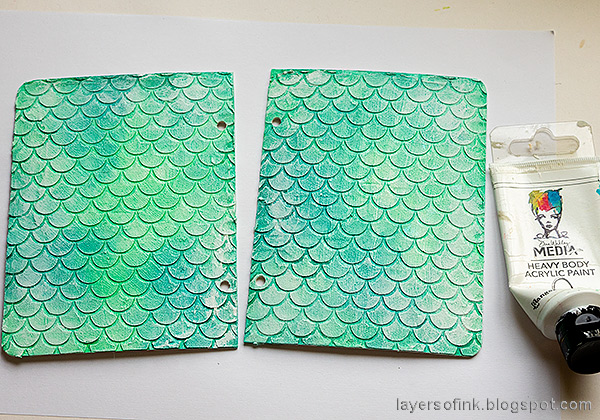
For the covers I used Sizzix Little Sizzles Mat Board and wanted texture. Texture paste was applied with a palette knife through the Simon Says Stamp Mermaid Scales stencil.

Layers of ink - Textured Vintage Notebook Tutorial by Anna-Karin Evaldsson. Paint with gesso.

When dry, paint with gesso.

Layers of ink - Textured Vintage Notebook Tutorial by Anna-Karin Evaldsson. Paint with Distress Ink.

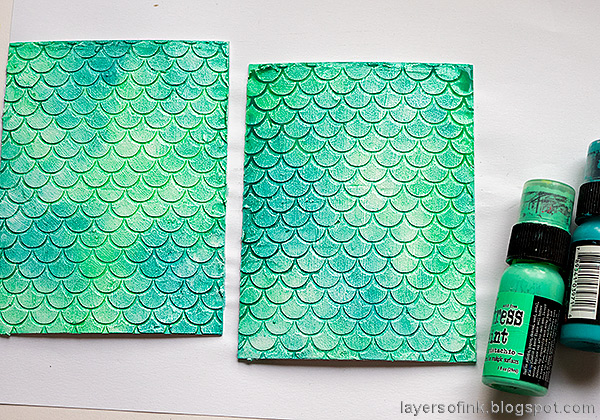
Paint with Distress Paint. I used Cracked Pistachio and Peacock Feathers. Mist with water. The water will make some of the gesso texture more apparent and will make the paint darker in between the scales.

Layers of ink - Textured Vintage Notebook Tutorial by Anna-Karin Evaldsson. With Simon Says Stamp Document It stamp set.

Dry brush a little bit of white paint on the background. Round the outer corners and punch holes with a Crop-a-Dile.

Layers of ink - Textured Vintage Notebook Tutorial by Anna-Karin Evaldsson. Apply Sizzix Luster Wax.

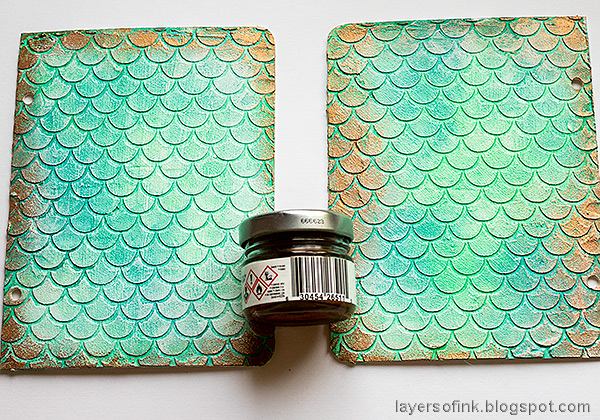
Apply Sizzix Rose Gold Luster Wax with your finger around the edges. 

Layers of ink - Textured Vintage Notebook Tutorial by Anna-Karin Evaldsson. With Simon Says Stamp Document It stamp set.

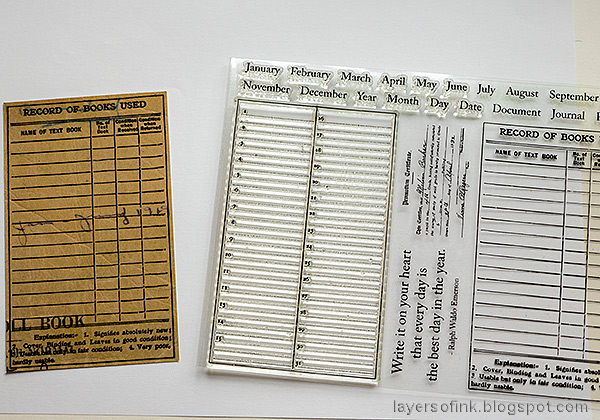
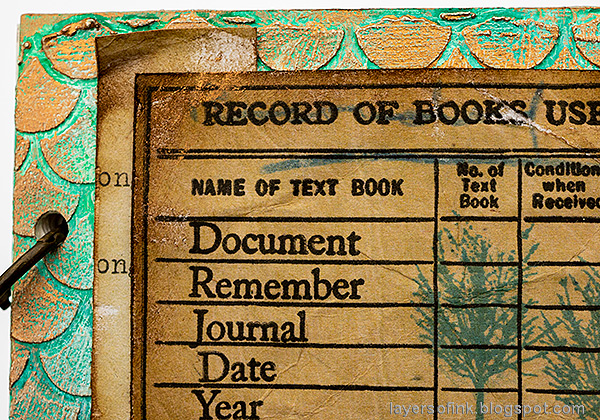
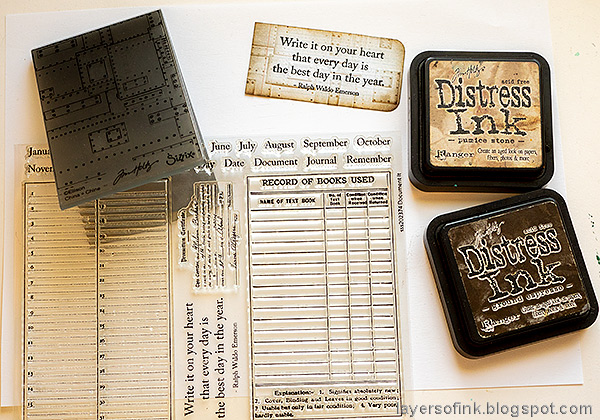
The 'Record of book used' stamp from Simon Says Stamp Document It was stamped on one of Tim Holtz Backdrops Vol 1 papers. I really like these papers. The paper I used was mainly neutral, but had some writing and the word 'book' on it already. I placed the stamp so that the words would line up with the lines on the stamp.

Layers of ink - Textured Vintage Notebook Tutorial by Anna-Karin Evaldsson. With Simon Says Stamp Document It stamp set. Stamp sentiments.

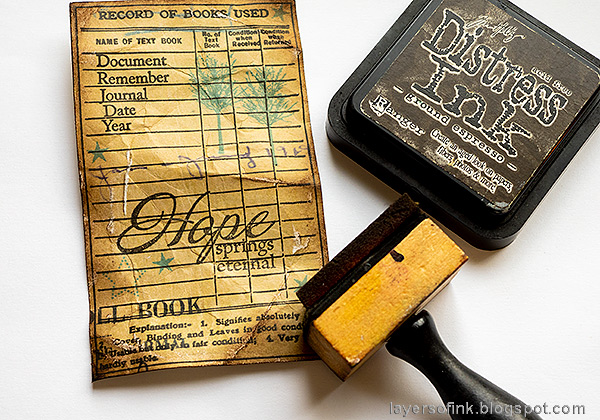
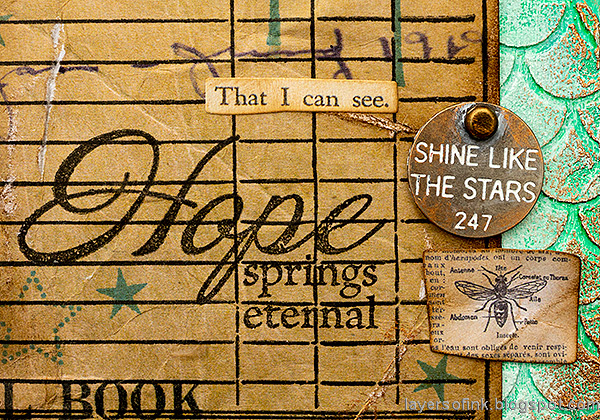
Stamp words from Document It and a sentiment from Simon Says Stamp Foxglove.

Layers of ink - Textured Vintage Notebook Tutorial by Anna-Karin Evaldsson. Stamp trees with Simon Says Stamp All Seasons Tree.

I wanted more of that old blue stamping ink look, similar to the writing on the paper. Archival Ink Cobalt was the perfect shade. Trees from Simon Says Stamp All Seasons Tree and stars from Mix and Match Circles were stamped with the blue ink. This ink pad is one of my oldest ink pads and still works perfectly.

Layers of ink - Textured Vintage Notebook Tutorial by Anna-Karin Evaldsson. With Simon Says Stamp Document It stamp set.

Fold, crumble and sand the paper lightly and then ink with brown ink.

Layers of ink - Textured Vintage Notebook Tutorial by Anna-Karin Evaldsson.

I had a scrap from another Backdrops paper on my desk and placed it underneath the main panel. 

Layers of ink - Textured Vintage Notebook Tutorial by Anna-Karin Evaldsson.

I really like the look of the stamping on that particular Backdrops paper and together with the bits of hand-writing.

Layers of ink - Textured Vintage Notebook Tutorial by Anna-Karin Evaldsson. With Simon Says Stamp Foxglvoe set.

I also added a couple of Tim Holtz Clippings Stickers, a Thought Token and two Field Notes Snippets ephemera pieces.

Layers of ink - Textured Vintage Notebook Tutorial by Anna-Karin Evaldsson. Apply Sizzix Luster Wax.

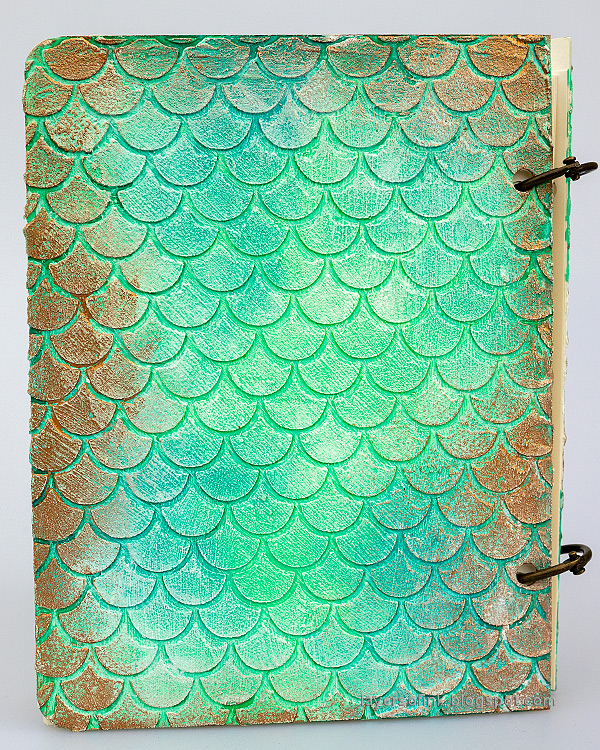
The back was left plain and feels great to the touch. I used my favorite sketching paper for the inside pages.

Layers of ink - Textured Vintage Notebook Tutorial by Anna-Karin Evaldsson. Apply Sizzix Luster Wax.

The stenciled paste, gesso paint brush marks, Distress Paint and Luster Wax gives a great textured look to the cover, with just a little bit of shine.


STAMPtember® is almost over. Don't miss all inspiration, surprises and exclusive products. There has also been a huge Simon Says Stamp release for STAMPtember®, with stamps, dies, stencils, inks and paper products.


Thank you so much for taking the time to stop by here today! 

Happy crafting!

Anna-Karin

Supplies:

* Please note: the links are affiliate links, for which I receive a small percentage of sales generated by the link, at no extra cost to you.

Monday, September 27, 2021

Shiny Autumn Card Tutorial

Hi stampers! We have had fantastic autumn weather during the weekend, with crystal clear air and all the colorful leaves. My card for today is inspired by my weekend walks. 

Please note: this post has affiliate links, for which I receive a small percentage of sales generated by the link, at no extra cost to you.

Our theme this week at the Simon Says Stamp Monday Challenge Blog is 'Touchy Feely', in the sense of adding texture. Texture is one of my favorite things and I am always looking for new ways of giving texture to a project. Don't miss the last contribution by our September guest designer Susanne. She made a fantastic Halloween card for you.

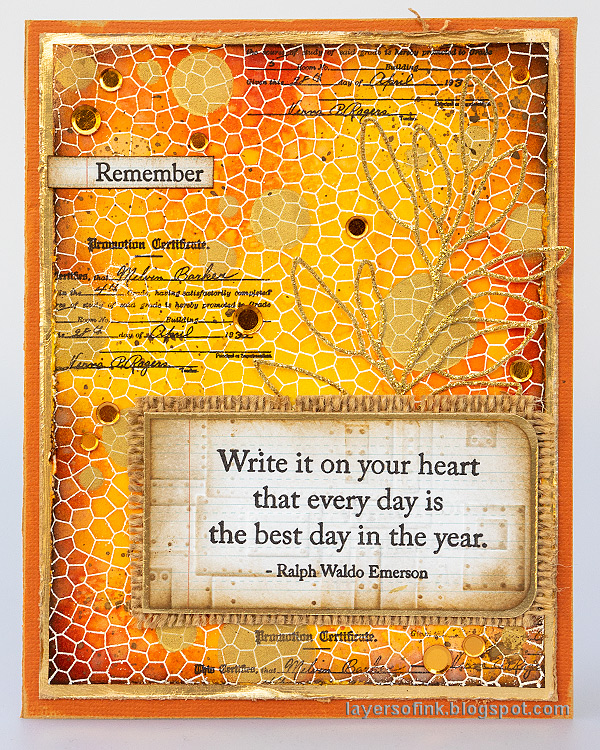
Layers of ink - Shiny Autumn Card Tutorial by Anna-Karin Evaldsson. With Simon Says Stamp Document It and Stained Glass.

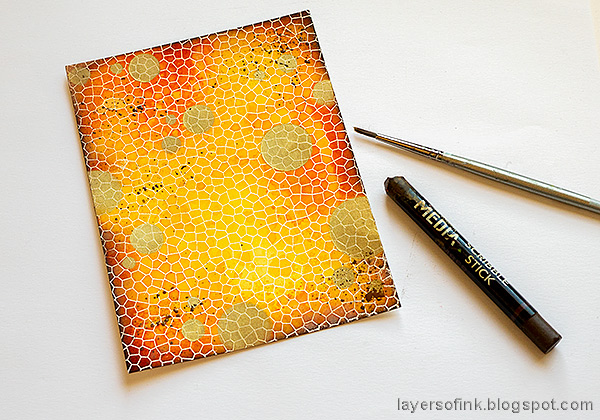
I kept adding elements to the background of this card and, in particular, the golden dots was a spur of the moment idea, which turned out really well. If you use shades of blue instead, the background will look icy and be perfect for winter cards, but I wanted warm shades of autumn. I used mainly Simon Says Stamp products here.

Layers of ink - Shiny Autumn Card Tutorial by Anna-Karin Evaldsson. White emboss the Stained Glass Background.

Start by white embossing the Simon Says Stamp Stained Glass background on heavystock paper. This is the first time I used this stamp, which is one of the stamps that I designed. 

Layers of ink - Shiny Autumn Card Tutorial by Anna-Karin Evaldsson.

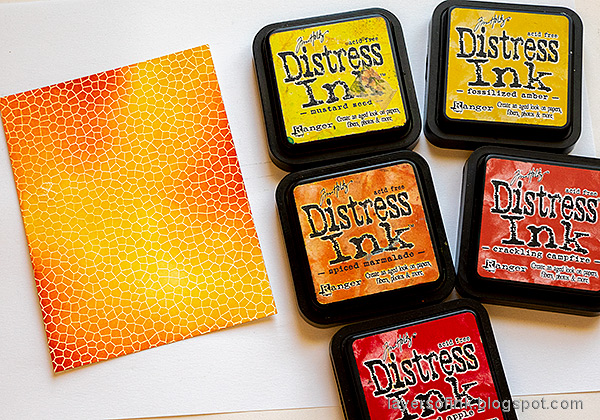
Ink with yellow, orange and red shades of Distress Ink.

Layers of ink - Shiny Autumn Card Tutorial by Anna-Karin Evaldsson. Ink with Distress Ink.

Smear Distress Oxide Ink on a non-stick craft sheet, mist with water and lightly press the paper into the ink. This will create splotches of color and adds texture. Since the background is embossed the splotches stay inside the embossed lines, although not everywhere.

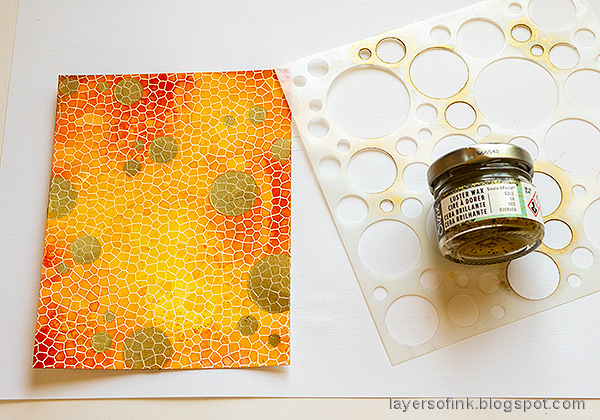
Layers of ink - Shiny Autumn Card Tutorial by Anna-Karin Evaldsson. Apply luster wax through the Simon Says Stamp Mix and Match Circles stencil.

Apply Sizzix Gold Luster Wax with your finger through dots from the Simon Says Stamp Mix and Match Circles stencil. I really liked this effect. 

Layers of ink - Shiny Autumn Card Tutorial by Anna-Karin Evaldsson.

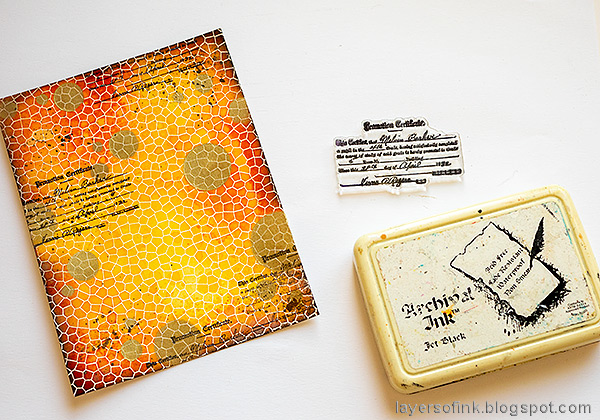
Stamp in a few places with a scrip stamp from Simon Says Stamp Document It.

Layers of ink - Shiny Autumn Card Tutorial by Anna-Karin Evaldsson. Simon Says Stamp Document it stamp set.

Add just a few splatters with a Scribble Stick.

Layers of ink - Shiny Autumn Card Tutorial by Anna-Karin Evaldsson. Simon Says Stamp Document it stamp set.

The sentiment from Document It (also one of my sets) was stamped on a Tim Holtz Journal Card. Then the card was embossed in Tim's Mini Foundry 3-D folder.

Layers of ink - Shiny Autumn Card Tutorial by Anna-Karin Evaldsson.

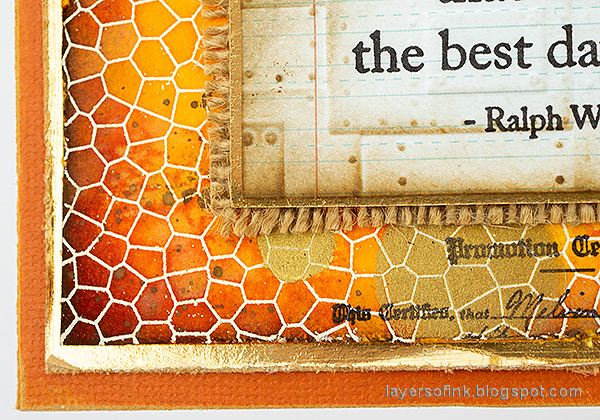
The golden dots look different from different angles. They cover the ink, but not the embossing. The card was mounted on gold kraft cardstock which was slightly sanded and an orange cardbase.

Layers of ink - Shiny Autumn Card Tutorial by Anna-Karin Evaldsson. Simon Says Stamp Document it stamp set.

Burlap adds instant texture, even if you just see a little bit of it, like here under the sentiment panel.

Layers of ink - Shiny Autumn Card Tutorial by Anna-Karin Evaldsson. Simon Says Stamp Document it stamp set.

I also die cut a Simon Says Stamp Leafy Branch from gold paper and added some sequins.

Layers of ink - Shiny Autumn Card Tutorial by Anna-Karin Evaldsson. Simon Says Stamp Document it stamp set.

Just a little bit of text stamping adds a lot of texture.

Layers of ink - Shiny Autumn Card Tutorial by Anna-Karin Evaldsson. Simon Says Stamp Document it stamp set.

I really like this quote and used it on an art journal page yesterday too, which you can find here.

I hope you will join us this week in our Touchy Feely challenge. You have a chance to win a $25 gift voucher to do some fun shopping at Simon Says Stamp. You have until Monday 8am Ohio time. 1pm UK time, 2 pm CET to join in.


Do you use Instagram? If so please add #sssmchallenge so we can see your entries there too.


Also, don't miss all the STAMPtember® inspiration, surprises and exclusive products during the month. There has also been a huge Simon Says Stamp release for STAMPtember®, with stamps, dies, stencils, inks and paper products.

Thank you so much for taking the time to stop by here today! 

Happy crafting!

Anna-Karin

Supplies:

* Please note: the links are affiliate links, for which I receive a small percentage of sales generated by the link, at no extra cost to you.
Sunday, September 26, 2021

Vintage Foxglove Art Journal Tutorial

Hi stampers! Today I have an art journal page to share with you, which can also be a card if you just work on a smaller surface.

Please note: this post has affiliate links, for which I receive a small percentage of sales generated by the link, at no extra cost to you.

Layers of ink - Vintage Foxglove Art Journal Tutorial by Anna-Karin Evaldsson. With Simon Says Stamp Foxglove and Document It stamp sets.
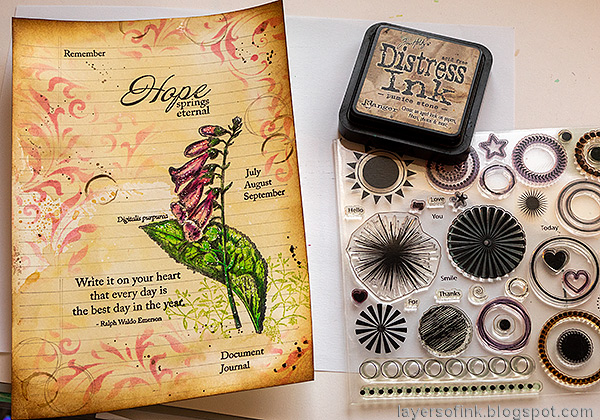
STAMPtember® continues at Simon Says Stamp and I was happy to find the stamps that I designed from the Simon Says Stamp STAMPtember® release in my postbox the other day. Here, I did an art journal page inspired by vintage botanical illustrations, but with added texture and sentiments. The page is stapled to a kraft page in my Dina Wakley Media Journal. The kraft page had failed stamping, which is now covered up.

Layers of ink - Vintage Foxglove Art Journal Tutorial by Anna-Karin Evaldsson. Ink with Distress Ink.

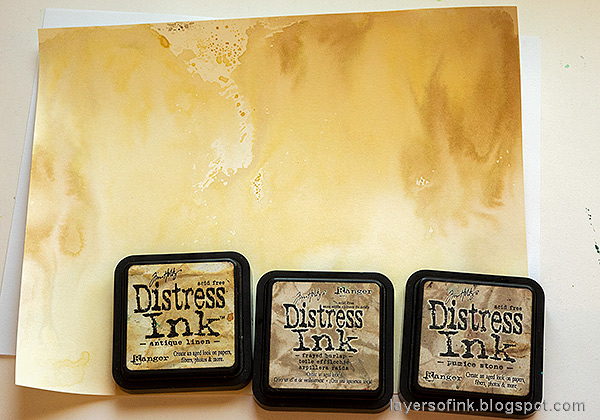
Start by smearing Distress Inks on a non-stick craft sheet, mist with water and press a heavystock paper into the ink. This gives a nice old paper look.

Layers of ink - Vintage Foxglove Art Journal Tutorial by Anna-Karin Evaldsson. Stamp with Simon Says Stamp Ledger Paper Background.

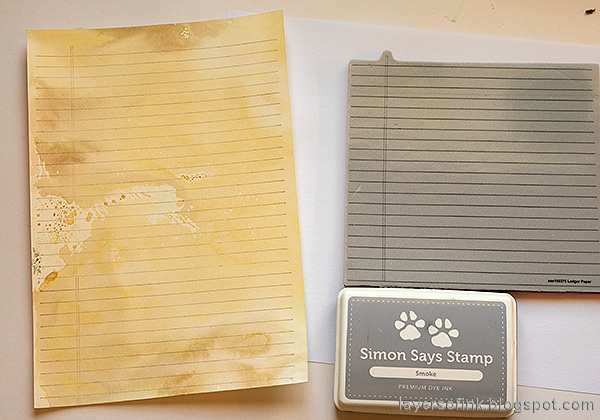
Stamp with the Ledger Paper Background stamp and Smoke ink. This stamp is great for backgrounds, journaling, mini books and more.

Layers of ink - Vintage Foxglove Art Journal Tutorial by Anna-Karin Evaldsson. Stamp with Simon Says Stamp Foxglove.

Ink the foxglove with Potting Soil ink and then dabb some Jet Black ink around the edges.

Layers of ink - Vintage Foxglove Art Journal Tutorial by Anna-Karin Evaldsson. Color with Faber-Castell Polychromos.

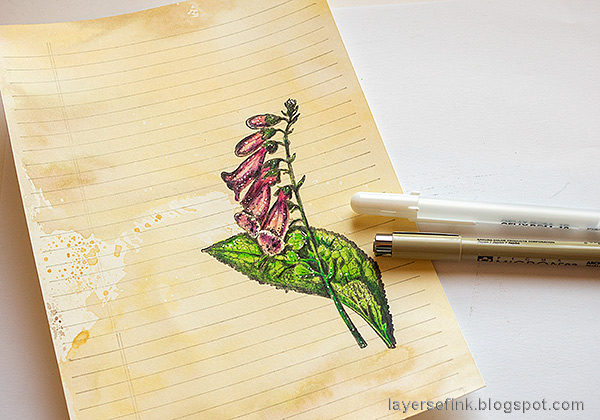
Color the plant with colored pencils. I used Faber-Castell Polychromos. The shadings on the stamp can be used as a guide when coloring.

Layers of ink - Vintage Foxglove Art Journal Tutorial by Anna-Karin Evaldsson.

Darken some of the shades with a black pencil and then add details and highlights with a white gel pen and a black pen.

Layers of ink - Vintage Foxglove Art Journal Tutorial by Anna-Karin Evaldsson.

Stamp the leafy stamp on the Foxglove set twice.

Layers of ink - Vintage Foxglove Art Journal Tutorial by Anna-Karin Evaldsson. Stamp with Simon Says Stamp Document It.

Stamp sentiments from both Foxglove and Document It. I am very fond of that quote by Ralph Waldo Emerson. 

Layers of ink - Vintage Foxglove Art Journal Tutorial by Anna-Karin Evaldsson.

Ink the edges of the paper. I wanted an additional element and decided to use Tim Holtz Flourish stencil together with Worn Lipstick ink.

Layers of ink - Vintage Foxglove Art Journal Tutorial by Anna-Karin Evaldsson.

Stamp a few circles from Simon Says Stamp Mix and Match Circles, misting with water before stamping. Add a few splatters with the same ink. Smear the ink on a non-stick craft sheet, mist with water, pick up with a paint brush and tap against the brush.

Layers of ink - Vintage Foxglove Art Journal Tutorial by Anna-Karin Evaldsson.

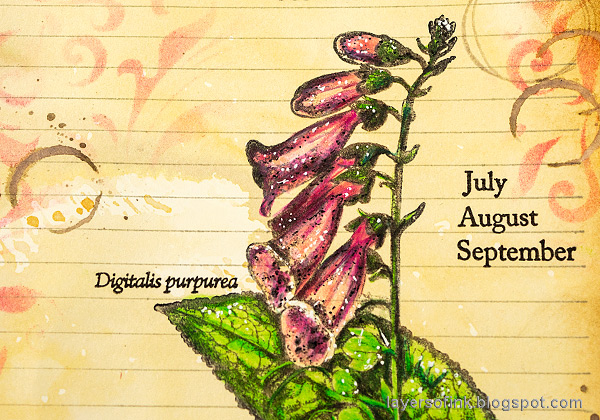
I stamped the latin name of the plant too. The foxglove is such a beautiful plant.

Layers of ink - Vintage Foxglove Art Journal Tutorial by Anna-Karin Evaldsson.

When I was thinking of sentiments for the Foxglove set, I wanted a positive message that would work for many themes, and for cardmaking, art journaling and scrapbooking. It is by Alexander Pope. 

Layers of ink - Vintage Foxglove Art Journal Tutorial by Anna-Karin Evaldsson.

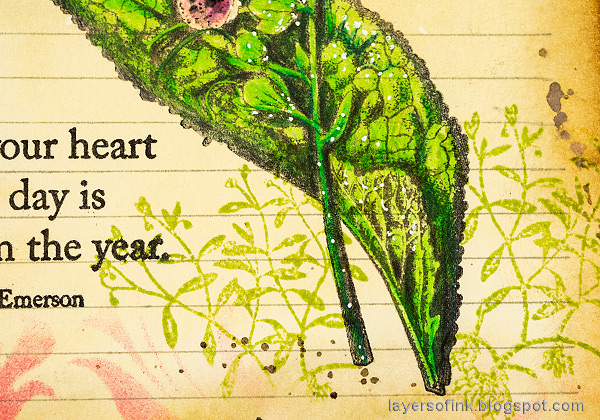
I like the textures on this leaf.

Layers of ink - Vintage Foxglove Art Journal Tutorial by Anna-Karin Evaldsson.

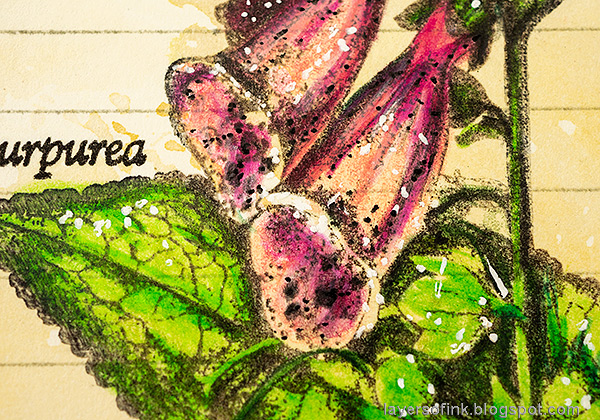
Here you can see the white and black dots that I added to the flowers.


Don't miss all the STAMPtember® inspiration, surprises and exclusive products during the month, with still a few days to go. There has also been a huge Simon Says Stamp release for STAMPtember®, with stamps, dies, stencils, inks and paper products.


Thank you so much for taking the time to stop by here today! 

Happy crafting!

Anna-Karin

Supplies:

* Please note: the links are affiliate links, for which I receive a small percentage of sales generated by the link, at no extra cost to you.