Tuesday, December 31, 2019

Favorite Projects of 2019

Hi everyone! The year is almost at an end and it is time to look back and do a little review. It's been quite a year, with both lots of fun things, everyday happenings and activities, achievements, changes and adventures, and some less fun things such as our unwanted and very sudden move. 

I enjoy looking back at my projects from the year and it gives a sense of perspective. It is easy to feel that the time has flown past, but when I look at the projects I did at the beginning of the year, it still feels pretty long ago. If you start looking at details and remembering events, time seems to slow down.

I have picked some favorite projects, and they are favorites for different reasons. 

A big thank you to everyone who looks at my projects, posts comments here and on my social media channels and click on affiliate links. I really appreciate it and I always look forward to hearing what you think about a project and hope that my projects inspire creativity and art making.

Layers of ink - Recycled Tag by Anna-Karin Evaldsson.

Let's start with a fun Recycled tag, which has some of my favorite elements: words, transparent elements, fun colors and little details.

Layers of ink - Forest Layout by Anna-Karin Evaldsson.

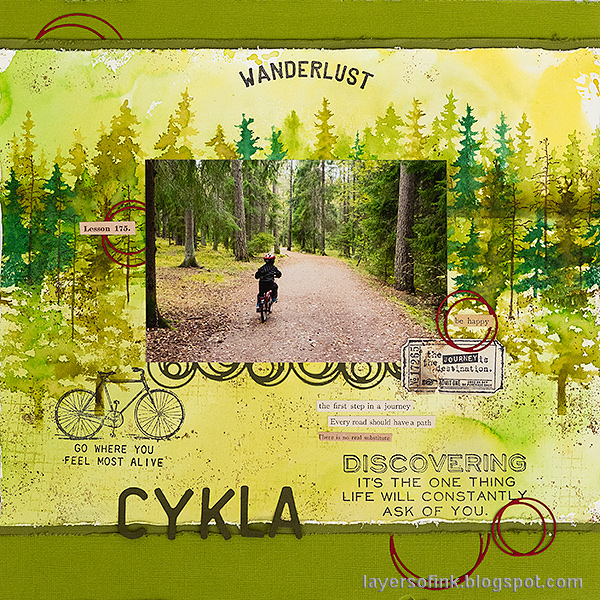
A scrapbooking layout about one of my favorite places, the forest. 

Layers of ink - Past Times Wall-Hanging by Anna-Karin Evaldsson.

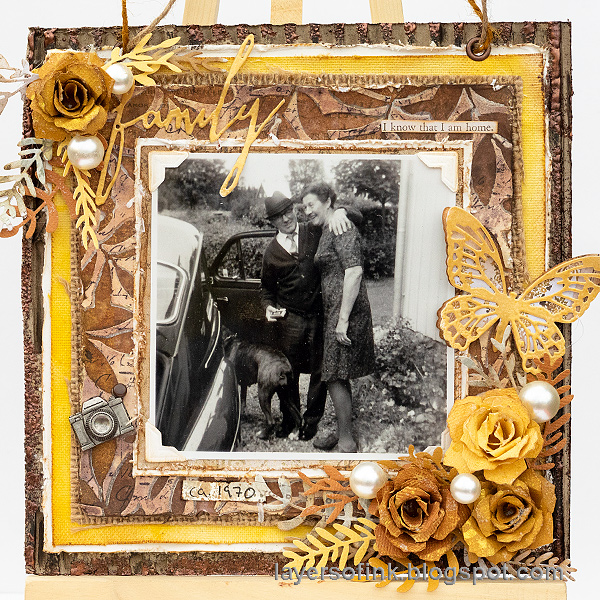
My favorite part of this Past Times wall-hanger is the photo of my grandmother and her brother-in-law. I also like the mix of yellow, brown and gold.

Layers of ink - Springtime Altered Tin by Anna-Karin Evaldsson.

You can create a springtime fairy-tale scene in an altered tin. Leo loves this project and looks at it often.

Layers of ink - Vintage Stenciled Wall-Hanging by Anna-Karin Evaldsson.

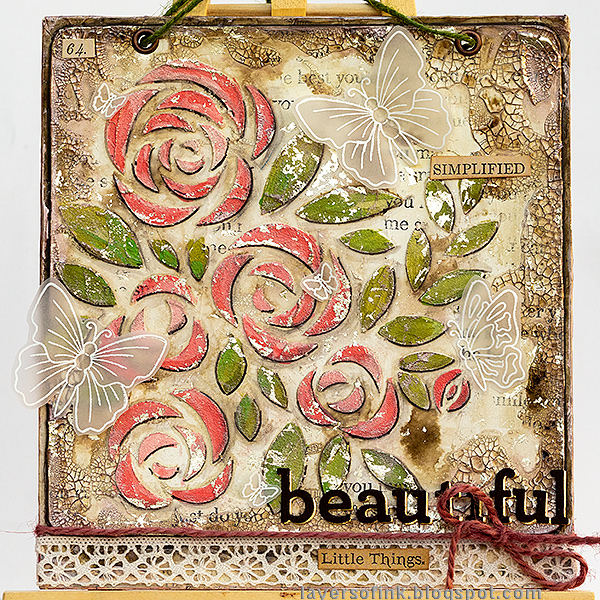
This vintage stenciled wall-hanging also made it onto my list, because of the pretty roses, gold foil, crackles and vellum butterflies.

Layers of ink - Mist Resist Tags by Anna-Karin Evaldsson.

I picked these tags because of the fun Mist Resist Technique, and to remind myself to do the technique soon again.

Layers of ink - Ocean Art Journal Page by Anna-Karin Evaldsson.

This Ocean art journal page is so peaceful and calm, and I used a fun resist effect for the water.

Layers of ink - Yellow Textured Tag by Anna-Karin Evaldsson.

And a cheerful yellow tag, with fun textured flowers. 

Layers of ink - Nautical Tag by Anna-Karin Evaldsson.

My Nautical Tag has an interesting mix of colors, textures and metals, and I had such fun when I made it.

Layers of ink - At The Seaside by Anna-Karin Evaldsson.

We have had very grey and rainy weather here lately, which inspired me to pick some extra sunny summer projects for this post, such as this At the Seaside scrapbooking page.

Layers of ink - Watercolor Florals by Anna-Karin Evaldsson.

As you know, watercolor techniques are among my favorites, and I really enjoyed doing these borderlesss watercolored florals.

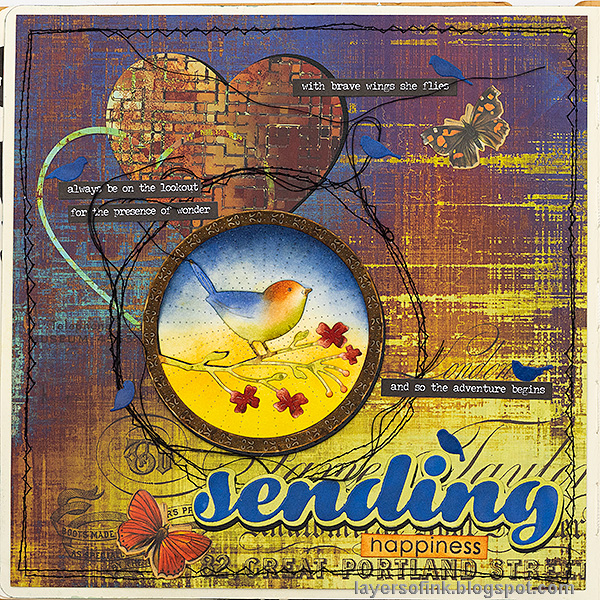
Layers of ink - Sending Happiness by Anna-Karin Evaldsson.

My favorite patterned papers from this year were definitely Tim Holtz's Abandoned Paper Stash, which I used for this Sending Happiness art journal page. Another favorite project with the same papers were my two Heart Shaker Cards

Layers of ink - Gold and Shimmer Tag by Anna-Karin Evaldsson.

I have used unusually many gold elements lately and this Shimmer and Shine Tag went all out and is almost completely sparkling with gold metal and glitter.

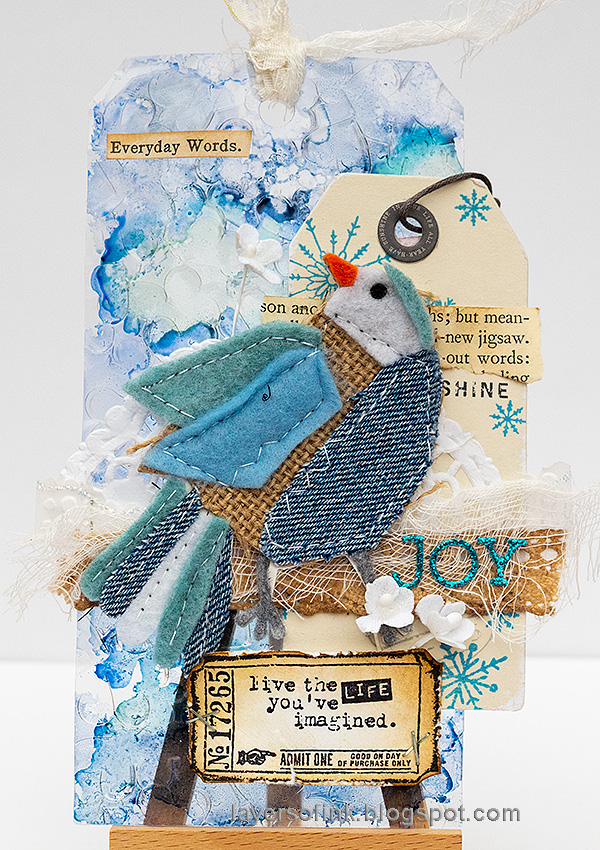
Layers of ink - Winter Bird Tag by Anna-Karin Evaldsson.

My Winter Bird Tag was such fun to make, using almost only items found in my scrap boxes.

Layers of ink - December Daily Journal by Anna-Karin Evaldsson.

I almost always pick my December Daily journal for my favorite projects of the year post. The winter mountain journal is now filled with Christmas memories.

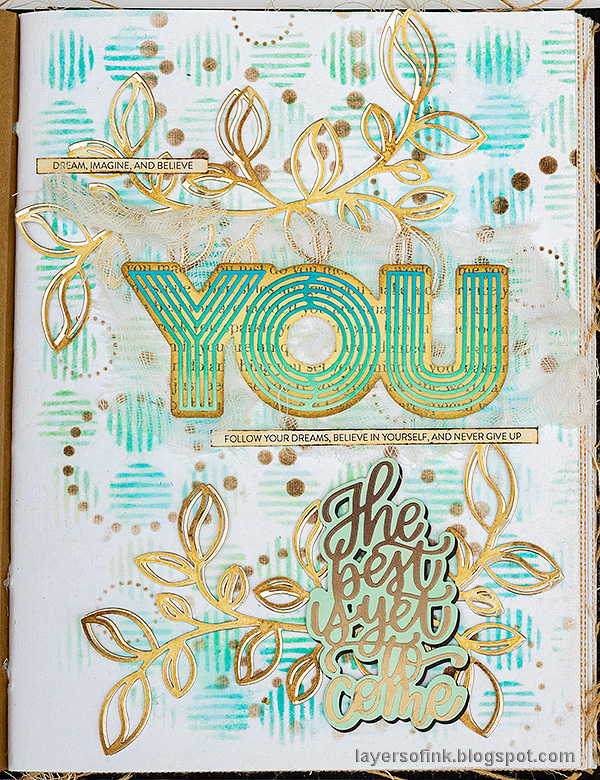
Layers of ink - Your Art Journal Page by Anna-Karin Evaldsson.

I like the colors, bits of gold, big Lined You and the message of this art journal page. I also used the SSS Lined You die on my New Year art journal page.

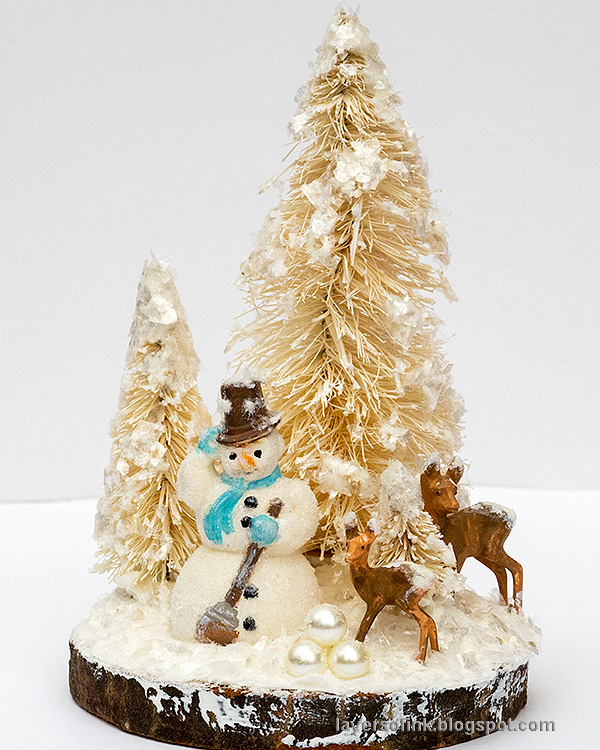
Layers of ink - Winter Wonderland by Anna-Karin Evaldsson.

Let's finish the year with a Winter Wonderland. I like all the sparkly snow on this project and since it is winter-themed, I am planning to display it the whole winter, but hopefully we will get some real snow too.

Again, thank you so much for all your support throughout this year. I want to wish you all a Happy New Creative Year 2020!!

Anna-Karin

* Please note: the links are affiliate links, for which I receive a small percentage of sales generated by the link, at no extra cost to you.


Monday, December 23, 2019

New Year Art Journal

Hello friends! It is Monday again and this weekend was all about Christmas and Christmas preparations. I was also happy to send off a parcel to one of my best friends in South Africa together with some kind people who were flying there over Christmas. 


At the Simon Says Stamp Monday Challenge Blog we have a Party Time theme, and this challenge lasts for two weeks, so it is our last challenge of the year. I hope you will be able to join us, and don't miss the last project by our December guest designer Autumn Clark, with her blog SewPaperPaint.


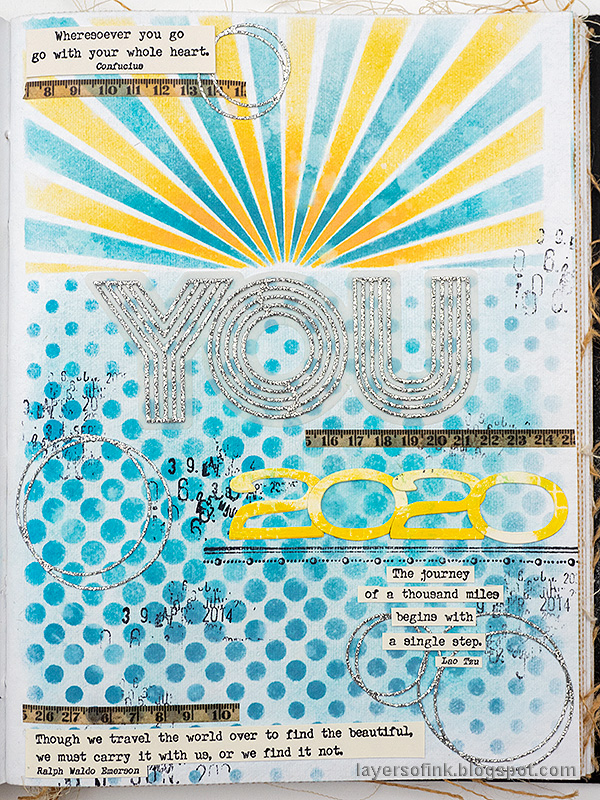
Layers of ink - New Year Art Journal Page by Anna-Karin Evaldsson.

I always make an art journal page to celebrate the coming of a new year, and this time, it is even a new decade. I can't believe that twenty years have passed since the Millennium. When it comes to new year's celebrations, I am ambivalent, and I have never really liked huge celebrations. An art journal page starting the new year on a positive note, is better.  

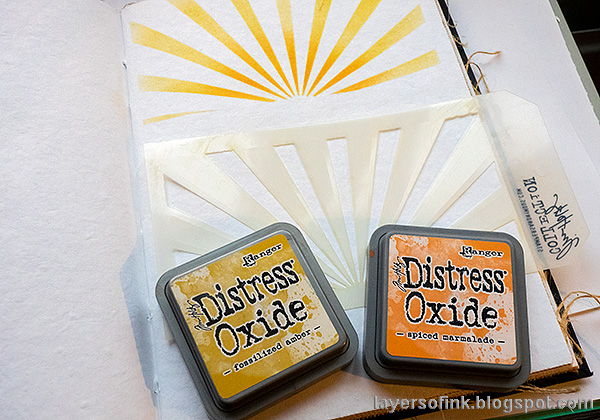
Layers of ink - New Year Art Journal Page by Anna-Karin Evaldsson. Tim Holtz Shifter Rays stencil.

I worked on a cotton-rag page in my Dina Wakley Media Journal and used Tim Holtz Shifter Rays stencil. Start by applying yellow and then orange Distress Oxide inks.

Layers of ink - New Year Art Journal Page by Anna-Karin Evaldsson.

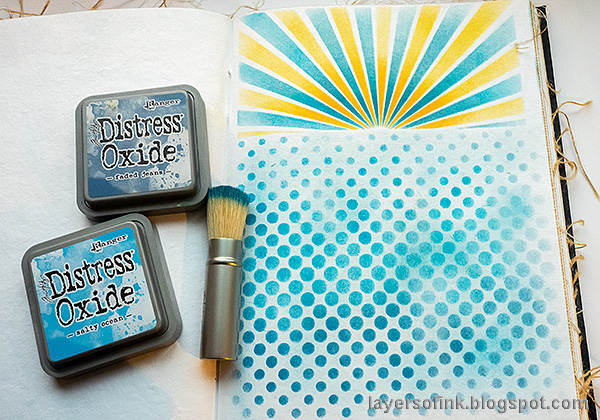
Clean the stencil, line up the yellow area under the marks, and continue with blue inks. I love this cool effect.

Layers of ink - New Year Art Journal Page by Anna-Karin Evaldsson. Tim Holtz Gradient Dot stencil.

For the lower part of the page I used the Gradient Dot stencil and blue Distress Oxide inks. I inked the page lightly before starting with the stenciling, so that the background wouldn't be stark white.

Layers of ink - New Year Art Journal Page by Anna-Karin Evaldsson.

Mist slightly with water, for texture.

Layers of ink - New Year Art Journal Page by Anna-Karin Evaldsson.

The SSS Lined You was die cut from SSS Silver glittery paper and the base from vellum. I love this word and recently used in on another art journal page, which you can find here.

Layers of ink - New Year Art Journal Page by Anna-Karin Evaldsson.

I used a fantastic Travels and Journeys quote set by Paper Artsy, designed by Alison Bomber. Alison always posts fantastic quotes on her blog and I was so happy to see some of them as stamps. I also really like the font and the size of the stamps.

Layers of ink - New Year Art Journal Page by Anna-Karin Evaldsson.

I stamped the background here and there with a date stamp by Tim Holtz.

Layers of ink - New Year Art Journal Page by Anna-Karin Evaldsson.

This quote was cut into strips. The Circle Loops were also die cut from silver paper. I stamped the background here and there with a date stamp by Tim Holtz.

Layers of ink - New Year Art Journal Page by Anna-Karin Evaldsson.

And one of my all time favorite quotes, and particularly important at the start of a new year.

I hope you will join us this week in our Party Time challenge. As always, you have a chance to win a $50 gift voucher to do some fun shopping at Simon Says Stamp. You have until 6 January 8am Ohio time. 1pm UK time, 2 pm CET to join in.


Don't forget to follow Simon Says Stamp on Instagram, they post great stuff daily. 


Do you use Instagram? If so please add #sssmchallenge so we can see your entries there too.


Thank you so much for taking the time to visit my blog today!  I also want to wish you a:

Merry Christmas and a New Year filled with happiness and adventures (and lots of stamping)! 

Happy crafting!

Anna-Karin

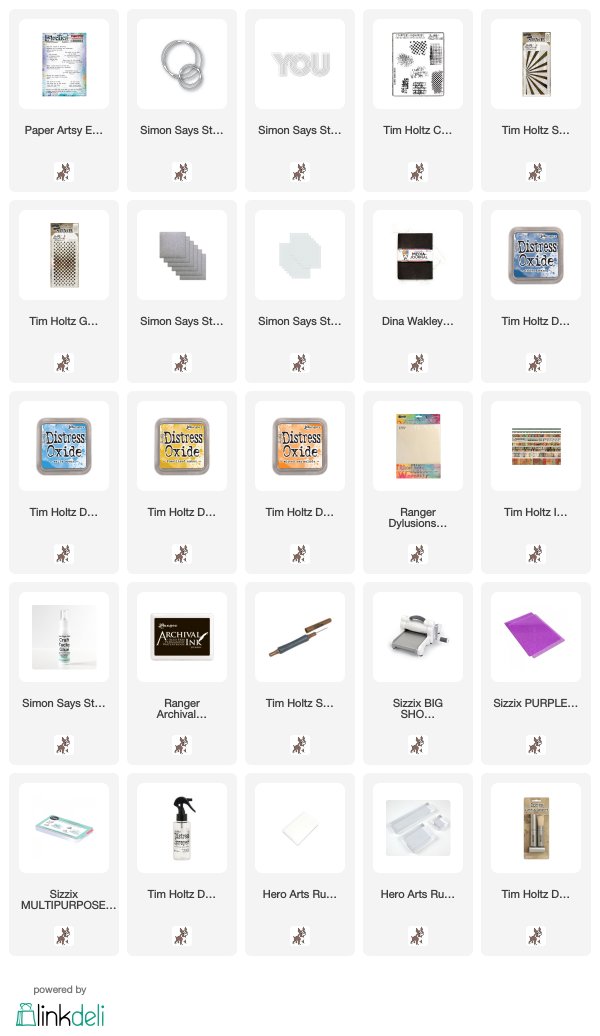
Supplies:

* Please note: the links are affiliate links, for which I receive a small percentage of sales generated by the link, at no extra cost to you.


Saturday, December 21, 2019

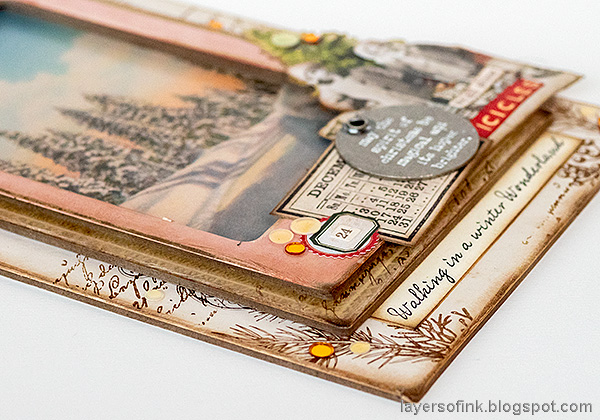
Vintage Christmas Frame

Hello friends! I am back with another Christmas project, and this is a quick one, so if you need a last minute gift it would work great. It can also easily be adapted to other seasons, by using different images and stamps.

Layers of ink - Vintage Christmas Frame Tutorial by Anna-Karin Evaldsson.

I love the vintage images in Tim's Ephemera and Layers and Baseboards packs and have, for example, used them as notebook covers, and when I saw this pretty picture of a snowy landscape, I knew I wanted it to be the focal point of a project. Any of the other postcard style pictures would work just as well, for instance, from the Layer Remnants set. I had fun layering ideaology products here.

Layers of ink - Vintage Christmas Frame Tutorial by Anna-Karin Evaldsson. With Tim Holtz ideaology Layers and Baseboard.

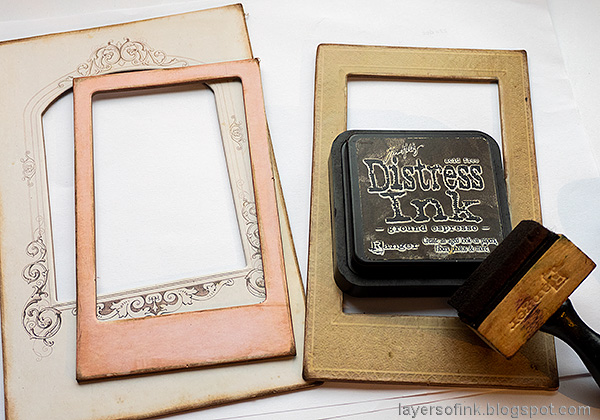
Start by picking three frames in different sizes from the Christmas Layers and Baseboard set, sand the edges.

Layers of ink - Vintage Christmas Frame Tutorial by Anna-Karin Evaldsson. Sand the frames.

Ink the edges. The ink will stick to the sanded areas.

Layers of ink - Vintage Christmas Frame Tutorial by Anna-Karin Evaldsson.

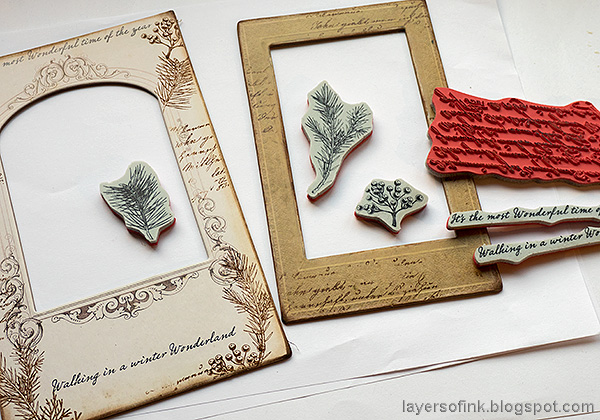
Stamp the frames with sentiments, branches and script. I used black and brown ink.

Layers of ink - Vintage Christmas Frame Tutorial by Anna-Karin Evaldsson.

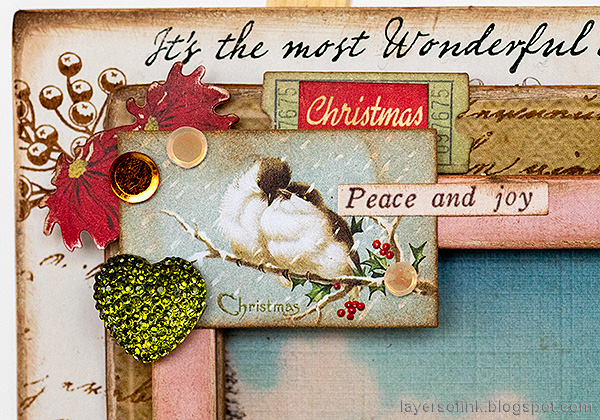
Glue the frames together, placing the image under the brown frame. Add idea-ology ephemera and words. The Gumdrop Heart was colored with a drop of alcohol ink. I also used sequins from the SSS Sunken Chest set. I just love the script used for the sentiments in Tim's Scenic Holiday stamp set.

Layers of ink - Vintage Christmas Frame Tutorial by Anna-Karin Evaldsson. Paper dolls.

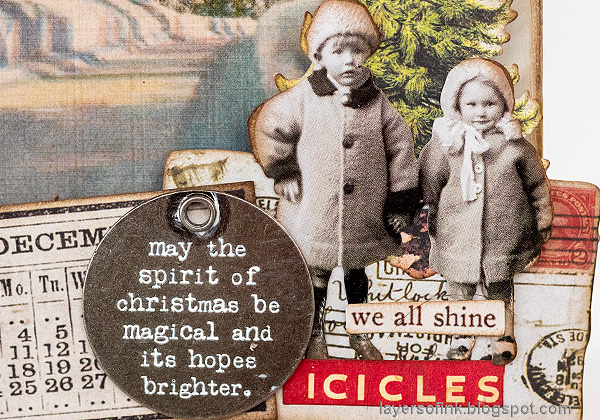
Ink the little children and layer them on top of an old postcard and a tree. I also added a calendar image, some words, and a metallic sentiment circle. Rub white paint into the words to make them stand out. My packs of paper dolls are mixed up, so I am not completely sure which pack these children came from.

Layers of ink - Vintage Christmas Frame Tutorial by Anna-Karin Evaldsson.

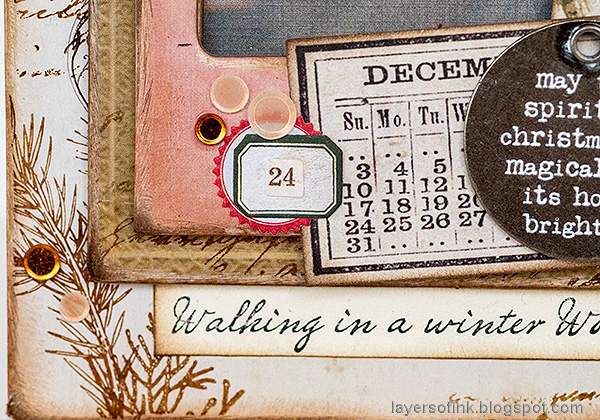
Add more ephemera and sequins. I messed up the stamping of this sentiment, and restamped it on a piece of cardstock.

Layers of ink - Vintage Christmas Frame Tutorial by Anna-Karin Evaldsson.

Since the baseboard frames are thick and sturdy, the project has quite a bit of dimension. You can cover the frame at the back with a piece of cardstock for a finished look.


Thank you so much for taking the time to visit my blog today!  

Happy Christmas crafting!

Anna-Karin

Supplies:

* Please note: the links are affiliate links, for which I receive a small percentage of sales generated by the link, at no extra cost to you.


Friday, December 20, 2019

Christmas Forest Tutorial

Hello friends! I can't believe how close we are getting to Christmas now. Today, I have a Christmas ornament tutorial to share with you, which would also be a great little gift. 
Layers of ink - Christmas Forest with Snowglobe Tutorial by Anna-Karin Evaldsson.

This is the second ornament that I make on top of a wooden coaster. I am keeping the first Winter Wonderland one, but this one I will give away as a gift. I found cheap wooden coasters in a shop and thought they would make a great base for projects. If you don't have coasters, you can also use layers of chipboard or mat board, or a small canvas board.

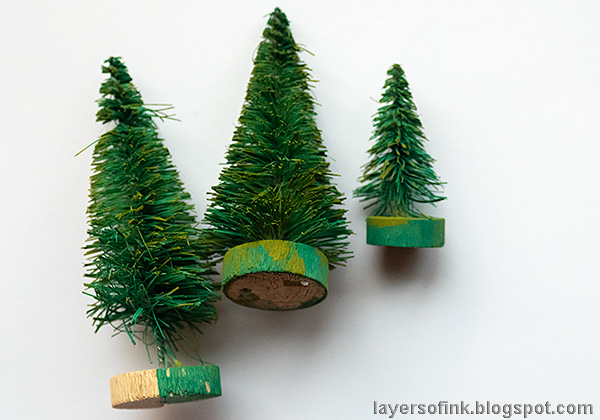
Layers of ink - Christmas Forest with Snowglobe Tutorial by Anna-Karin Evaldsson. Color the trees with Distress Paint.

Start by coloring three trees with Pine Needles. Protect your clothing and work surface, since it gets a little messy.

Layers of ink - Christmas Forest with Snowglobe Tutorial by Anna-Karin Evaldsson.

When dry, add some Peeled Paint.

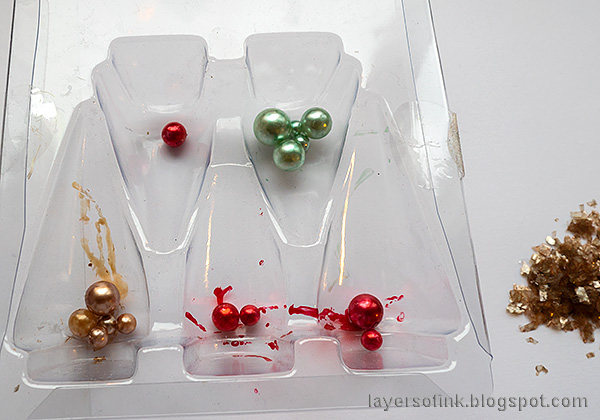
Layers of ink - Christmas Forest with Snowglobe Tutorial by Anna-Karin Evaldsson. Color mica flakes with alcohol ink.

Color mica flakes with alcohol ink. I also made a teal version.

Layers of ink - Christmas Forest with Snowglobe Tutorial by Anna-Karin Evaldsson.

Color baubles with alcohol ink. I placed both baubles and mica flakes in a plastic bad and added a couple of drops of ink.

Layers of ink - Christmas Forest with Snowglobe Tutorial by Anna-Karin Evaldsson. Add mica to the snowglobe.

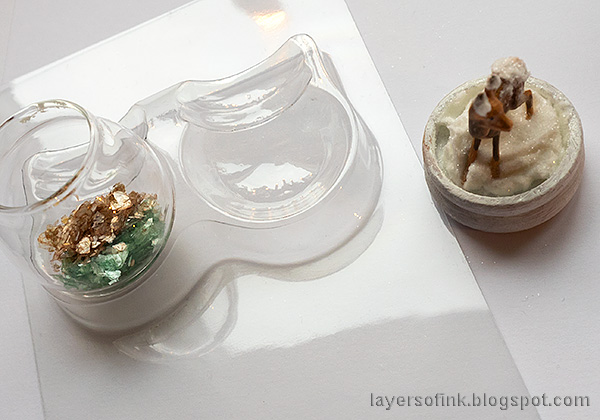
Color a deer in the same way as I did for my Winter Wonderland, add a little texture paste to the base of a snowglobe (first painted white) and sprinkle Rock Candy Glitter on top. You can use the snowglobe packaging to hold the globes in place while working. Add the colored mica, and then a tiny bit of glue around the rim. Place the base onto the glass.

Layers of ink - Christmas Forest with Snowglobe Tutorial by Anna-Karin Evaldsson. Glue baubles and mica flakes to the trees.

Add some white paint to the trees and then glue baubles in place with Matte Medium. Add more medium to the tree and sprinkle colored mica flakes on top. You can add even more baubles, but I ran out of baubles while making this.

Layers of ink - Christmas Forest with Snowglobe Tutorial by Anna-Karin Evaldsson. DIY snowman made of pearls.

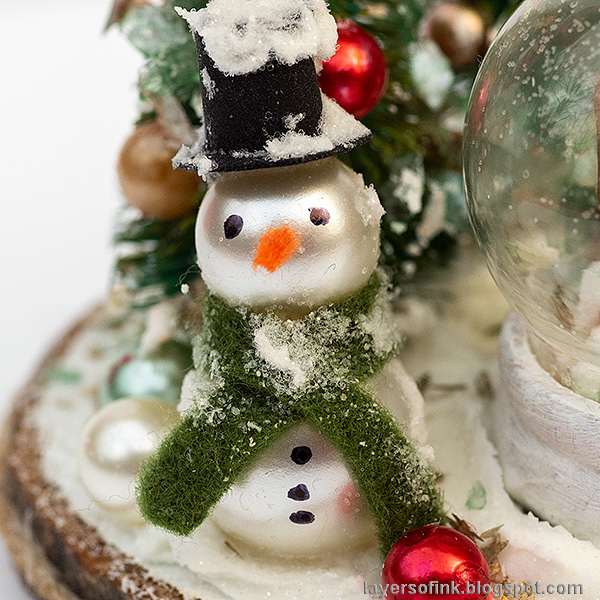
I wanted a little snowman too and had used my last one on the Winter Wonderland project, so instead I made a snowman with baubles. Glue the baubles together and then add a scarf cut from felt. Cut a hat from black paper and glue to the head. Draw eyes and buttons and add a felt carrot as a nose. Apply some texture paste to the snowman and sprinkle Rock Candy on top.

Layers of ink - Christmas Forest with Snowglobe Tutorial by Anna-Karin Evaldsson.

Prepare the coaster as in the Winter Wonderland tutorial. Apply texture paste with a palette knife and press the items into the paste. The paste acts as a glue. I only made an impression for the snowglobe, since I wanted the recipient to be able to remove it and shake it. It looks like it is standing in the snow, but it it lose. Sprinkle some leftover colored mica flakes on top and then sprinkle Rock Candy Glitter everywhere.

Layers of ink - Christmas Forest with Snowglobe Tutorial by Anna-Karin Evaldsson.

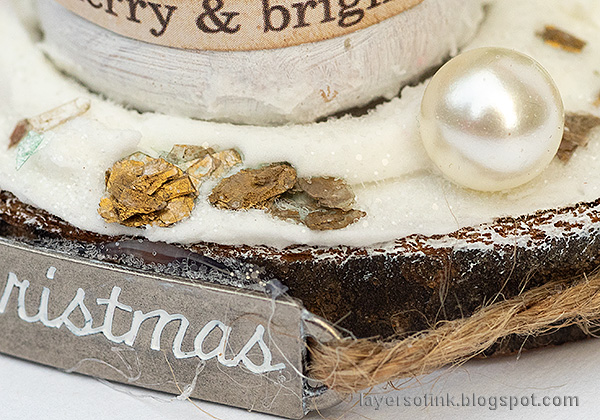
I just love the look of these baubles. Here you can also see the glitter from the Rock Candy.

Layers of ink - Christmas Forest with Snowglobe Tutorial by Anna-Karin Evaldsson.

Some of the mica flakes were colored with gold metallic mixative.

Layers of ink - Christmas Forest with Snowglobe Tutorial by Anna-Karin Evaldsson.

I shaped a word band, rubbed white paint into the letters and tied it to the base with twine. Add matte medium to the back of the word band to make sure it stays put.

Layers of ink - Christmas Forest with Snowglobe Tutorial by Anna-Karin Evaldsson. Deer snowglobe.

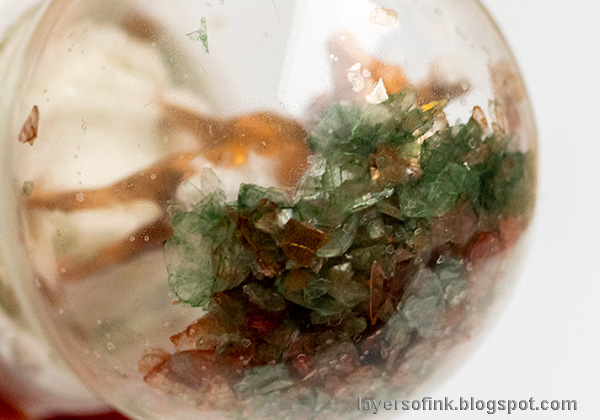
Here's a close up of the little deer in the snowglobe. Shake the globe and the colored mica flies around.

Layers of ink - Christmas Forest with Snowglobe Tutorial by Anna-Karin Evaldsson.

It will look just as nice, or nicer, if you leave the mica flakes their original color, as I used in my Winter Cottage in a Snowglobe, but I wanted to try dyeing some mica to see how it would look.

Layers of ink - Christmas Forest with Snowglobe Tutorial by Anna-Karin Evaldsson.

The ornament looks good from all sides, and even from above.

Layers of ink - Christmas Forest with Snowglobe Tutorial by Anna-Karin Evaldsson.

I hope you enjoyed this project. With some assistance, it would be a great project to do with kids over Christmas. They would love to make their own trees, snowmen and snowglobes.


Thank you so much for taking the time to visit my blog today!  

Happy Christmas crafting!

Anna-Karin

Supplies:

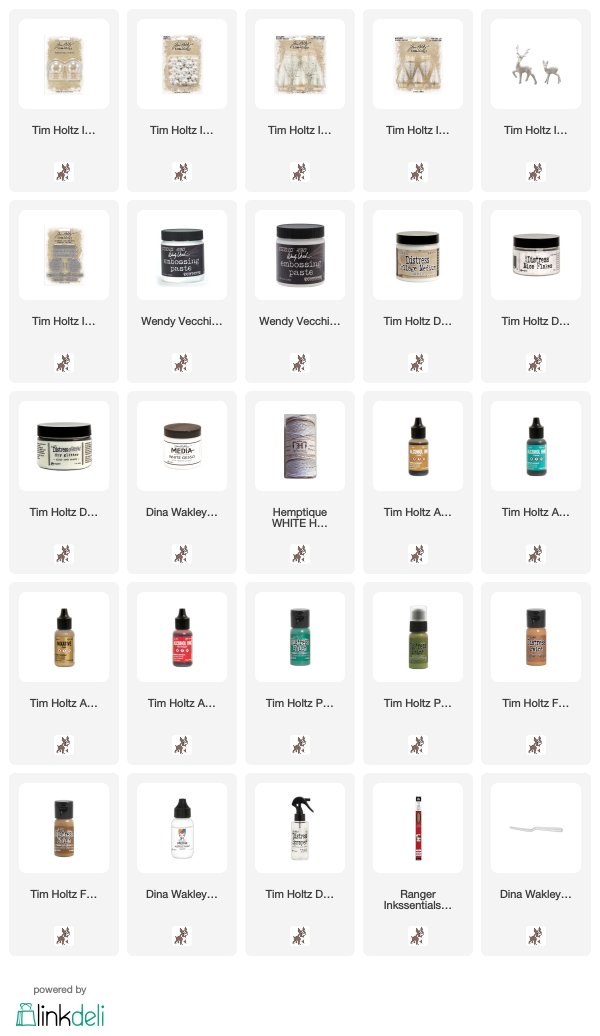
* Please note: the links are affiliate links, for which I receive a small percentage of sales generated by the link, at no extra cost to you.