
Hello friends! It is Monday and we have a new fun Simon Says Stamp Monday Challenge for your. This week our theme is Stars and Stripes.

Don't miss to check out the last project by our June guest designer Jess, with her blog Two Mad Dahlias.

I made a yellow tag using both stars and stripes, but not how one might traditionally think of the two together. My favorite part of the tag are the crackles in the background, multi-colored with the help of Distress Crayons.
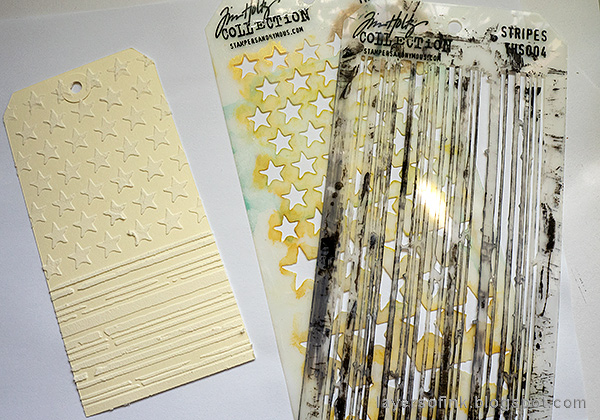
Start by applying Texture Paste through Tim Holtz's Stars stencil, and when dry, continue with the stripes.

Paint the top with Squeezed Lemonade and the bottom with Mustard Seed, mixing them a little here and there.
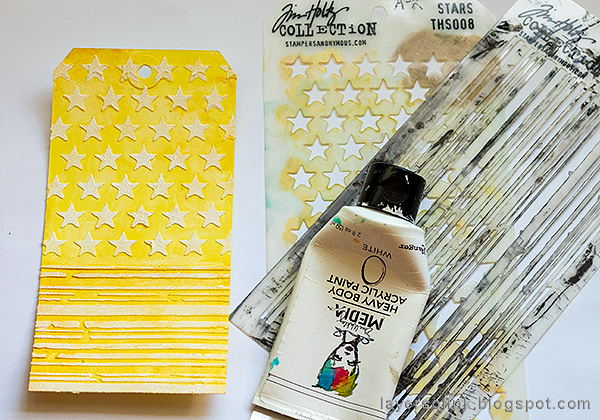
When dry, place the stencils back on the tag and sponge white paint through the stencils.

I forgot to photograph the crackle step. Apply Rock Candy Distress Crackle Paint with a palette knife. Crackles appear as it dries. When dry, rub white, Cracked Pistachio and Spiced Marmalade Distress Crayon into the cracks. I particularly like the look of the white crayon.

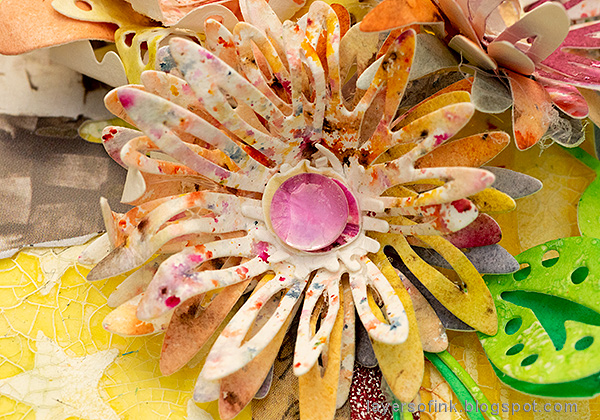
I had a bunch of left-over Infusions colored papers, and made a couple more. Just mist watercolor paper with water, sprinkle over a tiny amount of Paper Artsy Infusions, and mist with water again to blend them even more. The green paper was done with Distress Ink. Die cut flowers and leaves with Tim's Funky Floral Large set.

Shape the flowers with Sizzix Paper Sculpting tool, or with Tonic's Craft Tool Set.
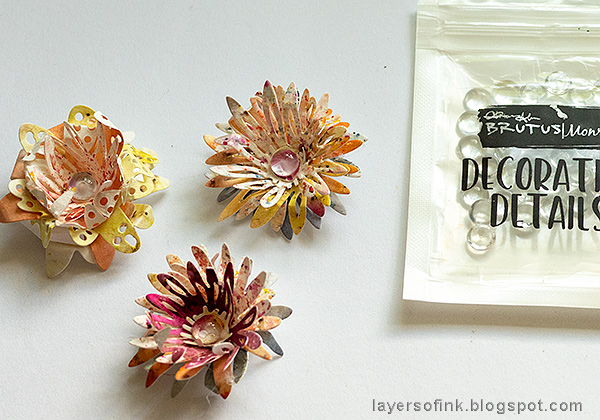
Layer them together and glue Flat Back Bubbles in the center.

Here's a close up of the background. I also used a Word Band with white paint rubbed into the words.
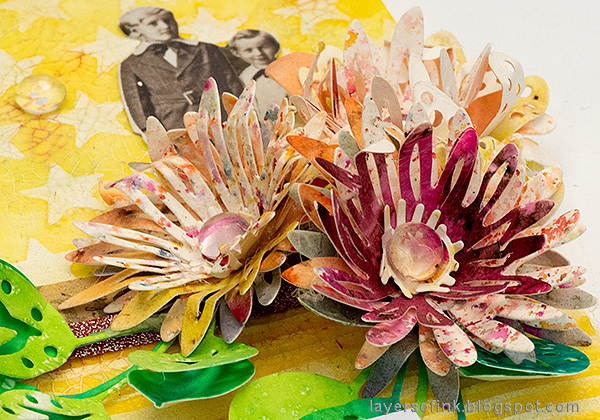
The flowers are dimensional and fun to look at with all the different colors. There are a couple of Design Tape pieces underneath them.

It is so quick and easy to color papers with Infusions.
You can also add a magnet to the back of a flower and give it as a gift.

Here's a look at the striped area.
I hope you will join us this week in our Stars and Stripes challenge. As always, you have a chance to win a $50 gift voucher to do some fun shopping at Simon Says Stamp. You have until next Monday 8am Ohio time. 1pm UK time, 2 pm CET to join in.


Do you use Instagram? If so please add #sssmchallenge so we can see your entries there too.


Thank you so much for taking the time to visit my blog today!
Happy crafting!
Anna-Karin
Supplies:
* Please note: the links are affiliate links, for which I receive a small percentage of sales generated by the link, at no extra cost to you.
* Please note: the links are affiliate links, for which I receive a small percentage of sales generated by the link, at no extra cost to you.
What great layering, Anna-Karin, and such a cheerful way to start Monday! I really love your flowers - great idea to use the infusions paper!! And all that crackle goodness - very inspirational! Have a great week - xx Lynn
ReplyDeleteThis is my first day visiting the Challenges from Simon Says Stamp - don´t know why I never had the Idea to do this much earlier. I LOVED this tutorial - these colours are inspiering and the way you shown step by step motivates to start NOW... THANK YOU !!!!
ReplyDeleteFabulous tag Anna Karin :-) I love how you used the stencils with the crackle paste, the flowers and whole design is gorgeous :-)
ReplyDeleteThinking of you and hope all is going well XXX
hope you have a great weekend!
luv
Lols x x x
Love your bright yellow and flowery take on the challenge! hugs, Maura
ReplyDelete