

This winter wonderland is very sparkly, with both glitter and mica flakes. It would make a great gift, or you can keep if for yourself. I was going to give it away, but then it looked so good in one my Christmas decorations areas, so it will stay here. This project started as a wooden coaster, which I found in a local shop. You can of course also saw your own coaster from a piece of wood, or use any kind of sturdy surface. A small canvas board, or layered pieces of mat board would also work well.
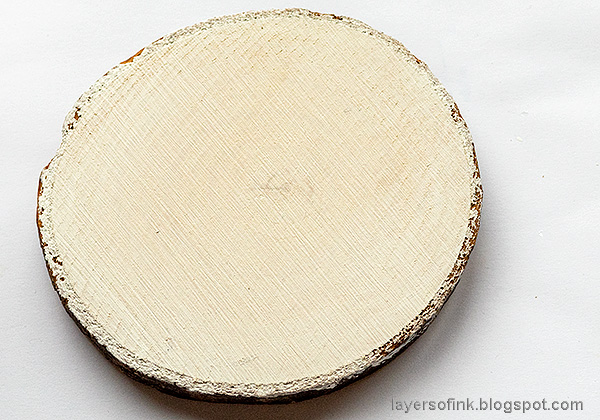
I started out by coating the wooden coaster with a couple of layers of gesso. The coaster is about 4 x 3.5 inches.

Paint three trees with Picket Fence Distress Paint, rubbing the paint into the trees. It's a bit messy, so protect your work area and clothes. I used three sizes of trees, but couldn't find the larger one in the SSS shop now. You can put two half trees together if you want a large tree, or just leave the half part at the back.

When dry, paint the thicker Dina Wakley white paint here and there on the branches. You can make them completely white if you want to.

Apply white texture paste on the trees with a palette knife. Add as much or as little as you'd like. Sprinkle Tim Holtz Mica Flakes on the trees, or press the trees into a pile of mica flakes. Next, sprinkle lots of Rock Candy distress glitter on the trees and return the leftovers to the jar.
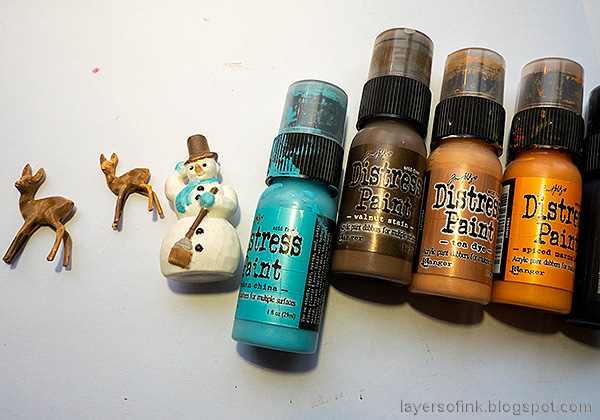
Paint a Salvaged Snowman and two deer with Distress Paint. I by mistake took two deer from an older pack, the larger deer to the left now looks even nicer, with horns.

Apply gloss multimedium to most of the snowman, and apply texture paste to parts of the deer. Sprinkle Rock Candy glitter over them.
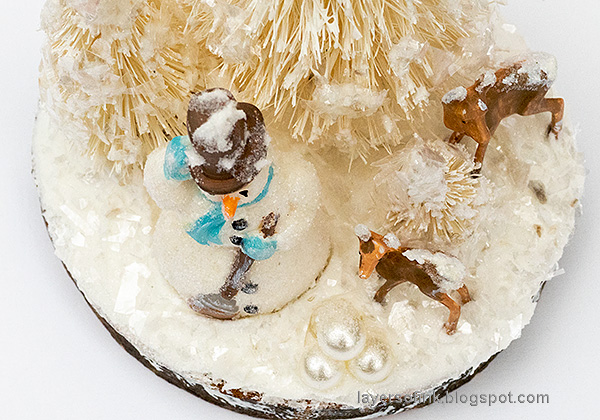
Apply a thick layer of texture paste on the wooden coaster and press the elements into the paste. Add extra paste around the trunks of the trees. The paste acts as a glue. Sprinkle mica flakes on top and then Rock Candy Glitter.

I made a snow lantern with four baubles. As you can see, I also dry brushed some gesso around the edges of the coaster.

The combination of mica flakes and Rock Candy glitter makes for a super sparkly winter project, mimicking both snow and ice.
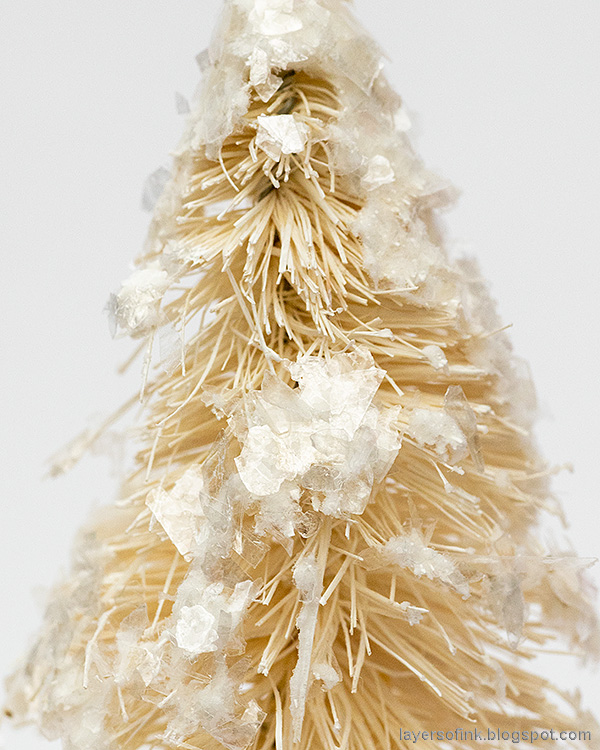
If you want to, you can add even more mica and glitter on the trees.
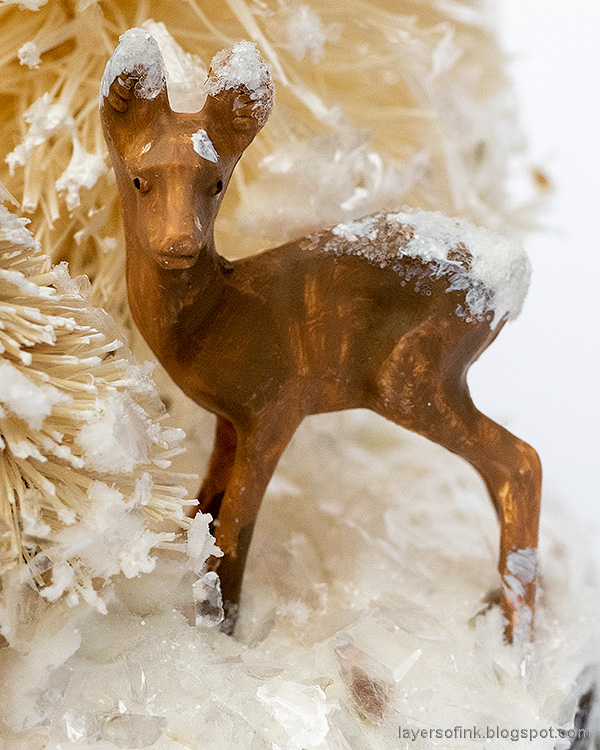
I just love these little deer and have used them before. Last year, I colored them gold for a Christmas altered tin. In the new pack, this larger deer has beautiful horns and a raised front leg.

I love the look of the snowman with the Rock Candy. You can use the same techniques for the Santa that comes in the same pack as the snowman.

Here's a close up of the glitter. As you can see, I applied the gel medium mainly to the snow parts of the snowman.

The winter wonderland scene looks good from all sides, and would work well as a small center piece on a table. Since it is winter-themed rather than Christmas-themed, I am planning to leave it out for the whole winter.

This photo would have looked so much better with some snow in the background. But no luck there!

You can wrap lights around the scene to make it shine and glitter when it is dark too. I only found larger snowflakes lights for this photo, but I think it will look even better with tiny fairy lights.

Thank you so much for taking the time to visit my blog today!
Happy Winter Crafting!
Anna-Karin
Supplies:
* Please note: the links are affiliate links, for which I receive a small percentage of sales generated by the link, at no extra cost to you.
* Please note: the links are affiliate links, for which I receive a small percentage of sales generated by the link, at no extra cost to you.

Just delightful - another real treat. I've just been playing with the snowman too, but mine is dressed in red (gasp!) - I'll definitely be saving one of the others to do a blue and brown version (much more my kind of thing) - he looks very dapper. The tall tree is gorgeous, and the snow sparkles perfectly. It all looks amazing lit up.
ReplyDeleteAlison x