
Hello crafters! I have a tutorial for a tiny flower book to share with you today. The techniques can also be used for other types of projects.

Here is the finished book. The background was done with a stencil and texture paste, which gives a nice textured surface to the book. You can use other stencils to easily change the theme of the book. Or do the stencil technique on a card or in an art journal instead. The book was made with Eileen Hull's Tiny Book die. During May the Eileen Hull Inspiration Team is sharing products with a flower theme.

Die cut the Tiny Book from mat board. You also get all the pieces to the right. I only used the key.
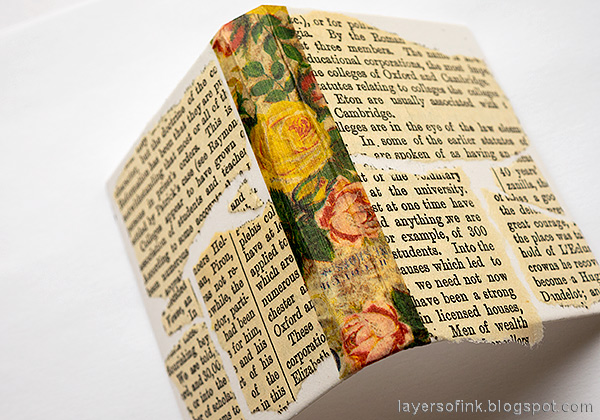
Glue strips of old book paper to the cover with matte medium. I added Rose Design Tape to the spine, also with the matte medium, to make sure it stuck down completely. Add a layer of matte medium on top of the cover too. Then give it a thin coating of gesso (I forgot to take a photo of this step - I was listening to a lecture at the same time and might have been a little distracted).

I also forgot to take a photo of the stencil step, which is so weird since I set everything up for the photo. Apply matte texture paste with a palette knife through Tim Holtz Floral stencil. I adhered a piece of masking paper over the design tape, to prevent getting paste there. When the paste is dry, paint with watered down Distress Paint.

Paint the flowers yellow and add green to the leaves.
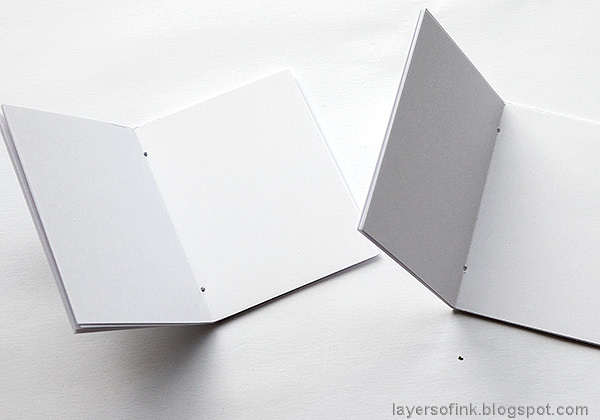
Cut inserts using your favorite sketching paper and fold in half. Arrange them into two signatures. I used seven paper in each, but it depends on the thickness of your paper. Pierce two holes down the spine.

Pierce corresponding holes in the spine. I had planned to leave the knots on the lower part of the spine, but had turned the book upside down, so they ended up at the top. I decided that it was fine anyway.

Here's the inside with the string going through the two holes and then out through the holes in the spine.

And then attach the second signature in the same way. For an alternative way of binding the tiny books, check out my Tiny Books Tutorial, with four tiny books.

I also added a Clippings Sticker. The small size is perfect for these tiny books.

The key was painted pink and embossed with several layers of Tea Rose embossing powder, which happened to be on my desk since my Honey Bee ATC from yesterday. Attach a piece of lace trim by stapling it to the background and use as a tie.

I love the texture and feel of the paste and the way the words show through here and there.

You can make the flowers in any color. I just felt like yellow flowers today.

The back of the book looks like this, with the lace stapled to the covers.

Your tiny book is ready to be filled with flower sketches, journaling, notes, or anything else you can think of. It is also great as a gift.

Thank you so much for taking the time to visit my blog today!
Happy crafting!
Anna-Karin
Supplies:
* Please note: the links are affiliate links, for which I receive a small percentage of sales generated by the link, at no extra cost to you.
Die: Eileen Hull Sizzix Tiny Book
* Please note: the links are affiliate links, for which I receive a small percentage of sales generated by the link, at no extra cost to you.
Die: Eileen Hull Sizzix Tiny Book

love your book Anna :)
ReplyDeletethis is gorgeous Anna-Karin!!! =)
ReplyDeleteWhat great texture added with the pasted and painted stenciling Anna-Karin! Love the floral binding and pretty lace closure!
ReplyDeleteFabulous texture! Love the heat embossed key! Great project!
ReplyDeleteGorgeous textured book - the flowers look as though they are covered with pollen! - and the tutorial is so clear and detailed. Fabulous!
ReplyDeleteAlison x
Every detail is perfect and as always, great tutorial- thanks so much Anna-Karin!
ReplyDelete