
Hello friends! I hope your week is going well. Today I have a quick and simple cloudy sky tutorial to share with you. It can be varied in many ways. Clouds can be both happy and more moody/rainy, depending on the colors you use. I went with bright shades of blue to create a joyful look.

For the cloudy sky, I used the Simon Says Stamp Clouds For Days stencil, which is such a clever stencil. All the four edges are shaped as clouds and they are all different, which means you can get a lot of variety in your clouds. No need to repeat the same cloud-bank over and over. In the center of the stencil there are three solid clouds. I didn't use them here, but I will use them for another project to show even more alternatives with this stencil.
My card was done on gloss cardstock, but you can also use ordinary white cardstock. The gloss finish does look nice though and it makes the splatter effect more pronounced. Dye ink also almost shine on gloss cardstock.
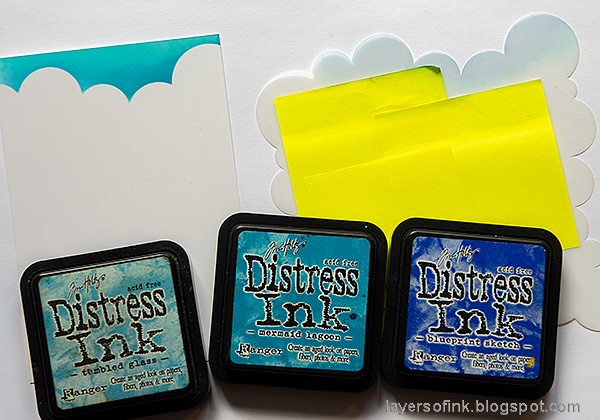
Begin from the top and ink with Distress Ink and a round ink-blending tool. Start with the lightest shade of blue and gradually build up darker colors. Make it darker toward the edge of the clouds/stencil. As you can see, I covered up the center of the stencil with post-it notes. This was to avoid getting ink through the full clouds that are positioned inside the stencil.

Continue building your cloudy sky. Alternate between the four edges of the stencil. I made the sky lighter towards the base of the card.

Splatter water on the background and pat with a paper towel - don't drag when drying the background since that will create smears instead of splatters.

Stamp the balloon from Lifting Hearts on gloss cardstock with Jet Black Archival Ink.
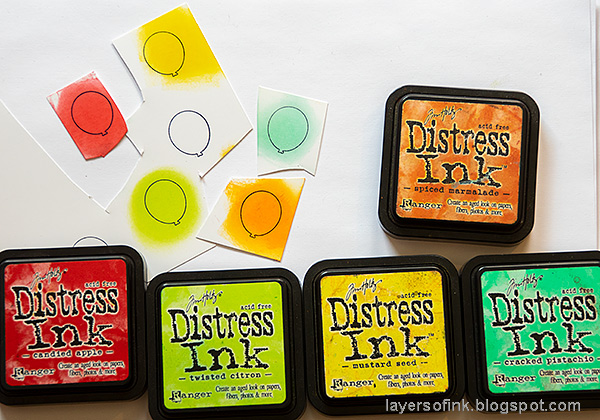
Ink the balloons with Distress Inks. I cut them out roughly so that I could ink them very quickly.
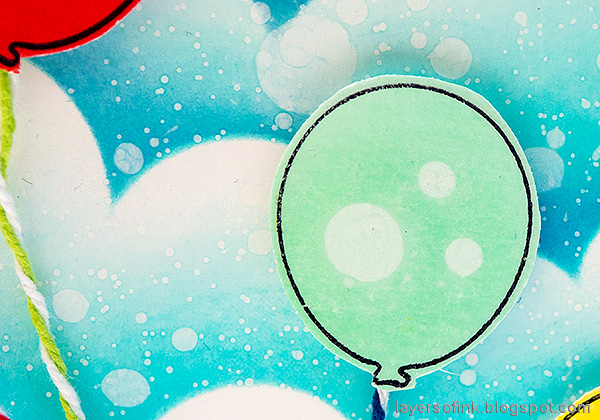
I also added droplets to the balloons, as highlights.

Cut out the clouds and add a piece of baker's twine to the back. Adhere to the card with foam dots.

The water drops in the background gives a great effect on the gloss cardstock. You can also use Specialty Stamping Paper, for the same effect, but with a matte finish.

I really like the lettering in this big word from the Simon Says Stamp Luck and Hugs set, from the Sunny Days Ahead release. You can see a different example where I colored it with watercolor paints here. The small sentiment comes from the same set and fits so well with the balloons.

Maybe you see the glossy surface a little better here.
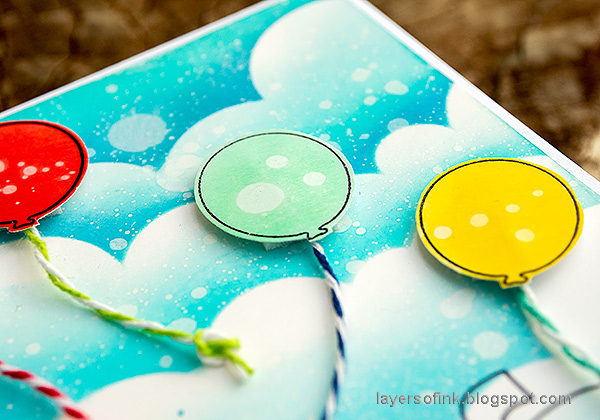
I tied the twine in the ends but left them hanging loose for a playful finish.

Thank you so much for stopping by here today!
Happy crafting!
Anna-Karin
Supplies:
* Please note: the links are affiliate links, for which I receive a small percentage of sales generated by the link, at no extra cost to you.
* Please note: the links are affiliate links, for which I receive a small percentage of sales generated by the link, at no extra cost to you.
Hi Anna-Karin!
ReplyDeleteThank you for this lovely card, and great tutorial as usual!!
Stopping by your blog today especially to say....
HAPPY HAPPY BIRTHDAY TO YOU MY FRIEND!!!!! :D
I wish you a wonderful day with your boys and husband :)
Sending hugs and love
Bises amicales, passe une très belle journée !!!!
Corinne