
Hello friends! I hope you are well Today I have four little books to share. They could be used as little notebooks or sketchbooks, or you could add photos to them. I like having some notebooks around that I can give away as gifts. Kids would also love to make these.

The books were made with Eileen Hull's Tiny Book die and this week the Eileen Hull Inspiration Team are sharing projects made with the Tiny Book and Tiny Book Case dies. I only used the former of the two. Some patterned papers are too gorgeous to cover up and those papers make wonderful notebook covers. I used Cosmos papers by Stamperia. The finished book measures 3x2.4 in.

Start by die cutting four Tiny Books from mat board. The die also includes the pieces shown above, as well as an oval. It's a normal Bigz die, so you get a lot of different shapes. I ended up not using the small pieces, but I really like them, especially the key.

Choose four papers for the front covers.

Glue a strip of natural sticky-back canvas to the spine. If you want to you can cut it larger so that it covers the joints completely. It is probably the better method, but I happened to have some strips of canvas with were just wide enough, so I decided to use them.

Glue the papers to the cover with matte medium. Leave to dry under a heavy book.

Sand and ink the edges.
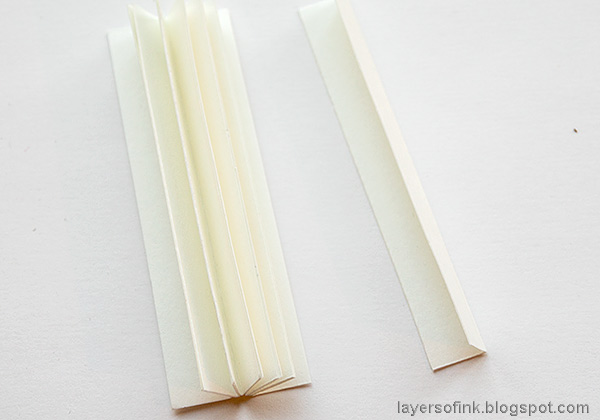
You can do the inside pages in many different ways. I cut strips of 0.8 in (20 mm) and folded in half. Use tape to adhere them together one at a time as shown here. Depending on the thickness of your paper, you can use 7 or 8, maybe more if you use thinner paper.

Cut pages and fold in half, adhere to the right hand flaps.

You can attach the pages in two ways. Here, I adhered tape to both flaps at the ends and adhered them to the cover on each side of the spine. This makes for a more traditional looking book, but all the pages might not fold down completely flat.

An alternative is to add tape only to the back flap, and possibly also to the back page. This gives you more flexible pages that lie flatter.

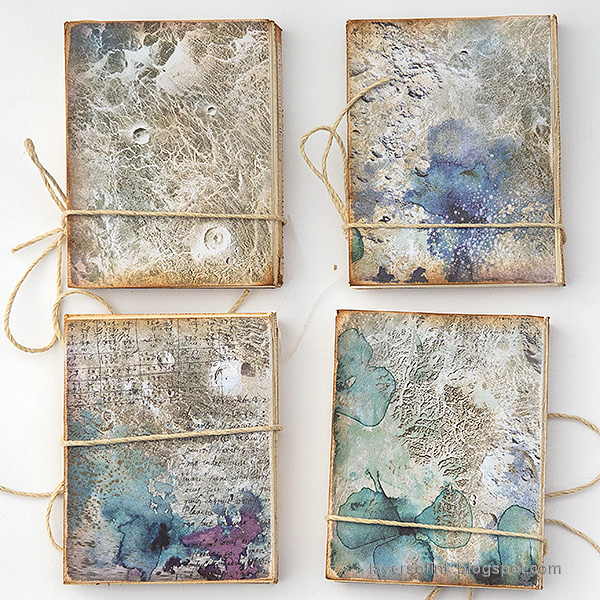
Don't use too many pages since that might damage the spine. I made that mistake with my first book, which you can see here (the second book from the left). The book still holds together well, but it doesn't look as nice. I will keep it for myself. I added Clipping Stickers to the spine of the books, picking phrases that fit with the images.

Add another sentiment to the front of the book. The books are tied with strings to keep them closed. You can do the closure mechanism in many different ways. I decided to keep it simple.

Here's the cover of the book that I am keeping for myself. The sentiment on the spine is 'everyday words'.

I love the sentiment combination on this book. On the spine, it says 'dreams of beauty'.

This wonderful wolf image was the focal point on the Magical Nature Wall-hanging that I made recently. You might also spot both the bird and the owl on that project.
For the back, I used one of the textured papers from the Cosmos paper pad. You can of course make them more elaborate if you want to.

Here you can see all four little books together.

Thank you so much for taking the time to visit my blog today!
Happy crafting!
Anna-Karin
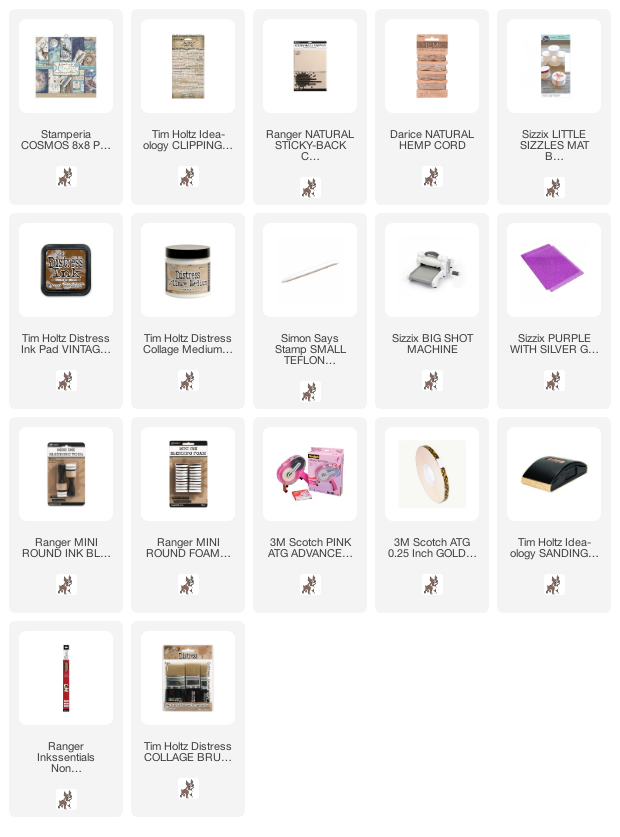
Supplies:
* Please note: the links are affiliate links, for which I receive a small percentage of sales generated by the link, at no extra cost to you.
Die: Eileen Hull Sizzix Tiny Book
* Please note: the links are affiliate links, for which I receive a small percentage of sales generated by the link, at no extra cost to you.
Die: Eileen Hull Sizzix Tiny Book
Gorgeous little books 😘😘😘
ReplyDeleteoh I loooooooove these books and the Stamperia papers!!!
ReplyDeleteAbsolutely gorgeous little books . Thank you for a very good tutorial too! X
ReplyDeleteThese are completely enchanting, Anna-Karin - a lovely way to use the papers, and I love those canvas textured spines.
ReplyDeleteAlison x
Absolutely fabulous!! What amazing little books and the backs are just as lovely too!! ~ Blessings, Tracey
ReplyDeleteThese are such lovely books Anna-Karin! I love the papers you used (just ordered the Cosmos, Forest and Sea Paperpads thank you very much!) The sticky backed canvas makes such a realistic binding and the sponged edges really make the little books look like old books from the attic! Love these!! xx
ReplyDeleteCan't tell you how much I love these! I have the same paper and I am going to re-create these babies! I am also going to give your page idea a try!
ReplyDeleteWhat size are the pages. I have the die and love the way the pages have been done.
ReplyDeleteThank you Allyson! The pages are about 4.3 x 2.9 inches (11x7.3 cm), and then folded in half. Have fun with the die!
Delete