Hi everyone! I hope you are well! I have a quick dry and heat embossing tutorial to share with you today.
Please note: this post has affiliate links, for which I receive a small percentage of sales generated by the link, at no extra cost to you.
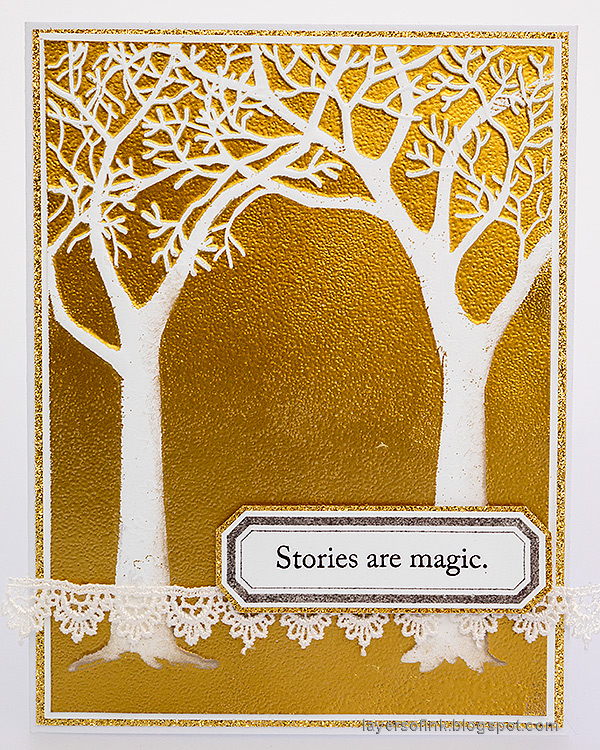
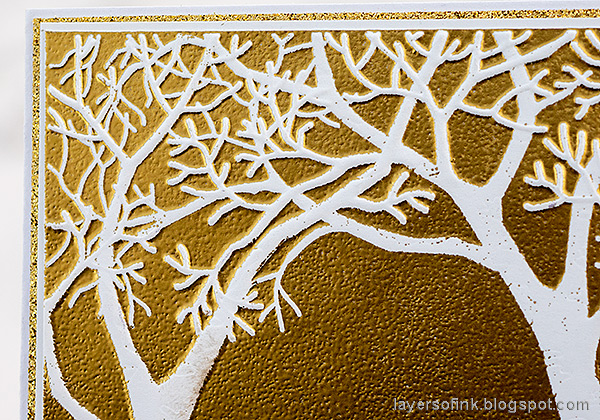
This is a quick technique. Apply embossing ink directly to the Winter Trees embossing folder. Emboss white cardstock and then cover the card with gold embossing powder. There will probably be some stray powder on the trees. I removed some of it, but not everything, since I didn't want the trees to be perfectly white. Be very careful when using a heat tool and do not touch the melted powder before it has cooled down completely.
Add just a hint of shading to one side of the trees with Pumice Stone Distress Ink.
This card was a tricky to photograph since both the golden shine and the embossed effect doesn't show so well on the photos. I mounted the panel on white paper, then on Simon Says Stamp gold glitter paper and finally on folded white cardstock.
As you can see there is some stray powder left on the trees and I liked the bits of texture from that.
I stamped one of the labels from the Simon Says Stamp Mixed Labels set with grey ink and cut out. You can also use the coordinating Mixed Labels dies. Mount on glitter paper. The sentiment comes from the same stamp set. The label was adhered with foam tape.
You can use this technique with many different embossing folders. For the opposite version of this technique, check out my Winter Pines tutorial.
Thank you so much for taking the time to stop by here today!
Happy crafting!
Anna-Karin
Supplies:
* Please note: the links are affiliate links, for which I receive a small percentage of sales generated by the link, at no extra cost to you.
* Please note: the links are affiliate links, for which I receive a small percentage of sales generated by the link, at no extra cost to you.


No comments:
Post a Comment
Thank you so much for leaving a comment! Happy Crafting!