
Hi! This week anything goes at Simon Says Stamp Monday Challenge Blog! I am looking forward to seeing all the creations.

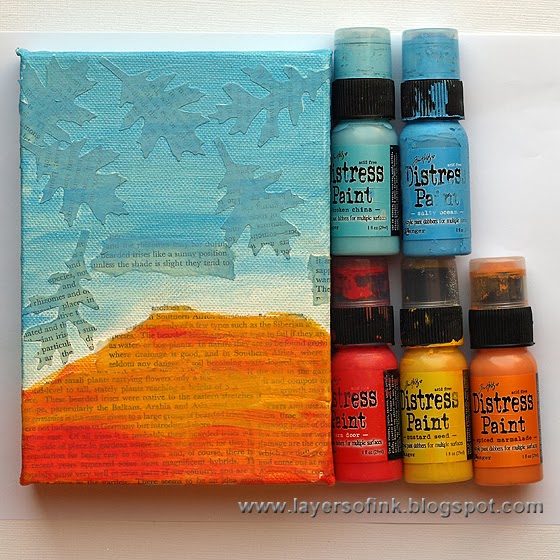
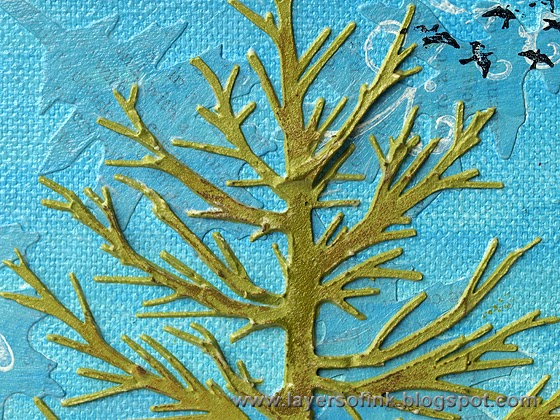
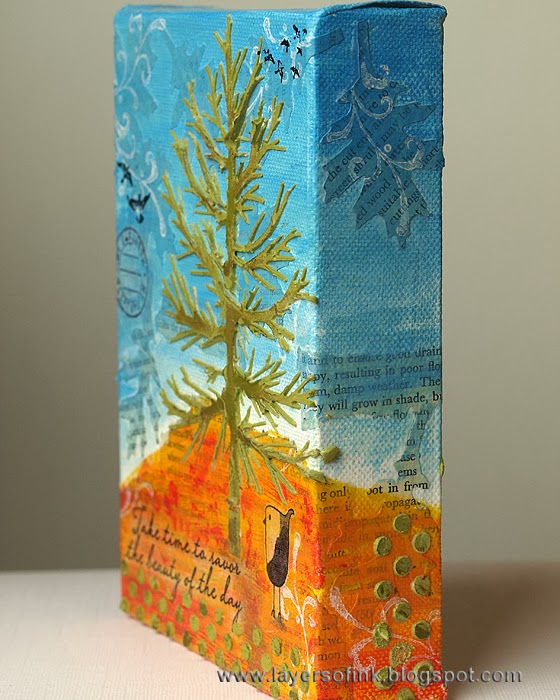
I sometimes have a hard time deciding what to do on anything goes challenges, but this week I knew I wanted to use the new Hero Arts Elegant Pine stencil. I LOVE this stencil, it is so intricate and the tree looks amazing. You might already know that I like trees, and this week I made a mixed media canvas (5 x 8 in) featuring this great pine tree. I took some step photos.

I first gave the canvas a coat of gesso, when it was dry I started by gluing down text paper. Some of the paper was die cut into leaves falling down the canvas, and the rest was torn into hills. I used multi-medium to glue them down.
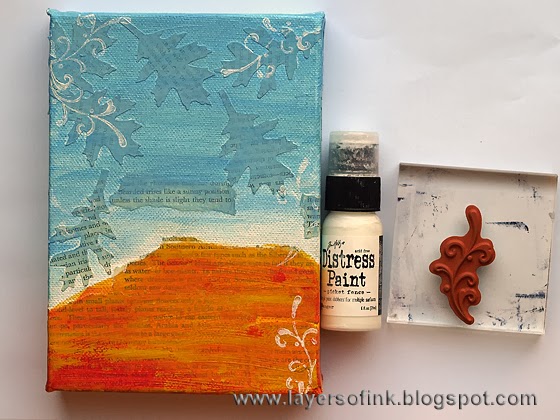
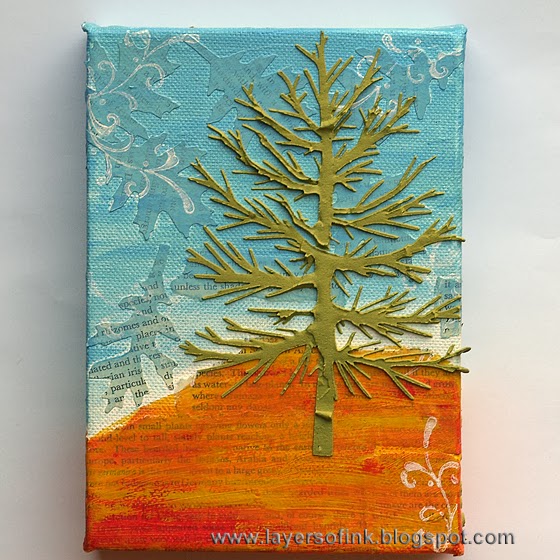

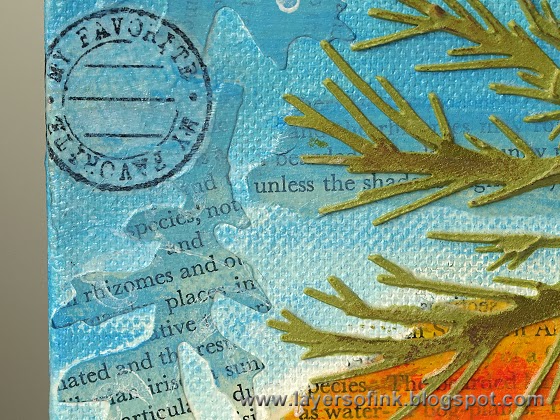
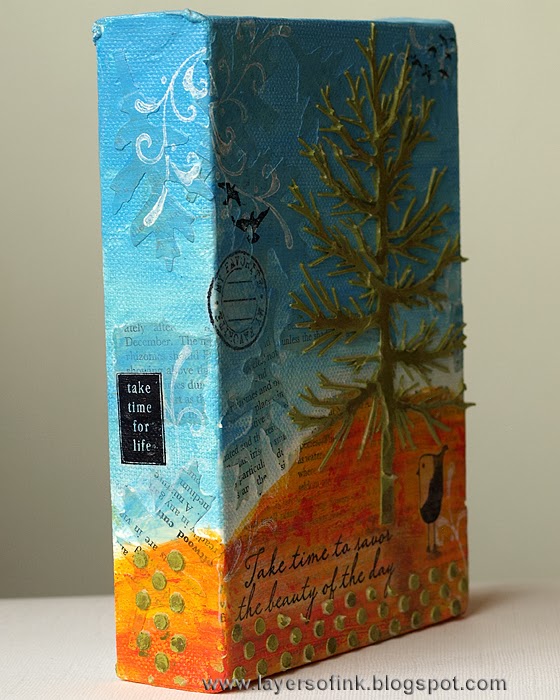
I extended the sky and ground onto the sides of the canvas. Here I also added another stamp, first stamped on tissue paper.
Join us this week and remember that anything goes! As every week, one random participant wins a $50 gift voucher from Simon Says Stamp.

Also, a little reminder, in case you might have missed it, Simon Says Stamp has a new blog. Make sure you are following it so that you don't miss out on the fabulous inspiration.

Thank you for the visit!
Happy crafting!
Anna-Karin
Supplies:
Surface: Canvas 5 x 8 in; old book paper; tissue paper
Dies: Sizzix: Mini Tattered Leaves
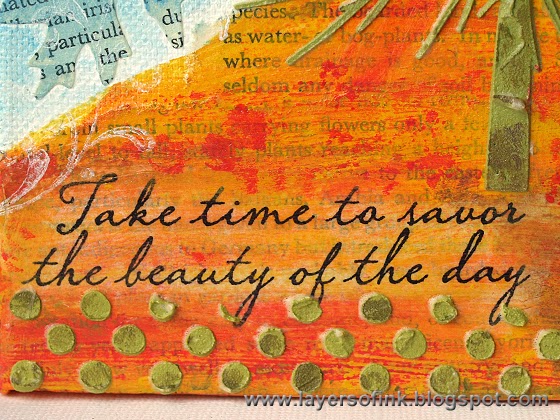
Stamps: Hero Arts: My Favorite AC030, Collage Friend AC022, Take Time to Savor G5374; Stampers Anonymous Tim Holtz: Mini Ornates
Ink: Ranger Archival Ink Jet Black
Paint: Distress Paint: Broken China, Salty Ocean, Mustard Seed, Walnut Stain, Peeled Paint, Forest Moss, Spiced Marmalade, Barn Door, Picket Fence
Stencil: Hero Arts: Elegant Pine, Borders
Medium: Claudine Hellmuth Multi-Medium Matte, Gesso; Wendy Vecchi Stampers Anonymous: White Embossing Paste
Beautiful canvas Anna-Karin! Love all the layers and mix of vibrant colors!
ReplyDeleteSuch a magnificent canvas Anna-Karin. With a special birthday card to make today you've filled me with ideas so thank you for all the inspiration. Jenny x
ReplyDeletebeautiful! thanks for all the tips!
ReplyDeleteSandra ltb
Beautiful! I love how the sides have a little embellishment and surprise with the verse. Lovely canvas!
ReplyDeleteGorgeous, gorgeous!!! Love that blue and orange!!!
ReplyDeleteAnna-Karin...your canvas is so pretty. I love the bright colors and the design. Those little leaves die cut from text and melting into the background look amazing! LOVE the orange at the bottom and the sweet sentiment you've added using tissue paper. That Hero Arts stencil is so pretty and you did such a gorgeous job adding the pine to your canvas. Love the green color! <3 Candy
ReplyDeleteGreat canvas Anna-Karin, love the tree and I have in fact got that on my shopping list. Love how you added leaves to the backdrop prior to painting too and the sentiment is fantastic. I love how you decorated the sides too. Thanks so much for your comment on my blog. I will try washing my Gelli plate as you suggested. I did actually like the mottled effect too but think I will try both, THANKS so much. Tracy x x
ReplyDeleteIts wonderful ! i loved the idea of using diecut leaves on base for adding texture .Loved the texture paste tree,the colors ..everything !
ReplyDeleteThis is such a beautiful canvas! Anna Karin. I love thepretty stenciled and old book paper leaves. The colors and textures are fabulous! :)
ReplyDeleteI'm just updating the Monday list for Challenges for Days. Had to stop to say WOW your canvas is fantastic, and the tutorial here brilliant. XOXO Zoe
ReplyDeleteLove this ! Need that tree stencil for sure.
ReplyDeleteJust lovely. Nice how it wraps around the canvas.
ReplyDeleteWow, Anna-Karin! Your canvas is amazing! Love the big pine tree!And the leaves in the back are so great for texture! The sentiment is perfect! Hugs, Sandra
ReplyDeleteWow! Gorgeous!
ReplyDeleteWow! Gorgeous!
ReplyDeleteGorgeous canvas, Anna-Karin! I love the layering and the stenciling!!
ReplyDelete*mwah*
Steph
Simon Says Stamp!
You are always such a layering genius! Holy cow! I especially loved the subtlety of the text leaves in the background. And the fact that you wrapped the image around the edges of your canvas? Brilliant! That's awesome that you did not leave the edges neglected like SOMEONE I know (yep-- that would be me). But you've inspired me to take it up a notch, as usual!
ReplyDeletei could never see myself doing this but this is a wonderful piece of art. thank you for sharing it with all of us.
ReplyDeleteYour canvas is beautiful. I love the colors the images and how you pulled it all together. I am so inspired to want to do this. Beautiful.
ReplyDeleteThis is a beautiful canvas Anna-Karin... I love how you created it and that stencil is just beautiful...
ReplyDeleteLove this so much, Anna-Karin!
ReplyDeleteThis canvas is really beautiful, cheerful, colorful, and the tree is fabulous!! I like very much your use of colored embossing paste! Barbarayaya
ReplyDeleteAnna-Karin, your work is always so inspiring. I love the little scenic worlds that you create and this one is equally lovely. The tree is gorgeous. I love the leaves too. Fabulous!
ReplyDeleteBeautiful! I love the way you pieced together your landscape using such a variety of tools. Blessings!
ReplyDelete