Monday, March 2, 2020

Mixed Media Bird Tag

Hi friends! Today, I have a mixed media bird tag to share with you, with a textured neutral background and a bird with stamped patterns. As with all tags, it could just as easily be a card instead.

We had a fun weekend with a Transformer birthday party, a soccer game and a very nice visit from my parents. 



At the Simon Says Stamp Monday Challenge Blog we have a Tag It challenge. Since it is the first day of a new month, the team is showcasing a specific designer/company, and this week it is Tim Holtz. Tim has such a fantastic line of products and you can find them all here. You don't have to use Tim's products to join, but it is always fun if you do.

This month, Ann Chuang is our guest designer and I hope you will stop by her blog. She has created a fantastic project for today.

Layers of ink - Mixed Media Bird Tag Tutorial by Anna-Karin Evaldsson.

I made a bird themed mixed media tag this week, using Tim's Patchwork Bird die, which is such a fun die with so many options. The background is textured, yet neutral, since I wanted the bird on a neutral background. I also used a branch from the garden and some old fibers.

Layers of ink - Mixed Media Bird Tag by Anna-Karin Evaldsson.

Start by tearing old book paper and glue them to a tag with Matte Medium.

Layers of ink - Mixed Media Bird Tag by Anna-Karin Evaldsson. Add gesso.

When dry, coat with gesso, taking care not to cover all the words. I often look for words that I want to keep.


Apply Texture Paste through the Latticework stencil with a palette knife.

Layers of ink - Mixed Media Bird Tag by Anna-Karin Evaldsson. Paint with Distress Paint.

When the paste is dry, paint the tag with Distress Paint and mist with water to make the paints blend and run.

Layers of ink - Mixed Media Bird Tag Tutorial by Anna-Karin Evaldsson.

Stamp with a dot stamp and dry brush darker brown paint here and there. I thought the top part almost looked like a landscape, so I drew three very simple winter trees there.

Layers of ink - Mixed Media Bird Tag Tutorial by Anna-Karin Evaldsson.

Apply glue with a glue stick and rub a gold foil sheet on top, working one area at a time, and focusing on the edges.

Layers of ink - Mixed Media Bird Tag Tutorial by Anna-Karin Evaldsson.

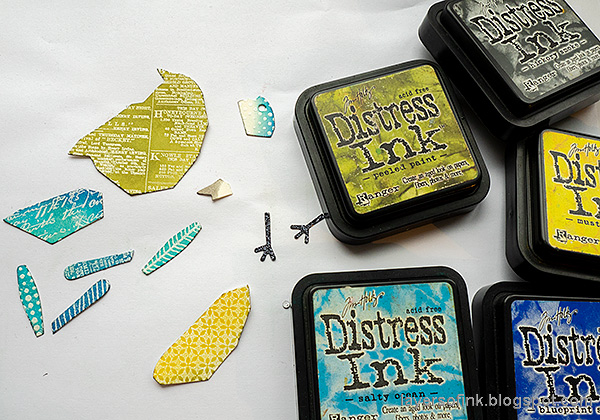
Die cut the bird from heavystock paper and white emboss various background stamps on the pieces. 

Layers of ink - Mixed Media Bird Tag Tutorial by Anna-Karin Evaldsson. Ink the bird.

Ink with Distress Inks and the embossing will resist the ink. My bird is inspired by the blue tit.

Layers of ink - Mixed Media Bird Tag Tutorial by Anna-Karin Evaldsson. Piece the bird together

Die cut the base piece of the bird from mat board, to give it stability and then patch the pieces together on top of the mat board. I also die cut a wing and feathers from Simon Says Stamp Sapphire glittery cardstock and legs from black glitter paper. The eye is also from black glitter paper.

Layers of ink - Mixed Media Bird Tag Tutorial by Anna-Karin Evaldsson. Gold foiling.

The gold foil adds a nice touch and gives shine without being overpowering. I like how you see some of the words from the old book underneath all the other layers.

Layers of ink - Mixed Media Bird Tag Tutorial by Anna-Karin Evaldsson.

I picked out three Clippings Stickers as sentiments. Here you can also see my very rough trees. My finer pens were hiding, so I used a slightly too broad pen.

Layers of ink - Mixed Media Bird Tag Tutorial by Anna-Karin Evaldsson. Patchwork Bird.

You can vary this bird in so many ways, by using different patterns, different colors and different types of surfaces. For a fabric version of the Patchwork Bird, check out my Winter Bird Tag. I used a black pen to draw simple lines as shadows between the pieces and around the entire bird.

Layers of ink - Mixed Media Bird Tag Tutorial by Anna-Karin Evaldsson. Bird feathers.

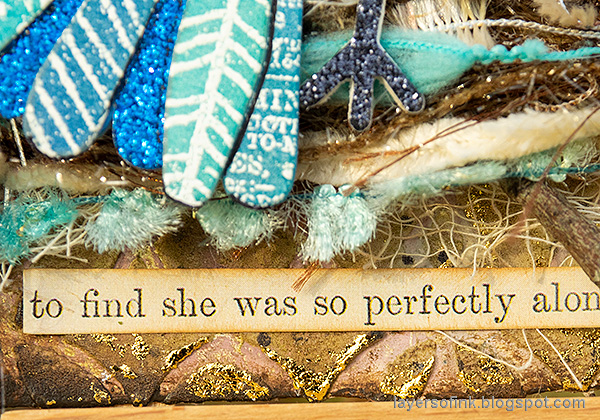
My favorite part of the bird is the tail feathers, with the mix of patterns and glitter. I particularly liked how the feathers stamped with the Pine stamp turned out. Look at your background stamps and try to imagine patterns and textures that you can create with them, even on very small surfaces.

Layers of ink - Mixed Media Bird Tag Tutorial by Anna-Karin Evaldsson. Fiber bird nest.

Underneath the bird you will find a piece of dyed cheese cloth, a branch from the garden and lots of old fibers.

Layers of ink - Mixed Media Bird Tag Tutorial by Anna-Karin Evaldsson.

I used some of the same fibers to tie the tag at the top.
Layers of ink - Mixed Media Bird Tag Tutorial by Anna-Karin Evaldsson.

And a final sentiment.  

Layers of ink - Mixed Media Bird Tag Tutorial by Anna-Karin Evaldsson. DIY paper bird.

The bird was adhered with foam tape, placing two strips on top of each other to increase the thickness.

Layers of ink - Mixed Media Bird Tag Tutorial by Anna-Karin Evaldsson.


I hope you will join us this week in our Tag It challenge. As always, you have a chance to win a $50 gift voucher to do some fun shopping at Simon Says Stamp. You have until next Monday 8am Ohio time. 1pm UK time, 2 pm CET to join in.


Don't forget to follow Simon Says Stamp on Instagram, they post great stuff daily. 


Do you use Instagram? If so please add #sssmchallenge so we can see your entries there too.


Thank you so much for taking the time to visit my blog today!  

Happy crafting!

Anna-Karin

Supplies:

* Please note: the links are affiliate links, for which I receive a small percentage of sales generated by the link, at no extra cost to you.

Friday, February 28, 2020

Vintage Floral Tag Tutorial

Hi crafters! Vintage floral images are so pretty and today I made a tag featuring a floral stamp, together with a printed tissue paper background. If you don't want to make a tag, turn it into a card instead or use the techniques for an art journal page.

Layers of ink - Vintage Floral Tag Tutorial by Anna-Karin Evaldsson.

The sun is shining and we actually got a little bit of snow, to the boys great joy. They could go downhill on their sleds for the first time this winter.
 
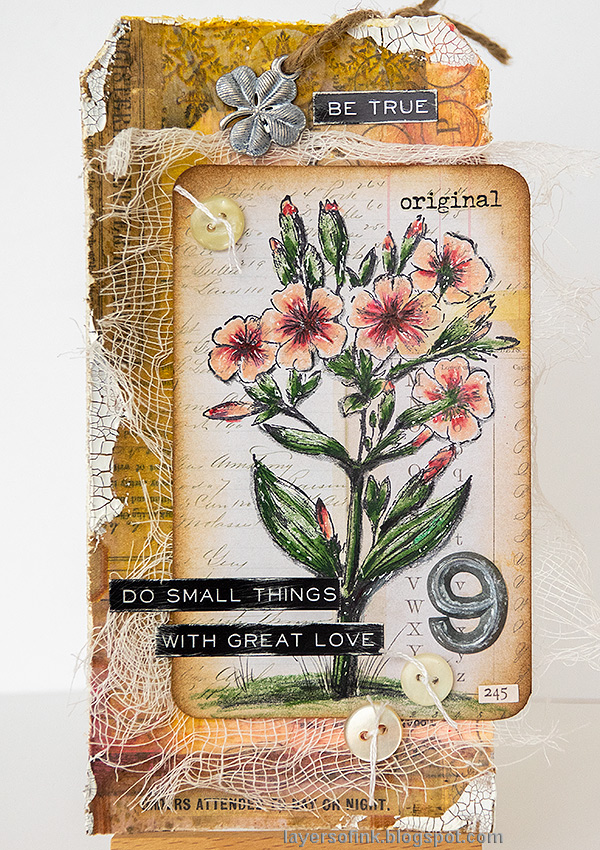
This tag has a vintage feel to it because of the combination of papers, stamps and old buttons. Both the stamps and the papers are by Tim Holtz. You can use the colored pencil technique with many types of images.

Layers of ink - Vintage Floral Tag Tutorial by Anna-Karin Evaldsson.

I started out by covering a heavystock tag with Typography Collage Paper, wrinkling it a little bit. There is also a small piece from the Documented Collage Paper at the bottom of the tag. Add a layer of matte medium on the tag and place the paper into the medium. Then add a second layer of medium on top.

Layers of ink - Vintage Floral Tag Tutorial by Anna-Karin Evaldsson. Add the collage paper.

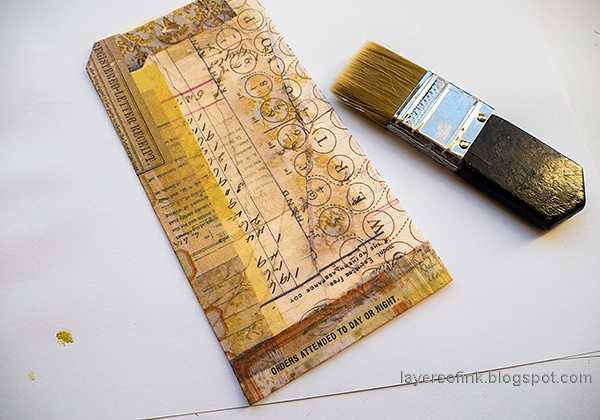
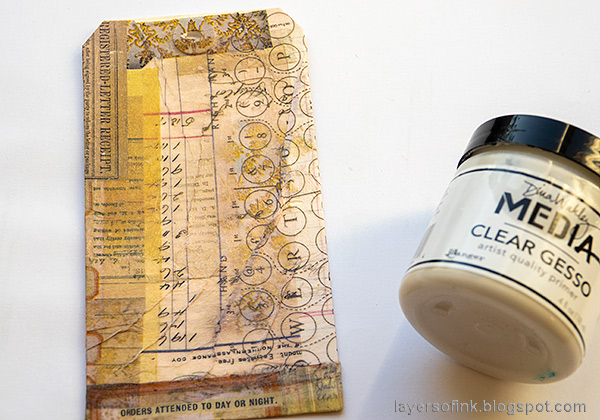
I decided to also add a layer of clear Gesso. You could skip the top layer of matte medium and go straight to the gesso instead. It will give tooth to the Distress Crayons in the next step.

Layers of ink - Vintage Floral Tag Tutorial by Anna-Karin Evaldsson.

Add color to the tag with Distress Crayons, smoothing them out with your finger.

Layers of ink - Vintage Floral Tag Tutorial by Anna-Karin Evaldsson.

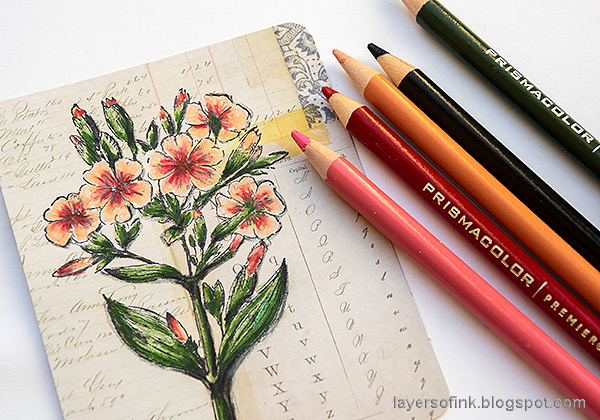
Stamp a flower from Tim Holtz Illustrated Garden on one of his journal cards. Color it with colored pencils, also adding shading. I used Prismacolors.
 Layers of ink - Vintage Floral Tag Tutorial by Anna-Karin Evaldsson. Color the vintage flowers.

Bring back some of the details with a black pen, giving it more of a hand-drawn look. Add highlights with a white gel pen.

Layers of ink - Vintage Floral Tag Tutorial by Anna-Karin Evaldsson.

When the tag was assembled, I decided to add a little crackle paste here and there around the edges. White paint was rubbed into the metallic embellishments.

Layers of ink - Vintage Floral Tag Tutorial by Anna-Karin Evaldsson. Add wink of stella.

I don't know if you can see it, but I used a Wink of Stella to give a light shimmer to the flowers. Here you can also see the shading better.

Layers of ink - Vintage Floral Tag Tutorial by Anna-Karin Evaldsson.

The collage paper background is almost too pretty to cover up. If you make a card, you can give it more space than what I had here.

Layers of ink - Vintage Floral Tag Tutorial by Anna-Karin Evaldsson.

I inked the edges of the journaling card and cut off a small piece on the right hand side, rounding the corners. I also drew grass for the plant, to ground it to the background. The sentiment stickers were sanded.

Layers of ink - Vintage Floral Tag Tutorial by Anna-Karin Evaldsson.

Years ago, I scored several bags of old buttons, recycled from clothing. I have had so much use for them and still have many left. Pierce holes and then stitch the buttons to the tag.


Thank you so much for taking the time to visit my blog today!  

Happy crafting!

Anna-Karin

Supplies:

* Please note: the links are affiliate links, for which I receive a small percentage of sales generated by the link, at no extra cost to you.


Tuesday, February 25, 2020

Vintage Vehicles Box

Hello crafters! Today I have a gift box tutorial with a vintage transportation theme to share with you, including stamping, inking and masking. The box can easily be turned into any theme and you it can also become an art block instead of a box.

The Eileen Hull Inspiration Team is sharing projects made with Eileen's Chapter 1 release this month. Don't miss all the inspiration!

Layers of ink - Vintage Vehicles Box Tutorial by Anna-Karin Evaldsson. DIY gift box.

We have a birthday coming up soon, and I made this box for Leo, so that he can keep some of his tiny vehicles in it. He loves vehicles, so the theme was easy to pick. The box was made with Eileen's Gift Box w/Scallop Edges die, which makes a 3.8 x 3.8 in box. I didn't want the box to have any lose parts that could fall off, so it is all just one layer, except for the extra decorative closure flap.

Layers of ink - Vintage Transportation Box Tutorial by Anna-Karin Evaldsson. Stamp the vintage vehicles.

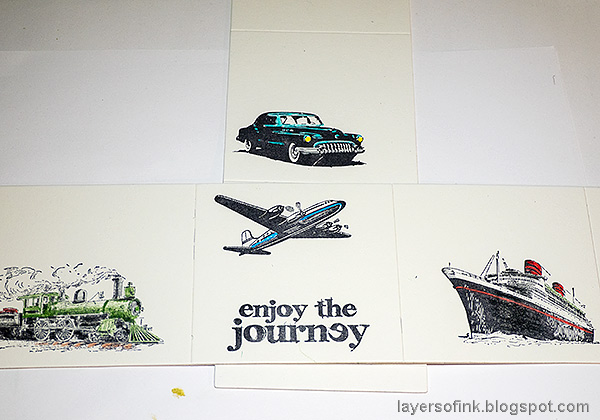
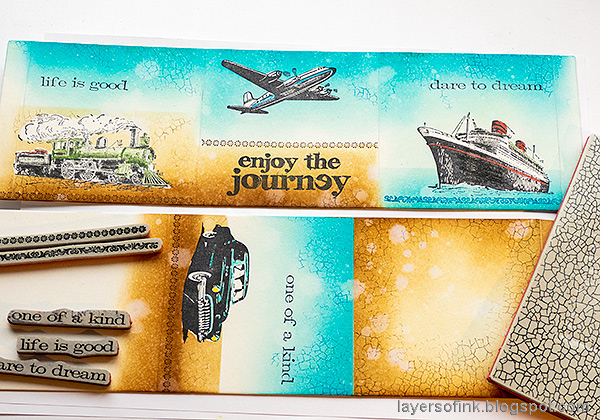
Die cut two box parts from mat board. Mat board is a wonderful surface, very sturdy and it takes inks and paint beautifully. You need to use the Extended Cutting Pads, since this is an XL die, but it fits perfectly in an ordinary Big Shot or Vagabond. Stamp with Tim Holtz transportation stamps. The airplane comes from Warehouse District and the other three from Travel Ways.

Layers of ink - Vintage Transportation Box Tutorial by Anna-Karin Evaldsson. Color with colored pencils.

Color the images with colored pencils. I used Prismacolors.

Layers of ink - Vintage Vehicles Box Tutorial by Anna-Karin Evaldsson. Mask the images.

Stamp them again on Simon Says Stamp masking paper, cut out and place over the images.

Layers of ink - Vintage Vehicles Box Tutorial by Anna-Karin Evaldsson.

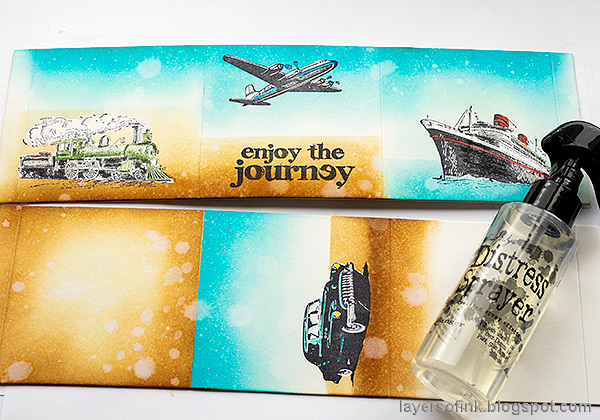
Use another piece of masking paper to mask out the sky and create a horizon line. Ink with Distress Ink and an in-blending tool.

Layers of ink - Vintage Vehicles Box Tutorial by Anna-Karin Evaldsson. Ink with Distress Ink.

Continue masking and inking, until you have created simple landscapes.

Layers of ink - Vintage Vehicles Box Tutorial by Anna-Karin Evaldsson.

Before removing the masking paper, mist with water and water drops. Dab off the water with a paper towel.

Layers of ink - Vintage Vehicles Box Tutorial by Anna-Karin Evaldsson. Stamp sentiments and textures.

When dry, stamp sentiments, borders and a craze texture on the background. I stamped with Archival Ink Potting Soil and Manganese Blue.

Layers of ink - Vintage Vehicles Box Tutorial by Anna-Karin Evaldsson. Vintage airplane.

Assemble the box with a strong adhesive. One of the reasons for why I stamped the Ornate Trim borders, was that I placed the masking paper a bit skewed on this side. The border stamp hides the mistake.

Layers of ink - Vintage Vehicles Box Tutorial by Anna-Karin Evaldsson.

Sand the edges to reveal the white of the mat board.

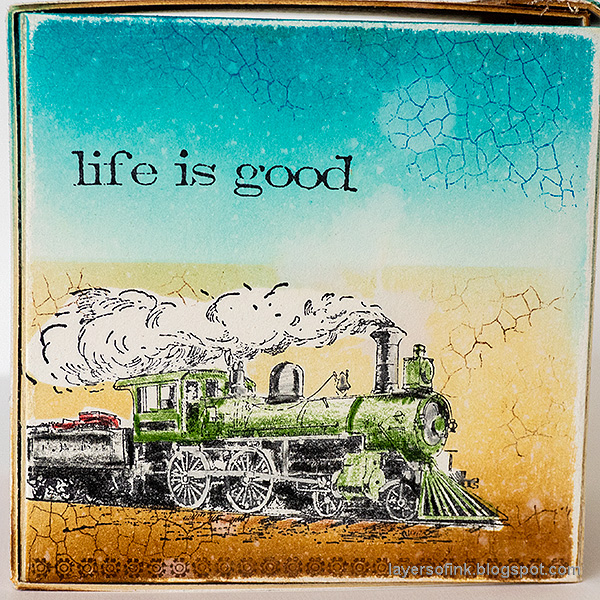
Layers of ink - Vintage Vehicles Box Tutorial by Anna-Karin Evaldsson. Vintage train.

I added some more color to the train after taking the photos, since I discovered that there were white areas while taking the photos.

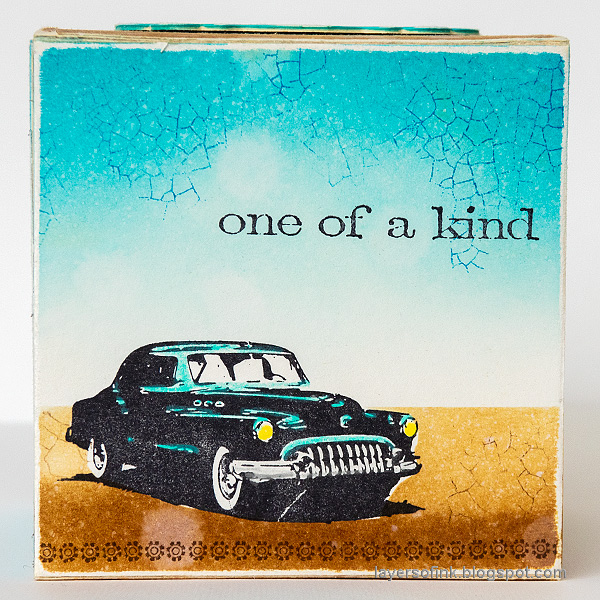
Layers of ink - Vintage Vehicles Box Tutorial by Anna-Karin Evaldsson. Vintage car stamp.

Just the little bit of color adds personality to the car. Even though this stamp is pretty solid, you now get the impression that it is a turquoise car and not a black car.

Layers of ink - Vintage Vehicles Box Tutorial by Anna-Karin Evaldsson. Vintage ship.

I always liked this ship stamp and have used it quite a few times before. 

Layers of ink - Vintage Vehicles Box Tutorial by Anna-Karin Evaldsson.

For the top of the box, I used the label that is a part of the die. It was stamped, inked and sanded. The alphabet stamps are from Tim's Tall Text set.

For more inspiration with the Gift Box w/Scallop Edges die, check out my Forest Photo Block.


Thank you so much for taking the time to visit my blog today!  

Happy crafting!

Anna-Karin

Supplies:

* Please note: the links are affiliate links, for which I receive a small percentage of sales generated by the link, at no extra cost to you.


Additional supplies:

Eileen Hull Sizzix Gift Box w/Scallop Edges XL die.