Monday, February 24, 2020

Sing Art Journal Page

Hello crafters! Today I am sharing an art journal page done with stamping, watercolors, colored pencils and some die cutting. It is 6 x 6 in and can very easily be turned into a card instead. 

We had a fun weekend with a bowling birthday party, which everybody enjoyed and which was so easy to arrange. All I had to do was to make the booking and send out invitations. The kids had a great time, and it is a big thing when your age suddenly needs two numbers, instead of one. 



This week at the Simon Says Stamp Monday Challenge Blog we have an Inspired By Music theme. Fun! Don't miss the last project by our February guest designer Christina, with her blog Rosso Papavero. 

Layers of ink - Sing Art Journal Page by Anna-Karin Evaldsson.

My eye fell on this stamp when I started on my project. I used only the sentiment a while ago. It's such a great stamp and perfect for a music theme. The page was done in my Dina Wakley White Journal, which consists of very heavyweight cotton-rag paper. You can use ordinary watercolor paper instead too.

Layers of ink - Sing Art Journal Page by Anna-Karin Evaldsson. Distress Resist Spray.

Start by splattering some Distress Resist Spray on a page, while protecting the opposite page.
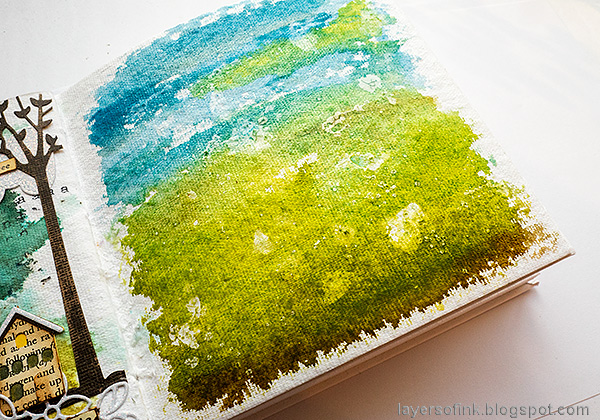
Layers of ink - Sing Art Journal Page by Anna-Karin Evaldsson. Paint with watercolors

When the resist spray is dry, paint the page with watercolors. As you can see, the resist splatters, resist the paint. When the paint is dry, you can use a slightly moist cloth to remove even more paint from the splatters.

Layers of ink - Sing Art Journal Page by Anna-Karin Evaldsson. Stencil with white paint.

Sponge white paint through a stencil to add texture. This is Tim's Cargo stencil.
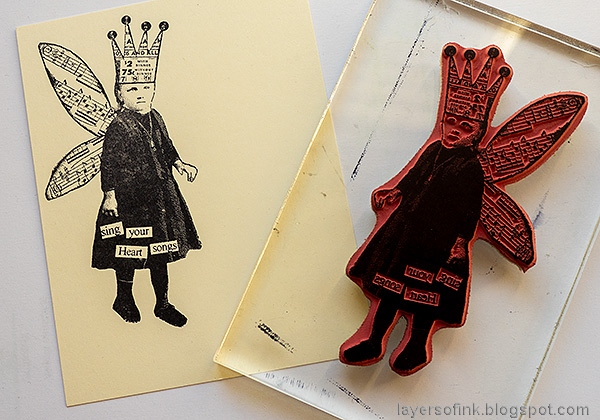
Layers of ink - Sing Art Journal Page by Anna-Karin Evaldsson. Stamp the Winged Things image.

Stamp the image from Tim Holtz Winged Things 1 on heavystock paper.

Layers of ink - Sing Art Journal Page by Anna-Karin Evaldsson. Color with Prismacolors.

Color with colored pencils. I used Prismacolors.
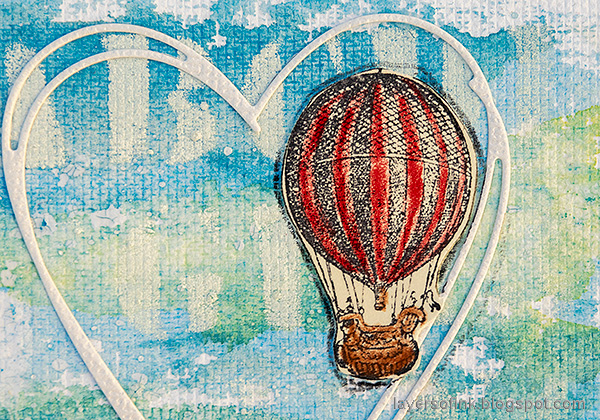
Layers of ink - Sing Art Journal Page by Anna-Karin Evaldsson. Hot-air balloon.

The hot-air balloon comes from Tim's Tiny Things set, and the heart is Tall Sketch Heart by Memory Box. It was die cut from SSS glimmery paper.

Layers of ink - Sing Art Journal Page by Anna-Karin Evaldsson. Old gramophone.

The gramophone comes from Tiny Things 2, and so does the music notes. As you can see, I added a rough shadow with a black pencil, to ground the elements to the background.

Layers of ink - Sing Art Journal Page by Anna-Karin Evaldsson. Watercolor resist.

When the Distress Resist Spray splatters are large, they sometimes get crackles, which is a cool effect.
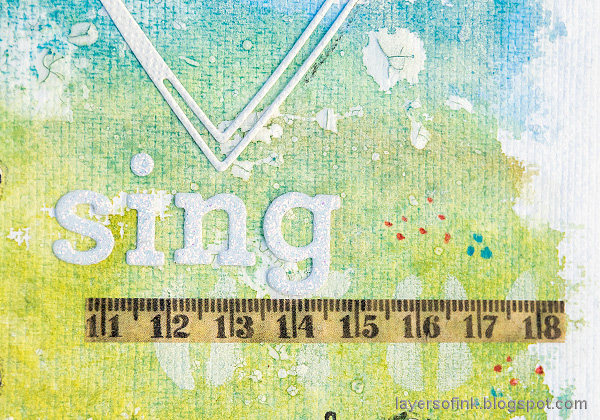
Layers of ink - Sing Art Journal Page by Anna-Karin Evaldsson.

Sing was die cut with the SSS Archie Jr Solid, from white glitter paper, partly since I had used the same glitter paper on the opposite page.

I hope you will join us this week in our Inspired by Music challenge. As always, you have a chance to win a $50 gift voucher to do some fun shopping at Simon Says Stamp. You have until next Monday 8am Ohio time. 1pm UK time, 2 pm CET to join in.


Don't forget to follow Simon Says Stamp on Instagram, they post great stuff daily. 


Do you use Instagram? If so please add #sssmchallenge so we can see your entries there too.


Thank you so much for taking the time to visit my blog today!  

Happy crafting!

Anna-Karin

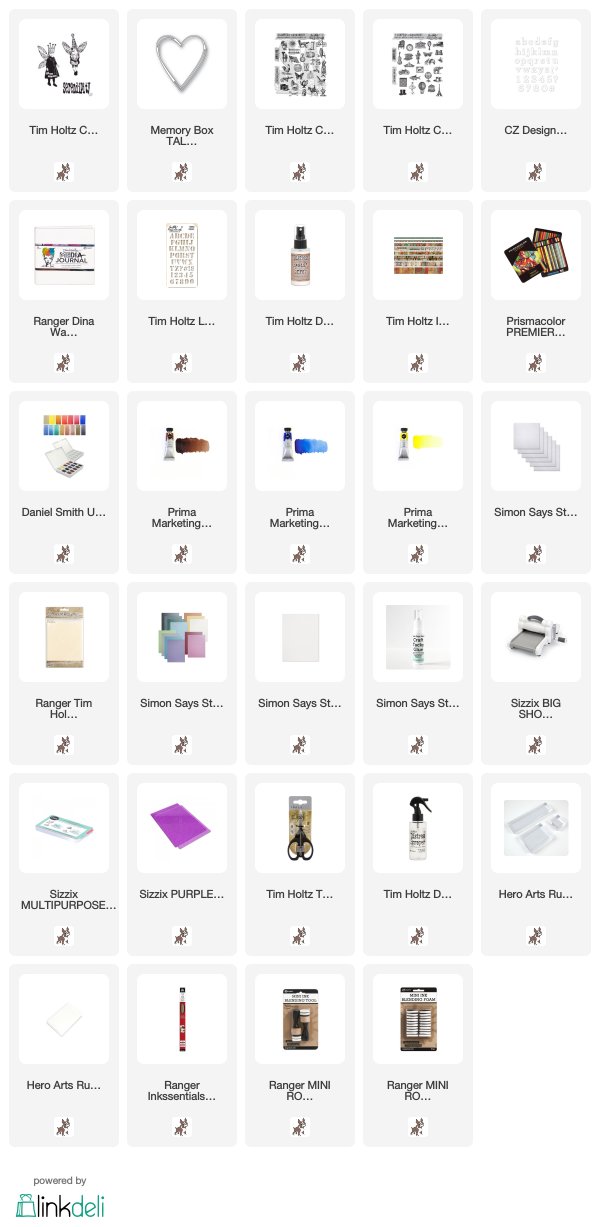
Supplies:

* Please note: the links are affiliate links, for which I receive a small percentage of sales generated by the link, at no extra cost to you.


Sunday, February 23, 2020

Panda Shaker Card

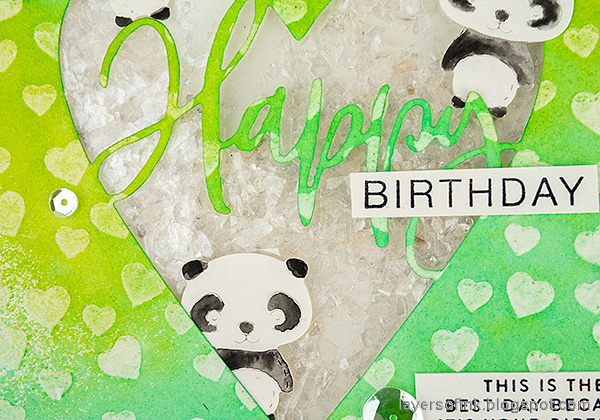
Hello friends! Today I have a shaker card tutorial to share with you, with three very cute pandas. Shaker cards will always bring a smile to the recipient and they are also such fun to make.

Both boys have their birthday in February, and I can't believe we now have a ten-year old and soon a five-year old in the house. Leo loves pandas and I made this card for him.

Layers of ink - Panda Shaker Card Tutorial by Anna-Karin Evaldsson.

Leo has a sweet habit of saying 'today is the best day since it is Monday/Friday/we will go to the play ground/we will build transformers/he will cycle, and many other reasons', which is a pretty good way of looking at life. That's why I was extra happy to find a sentiment stamp with this exact expression. One big heart and lots of small ones, made with a die and a stencil. Change the colors and use a different animal to create this card in other themes. It is 6 x 6 in.

Layers of ink - Panda Shaker Card Tutorial by Anna-Karin Evaldsson.

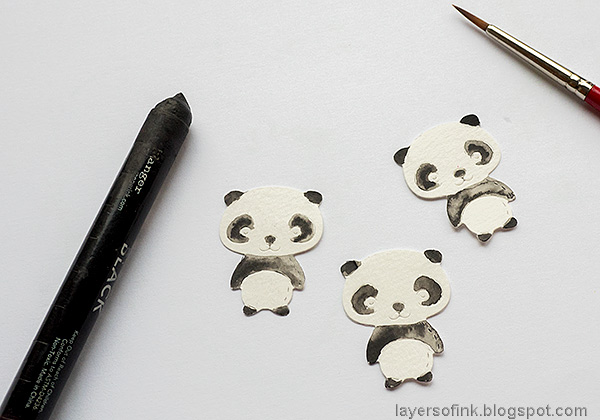
Start by die cutting the Whittle Panda from Poppy Stamps three times, from watercolor paper.

Layers of ink - Panda Shaker Card Tutorial by Anna-Karin Evaldsson. Color the pandas.

I colored the panda by picking up black pigment directly from a Scribble Stick. You can also use ordinary watercolor paint, or Distress Ink.

Layers of ink - Panda Shaker Card Tutorial by Anna-Karin Evaldsson.

For the background, I smeared texture paste through the Memory Box Drifting Hearts stencil, also on watercolor paper.

Layers of ink - Panda Shaker Card Tutorial by Anna-Karin Evaldsson. Die cut the heart window.

When the paste was dry, I die cut the Memory Box Happy Heart Collage from the center of the paper.

Layers of ink - Panda Shaker Card Tutorial by Anna-Karin Evaldsson.

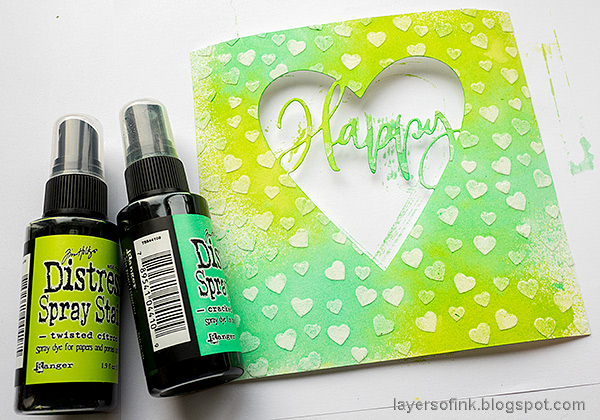
Mist the paper with Twisted Citron and Cracked Pistachio Distress Spray Stain. Pick up the mist from some of the hearts with a paper towel, so that they look lighter than the background.

Layers of ink - Panda Shaker Card Tutorial by Anna-Karin Evaldsson. Fill the shaker window with mica flakes.

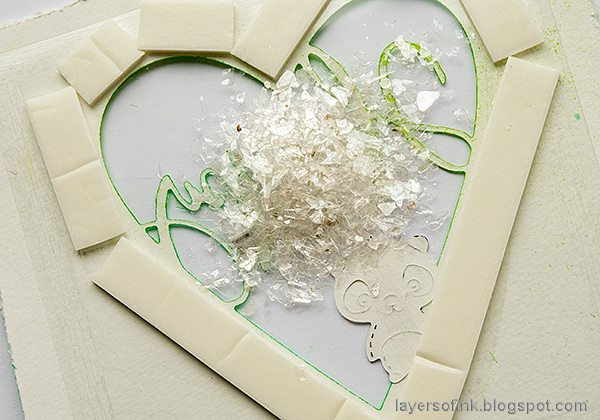
Cut a piece of acetate and adhere behind the window, first adding the panda that peeks out. Add foam tape around the heart and a pile of Tim Holtz mica flakes in the middle. You can also use sequins, glitter or beads. Place a second piece of acetate on top.

Layers of ink - Panda Shaker Card Tutorial by Anna-Karin Evaldsson.

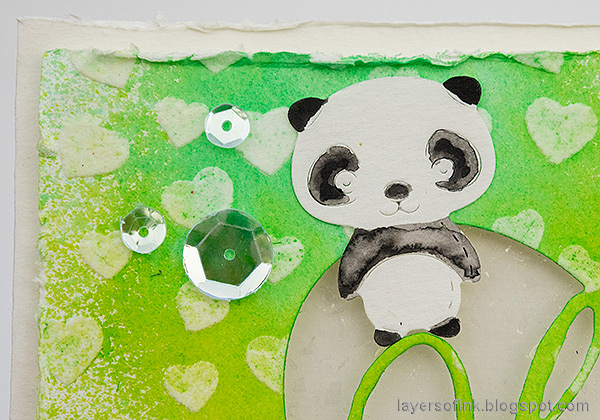
The whole panel was adhered to the background folded cardstock with foam tape. As a final touch, I glued some Simon Says Stamp sequins to the card. Leo loves to find sequins on my desk and on the floor. Like finding little treasures.

Layers of ink - Panda Shaker Card Tutorial by Anna-Karin Evaldsson.

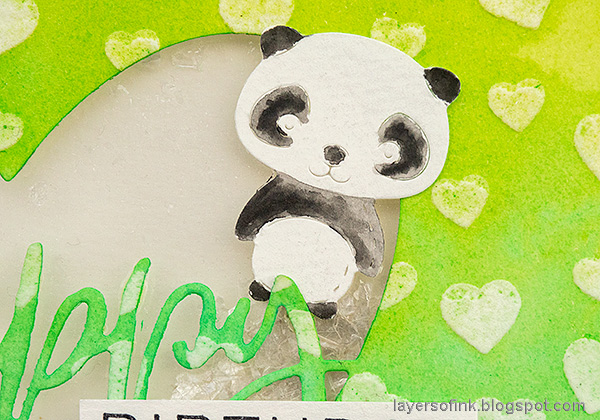
These little pandas are so cute.

Layers of ink - Panda Shaker Card Tutorial by Anna-Karin Evaldsson.

The sentiments come from the Simon Says Stamp Tiny Words Birthday set.

Layers of ink - Panda Shaker Card Tutorial by Anna-Karin Evaldsson. Tiny panda.

The mica flakes glitter very much in the shaker window and they are fun to shake around.

Layers of ink - Panda Shaker Card Tutorial by Anna-Karin Evaldsson.

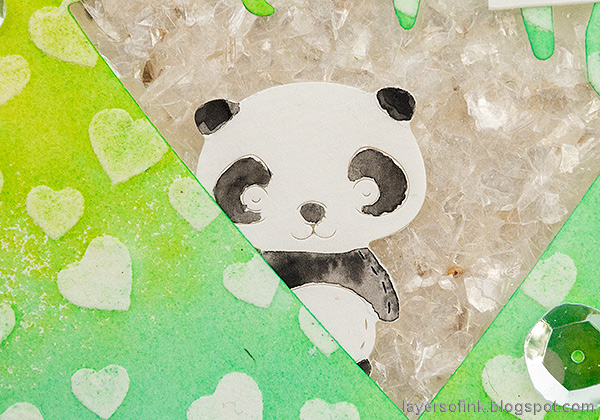
 If the card lies flat, the entire window can almost be covered in mica flakes.


Thank you so much stopping by here blog today!  

Happy crafting!

Anna-Karin

Supplies:

* Please note: the links are affiliate links, for which I receive a small percentage of sales generated by the link, at no extra cost to you.


Monday, February 17, 2020

Smile and Laughter Tag

Hello friends! Today I have an tag to share, with some inking, stamping and heat embossing. It can easily be turned into a card or an art journal page instead. 

I hope you had a fun weekend! We had a mix of activities: ice skating, soccer and a friend's birthday party. Everybody enjoyed it, and we now have two week's with birthday celebrations coming up.


This week at the Simon Says Stamp Monday Challenge Blog we have a Frame It challenge. Lots of options here! I hope you will join us. Don't miss the beautiful project by our February guest designer Christina, with her blog Rosso Papavero. 

Layers of ink - Smile and Laughter Tag by Anna-Karin Evaldsson. Ink, stencil and stamp tutorial.

I made a tag using one of my favorite frame stamps, and I also framed some words with circle die cuts. The background was done by inking through a stencil and then stamping on top, plus a tiny bit of water misting. It is a quick and simple background and can be varied in so many ways, by using different colors and patterns.

Layers of ink - Smile and Laughter Tag by Anna-Karin Evaldsson. Ink, stencil and stamp tutorial. Apply ink through stencil.

I first stamped the frame from Tim Holtz Mini Ornates with Jet Black Archival Ink. Ink the whole tag with Antique Linen. Place the Ornate stencil over the tag and ink with Mermaid Lagoon. Avoid inking inside the frame.

Layers of ink - Smile and Laughter Tag by Anna-Karin Evaldsson. Ink, stencil and stamp tutorial. Mist with water.

Ink with Vintage Photo, particularly around the edges. Mist and splatter with water for extra texture.

Layers of ink - Smile and Laughter Tag by Anna-Karin Evaldsson. Ink, stencil and stamp tutorial.

Stamp the background with a dot stamp and brown ink.

Layers of ink - Smile and Laughter Tag by Anna-Karin Evaldsson. Ink, stencil and stamp tutorial. Emboss the flower.

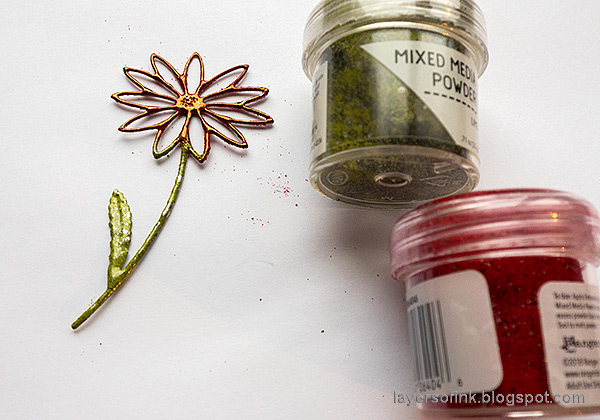
I die cut Simon Says Stamp Daisy Stem and Circle Loops from heavystock paper. Heat emboss with Ranger's Mixed Media powders: Scarlet and Lime. Always be careful when you heat emboss and never touch the melted powder until it is completely cool.

Layers of ink - Smile and Laughter Tag by Anna-Karin Evaldsson. Ink, stencil and stamp tutorial.

The Circle Loop set is one of my all time favorite dies, and here I embossed them with both Lime and Scarlet powder. Use the circles to frame rub-on words. The words I used are from Tim Holtz Tiny Text.

Layers of ink - Smile and Laughter Tag by Anna-Karin Evaldsson. Ink, stencil and stamp tutorial.

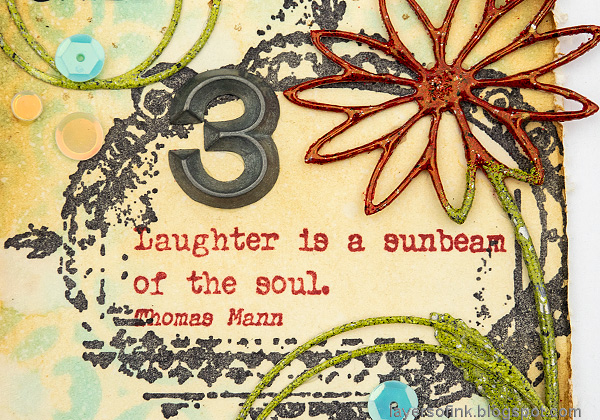
Stamp a sentiment in the frame with Red Geranium ink. The sentiment comes from the Paper Artsy The Happiness Edition by Alison Bomber. It is such a great quote. I also added a metallic number.

Layers of ink - Smile and Laughter Tag by Anna-Karin Evaldsson. Ink, stencil and stamp tutorial.

Frame additional words with two more circle loops. For a fun touch, I also added some sequins, from the Simon Says Stamp Sunken Treasure.

Layers of ink - Smile and Laughter Tag by Anna-Karin Evaldsson. Ink, stencil and stamp tutorial.

This is a simple, but effective, background, and even though it is just one layer, it has the appearance of depth.

I hope you will join us this week in our Frame It challenge. As always, you have a chance to win a $50 gift voucher to do some fun shopping at Simon Says Stamp. You have until next Monday 8am Ohio time. 1pm UK time, 2 pm CET to join in.


Don't forget to follow Simon Says Stamp on Instagram, they post great stuff daily. 


Do you use Instagram? If so please add #sssmchallenge so we can see your entries there too.


Thank you so much for taking the time to visit my blog today!  

Happy crafting!

Anna-Karin

Supplies:

* Please note: the links are affiliate links, for which I receive a small percentage of sales generated by the link, at no extra cost to you.


Sunday, February 16, 2020

Peony Mixed Media Canvas Tutorial

Hello friends! I have a peony mixed media canvas tutorial to share with you today, made with a stencil, acrylic paint and pastes. It is much easier to do than what it might look like, which is usually the case with mixed media. The finished product might look complicated, but if you just work one step at a time, it isn't hard to achieve. 

We have such bleak and grey weather here, a cheerful floral project was just what I needed.

Layers of ink - Peony Mixed Media Canvas Tutorial by Anna-Karin Evaldsson.

The canvas board is 6 x 6 in, and for some reason it is not looking totally square here, which must have been caused by the angle of the camera. I made it with the new Simon Says Stamp Peony Bouquet stencil, which is so pretty. You could also do the techniques for a card or an art journal page, if you use a sturdy paper for the base, such as watercolor paper.

Layers of ink - Peony Mixed Media Canvas Tutorial by Anna-Karin Evaldsson. Apply texture paste through stencil.

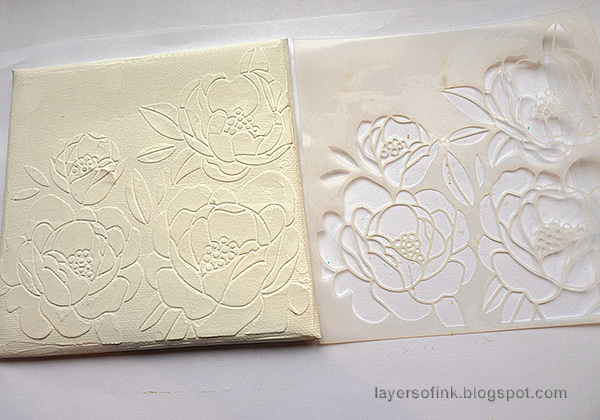
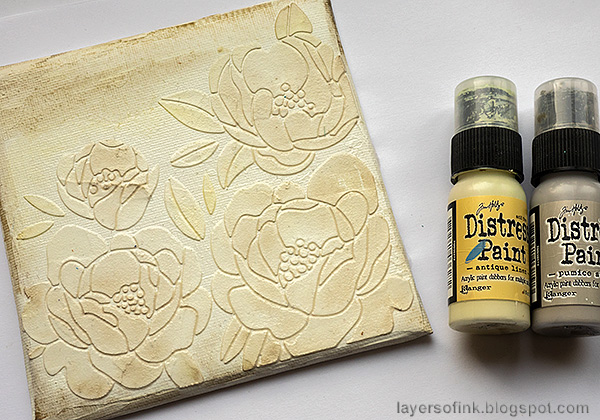
Start by coating the canvas with gesso and when that is dry, smear texture paste through the stencil with a palette knife. Let dry.

Layers of ink - Peony Mixed Media Canvas Tutorial by Anna-Karin Evaldsson. Paint with acrylic paints.

Water down Antique Linen and Pumice Stone and paint the canvas, to give a base.

Layers of ink - Peony Mixed Media Canvas Tutorial by Anna-Karin Evaldsson.

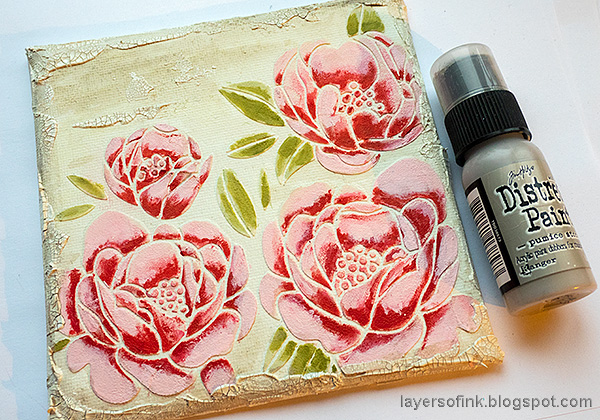
When dry, start painting the flowers. Later, I covered up most of the Victorian Velvet, since I wanted them to be brighter.

Layers of ink - Peony Mixed Media Canvas Tutorial by Anna-Karin Evaldsson.

Continue with the leaves.

Layers of ink - Peony Mixed Media Canvas Tutorial by Anna-Karin Evaldsson. Paint peonies with acrylic paint.

Bring in one or two darker colors, to make the flowers come to life. It can be hard to see where the darker areas should be. Imagine where the light is coming from, and now and then hold the canvas at a distance. Looking at it from a distance makes it much easier to see where to paint the darker colors. Don't worry about perfection.

Layers of ink - Peony Mixed Media Canvas Tutorial by Anna-Karin Evaldsson. Add crackle paste.

Add a little crackle paste around the edges and let dry. Crackles appear as it dries. The paste was on my desk since my lighthouse tag.

Layers of ink - Peony Mixed Media Canvas Tutorial by Anna-Karin Evaldsson.

Paint the paste with watered down Pumice Stone.

Layers of ink - Peony Mixed Media Canvas Tutorial by Anna-Karin Evaldsson.

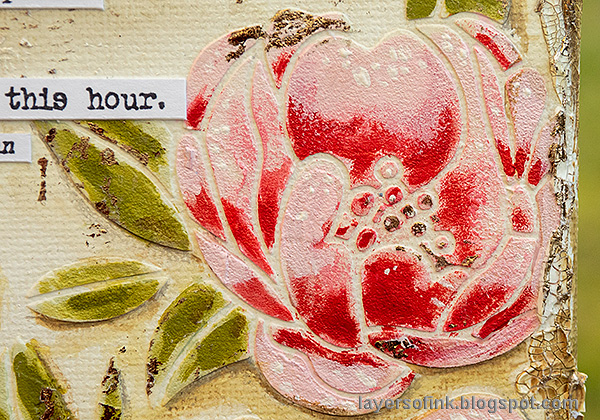
Add more Pumice Stone as shading to the flowers, and a little green and brown.

Layers of ink - Peony Mixed Media Canvas Tutorial by Anna-Karin Evaldsson. Add foiling.

Apply a glue stick here and there, especially around the edges, working one area at a time. Let dry for maybe 30 seconds to a minute (it depends on the glue) and then rub a foil sheet on top. This leaves of small areas of shiny foil, giving a great extra texture to the canvas. I used Therm o Web Rose Gold Deco Foil.

Layers of ink - Peony Mixed Media Canvas Tutorial by Anna-Karin Evaldsson.

I also added dots of white paint to the petals, especially where the light was meant to be hitting.

Layers of ink - Peony Mixed Media Canvas Tutorial by Anna-Karin Evaldsson. The Happiness Edition.

I used a quote from Paper Artsy's The Happiness Edition by Alison Bomber.

Layers of ink - Peony Mixed Media Canvas Tutorial by Anna-Karin Evaldsson. Background textures.

Here's a close up of the cool textures created with the paste, paint and foil.

Layers of ink - Peony Mixed Media Canvas Tutorial by Anna-Karin Evaldsson.

The foil is hard to photograph. Its a rose gold, which fitted well with the project.

Layers of ink - Peony Mixed Media Canvas Tutorial by Anna-Karin Evaldsson.

I hope you will try out some of these techniques. You don't need to do all of them on a project and can, for example, skip the crackle paste and foil, which will also give you a cleaner and less distressed look.


Thank you so much for taking the time to visit my blog today!  

Happy crafting!

Anna-Karin

Supplies:

* Please note: the links are affiliate links, for which I receive a small percentage of sales generated by the link, at no extra cost to you.