
Hello friends! Today I have a shaker card tutorial to share with you, with three very cute pandas. Shaker cards will always bring a smile to the recipient and they are also such fun to make.
Both boys have their birthday in February, and I can't believe we now have a ten-year old and soon a five-year old in the house. Leo loves pandas and I made this card for him.

Leo has a sweet habit of saying 'today is the best day since it is Monday/Friday/we will go to the play ground/we will build transformers/he will cycle, and many other reasons', which is a pretty good way of looking at life. That's why I was extra happy to find a sentiment stamp with this exact expression. One big heart and lots of small ones, made with a die and a stencil. Change the colors and use a different animal to create this card in other themes. It is 6 x 6 in.

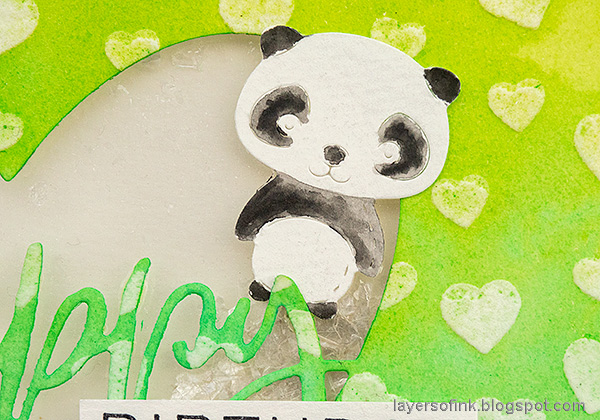
Start by die cutting the Whittle Panda from Poppy Stamps three times, from watercolor paper.

I colored the panda by picking up black pigment directly from a Scribble Stick. You can also use ordinary watercolor paint, or Distress Ink.

For the background, I smeared texture paste through the Memory Box Drifting Hearts stencil, also on watercolor paper.

When the paste was dry, I die cut the Memory Box Happy Heart Collage from the center of the paper.
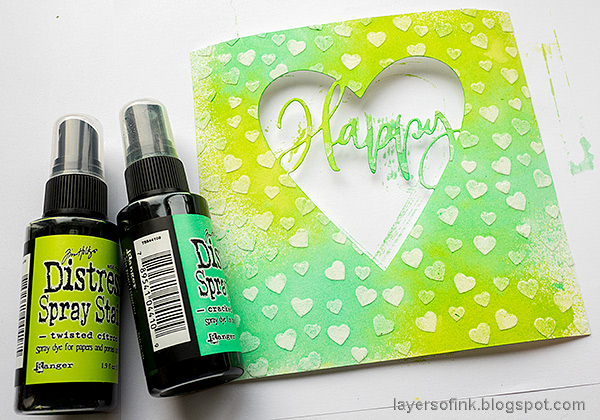
Mist the paper with Twisted Citron and Cracked Pistachio Distress Spray Stain. Pick up the mist from some of the hearts with a paper towel, so that they look lighter than the background.
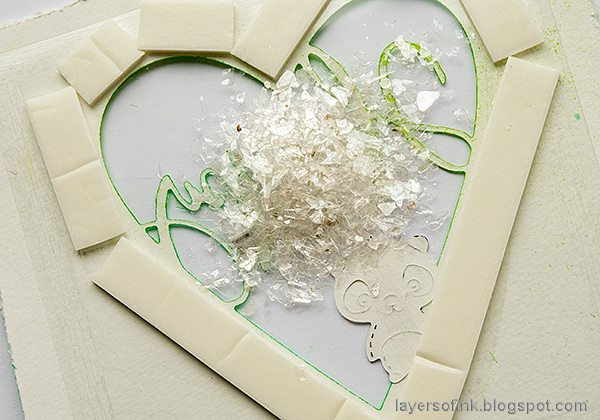
Cut a piece of acetate and adhere behind the window, first adding the panda that peeks out. Add foam tape around the heart and a pile of Tim Holtz mica flakes in the middle. You can also use sequins, glitter or beads. Place a second piece of acetate on top.
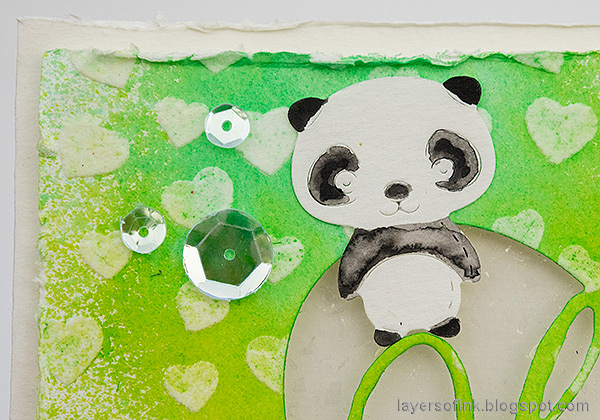
The whole panel was adhered to the background folded cardstock with foam tape. As a final touch, I glued some Simon Says Stamp sequins to the card. Leo loves to find sequins on my desk and on the floor. Like finding little treasures.
These little pandas are so cute.

The sentiments come from the Simon Says Stamp Tiny Words Birthday set.
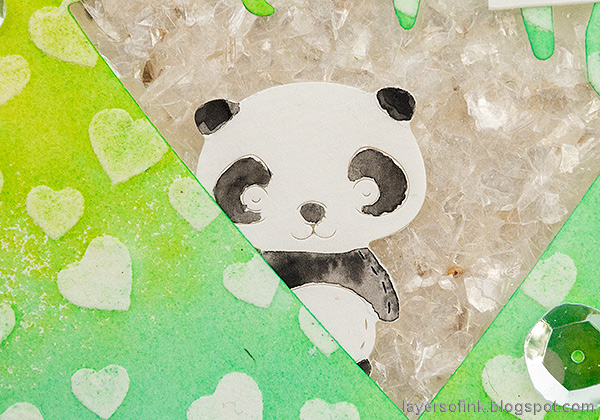
The mica flakes glitter very much in the shaker window and they are fun to shake around.
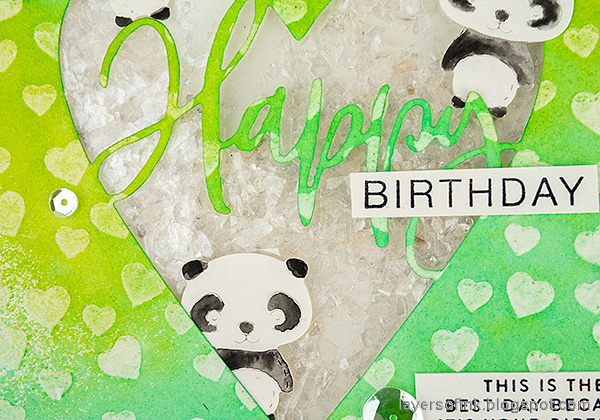
If the card lies flat, the entire window can almost be covered in mica flakes.

Thank you so much stopping by here blog today!
Happy crafting!
Anna-Karin
Supplies:
* Please note: the links are affiliate links, for which I receive a small percentage of sales generated by the link, at no extra cost to you.
* Please note: the links are affiliate links, for which I receive a small percentage of sales generated by the link, at no extra cost to you.
No comments:
Post a Comment
Thank you so much for leaving a comment! Happy Crafting!