Saturday, April 4, 2020

SSS United We Craft Blog Party

Hello friends! I am so happy to be a part of the Simon Says Stamp United We Craft Blog Party. This is a difficult time in the world and I can't think of any previous historical event that has affected so many all over the world, in such a short span of time. One week, most things are normal, and the next week, few things are normal. It's a hard thing to deal with and its important to try to keep the hope up. This blog hop is a part of that. With 99 participants from all over the world, we hope to spread some joy and happiness. United we craft.


In the blog hop, we will be using earlier Simon Says Stamp exclusive products. You can find them all here in the shop. Shipping times are delayed at the moment, but you can still order, or add items to your wish list.

You can join us in this crusade by sharing your creative moments using #SSSUnitedWeCraft. Use the hashtag to share photos of what you create and who you create with in person or virtually. 

I made two projects, an art journal page and three watercolor cards. They are pretty different from each other and all the techniques can be used for other types of projects too. 

Layers of ink - Always Hope Seascape Art Journal Page Tutorial by Anna-Karin Evaldsson.

The art journal page is a double spread in my large Dylusions journal (16.5 x 11.5 in). I think many of us at times feel like a little boat on a pretty rough and unknown sea, which is the feeling I wanted to convey here, but in combination with the ever so important sense of hope. To create the latter, I added both hopeful sentiments and quite a lot of anchors, a traditional symbol of hope.

Layers of ink - Always Hope Seascape Art Journal Page Tutorial by Anna-Karin Evaldsson.

Start by coating the page with gesso. When dry, add a piece of masking tape or Dina Wakley's Blank Media tape at the top, to form the horizon line.

Layers of ink - Always Hope Seascape Art Journal Page Tutorial by Anna-Karin Evaldsson. Paint with Distress Paint.

Paint with four shades of blue Distress Paints, making it darker towards the front, for a sense of perspective. Mist heavily with water. You need to have a couple of paper towels at hand, so that you can catch the water going to the edge and towards the center. But apart from that, let the page dry on its own for dramatic results. 

Layers of ink - Always Hope Seascape Art Journal Page Tutorial by Anna-Karin Evaldsson. Paint the sky.

Remove the masking tape. The sky was painted without adding water, since I wanted it to have a more solid look. All I did was to remove some of the paint with a paper towel to create rough clouds or movement.

Layers of ink - Always Hope Seascape Art Journal Page Tutorial by Anna-Karin Evaldsson. Stamp anchors.

Stamp with the Simon Says Stamp Anchors Background stamp, using white paint. Always clean your stamp immediately after using it with paint.

Layers of ink - Always Hope Seascape Art Journal Page Tutorial by Anna-Karin Evaldsson.

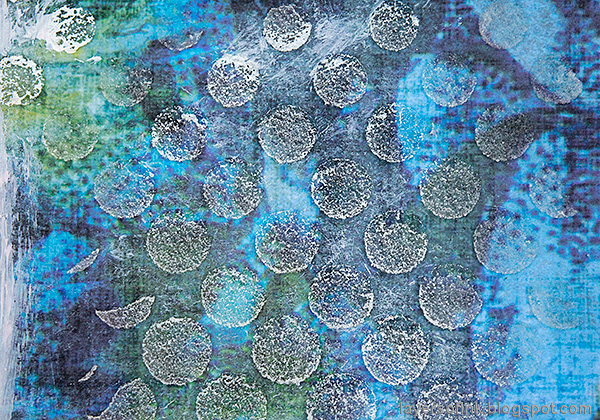
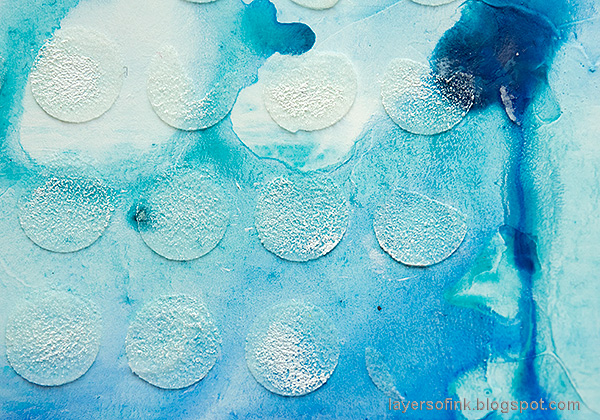
For added texture, I used Tim Holtz Translucent Grit Paste together with a dots stencil. Apply through the stencil with a palette knife.
Layers of ink - Always Hope Seascape Art Journal Page Tutorial by Anna-Karin Evaldsson.

When dry, dry-brush white paint on top of the dots, but don't cover them completely. This gives textures, while the background still shows through. I used the same technique on my Crocus Layout from earlier this week.

Layers of ink - Always Hope Seascape Art Journal Page Tutorial by Anna-Karin Evaldsson. Stamp the background.

Stamp here and there with the SSS You Matter Background stamp.

Layers of ink - Always Hope Seascape Art Journal Page Tutorial by Anna-Karin Evaldsson. Add mica flakes.

For some bling, add dots or lines of SSS glue to the page and sprinkle Tim's Mica Flakes on top.
Layers of ink - Always Hope Seascape Art Journal Page Tutorial by Anna-Karin Evaldsson. Die cut anchors.

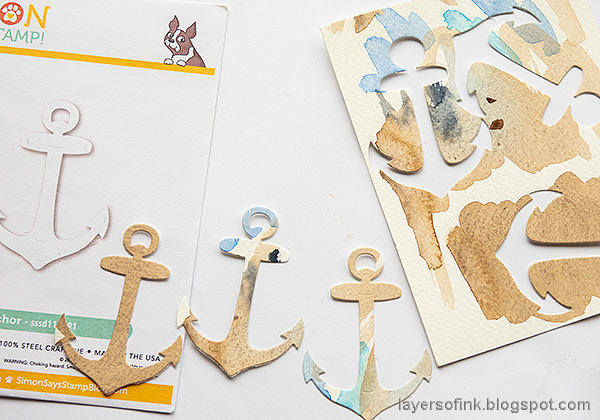
The anchors were die cut from a piece of watercolor paper. It was a piece of paper where I had tested some brown and blue watercolor mixes and didn't look like much. Use these type of pieces for die cutting since it will give you unexpected results.
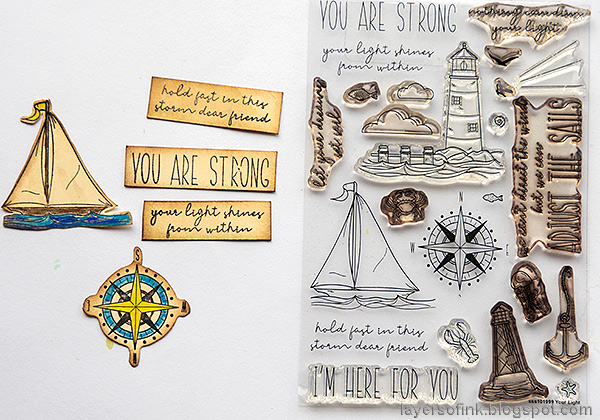
Layers of ink - Always Hope Seascape Art Journal Page Tutorial by Anna-Karin Evaldsson. Stamp with Your Light.

The ship, compass and sentiments from Your Light were stamped on a piece of heavystock paper that had been inked with Antique Linen and Pumice Stone Distress Ink. Color with colored pencils and ink the edges.

Layers of ink - Always Hope Seascape Art Journal Page Tutorial by Anna-Karin Evaldsson.

The ship has a trail of mica behind it. 
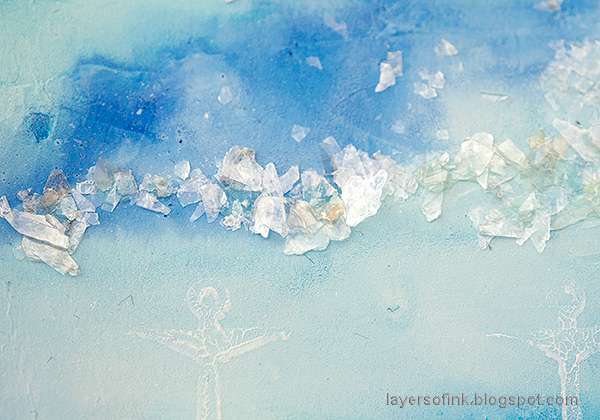
Layers of ink - Always Hope Seascape Art Journal Page Tutorial by Anna-Karin Evaldsson.

Here's a closer look at the mica.

Layers of ink - Always Hope Seascape Art Journal Page Tutorial by Anna-Karin Evaldsson.

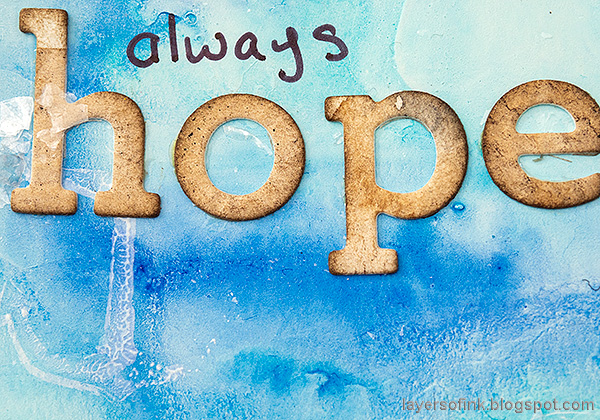
The title was die cut from the same watercolor paper as the anchors, using the SSS Archie Jr Solid die.

Layers of ink - Always Hope Seascape Art Journal Page Tutorial by Anna-Karin Evaldsson.

I really like the sentiments on the Your Light stamp set.


A little bit of yellow was added to both the compass and the boat, also as a sign of hope.


The anchors were glued to the background.


The stamped anchors almost gives a ghost like appearance, which I like. Don't worry if the stamping isn't perfect, it is not meant to be.


Here's another look at the translucent grit-paste dots.

Layers of ink - Watercolor cards tutorial by Anna-Karin Evaldsson.

I also made three spring-time cards with encouraging messages. Coloring images, without thinking too much about perfection, is a great activity to do if you need just a bit of creativity. It is also fun for kids. Cut up some paper and stamp images on them so that they are ready when you feel like coloring. And if you don't feel like doing anything creative, try to do it anyway, even if it is just for a short while.

Layers of ink - Watercolor cards tutorial by Anna-Karin Evaldsson. Border-less watercoloring.

I did border-less coloring on these, but you can also stamp them with black ink. If you want edges that disappear almost completely, stamp with Antique Linen instead. I used Pumice Stone, since I like the way it creates a shadow, and almost looks like a pencil sketch. I used the Spring Gnomes and Lifting Hearts sets. They were stamped on watercolor paper, about 4x4 in.

Layers of ink - Watercolor cards tutorial by Anna-Karin Evaldsson.

Watercolor the images loosely, dropping in darker shades of color for shading. If you don't have watercolor paint, you can also use Distress Ink. Smear it on a craft sheet, mist with water and pick up with a paint brush.

Layers of ink - Watercolor cards tutorial by Anna-Karin Evaldsson. Add shading and grass.

Add more shading and some thin lines. The gnomes were also given grass to stand on.

Layers of ink - Watercolor Spring Gnome Tutorial by Anna-Karin Evaldsson.

I wanted to stitch around these, but I couldn't find my white thread, so instead I just added a staple in each corner. The sentiment comes from the Uplifting Thoughts set, one of my all time favorite sentiment sets. You can vary the colors of the gnomes in so many ways. For another example of the Spring Gnomes check out my Gnome Home canvas.

Layers of ink - Watercolor Spring Gnome Tutorial by Anna-Karin Evaldsson.

Here you can see the I colored it loosely. Leave some of the paper white, for highlights.

Layers of ink - Watercolor Spring Gnome Tutorial by Anna-Karin Evaldsson.

I used both wet-on-wet and wet-on-dry watercoloring on these, you can see the difference where there is smooth blending and where there is more of an edge. Both are great techniques.

Layers of ink - Balloon and Bunny Tutorial by Anna-Karin Evaldsson.

This bunny is so cute and balloons makes everyone happier. Add a few pearls to the cards for embellishments. The sentiment also comes from the Lifting Hearts set and was stamped with Hickory Smoke Archival Ink.
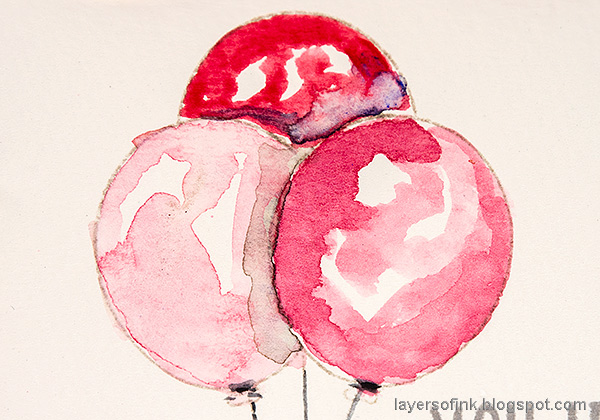
Layers of ink - Balloon and Bunny Tutorial by Anna-Karin Evaldsson. Watercolor balloons.

I used the same pink color for all the balloons, just varying the amount of water, and there is a tiny bit of blue in the mix for the balloon at the back.

Layers of ink - Balloon and Bunny Tutorial by Anna-Karin Evaldsson. Watercolor bunny.

If you look closely at the bunny, you can clearly see the difference between the smooth edge of the wet-on-wet (such as on her forehead) and the harsher edges of the wet-on-dry, such as the shading at on her back.
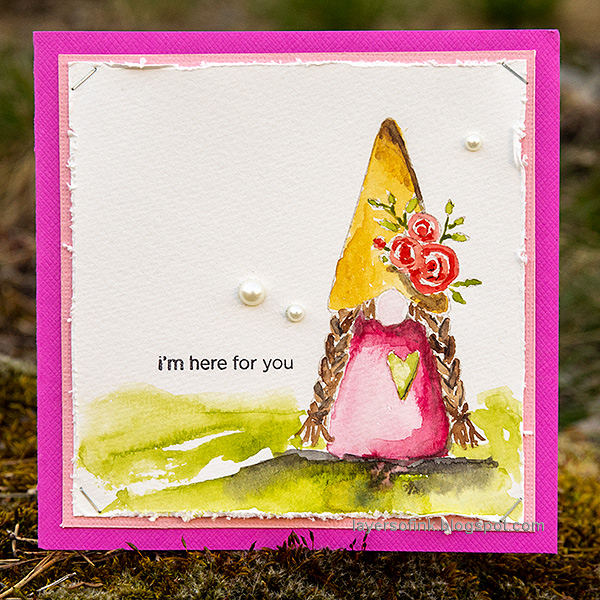
Layers of ink - Watercolor Spring Gnome Tutorial by Anna-Karin Evaldsson.

Finally, the pink gnome with braids. The sentiment comes from the You Got This set and I only stamped a part of a sentiment.

Layers of ink - Watercolor Spring Gnome Tutorial by Anna-Karin Evaldsson.

Watercolor sometimes behaves unpredictably, which is part of the fun. I particularly like how some of the pink bled into the shadow, which wasn't planned.

Layers of ink - Watercolor Spring Gnome Tutorial by Anna-Karin Evaldsson.

Don't miss all the wonderful inspiration in this blog party and join us in crafting together, even though we are apart. You can find a full list of all the participants on the Simon Says Stamp Store Blog.

Don’t forget to share YOUR creative moments with family and friends using #SSSUnitedWeCraft.


Here's a list with all the participants. Pretty amazing, isn't it.

  1. Adelle Emery
  2. Amber Rain Davis
  3. Amy Rysavy
  4. Andy Granick
  5. Angela Simpson
  6. Anja Glauner
  7. Anna-Karin Evaldsson
  8. Arjita Singh
  9. Ashlea Cornell
  10. Ashley Tucker
  11. Barb Engler
  12. Barbara Tarayao
  13. Betty Wright
  14. Bibi Cameron
  15. Bobbi Lemanski
  16. Bonnie Crane
  17. Cathie Cowles
  18. Cathy Zielske
  19. Cheiron Brandon
  20. Christine Smith
  21. Cindy Norberg
  22. Courtney Kreeber
  23. Daniel West
  24. Debby Hughes
  25. Debby Yates
  26. Desiree Kuemmerle
  27. Emma Williams
  28. Gayatri Murali
  29. Hannelie Bester
  30. Heather Hoffman
  31. Heather Ruwe
  32. Ilda Dias
  33. Jana Millen
  34. Janette Kausen
  35. JD Collins
  36. Jeff Lindberg
  37. Jenn Shurkus
  38. Jennifer McGuire
  39. Jessica Vasher
  40. Jessie Banks
  41. Jill Dewey Hawkins
  42. Jo Nevill
  43. Joe Sysavath
  44. Joy Ott
  45. Karen Bull
  46. Karin Ã…kesdotter
  47. Kath Stewart
  48. Kathy Racoosin
  49. Keisha Charles
  50. Kim Hamilton
  51. Koren Wiskman
  52. Kristina Pokazanieva
  53. Laura Bassen
  54. Laurie Willison
  55. Lea Lawson
  56. Leigh Houston
  57. Lin Brandyberry
  58. Lisa Addesa
  59. Lisa Hetrick
  60. Lisa Tilson
  61. Lorraine Aquilina
  62. Lydia Fiedler
  63. Mandy Stacey
  64. Maria Fischer
  65. Maria Peters
  66. Maura Hibbitts
  67. Megin Brooks
  68. Meihsia Liu
  69. Michelle Lupton
  70. Michelle Peckham
  71. Michelle Short
  72. Mindy Eggen
  73. Miriam Prantner
  74. Natalia Valkovskaya
  75. Nichol Spohr
  76. Nina-Marie Trapani
  77. Norine Borys
  78. Olga Direktorenko
  79. Pam Sparks
  80. Pam Torkelson
  81. Preeti Chandran
  82. Rosemary Dennis
  83. Sandi MacIver
  84. Sandra Mouwen
  85. Sarah Moerman
  86. Seeka Yang
  87. Shari Carroll
  88. Sidnie Des Jardins
  89. Susan R. Opel
  90. Suzy Plantamura
  91. Tania Vasta
  92. Tina Smith
  93. Vera Yates
  94. Virginia Lu
  95. Yana Smakula
  96. Yasmin Diaz
  97. Yoonsun Hur
  98. Yuliya Yavorskaya
  99. Zoey Emanuela Scarpelli

Thank you so much for taking the time to visit my blog today!  

Happy crafting and stay safe!

Anna-Karin

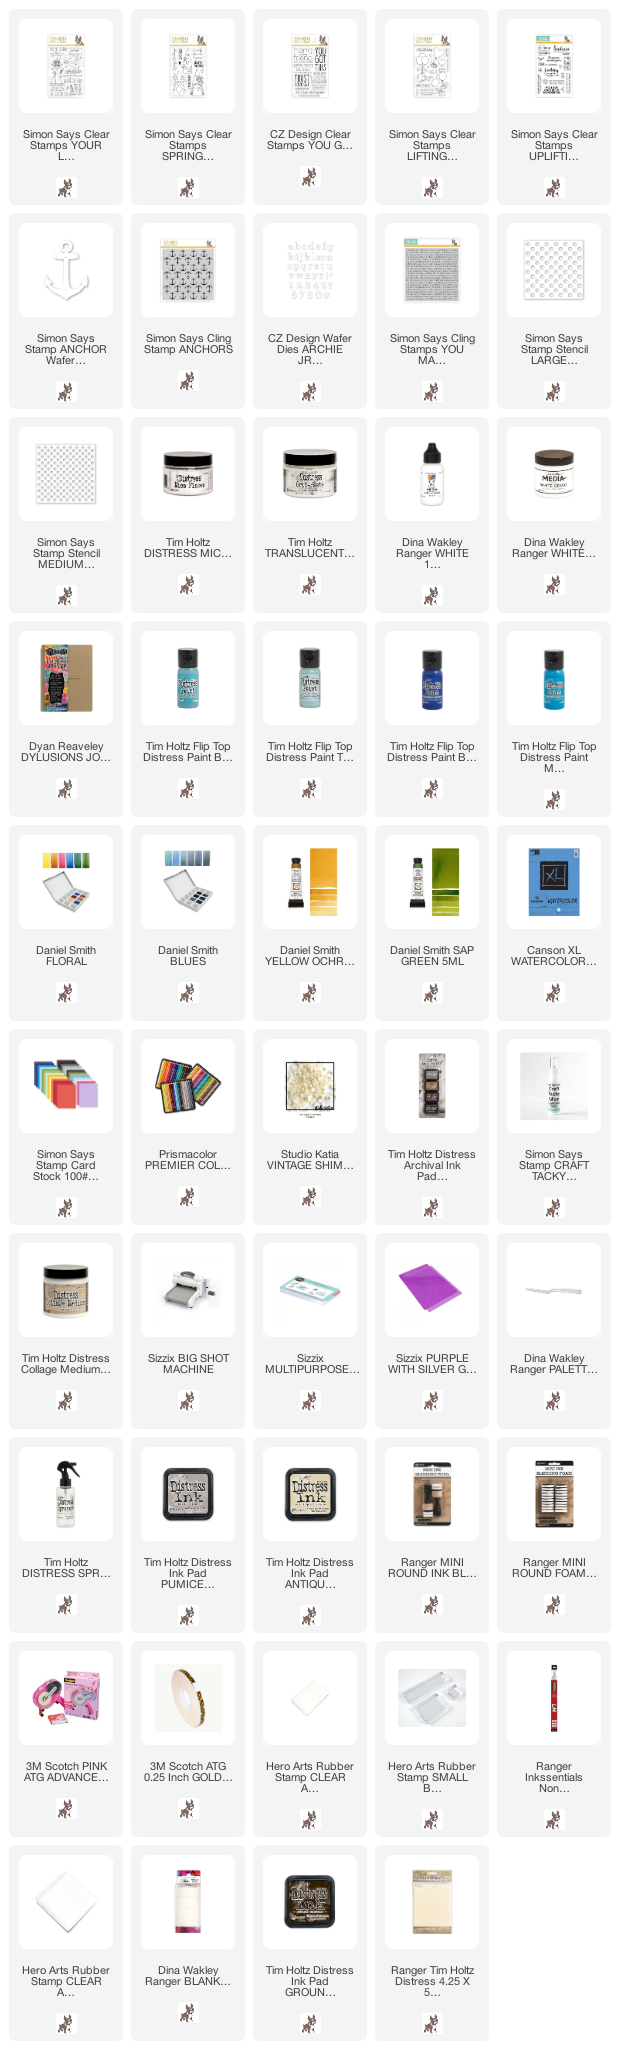
Supplies:

* Please note: the links are affiliate links, for which I receive a small percentage of sales generated by the link, at no extra cost to you.


Tuesday, March 31, 2020

Heart mixed media layout

Hi friends. I hope you are well. In these days particularly, we all miss someone. Maybe it is someone you can't meet to protect them or maybe that someone lives far away and traveling isn't possible. My sisters and I don't see our parents at the moment, nor do the grandkids, to protect our parents from the virus. We chat a lot on the phone, but it isn't the same, and when looking through some photos I saw this photo of my dad out walking with the kids.

Layers of ink - Heart Mixed Media Layout by Anna-Karin Evaldsson.

I knew right away that I wanted to use it for a scrapbooking layout. It is from a couple of years ago, since the boys are a lot bigger now. I love the golden light in the photo and wanted to make a warm layout with lots and lots of hearts. You can use the techniques for a card or an art journal page instead.

Layers of ink - Heart Mixed Media Layout by Anna-Karin Evaldsson. Die cut Falling Hearts.

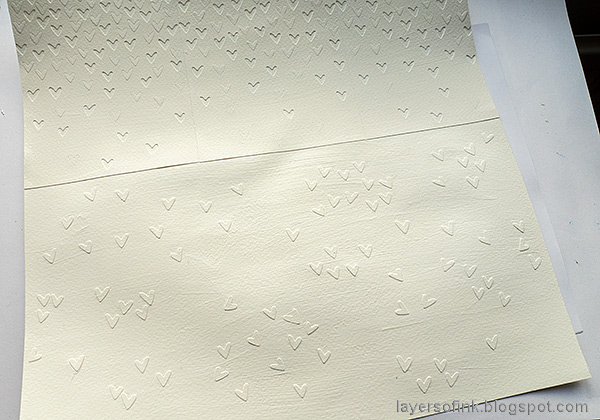
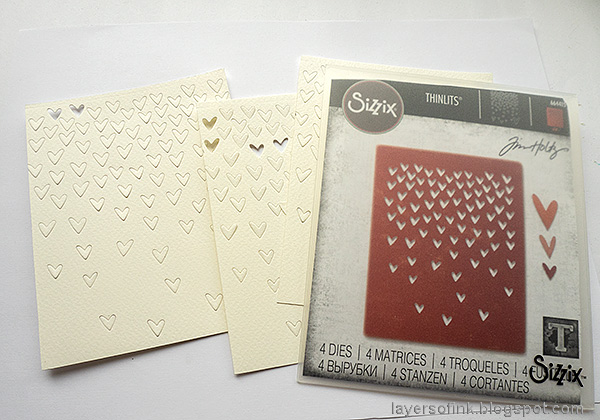
First I die cut three panels from watercolor paper, using Tim Holtz Falling Hearts die. Remove some of the hearts, but not all of them.

Layers of ink - Heart Mixed Media Layout by Anna-Karin Evaldsson.

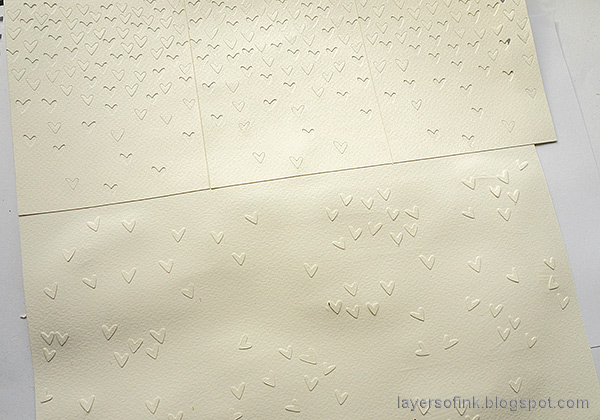
Glue the panels to a 12 x 12 sheet of watercolor paper using matte medium. Glue the left-over hearts here and there.

Layers of ink - Heart Mixed Media Layout by Anna-Karin Evaldsson. Coat with gesso.

Coat with gesso. Don't worry about the warping.

Layers of ink - Heart Mixed Media Layout by Anna-Karin Evaldsson. Add texture paste through stencil.

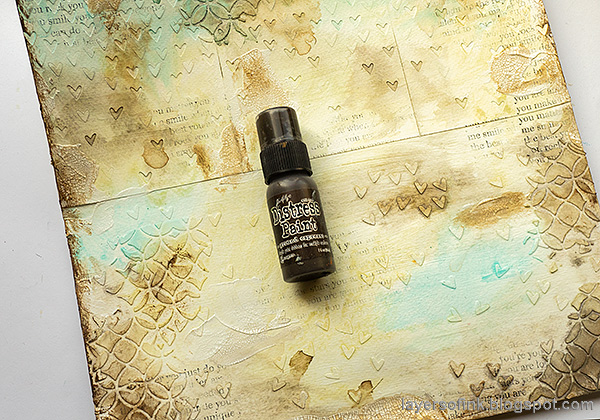
When dry, apply Distress Texture Paste through the Latticework stencil. Let dry.

Layers of ink - Heart Mixed Media Layout by Anna-Karin Evaldsson.

Paint the background with watered-down Distress Paint and mist with more water to help the colors blend.

Layers of ink - Heart Mixed Media Layout by Anna-Karin Evaldsson.

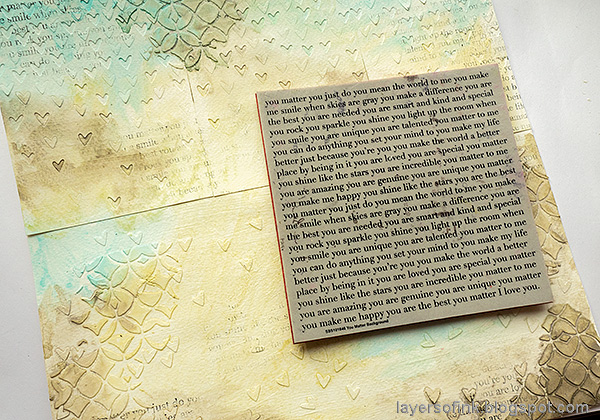
Stamp here and there with the Simon Says Stamp You Matter stamp. I really love this stamp.

Layers of ink - Heart Mixed Media Layout by Anna-Karin Evaldsson.

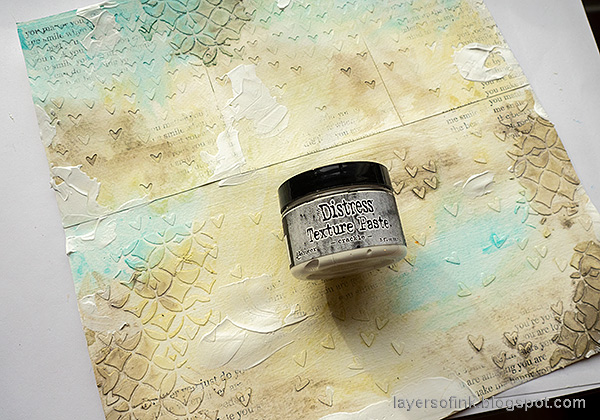
Apply a little Distress Crackle Paste here and there.

Layers of ink - Heart Mixed Media Layout by Anna-Karin Evaldsson.

Add more paint to the crackles and here and there on the layout. The paint on the crackle areas was misted with water, while the rest was dry-brushed.

Layers of ink - Heart Mixed Media Layout by Anna-Karin Evaldsson.

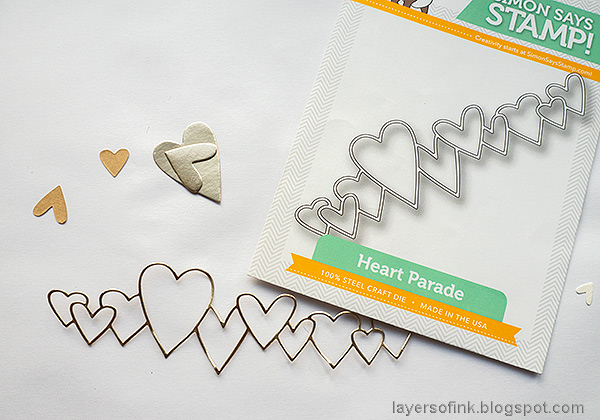
Die cut the Heart Parade from gold metallic paper.

Layers of ink - Heart Mixed Media Layout by Anna-Karin Evaldsson.

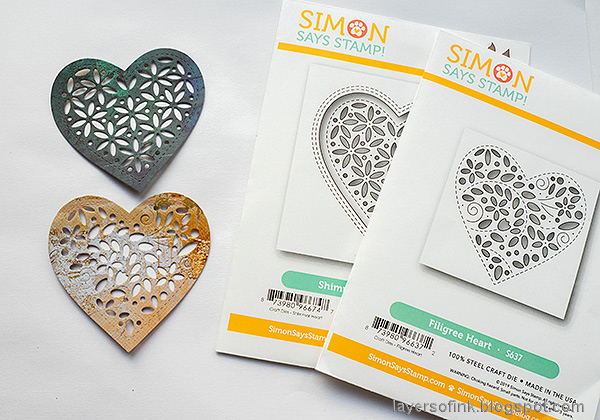
Die cut the Shimmer Heart and the Filigree Heart from Tim's Abandoned Paper Stash.

Layers of ink - Heart Mixed Media Layout by Anna-Karin Evaldsson.

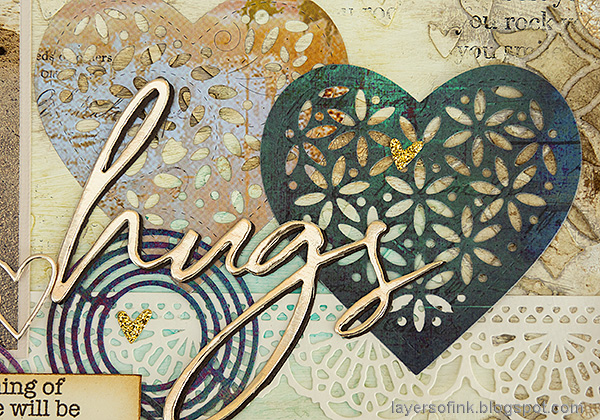
Die cut Falling Hearts from gold metallic and gold glitter paper. I am keeping these in a little jar on my desk so that they are ready to use. Some of them ended up on my Texture Tag from Sunday.

Layers of ink - Heart Mixed Media Layout by Anna-Karin Evaldsson. Die cut Lined You.

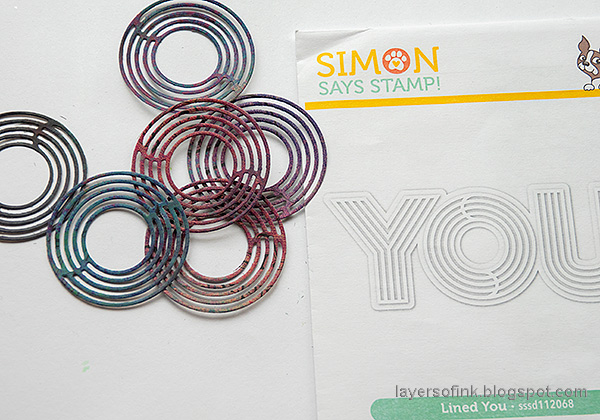
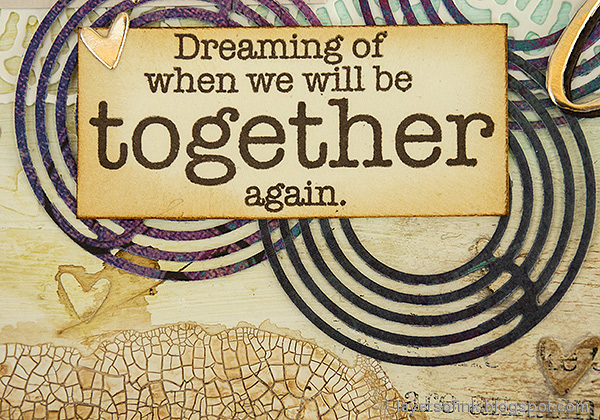
The 'O' in the Lined You also makes a very cool circle element. Die cut it from Abandoned paper. You can see the full die cut being used on my New Year Art Journal Page and You Art Journal Page.

Layers of ink - Heart Mixed Media Layout by Anna-Karin Evaldsson. Big Hugs die cut.

The border was die cut with Tim's Crochet set and the Memory Box Big Hugs was die cut from gold and brown paper. Layer and glue the die cut pieces to the background.

Layers of ink - Heart Mixed Media Layout by Anna-Karin Evaldsson. Die cut Lined You.

Here you can see the texture better. I also like the texture of the brush strokes from the gesso.

Layers of ink - Heart Mixed Media Layout by Anna-Karin Evaldsson. Die cut Lined You.

Simon Says Stamp Stronger Together set was created before the virus started to spread across the world, but the sentiments on the stamp set are perfect for these times. They were stamped with brown ink, since I wanted a softer look.

Layers of ink - Heart Mixed Media Layout by Anna-Karin Evaldsson. Die cut Lined You.

I glued the die cut panels a little bit from the upper edge of the layout, since I wanted a visible edge. You can see it here.

Layers of ink - Heart Mixed Media Layout by Anna-Karin Evaldsson. Die cut Lined You.

Here's another close-up of the textures.

Layers of ink - Heart Mixed Media Layout by Anna-Karin Evaldsson. Die cut Lined You.

The Heart Parade was glued on top of the photo.

Layers of ink - Heart Mixed Media Layout by Anna-Karin Evaldsson. Die cut Lined You.

And another wonderful sentiment. Glue the metallic and glitter hearts here and there.

Layers of ink - Heart Mixed Media Layout by Anna-Karin Evaldsson. Die cut Lined You.

This sentiment also comes from Stronger Together. It is a great sentiment for a card to someone you miss. 

Layers of ink - Heart Mixed Media Layout by Anna-Karin Evaldsson. Die cut Lined You.

I like how you can read some of the words, while others are too faint.


Thank you so much for taking the time to visit my blog today!  

Happy crafting!

Anna-Karin

Supplies:

* Please note: the links are affiliate links, for which I receive a small percentage of sales generated by the link, at no extra cost to you.


Monday, March 30, 2020

Spring has sprung

Hello friends. I hope you are well in these difficult times. This weekend I took two long forest walks. More people than normally are out walking, everybody greets each other friendly, but keeps a safe distance. I am so happy to have nature around the corner.


At the Simon Says Stamp Monday Challenge Blog we have a Spring Mood Board challenge. Don't miss the last project by our March guest designer Ann Chuang. 

 Design team member Macarena has made this gorgeous mood board for our inspiration!


Layers of ink - Spring has sprung scrapbooking layout by Anna-Karin Evaldsson.

The mood board inspired me to do a scrapbooking layout, using some springtime crocus photos from our old garden, where we had a lot of spring flowers. I used a Lost and Found patterned paper by Tim Holtz for the background, which has flower patterns and really gorgeous colors. 

Layers of ink - Spring has sprung scrapbooking layout by Anna-Karin Evaldsson. Tim Holtz Motif cardstock.

The two colorful panels are from Tim's Motif cardstock, which has a pattern that resists ink. I love these papers and the gorgeous patterns.

Layers of ink - Spring has sprung scrapbooking layout by Anna-Karin Evaldsson. Apply Translucent Grit-Paste through stencil.

I wanted to add a subtle texture to the background and used Translucent Grit-Paste together with the Gradient Dot stencil. Yesterday, I posted a Textured Tag where I used and compared four different Distress Pastes, if you want to see more paste examples.

Layers of ink - Spring has sprung scrapbooking layout by Anna-Karin Evaldsson.

When the paste was dry, I dry brushed a little white paint on the dots.

Layers of ink - Spring has sprung scrapbooking layout by Anna-Karin Evaldsson.

Here you can see the result better. I like the way the pattern shows through, but with the added texture from the white paint.

Layers of ink - Spring has sprung scrapbooking layout by Anna-Karin Evaldsson. Tim Holtz Scribbly Butterflies.

The butterflies were die cut from scrap pieces of paper using Tim's Scribbly Butterflies set. If you have pieces of paper which didn't turn out as planned, try using them for die cutting. The results are usually surprisingly wonderful.


The sentiments comes from Memory Box Springtime Typewriter Sentiments.

Layers of ink - Spring has sprung scrapbooking layout by Anna-Karin Evaldsson. Outline Clustered Leaves and Big Happy.

I also die cut the Simon Says Stamp Outline Clustered Leaves from glossy cardstock and inked with the same two shades of green used for the resist panels. Big Happy was die cut from Distress Cracked Leather Cardstock and then inked with an ombre effect.

Layers of ink - Spring has sprung scrapbooking layout by Anna-Karin Evaldsson.

You can see the leather effect better here.

Layers of ink - Spring has sprung scrapbooking layout by Anna-Karin Evaldsson.

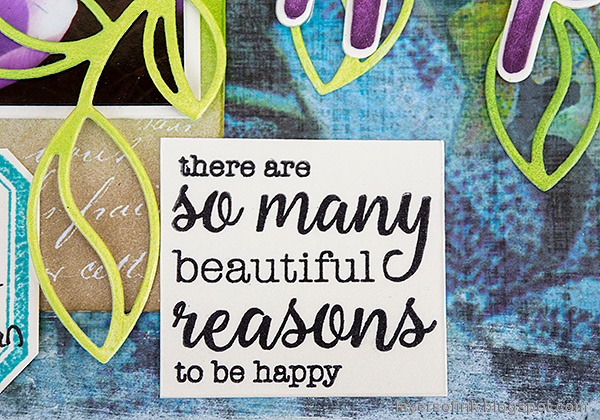
I also used a stamp from the SSS Uplifting Thoughts set, which is such a great stamp set. The label for the journaling was stamped with the new Darkroom Door Lots of Labels set.

Layers of ink - Spring has sprung scrapbooking layout by Anna-Karin Evaldsson.

And another butterfly to bring spring and hopefully new times.

I hope you will join us this week in our Spring Mood Board challenge. You have until next Monday 8am Ohio time. 1pm UK time, 2 pm CET to join in.

As you may know, the Simon Says Stamp Store is accepting new orders, but have longer shipping times for the moment due to the coronavirus. With this in mind we have made the difficult decision to suspend the $50 voucher for this challenge.

We know that many people are staying safe at home and we would love it if you would continue to enter the challenges and have fun! We are all in this together!


Don't forget to follow Simon Says Stamp on Instagram, they post great stuff daily. We also have a new hashtag #SSSUnitedWeCraft


Do you use Instagram? If so please add #sssmchallenge so we can see your entries there too.


Thank you so much for taking the time to visit my blog today!  

Happy crafting!

Anna-Karin

Supplies:

* Please note: the links are affiliate links, for which I receive a small percentage of sales generated by the link, at no extra cost to you.