Sunday, March 29, 2020

Texture Paste Tag

Hello friends! I hope you are well and staying healthy. And that you are able to do some crafting, since that helps to deal with the situation. I have a tag tutorial to share with you today made as a bit of an experiment. I recently got a bunch of Tim Holtz's new pastes and I wanted to try all of them at once. 

Layers of ink - Texture Paste Tag Tutorial by Anna-Karin Evaldsson. With Distress Pastes by Tim Holtz / Ranger.

I used four pastes on the tag: Distress Texture Paste Crackle, Distress Texture Paste Matte, Opaque Grit-Paste and Translucent Grit-Paste. I didn't have much of plan for the tag and after having done the background, I added bits and pieces from Tim's Field Notes Ephemera and Junk Drawer Baseboards. There are also some shiny hearts, since I think that at this time, you can't use too many hearts.

Layers of ink - Texture Paste Tag Tutorial by Anna-Karin Evaldsson.

Start by inking a tag or a card with Distress Ink, using an ink-blending tool.
Layers of ink - Texture Paste Tag Tutorial by Anna-Karin Evaldsson.

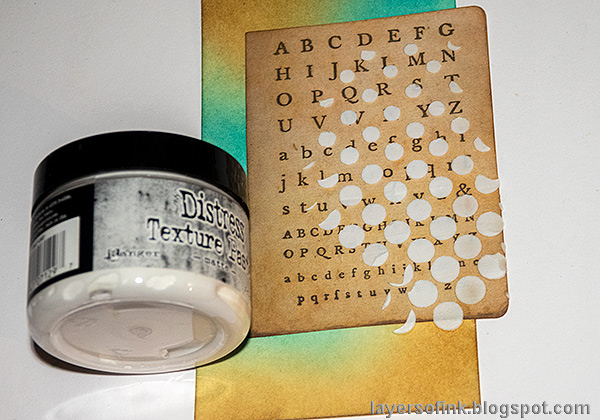
Glue an ephemera card to the tag and apply Distress Texture Paste Matte through the Gradient Dot stencil. Let dry.

Layers of ink - Texture Paste Tag Tutorial by Anna-Karin Evaldsson. Translucent grit-paste

At the bottom of the tag, I used Translucent Distress Grit-Paste.

Layers of ink - Texture Paste Tag Tutorial by Anna-Karin Evaldsson. Opaque grit-paste

Next came the Opaque Distress Grit-Paste.

Layers of ink - Texture Paste Tag Tutorial by Anna-Karin Evaldsson. Distress Crackle Paste.

And finally some Crackle Distress Texture Paste. As you might know, I love crackle paste.

Layers of ink - Texture Paste Tag Tutorial by Anna-Karin Evaldsson. Let the pastes dry.

As it dries you see the qualities of the different pastes better. Since I used Distress Ink for the background, some of the color will bleed through into the pastes, which was my plan, since I wanted the areas to coordinate colorwise. If you don't want the color to bleed, use Distress Paint instead. I particularly like the look of the translucent Grit-Paste, with both the paper and the color shining through.

Layers of ink - Texture Paste Tag Tutorial by Anna-Karin Evaldsson. Paint with acrylic paint.

Add some color with Distress Paint, mainly to make the areas into a unified whole. Mist with water, especially on the crackle areas, so that the paint goes into the crackles. I added less paint to the translucent paste.

Layers of ink - Texture Paste Tag Tutorial by Anna-Karin Evaldsson.

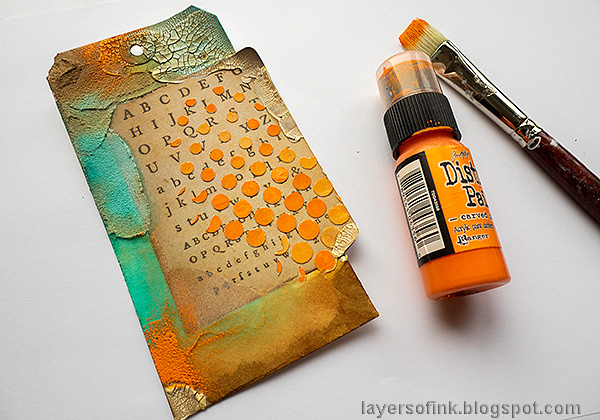
Paint the dots orange and add a little orange to the background.

Layers of ink - Texture Paste Tag Tutorial by Anna-Karin Evaldsson.

Distress the tag by dry-brushing dark brown paint.

Layers of ink - Texture Paste Tag Tutorial by Anna-Karin Evaldsson. Crackle paste texture.

The thicker the paste, the larger the crackles, which you can see here. I like a mix.
Layers of ink - Texture Paste Tag Tutorial by Anna-Karin Evaldsson. Field notes ephemera.

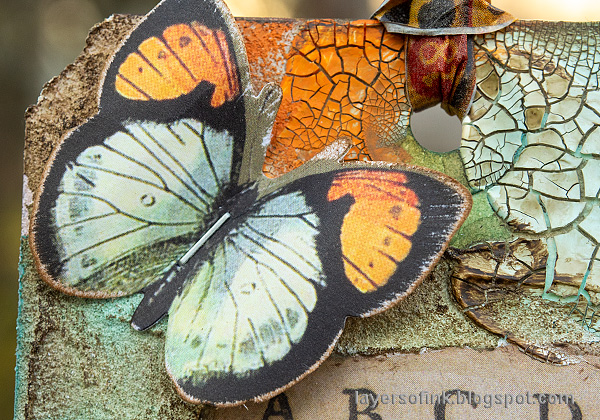
The tag was embellished with ephemera pieces from Tim's Field Notes Ephemera pack.
Layers of ink - Texture Paste Tag Tutorial by Anna-Karin Evaldsson.

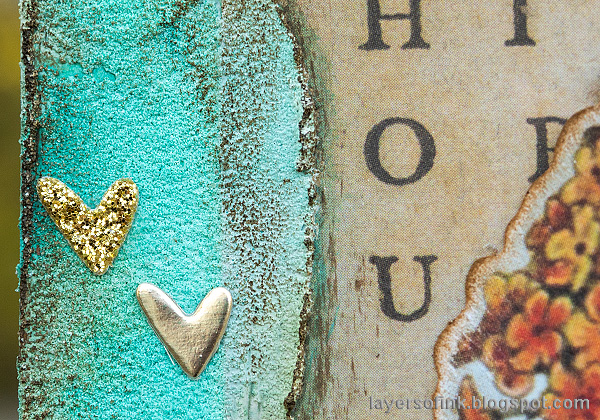
I love the texture of the opaque Grit-Paste with paint on top. The little hearts were die cut from gold metallic and gold glitter paper using Tim Holtz Falling Hearts die.

Layers of ink - Texture Paste Tag Tutorial by Anna-Karin Evaldsson. Vintage flowers.

I am very much into messages of hope and happiness at the moment. And today the sky really is clear and blue an the air is full of sunlight. I took a beautiful walk in the forest today, enjoying the sun, bird song and signs of spring. The sentiment comes from Tim's Clippings Sticker book. The flowers are also from the Field Notes ephemera pack. The metallic flower is from the Nature Adornments set.

Layers of ink - Texture Paste Tag Tutorial by Anna-Karin Evaldsson.

The sentiment from Simon Says Stamp Just Because Word Mix 2 was stamped on a label from the Field Notes ephemera pack. The baseboard piece in the background and the game piece comes from Tim's Junk Drawer Baseboard set.
Layers of ink - Texture Paste Tag Tutorial by Anna-Karin Evaldsson.

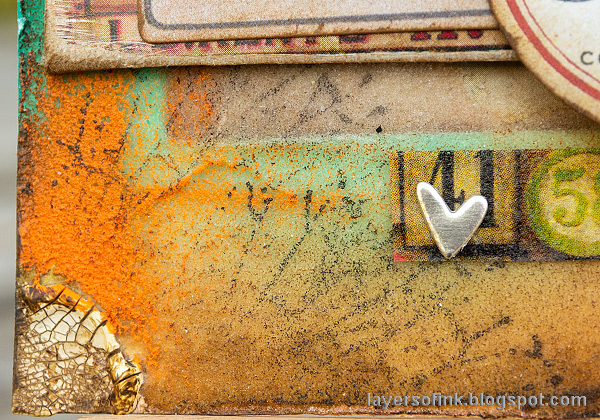
I stamped the translucent grit-paste with a crackle stamp, but didn't press heard enough, so it just added a very faint texture.

Layers of ink - Texture Paste Tag Tutorial by Anna-Karin Evaldsson.

Add a few pieces of Design Tape too.
Layers of ink - Texture Paste Tag Tutorial by Anna-Karin Evaldsson.

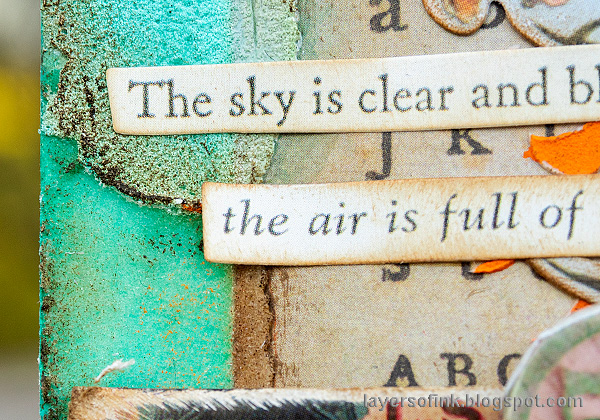
Here you can see the difference between the opaque grit-paste on the top, with paint added once it was dry, and the translucent base below it, where the original Distress Ink shows through. Both are very cool.


Thank you so much for taking the time to visit my blog today!  

Happy crafting!

Anna-Karin

Supplies:

* Please note: the links are affiliate links, for which I receive a small percentage of sales generated by the link, at no extra cost to you.


Wednesday, March 25, 2020

Balloons, hearts and a cute turtle

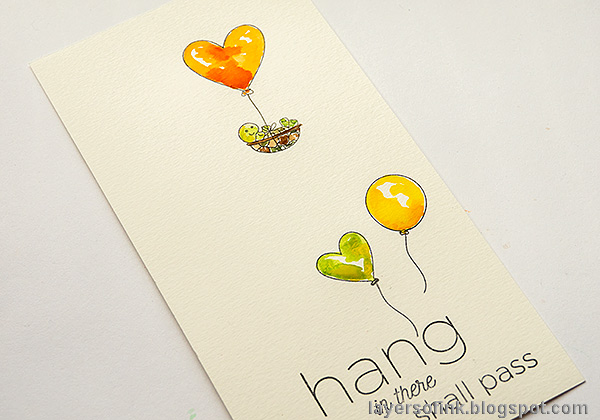
Hello friends! I have a sweet encouragement card to share with you today. I wanted to make something cute, quick and easy to send to a friend. Many of us need encouragement and hope at this moment and a card can make someone's day at least a little bit better. 

Layers of ink - Balloons, hearts and a cute turtle. Encouragement card tutorial by Anna-Karin Evaldsson.

Balloons, clouds, a cute turtle and glitter hearts are very cheerful, and that is what I was aiming for here. I wanted to do a tall card where there was plenty of space for the little turtle to fly away in her balloon. It's 4.5 x 8.2 in. Don't mind the dirt on the card to the left. I only noticed it after taking the photo and it was there since the card had fallen over. I could brush it off luckily. My projects sometimes takes tumbles while being photographed, especially if it is windy.

Layers of ink - Balloons, hearts and a cute turtle. Encouragement card tutorial by Anna-Karin Evaldsson. Stamp the images.

I used two stamp sets by Simon Says Stamp: Lifting Hearts and You Got This. On a piece of watercolor paper, stamp the turtle towards the top. The sentiment was stamped using two sentiment stamps. I placed a piece of torn printer paper over the word 'friend' when inking the first stamp. You can keep 'friend', but I only wanted a three line sentiment. Then stamp the second sentiment.

Layers of ink - Balloons, hearts and a cute turtle. Encouragement card tutorial by Anna-Karin Evaldsson.

Watercolor the turtle and the balloons.

Layers of ink - Balloons, hearts and a cute turtle. Encouragement card tutorial by Anna-Karin Evaldsson.

Paint the background blue and mist a little water here and there for texture.

Layers of ink - Balloons, hearts and a cute turtle. Encouragement card tutorial by Anna-Karin Evaldsson. Add glossy accents.

Add Glossy Accents to the balloons to make them shine.

Layers of ink - Balloons, hearts and a cute turtle. Encouragement card tutorial by Anna-Karin Evaldsson.

I die cut Tim Holtz Falling Hearts from Simon Says Stamp Aqua glitter paper, creating a whole lot of small glitter hearts in one go. I have die cut this great die from various glitter and metallic paper, so I have little hearts ready to use on projects. The clouds were die cut with Poppy Stamps Whittle Clouds, from white felt.

Layers of ink - Balloons, hearts and a cute turtle. Encouragement card tutorial by Anna-Karin Evaldsson.

For some reason, the Glossy Accents crackled a little. I don't know if it reacted with the watercolor or if the layer was a little too thick. I like crackles, so I didn't mind.

Layers of ink - Balloons, hearts and a cute turtle. Encouragement card tutorial by Anna-Karin Evaldsson.

The white highlights in the balloons will color a little when you coat them with Gloss Accents.

Layers of ink - Balloons, hearts and a cute turtle. Encouragement card tutorial by Anna-Karin Evaldsson. Turtle balloon.

The turtle holds a little heart.

Layers of ink - Balloons, hearts and a cute turtle. Encouragement card tutorial by Anna-Karin Evaldsson. This too shall pass.

It is important to remember that this difficult situation shall pass. We will get through this.

Layers of ink - Balloons, hearts and a cute turtle. Encouragement card tutorial by Anna-Karin Evaldsson.

After distressing the edges of the watercolor panel, I adhered it to turquoise cardstock and then to a folded white card.


Thank you so much for taking the time to visit my blog today! Stay safe!

Happy crafting!

Anna-Karin

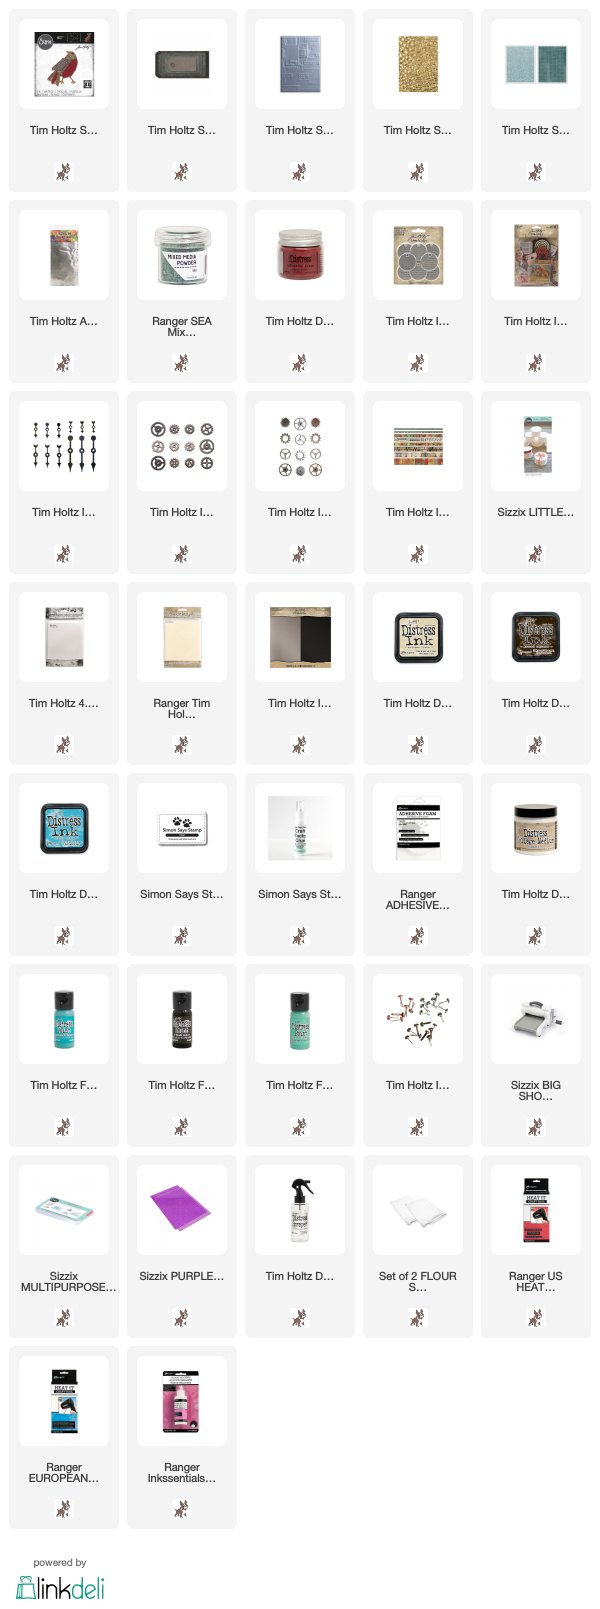
Supplies:

* Please note: the links are affiliate links, for which I receive a small percentage of sales generated by the link, at no extra cost to you.


Monday, March 23, 2020

Steampunk Bird Tutorial

Hello friends, I hope you are healthy and managing to keep the hope up. Being creative helps for me and if you find yourself struggling to sit down and create, try to do something simple. Make some backgrounds, stamp images and color in, or follow a tutorial. At the moment, I am busy finishing a project that I started with no plan at all, just adding things as I go along. 
In this post I will share a tutorial for a steampunk bird, with fun techniques working with foil tape, embossing folders, acrylic paint and embossing powders. Use them all, or focus on just one of the techniques.


At the Simon Says Stamp Monday Challenge Blog we have a Steampunk theme this week. Don't miss the inspiration by our March guest designer Ann Chuang. 

Layers of ink - Steampunk Bird Tutorial by Anna-Karin Evaldsson.

I have had fun creating with Tim Holtz Patchwork Bird die. It is a perfect die for trying out different techniques on since it consists of many pieces. I am enjoying thinking out ways to use it and combining textures. This is my third patchwork bird. The first one was mainly made from fabric and was called Winter Bird and the second one was mainly done by using background stamps: Mixed Media Patchwork Bird. You can use the techniques with other dies and embossing folders too, or turn the project into a card instead.

Layers of ink - Steampunk Bird Tutorial by Anna-Karin Evaldsson. Add foil tape to tag.

Start by covering a tag with foil tape, or cover a piece of cardstock and then die cut a tag.

Layers of ink - Steampunk Bird Tutorial by Anna-Karin Evaldsson. Emboss in Tim's Foundry folder.

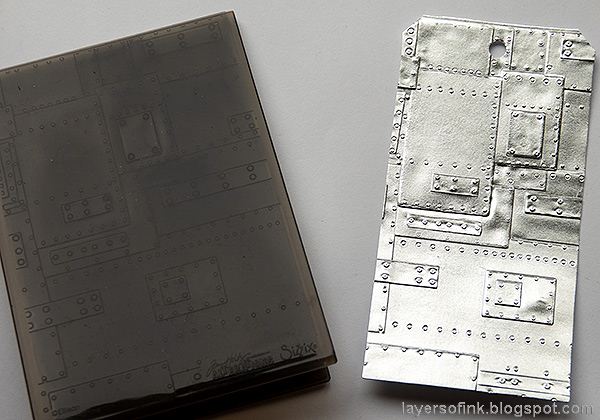
Emboss it in Tim's Foundry 3-D texture fade.

Layers of ink - Steampunk Bird Tutorial by Anna-Karin Evaldsson. Paint the metallic tag with acrylic paint.

Paint with Distress Paints and then mist pretty heavily with water. Leave to dry. You've got to be patient because this step takes time.

Layers of ink - Steampunk Bird Tutorial by Anna-Karin Evaldsson.

When the paint is almost completely dry, wipe it off in some areas. You can wipe more paint off if you want to, but I was aiming for a look where not much of the original metal was showing. Add a piece of Design Tape and a ruler from Tim's Junk Drawer.

Layers of ink - Steampunk Bird Tutorial by Anna-Karin Evaldsson. Die cut Tim Holtz Patchwork Bird.

Die cut the base of the bird from mat board, the body, feet and two wings from Cracked Leather cardstock and the head and the stomach from heavystock cardstock and the rest of the pieces from paper covered with foil tape. I die cut a second wing and some extra tail-feathers, not shown here.

Layers of ink - Steampunk Bird Tutorial by Anna-Karin Evaldsson. Emboss the wings.

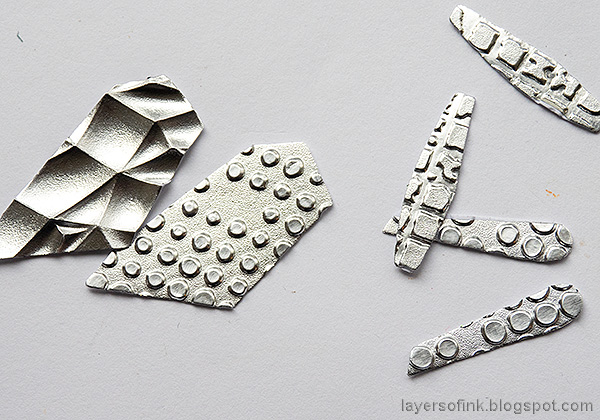
Emboss the metallic pieces in various embossing folders. I used Crackle 3-D, Dot-Matrix and Gridlock.

Layers of ink - Steampunk Bird Tutorial by Anna-Karin Evaldsson.

Paint with Distress Paint. Mist with water. When almost dry, wipe off some of the paint.

Layers of ink - Steampunk Bird Tutorial by Anna-Karin Evaldsson. Ink the bird's body.

Ink the cracked leather cardstock pieces with Distress Ink.

Layers of ink - Steampunk Bird Tutorial by Anna-Karin Evaldsson. Assemble the patchwork bird.

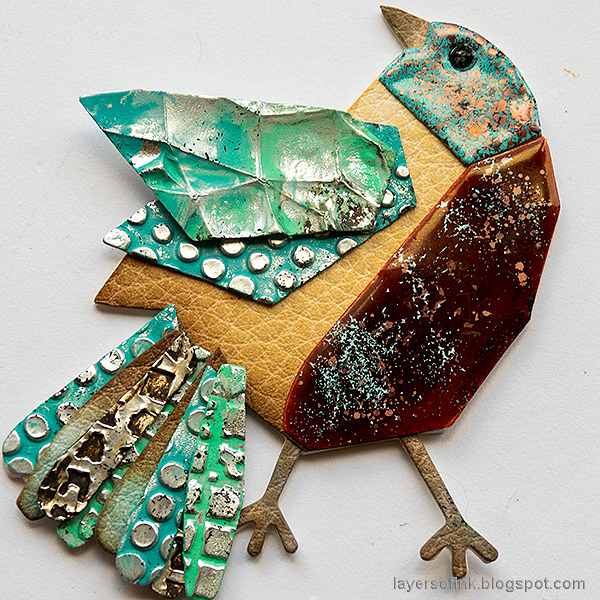
I forgot to take photos of the two heat embossed pieces. The head was embossed with Ranger's Sea Mixed Media powder. The stomach was embossed with several layers of the new Fired Brick Distress Embossing Glace. In the final layer, I dropped in some Sea powder to create speckles. Be careful when heat embossing and never touch the melted powder until it is completely dry.

Glue the pieces to the mat board base bird. Die cut a piece of black paper for the eye and add a dot of Glossy Accents to the eye.

Layers of ink - Steampunk Bird Tutorial by Anna-Karin Evaldsson.

Leo had a look at my earlier stamped Mixed Media Patchwork bird and this steampunk one, and liked the former better. 'Since it is a real bird, this one is a robot bird, it is not real'. Pretty funny, and a robot bird is of course also a great steampunk bird.

Layers of ink - Steampunk Bird Tutorial by Anna-Karin Evaldsson. Cut a hat for the bird.

Hats are common steampunk elements and I simply cut one from black metallic cardstock and sanded it slightly.

Layers of ink - Steampunk Bird Tutorial by Anna-Karin Evaldsson.

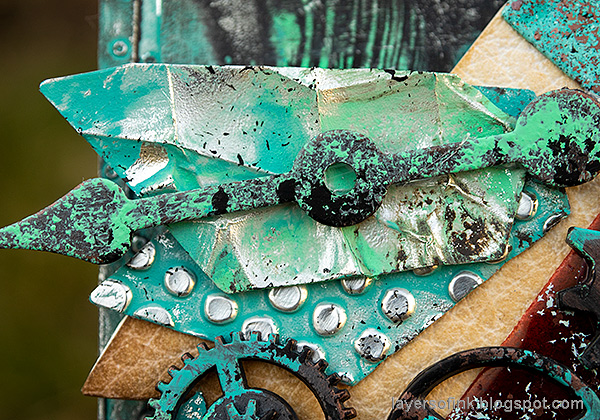
I also painted three gears and glued to the bird. Here you can also see how shiny the Distress Embossing Glace is.

Layers of ink - Steampunk Bird Tutorial by Anna-Karin Evaldsson.

And a painted game spinner was added to the wings.

Layers of ink - Steampunk Bird Tutorial by Anna-Karin Evaldsson. Textured tail feathers.

The tail feathers are my favorite part of the Patchwork Bird and it is fun to mix textures and colors.

Layers of ink - Steampunk Bird Tutorial by Anna-Karin Evaldsson. Embossed metal background.

A couple of pieces from Tim's cool Junk Drawer Baseboards set were added to the tag, such as this game piece. Ink the edges and add a bit of black paint to them to distress them.

Layers of ink - Steampunk Bird Tutorial by Anna-Karin Evaldsson.

Here's another Junk Drawer piece.

Layers of ink - Steampunk Bird Tutorial by Anna-Karin Evaldsson. Embossed and painted metal.

By misting the paint with water, it blends and gets a mottled appearance on the embossed foil tape background.

Layers of ink - Steampunk Bird Tutorial by Anna-Karin Evaldsson.

Add some twine and then adhere the bird with foam dots for dimension.

Layers of ink - Steampunk Bird Tutorial by Anna-Karin Evaldsson.

I wanted to finish the post with this quote from Emily Dickinson. The importance of focusing on hope in hard times. You can find the full poem here.

I hope you will join us this week in our Steampunk challenge. As always, you have a chance to win a $50 gift voucher to do some fun shopping at Simon Says Stamp. You have until next Monday 8am Ohio time. 1pm UK time, 2 pm CET to join in.


Don't forget to follow Simon Says Stamp on Instagram, they post great stuff daily. 


Do you use Instagram? If so please add #sssmchallenge so we can see your entries there too.


Thank you so much for taking the time to visit my blog today! Stay safe!

Happy crafting!

Anna-Karin

Supplies:

* Please note: the links are affiliate links, for which I receive a small percentage of sales generated by the link, at no extra cost to you.