Monday, February 10, 2020

Lighthouse Tutorial

Hello crafters! Today I am sharing a mixed media tutorial, with a crackle paste background, mica flakes and lots of texture. The techniques can be used for cardmaking, art journaling, 3-D projects and more.

We had a fun weekend with soccer, playgrounds and walks. Yesterday it was very windy and I struggled to photograph my project. It kept blowing away. All trees are still standing around us luckily.



This week we have a Crack It Up theme at the Simon Says Stamp Monday Challenge Blog. Don't miss the lovely project by our February guest designer Christina, with her blog Rosso Papavero. 

Layers of ink - Lighthouse Tag with crackle paste and mica flakes by Anna-Karin Evaldsson.

I love crackle paste and have for a long time. Ranger's Opaque Crackle Paste is a one-step crackle paste and much easier to use than the two step pastes I used many years ago. It is very easy, you just apply the paste and crackles will appear as it dries. All you need is a little bit of patience. The sea on my tag also has a crackle appearance, since it is covered with mica flakes. These are two easy techniques, which will give great results.

Layers of ink - Lighthouse Tag with crackle paste and mica flakes by Anna-Karin Evaldsson.

Coat a tag with gesso and when dry, apply Distress Inks. Most of this will be covered up, and you can actually skip painting the sea.

Layers of ink - Lighthouse Tag with crackle paste and mica flakes by Anna-Karin Evaldsson. Apply crackle paste.

Apply Ranger's Opaque Texture Paste across the sky, but don't cover the background completely. Apply Transparent Gloss Texture Paste over the sea.

Layers of ink - Lighthouse Tag with crackle paste and mica flakes by Anna-Karin Evaldsson. Add mica flakes.

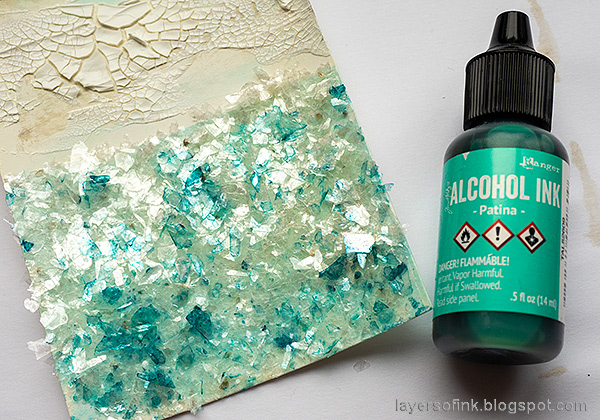
At this point, my eye fell on a jar of Tim Holtz Mica Flakes and I decided to cover the sea with flakes. You can also leave it without the mica, which will create a cool effect too. 
Layers of ink - Lighthouse Tag with crackle paste and mica flakes by Anna-Karin Evaldsson. Color Tim Holtz mica flakes.

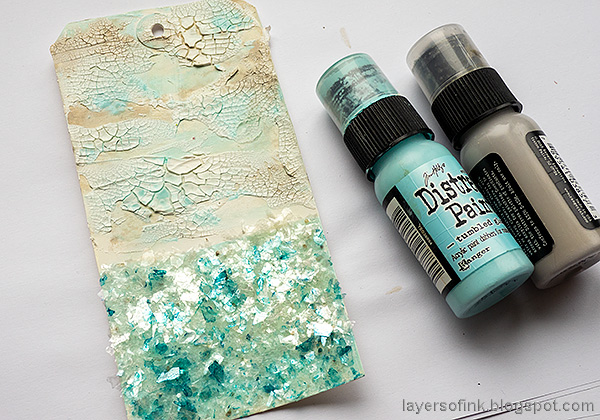
When the crackle paste dries, crackles will appear. Let the gloss paste dry too and then add some color to the mica flakes with Patina Alcohol Ink. Pounce up and down on the flakes with an ink blending tool and a felt applicator. This gives a cool varied look, instead of having colored all the flakes beforehand.
Layers of ink - Lighthouse Tag with crackle paste and mica flakes by Anna-Karin Evaldsson. Color crackle paste.

Add color to the crackled areas with watered down Tumbled Glass and Pumice Stone.

Layers of ink - Lighthouse Tag with crackle paste and mica flakes by Anna-Karin Evaldsson. Paper lighthouse.

Die cut the SSS Lighthouse from watercolor paper and from grey cardstock. I actually ended up not using the grey matte piece shown on this photo, but instead die cut the lighthouse with the details once more from the grey cardstock.

Layers of ink - Lighthouse Tag with crackle paste and mica flakes by Anna-Karin Evaldsson. Watercolor the lighthouse.

Color the lighthouse with Scribble Sticks, by picking up the pigment with a paint brush from the tip of the crayons. I left the stones in the die cut paper, but removed the waves.

Layers of ink - Lighthouse Tag with crackle paste and mica flakes by Anna-Karin Evaldsson. Make Art stamp.

Stamp the Woodware Collection Make Art background stamp on Specialty Stamping Paper. Cut out the sentiments you want to use and have the rest ready for another project. It's such a great stamp.

Layers of ink - Lighthouse Tag with crackle paste and mica flakes by Anna-Karin Evaldsson.

Splatter some black dots on the lighthouse by dipping the black Scribble Stick in water and flicking a paint brush against the tip. Mount the watercolor lighthouse on the grey one, placing the latter a little to the side.

Layers of ink - Lighthouse Tag with crackle paste and mica flakes by Anna-Karin Evaldsson.

I added a small stamped zigzag piece behind the window at the top of the lighthouse.

Layers of ink - Lighthouse Tag with crackle paste and mica flakes by Anna-Karin Evaldsson. Crackle paste background.

Glue the sentiments to the background.

Layers of ink - Lighthouse Tag with crackle paste and mica flakes by Anna-Karin Evaldsson.

I also added an art pebble and stamped some birds on the background.

Layers of ink - Lighthouse Tag with crackle paste and mica flakes by Anna-Karin Evaldsson.

I love the look of crackle paste.

Layers of ink - Lighthouse Tag with crackle paste and mica flakes by Anna-Karin Evaldsson.

The reason for why I didn't use the solid lighthouse matte piece is that I wanted the mica flakes to show through the die cut in the wave areas.

Layers of ink - Lighthouse Tag with crackle paste and mica flakes by Anna-Karin Evaldsson.

I hope you will join us this week in our Crack It Up challenge. As always, you have a chance to win a $50 gift voucher to do some fun shopping at Simon Says Stamp. You have until next Monday 8am Ohio time. 1pm UK time, 2 pm CET to join in.


Don't forget to follow Simon Says Stamp on Instagram, they post great stuff daily. 


Do you use Instagram? If so please add #sssmchallenge so we can see your entries there too.


Thank you so much for taking the time to visit my blog today!  

Happy crafting!

Anna-Karin

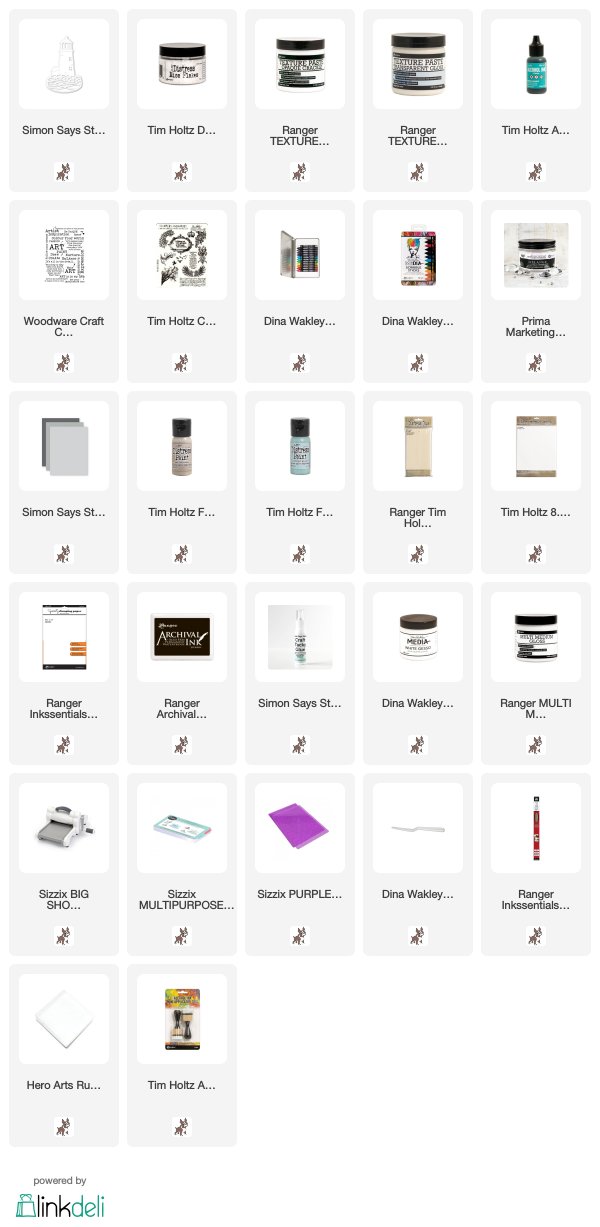
Supplies:

* Please note: the links are affiliate links, for which I receive a small percentage of sales generated by the link, at no extra cost to you.


Friday, February 7, 2020

Butterfly and House Art Journaling Page

Hello crafters! Today I have an art journaling tutorial to share with you, made with Infusions, stamps and die cuts. It is quick and easy to do and of course work for many other types of projects too. It could, for example, easily be turned into a card instead.

We had sunny weather today, which was really nice and I particularly like that the light lasts longer in the afternoons. It is no longer dark when I pick the kids up from school.

Layers of ink - Butterfly and House Art Journaling Page Tutorial by Anna-Karin Evaldsson.

I made an art journal page in my 6x6 Dina Wakley white journal. I really enjoy switching between formats and sizes. This page was inspired by the lovely quote from Virginia Woolf, which I found on the Paper Artsy Happiness Edition set by Alison Bomber. I believe that everyone needs to now and then shut themselves up in a world on their own with everything beautiful.

Layers of ink - Butterfly and House Art Journaling Page Tutorial by Anna-Karin Evaldsson. Color with infusions.

Start by misting the page pretty heavily with water. These pages are very thick and can take a whole lot of water. Sprinkle Paper Artsy Infusions Colored Stains into the water. You only need very little. Mist more water to help them dissolve and blend.

Layers of ink - Butterfly and House Art Journaling Page Tutorial by Anna-Karin Evaldsson.

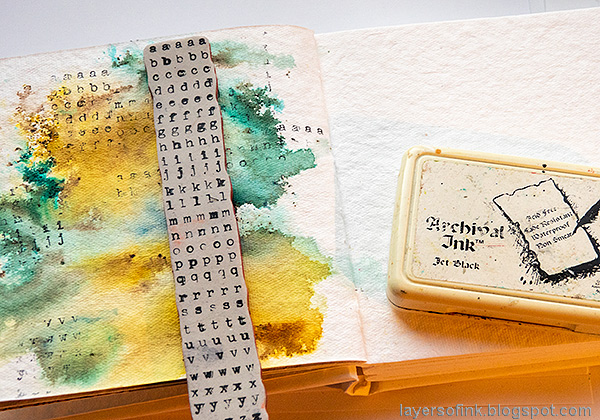
I kept the background simple, and just added a bit of texture with an alphabet stamp.
 Layers of ink - Butterfly and House Art Journaling Page Tutorial by Anna-Karin Evaldsson.

I saw a little house under a tree in front of me, and used one of the houses from Tim Holtz's Snowglobe set. It was die cut from old book paper, to fit the theme of the page, inky yellow paper, brown cardstock and a little white glittery cardstock.

Layers of ink - Butterfly and House Art Journaling Page Tutorial by Anna-Karin Evaldsson. Die cut Tim Holtz Scribbly Butterflies.

I also wanted to include a butterfly, since it implies both happiness and freedom. It was die cut from book paper and from white glittery paper. I die cut three, but used only one. They are from Tim Holtz Scribbly Butterflies set.

Layers of ink - Butterfly and House Art Journaling Page Tutorial by Anna-Karin Evaldsson.

I used blackout kraft stock paper for the tree. Because the tree is such an intricate die, I sanded the paper before die cutting.

Layers of ink - Butterfly and House Art Journaling Page Tutorial by Anna-Karin Evaldsson. Poppy stamps Soaring Tree Frame.

Die cut the Poppy stamps Soaring Tree Frame. I cut off the frame, except for the lower edge, which will serve as ground.


I also wanted glittery clouds and die cut a big cloud with the Whittle Cloud Border. You don't need to use these dies with a straight edge (as on the packaging), just use the second cloud border to die cut clouds from the other side of the paper too.

Layers of ink - Butterfly and House Art Journaling Page Tutorial by Anna-Karin Evaldsson. Tim Holtz Scribbly Butterflies.

I like the combination of, and contrast between, the old inked book paper and the white glittery cardstock.

Layers of ink - Butterfly and House Art Journaling Page Tutorial by Anna-Karin Evaldsson. Glitter Cloud.

I found a small stamped sentiment on my desk, from the Darkroom Door Nature Walk set, which also fit well here. I love to find little details on my desk to add to project.

Layers of ink - Butterfly and House Art Journaling Page Tutorial by Anna-Karin Evaldsson. Old book paper house.

After gluing the house layers together, I realised that I only wanted one room to be light, so I used a Distress Marker to darken the others. The door opens too.

Layers of ink - Butterfly and House Art Journaling Page Tutorial by Anna-Karin Evaldsson. Paper Artsy Happiness Edition.

The sentiment was stamped on an inky paper that I also found on my desk and cut into strips. I inked the edges by applying the ink pad directly to the paper. This gives a darker and messier edge than inking with an ink blending tool, and I wanted that on this project.

Layers of ink - Butterfly and House Art Journaling Page Tutorial by Anna-Karin Evaldsson.

The SSS Flower Swag forms a little hill for the house, and was also die cut from the white glittery paper. I just love this paper and that it adds instant glitter, without any mess at all.

Layers of ink - Butterfly and House Art Journaling Page Tutorial by Anna-Karin Evaldsson. Paper artsy infusions.

The Infusions Colored Stains powders gives such a quick and interesting background to projects, and you never know exactly what you are going to get, as they blend and move around with the water.


Thank you so much for taking the time to visit my blog today!  

Happy crafting!

Anna-Karin

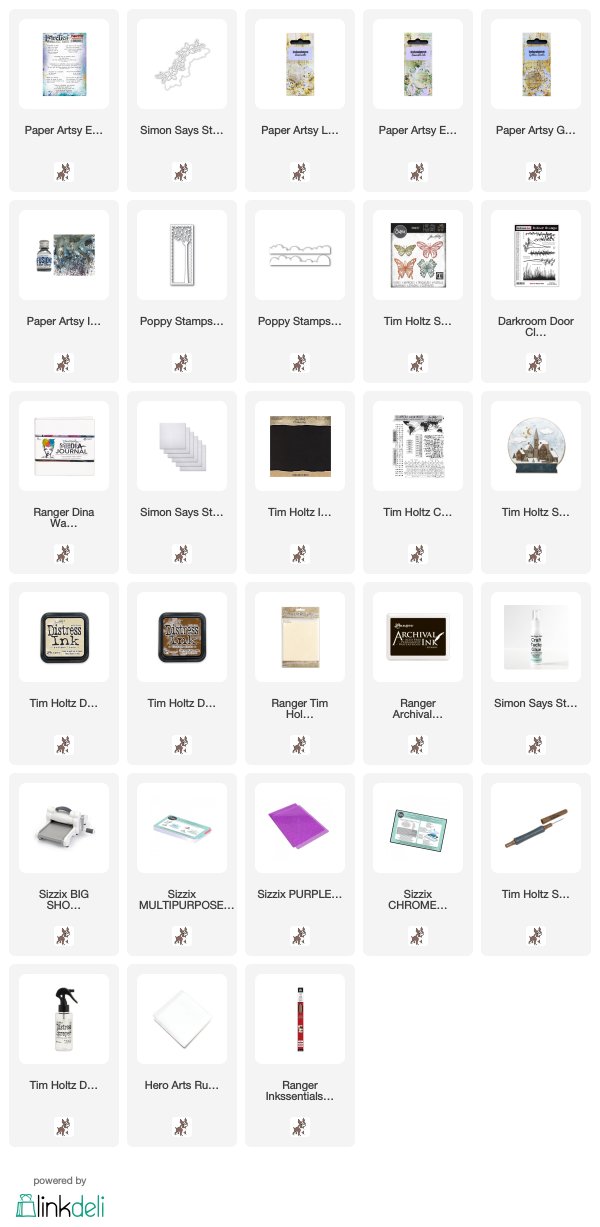
Supplies:

* Please note: the links are affiliate links, for which I receive a small percentage of sales generated by the link, at no extra cost to you.


Monday, February 3, 2020

Art Stones and Glass Beads

Hello friends! I hope you had a fun weekend! The sun was shining here and we spent a lot of time outdoors, at a favorite playground, at the soccer field and on a beautiful forest walk.


It is the first Monday of a new month and that means that this week the Simon Says Stamp Monday Challenge Blog team showcase a specific designer / company. This week it is Prima Marketing, with all their pretty products. You don't have to use Prima's products to join, but it is always fun if you do. Our theme is Floral Frenzy.

Since it is a new month, we also have a new guest designer. During February Christina, with her blog Rosso Papavero will share her gorgeous creations with us. I hope you will stop by her blog to see what she made for this week's challenge.

Layers of ink - Art Stones and Glass Beads ATC tutorial by Anna-Karin Evaldsson.

This week, I decided to make an Artist Trading Card, since it is such a fun, small surface to work on. The textured background was created with art stones and glass beads and is very easy to do, as you will see below. 

Layers of ink - Art Stones and Glass Beads ATC tutorial by Anna-Karin Evaldsson. Prima art stones.

Start by cutting a piece of watercolor paper into an ATC size (2.5 x 3.5 in). Coat with gesso. Add some glass beads directly into the gesso and continue with Mini Art Stones. Let dry.

Layers of ink - Art Stones and Glass Beads ATC tutorial by Anna-Karin Evaldsson. Textured background.

Add a layer of gesso on top of the art stones and beads. This prepares the card for the next step, and also acts as a glue.

Layers of ink - Art Stones and Glass Beads ATC tutorial by Anna-Karin Evaldsson. Paint with acrylic paint.

When the gesso is dry, paint with Distress Paints. For a different look, pick other colors. Let dry.

Layers of ink - Art Stones and Glass Beads ATC tutorial by Anna-Karin Evaldsson. Dry brush with metallic paint.

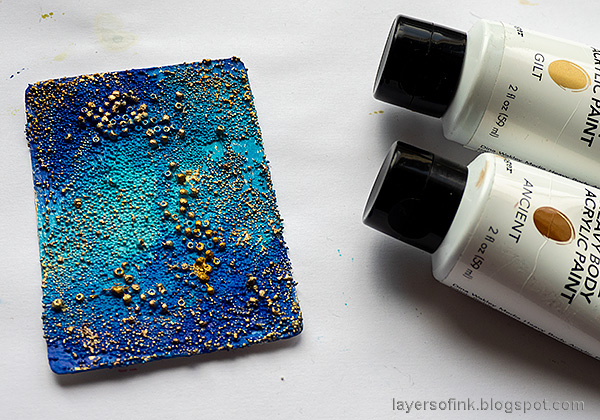
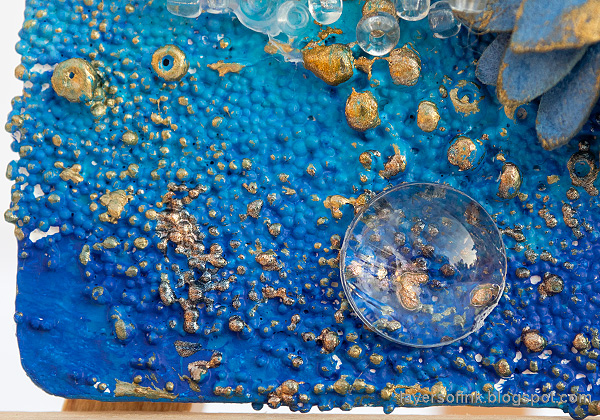
Dry brush the background with a little metallic paint. It will catch on to the textured parts, and makes them more visible. This background would work great for a space theme too, or for something relating to the sea.

Layers of ink - Art Stones and Glass Beads ATC tutorial by Anna-Karin Evaldsson.

I also added three art pebbles, to look like bubbles. The mix of mini art stones and the glass beads makes for a very interesting background, which is really easy to do.

Layers of ink - Art Stones and Glass Beads ATC tutorial by Anna-Karin Evaldsson. Add flowers and glass beads.

The flowers come from Prima's Moon Bay Golden Coast and were dry-brushed with a little metallic paint. I also added more crystal beads to the card.

Layers of ink - Art Stones and Glass Beads ATC tutorial by Anna-Karin Evaldsson.

The gloss medium used to add the clear beads hadn't dried completely when I took these photos. It is now completely clear. For the sentiment, I stamped the Finnabair 4 stamp on a piece of inked paper and added a Clippings Sticker on top.

Layers of ink - Art Stones and Glass Beads ATC tutorial by Anna-Karin Evaldsson. Art pebbles.

The Art Pebbles work as a magnifying glass, making the art stones look bigger.

I hope you will join us this week in our Floral Frenzy challenge. As always, you have a chance to win a $50 gift voucher to do some fun shopping at Simon Says Stamp. You have until next Monday 8am Ohio time. 1pm UK time, 2 pm CET to join in.


Don't forget to follow Simon Says Stamp on Instagram, they post great stuff daily. 


Do you use Instagram? If so please add #sssmchallenge so we can see your entries there too.


Thank you so much for taking the time to visit my blog today!  

Happy crafting!

Anna-Karin

Supplies:

* Please note: the links are affiliate links, for which I receive a small percentage of sales generated by the link, at no extra cost to you.