Thursday, August 30, 2018

Rosette Wall-hanger Tutorial

Hi crafters!! I am happy to have my camera back home again, after having been repaired. I missed it when it was away. Today, I have a colorful Sizzix tutorial to share with you. 
Layers of ink - Rosette Wall-hanger Tutorial by Anna-Karin Evaldsson

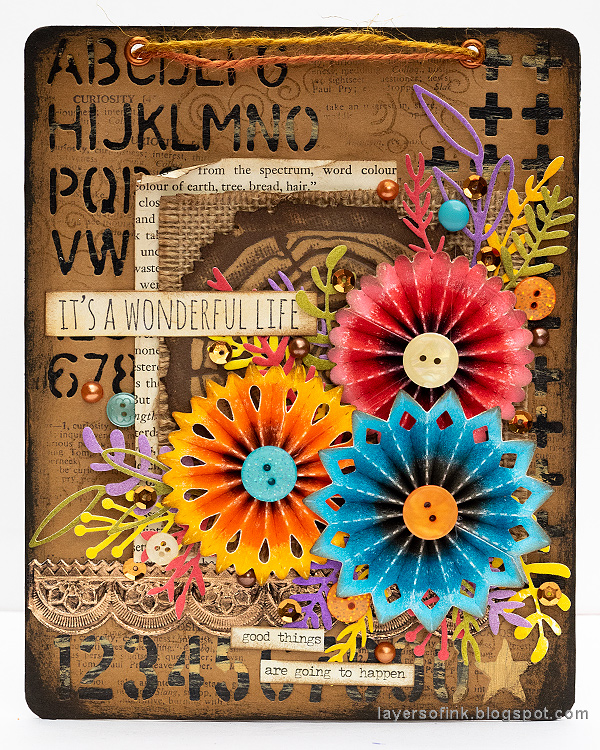
I made an autumn wall-hanger with vibrant colors, but you can use the techniques for any type of project. And if you don't want an autumn theme, just change the colors. I used a bunch different surfaces here to create texture and a project that you'd want to reach out and touch. The wall-hanger is 7.5 x 6 in and was made with dies by Tim Holtz.
Layers of ink - Rosette Wall-hanger Tutorial by Anna-Karin Evaldsson

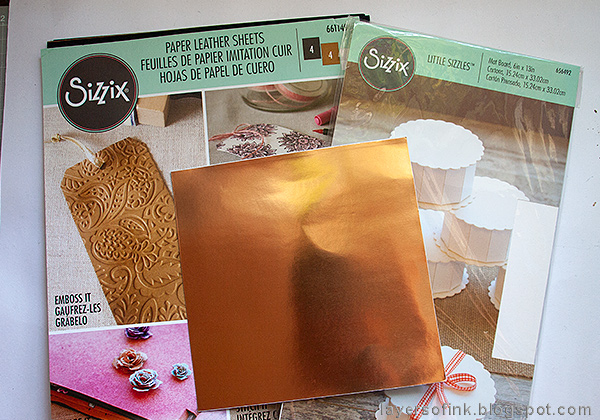
Some of the surfaces I used are: Sizzix Paper Leather, Little Sizzles Mat Board and Foil Adhesive Sheets, all which are fun surfaces which work for a wide range of techniques.
Layers of ink - Rosette Wall-hanger Tutorial by Anna-Karin Evaldsson with Tim Holtz Mixed Media

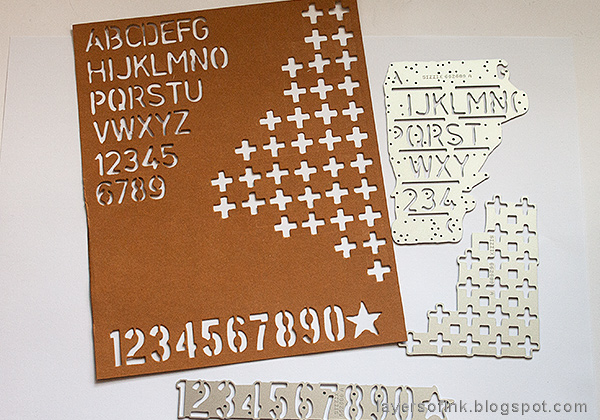
I started out by die cutting the background using brown Paper Leather. You can also use kraft cardstock, for a similar effect. Die cut with Tim Holtz Mixed Media 6 dies.

Layers of ink - Rosette Wall-hanger Tutorial by Anna-Karin Evaldsson

I cut a piece of mat board the same size as the Paper Leather and painted it black.

Layers of ink - Rosette Wall-hanger Tutorial by Anna-Karin Evaldsson

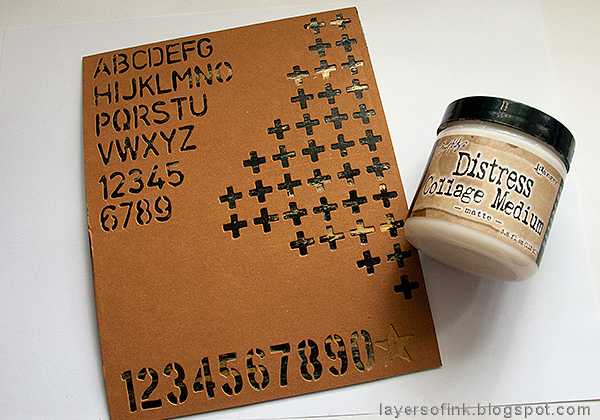
When dry, add a little bit of gold paint, which will shine through the negative die cutting. If you wonder about the splotch to the bottom right, it is because there is a star die cut there, and I wanted the star to be gold.
Layers of ink - Rosette Wall-hanger Tutorial by Anna-Karin Evaldsson

Glue the Paper Leather background on top of the mat board with Matte Medium. Place under a heavy book until it is dry.
Layers of ink - Rosette Wall-hanger Tutorial by Anna-Karin Evaldsson

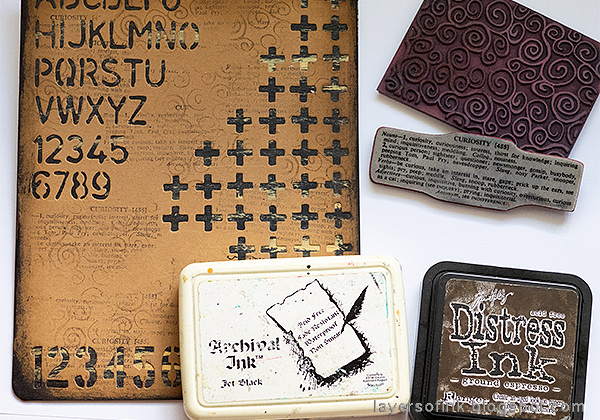
Stamp the background with a swirl stamp and Ground Espresso ink as well as with a text stamp and Jet Black ink. Ink the edges and add some Black Soot paint to make them darker.
Layers of ink - Rosette Wall-hanger Tutorial by Anna-Karin Evaldsson with Ranger Distress Crayons

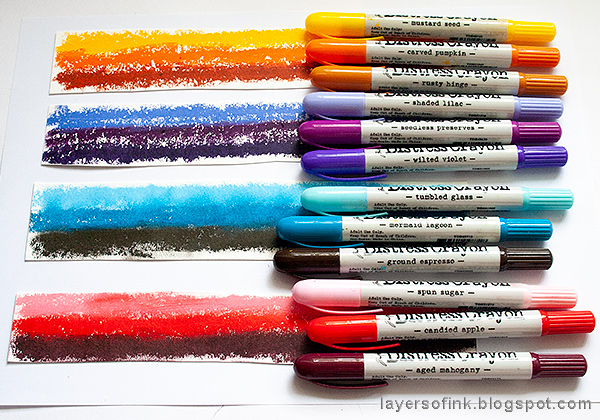
For the Rosettes I used a very fun and easy technique. My rosettes were die cut from white Paper Leather, but you can also use white cardstock. Cut strips and color each one with three shades of Distress Crayons, making them darker on one side and gradually lighter. Blend the crayons with your finger - in the photo, the bottom two are blended and the top two are not, to show you the difference.

Layers of ink - Rosette Wall-hanger Tutorial by Anna-Karin Evaldsson with Tim Holtz Sizzix Rosette set

The Rosette set has three designs. Die cut using this sandwich: Multipurpose Platform Tab 2, Cutting Pad, paper, die facing down, second Cutting Pad. Place the papers so that the darkest part will be on the inside of the finished rosette - where the straight edge of the die is.

Layers of ink - Rosette Wall-hanger Tutorial by Anna-Karin Evaldsson

Fold along the perforated lines. If you use ordinary cardstock, place a piece of tissue tape at the back before folding, to make sure the paper doesn't tear along any of the perforated lines. Paper Leather is very strong and if you use it, you can skip that step.

Layers of ink - Rosette Wall-hanger Tutorial by Anna-Karin Evaldsson

Glue the ends together. You can use hot glue to assemble the rosettes - but be careful not to burn yourself. I used Matte Medium instead. I like to use the largest circle from the Rosette set as a base to glue the rosette upon. Press the rosette down onto the glue and place under a book.

Layers of ink - Rosette Wall-hanger Tutorial by Anna-Karin Evaldsson

I made four rosettes. Later I decided to leave the purple one for another project, since it looked better with three than four rosettes on the wall-hanger.
Layers of ink - Rosette Wall-hanger Tutorial by Anna-Karin Evaldsson

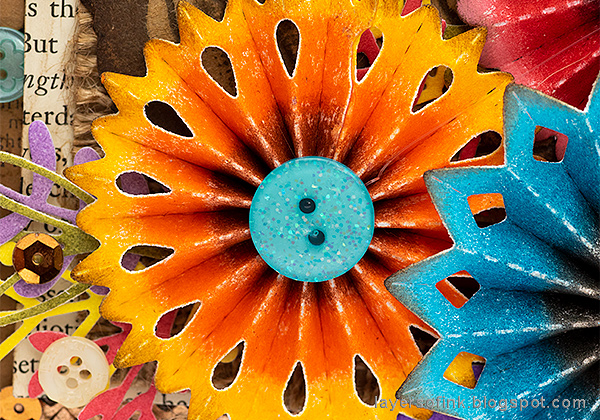
Instead of die cutting a center using the Rosette set, I glued a button to each center. It covered up less of the color and gave a nice extra touch.
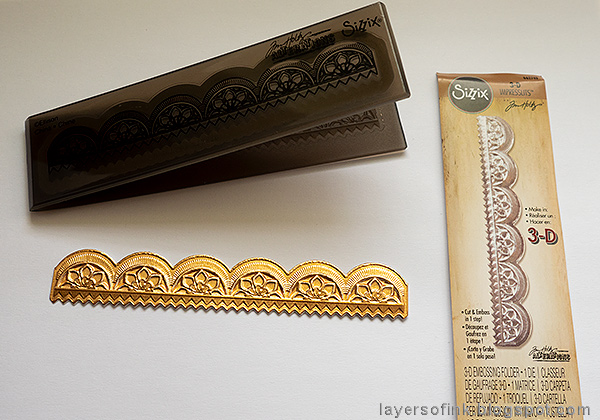
Layers of ink - Rosette Wall-hanger Tutorial by Anna-Karin Evaldsson with Sizzix Tim Holtz 3-D embossing folder

I used the Mini Scallops Impresslits 3-D Embossing folder for the first time, and loved the cool effect. It looks just like German Scraps. Adhere the foil to a piece of paper first and then place in the folder. It cuts and embosses at the same time. Use this sandwich: Multipurpose Platform Tab 1, Impresslits folder with paper inside, Cutting Pad.
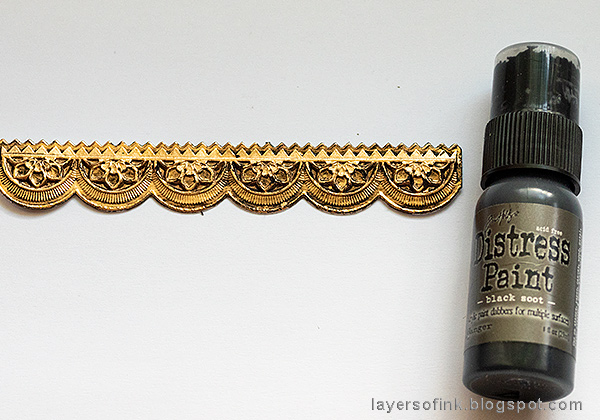
Layers of ink - Rosette Wall-hanger Tutorial by Anna-Karin Evaldsson

Distress with a little black paint.

Layers of ink - Rosette Wall-hanger Tutorial by Anna-Karin Evaldsson with Sizzix Tim Holtz Tree Ring

I also used the Tree Rings Bigz, which comes with a coordinating embossing folder. Depending on which way you place the paper in the folder, you can get a different wood grain effect, as you can see on the photo. I used the first example.
Layers of ink - Rosette Wall-hanger Tutorial by Anna-Karin Evaldsson with Sizzix Tim Holtz Funky Floral

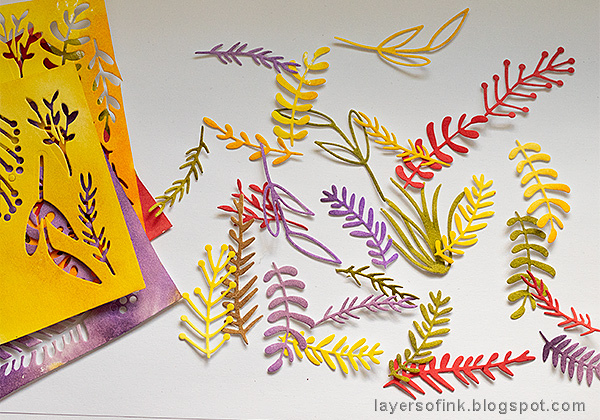
Press Distress Ink on a craft sheet, mist with water and press pieces of white Paper Leather into the ink. You can also use watercolor paper. Die cut with the Funky Floral 1, Funky Floral 2 and Funky Floral 3 sets, picking leaves that you like.
 Layers of ink - Rosette Wall-hanger Tutorial by Anna-Karin Evaldsson

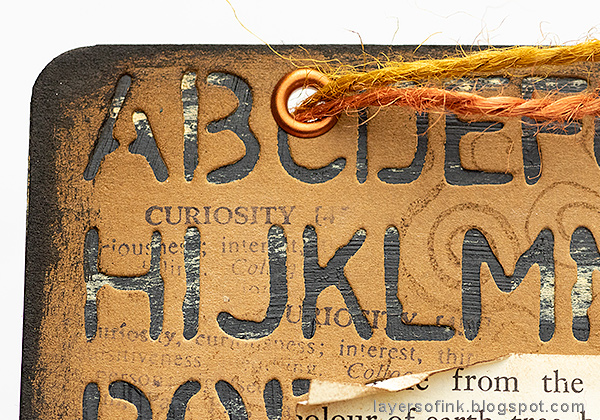
Punch two holes at the top of the wall-hanger and set an eyelet in them. Tie with twine.
Layers of ink - Rosette Wall-hanger Tutorial by Anna-Karin Evaldsson

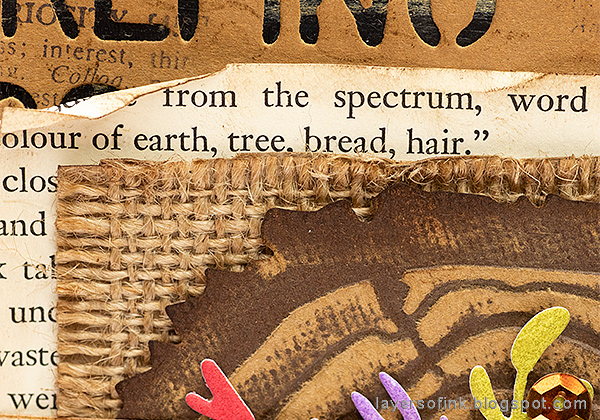
Behind the wood circle, I placed a piece of burlap and a page from an old book. I liked this particular page because of the text about the color of earth, tree, bread and hair.

 Layers of ink - Rosette Wall-hanger Tutorial by Anna-Karin Evaldsson

Stamp a sentiment and cut out.

Layers of ink - Rosette Wall-hanger Tutorial by Anna-Karin Evaldsson with Sizzix Tim Holtz Rosette set.

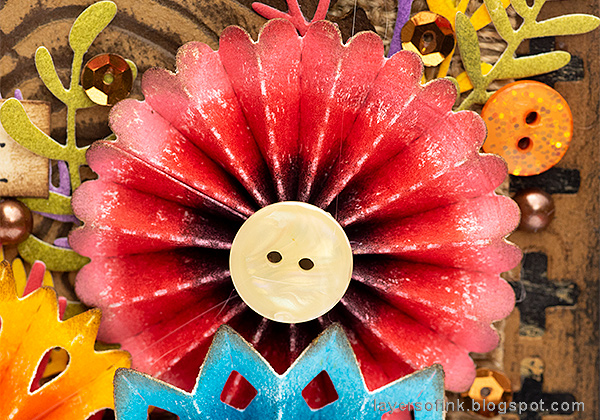
If you want to cover up the white perforated lines, you can simply use one of the Distress Crayons, but I left mine as they were.
Layers of ink - Rosette Wall-hanger Tutorial by Anna-Karin Evaldsson

The Distress Crayons give really vibrant colors to the rosettes.

Layers of ink - Rosette Wall-hanger Tutorial by Anna-Karin Evaldsson with Sizzix Tim Holtz Funky Floral

 
I added extra buttons, pearls and sequins here and there for some shine.
Layers of ink - Rosette Wall-hanger Tutorial by Anna-Karin Evaldsson

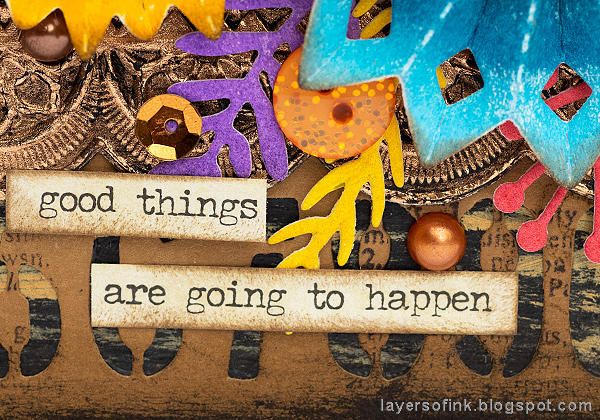
I also used a Small Talk sticker sentiment.

Layers of ink - Rosette Wall-hanger Tutorial by Anna-Karin Evaldsson

Here you can see the cool look of the embossed metal, as well as how the gold paint peaks through the die cut shapes in the background.

Thank you so much for taking the time to look at this long tutorial! I hope you enjoyed it!

Happy crafting!

Anna-Karin

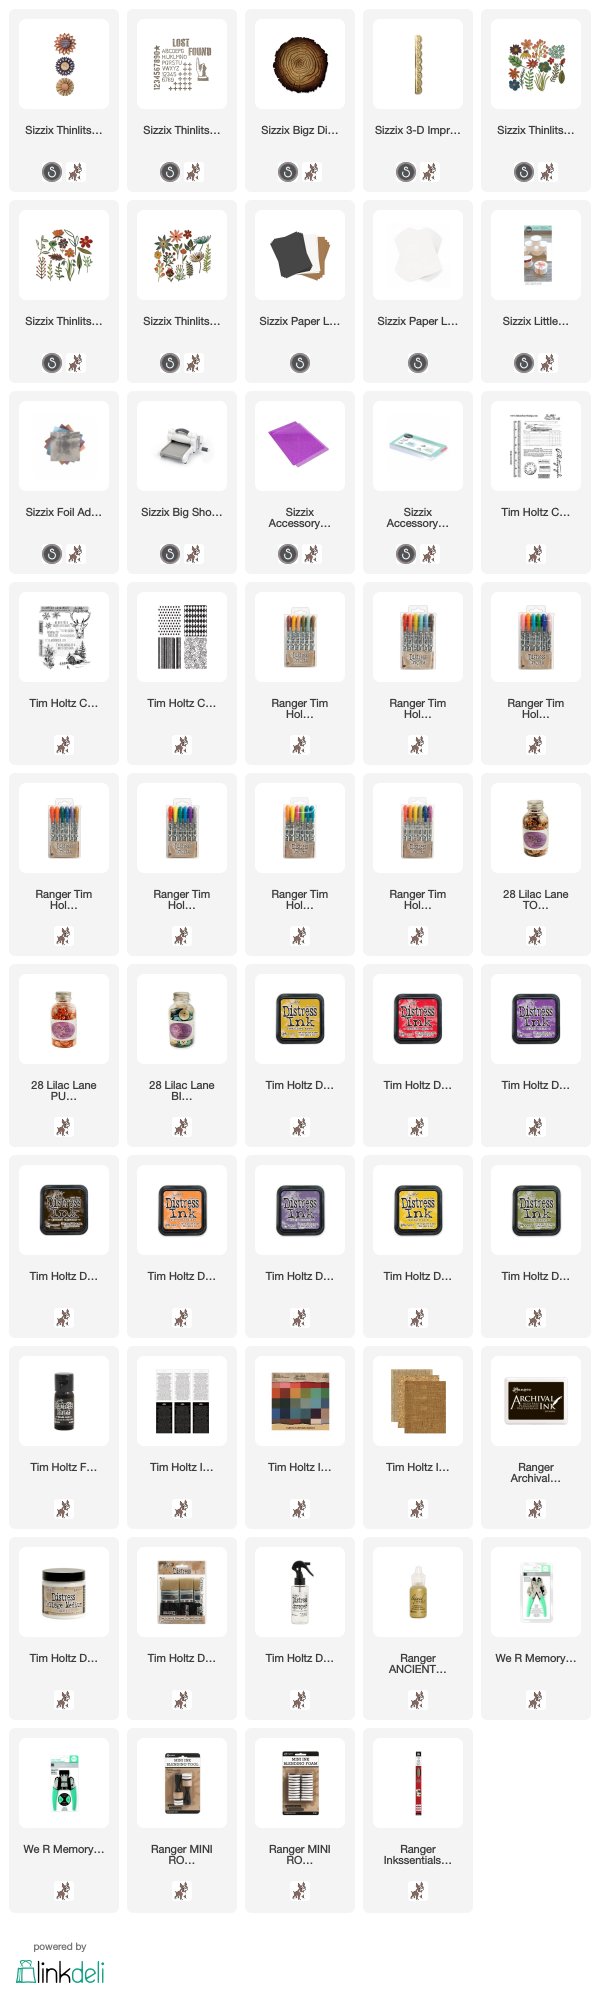
Supplies:

* Please note: the links are affiliate links, for which I receive a small percentage of sales generated by the link, at no extra cost to you.


Monday, August 27, 2018

Autumn Tree with Dimensional Flowers Tutorial

Hi crafters! I hope your weekend was a good one. We had a fun weekend with soccer, a birthday party for one of my friends and a really long walk. The weather is starting to turn and although the days are still pretty warm, the nights are getting cooler. 


This week at the Simon Says Stamp Monday Challenge Blog we have a Fall/Autumn theme. Don't miss the last project of our wonderful August guest designer Anne Redfern.

Layers of ink - Autumn Tree with Dimensional Flowers Tutorial by Anna-Karin Evaldsson

I made an autumn themed birthday card, which started out as an art journal page. I was in the mood for some dimensional flowers, and I try to keep my art journal pages as flat as possible, so I turned it into a big card instead.

Layers of ink - Autumn Tree with Dimensional Flowers Tutorial by Anna-Karin Evaldsson, watercolor background

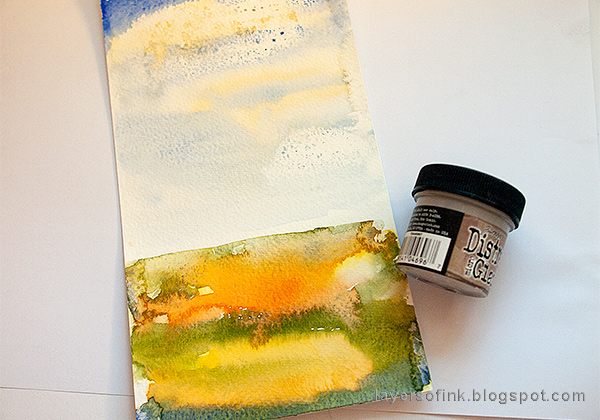
I found the background in my box of scrap papers and it was perfect for an autumn project. I might have made it when working on this Watercolor Tree Art Journal page. The clouds were done with Distress Micro Glaze before painting the background with watercolors. The glaze resists the paint.

Layers of ink - Autumn Tree with Dimensional Flowers Tutorial by Anna-Karin Evaldsson with SSS Brushed Branches stamp

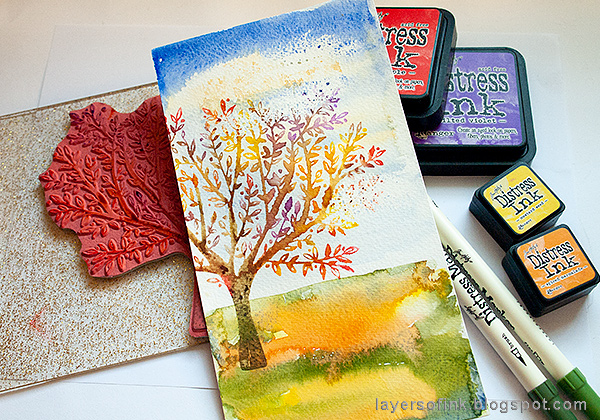
I used the Simon Says Stamp Brushed Branches as my focal point. I love this stamp. It was inked with a combination of ink pads and markers. It is a big stamp, and I used one of my Sizzix Cutting Pads as an acrylic block. Mist with water before stamping.

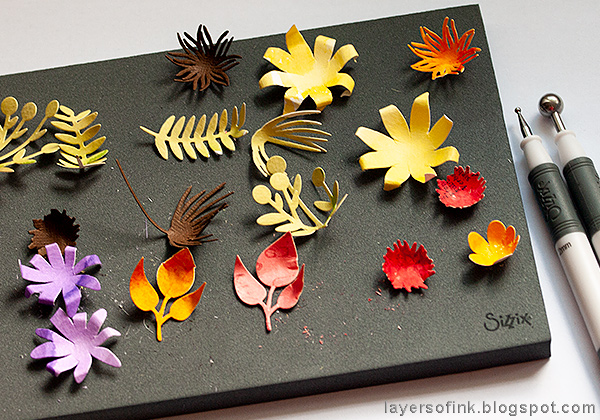
Layers of ink - Autumn Tree with Dimensional Flowers Tutorial by Anna-Karin Evaldsson with Tim Holtz Sizzix Funky Floral

The flowers and foliage were made with Tim Holtz Funky Floral 3 Thinlits set. The Funky Floral sets are so versatile and you can make an almost unlimited variation of flowers with them. I colored watercolor paper with Distress Inks and let it dry before die cutting the pieces. It helps to use the Sizzix Precision Base Plate with these intricate dies. The red paper was in my scrapbox and had been stamped with various stamps.

Layers of ink - Autumn Tree with Dimensional Flowers Tutorial by Anna-Karin Evaldsson with Tim Holtz Sizzix Funky Floral

Use the new Sizzix Paper Sculpting tool kit to give shape and life to the flowers and leaves.

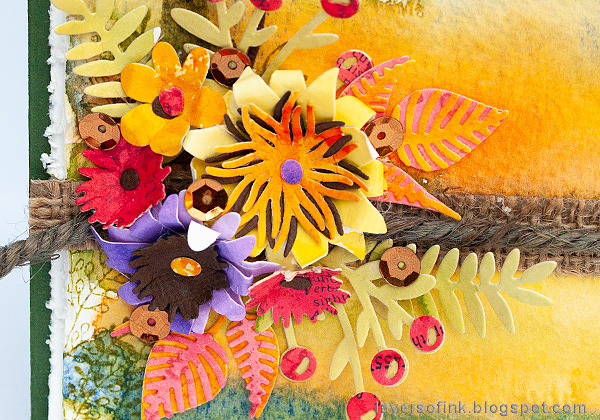
Layers of ink - Autumn Tree with Dimensional Flowers Tutorial by Anna-Karin Evaldsson with Tim Holtz Sizzix Funky Floral 3

Layer the flower pieces to create dimensional flowers and glue them to the card. I added a piece of burlap and twine below the flowers. Tuck the leaves in all around.

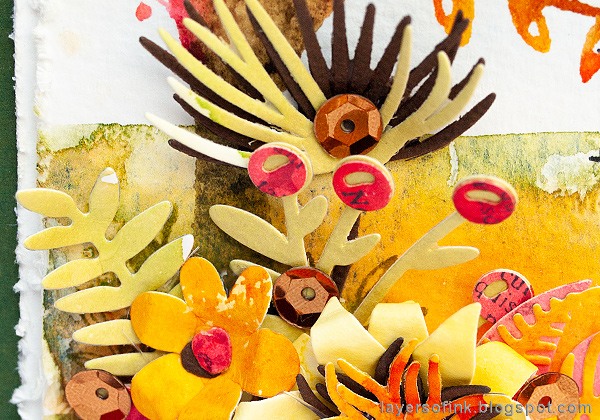
Layers of ink - Autumn Tree with Dimensional Flowers Tutorial by Anna-Karin Evaldsson with Tim Holtz Sizzix Funky Floral3.

I also glued some sequins among the flower, for a touch of bling.

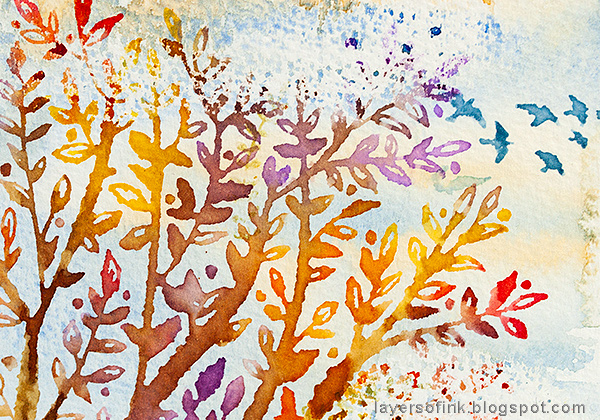
Layers of ink - Autumn Tree with Dimensional Flowers Tutorial by Anna-Karin Evaldsson with Ranger Distress Micro Glaze

Here you can see the resist effect of the micro glace. It also resist the stamping, so that it looks like the tree fades out in some areas. The birds were stamped with Faded Jeans ink.

Layers of ink - Autumn Tree with Dimensional Flowers Tutorial by Anna-Karin Evaldsson with Tim Holtz Sizzix Funky Floral

The Brushed Branches stamp looks great with the watercolor stamping technique. If you want to see more examples using it, check out my Guestbook tutorial.

Layers of ink - Autumn Tree with Dimensional Flowers Tutorial by Anna-Karin Evaldsson with Tim Holtz Sizzix Funky Floral

The sentiment stamp comes from the SSS Big Greetings set.

Layers of ink - Autumn Tree with Dimensional Flowers Tutorial by Anna-Karin Evaldsson with Tim Holtz Sizzix Funky Floral

Here you can see that the inky red paper I die cut some of the flowers from, already had some stamping up. It was a full sheet that I had inked and stamped to use on projects. I need to do that more often, because it is very handy, especially if you are in a hurry.

Layers of ink - Autumn Tree with Dimensional Flowers Tutorial by Anna-Karin Evaldsson with Tim Holtz Sizzix Funky Floral 3 dimensional flowers.

Here's another look at the dimensional autumn flowers. If you don't want to do an autumn project, just use different colors.

I hope you will join us this week in our Fall/Autumn challenge. As always, you have a chance to win a $50 gift voucher to do some fun shopping at Simon Says Stamp. You have until next Monday 8am Ohio time. 1pm UK time, 2 pm CET to join in.


Don't forget to follow Simon Says Stamp on Instagram, they post great stuff daily. 


Do you use Instagram? If so please add #sssmchallenge so we can see your entries there too.


Thank you so much for taking the time to visit my blog today!  

Happy crafting!

Anna-Karin

Supplies:

* Please note: the links are affiliate links, for which I receive a small percentage of sales generated by the link, at no extra cost to you.

Sunday, August 26, 2018

Word Art Journal Page Tutorial

Hi friends! I have a new tutorial on the Sizzix blog today, and it is a fun mixed media art journal page. As always, the techniques can be used on many types of projects.

Layers of ink - Word Art Journal Page Tutorial by Anna-Karin Evaldsson made with Tim Holtz Sizzix dies

One of my favourite techniques is to make die cuts a part of the background, by kind of baking them into the background with various media. Here I used Tim Holtz's new Shadow Script dies,  which are so versatile. I used the Shadow Script 1, Shadow Script 2 and Shadow Script 3 sets, as well as his Springtime Sideorder for the small butterflies. The background was done with gesso, Distress Paint, Rock Candy Crackle Paint and Distress Crayons.

You can find the full tutorial and lots of close-ups on the Sizzix blog.

Thank you so much for taking the time to stop by here today!

Happy crafting!!

Anna-Karin

* Please note: the links are affiliate links, for which I receive a small percentage of sales generated by the link, at no extra cost to you.
Thursday, August 23, 2018

Nautical Mini Album Tutorial

Hello crafters! Things are starting to settle into our normal routine here and the nights are getting cooler. During August, the Eileen Hull Inspiration Team is sharing projects with an anything goes theme. Don't miss all the very varied inspiration. 

Layers of ink - Nautical Mini Album Tutorial by Anna-Karin Evaldsson
As you probably know, I love to make mini albums and mini books of different kinds and I was happy to use the Book Binding die for the first time. It's a fun and easy way to bind a book and all you need are some Planner Mini Discs. I like that you can move pages around, if you change your mind about placement. When looking through a pile of photos I came upon photos from a holiday with my parents in 2009, which I had planned to use in a mini book, but never got to, so I decided it was about time. The cover was painted and stamped with Stampscapes stamps.

Layers of ink - Nautical Mini Album Tutorial by Anna-Karin Evaldsson with Eileen Hull Sizzix Book Binding die

Some of the step photos aren't perfect, because my camera is being repaired and my old camera doesn't do so well in low light. I made two lines with a white gel pen on the Book Binding die, as a guide to know where to place my papers. You don't see them here since the paper is exactly lined up with the lines. Use the Movers & Shapers Shuttle and place the die on top. All you need to do is to add one Cutting Pad on top of the paper. If you use larger binding rings, you can die cut the holes further in, to prevent a too big gap between the pages.

Layers of ink - Nautical Mini Album Tutorial by Anna-Karin Evaldsson with Eileen Hull Sizzix Journaling Card dies

I used various shapes of pages, two of them were scalloped pages die cut with Eileen's Flowers & Leaves Journaling Cards, and Heart Journaling Cards. Place the edge of the paper just inside the cutting line on one side, to get a straight edge where the binding will be.

Layers of ink - Nautical Mini Album Tutorial by Anna-Karin Evaldsson with Eileen Hull Sizzix Credit Card Sleeve dies

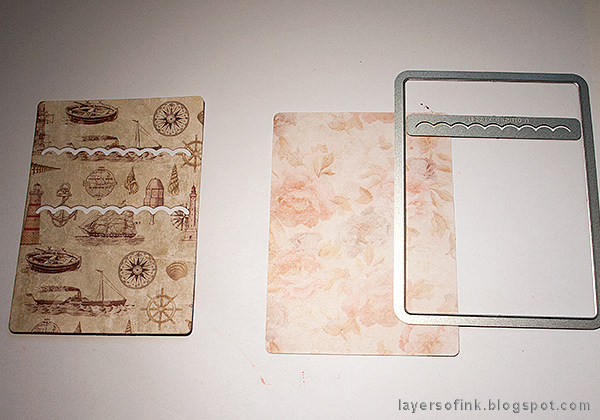
I also made a couple of pocket pages, using the Credit Card Sleeve & Tags set. Place the scalloped die as shown here to die cut the slots - it is easiest to do with the Magnetic Platform. Die cut one paper without the slots. For another example check out my Book Club Chapter 2 Card tutorial.

Layers of ink - Nautical Mini Album Tutorial by Anna-Karin Evaldsson

Apply adhesive along the edges and glue the two pieces together to make a pocket. Die cut tags with the Credit Card Sleeve & Tags set, from the same set.

Layers of ink - Nautical Mini Album Tutorial by Anna-Karin Evaldsson, painting with Distress Paint

The covers were die cut with the Passport Book die, from mat board. After coating them with gesso (and letting it dry), they were painted with Distress Paints, forming a very simple beach background.

Layers of ink - Nautical Mini Album Tutorial by Anna-Karin Evaldsson with Stampscapes scenic stamps

The covers were stamped with various Stampscapes stamps to create a simple scene. I used my trusted Stamp-a-ma-jig stamp positioner, both for precise placement, but in this case also to hold the stamped plastic sheet over the background to check placement and perspective before stamping. If the kids were placed at the very edge of the water, for instance, they would look gigantic.

Layers of ink - Nautical Mini Album Tutorial by Anna-Karin Evaldsson

After stamping the scene, I added some color and, in particular, shadows with paint.

Layers of ink - Nautical Mini Album Tutorial by Anna-Karin Evaldsson with Prima Flower St Tropez papers

I used teal Me and My Big Ideas Planner Mini Discs to bind my mini album. It is very easy to do.

Layers of ink - Nautical Mini Album Tutorial by Anna-Karin Evaldsson

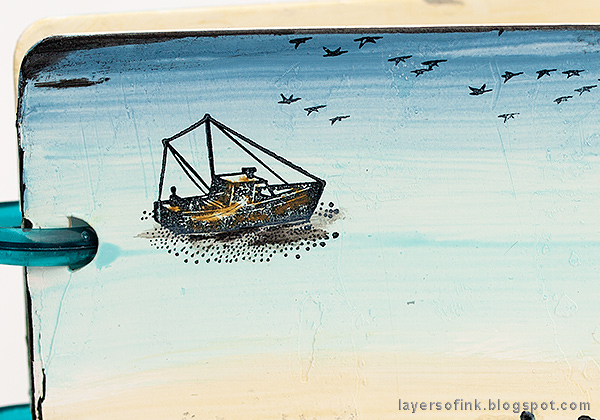
Since we saw lots of different kinds of boats on this coastal holiday, a fishing boat worked well for the cover, especially since the area is an old fishing community.

Layers of ink - Nautical Mini Album Tutorial by Anna-Karin Evaldsson

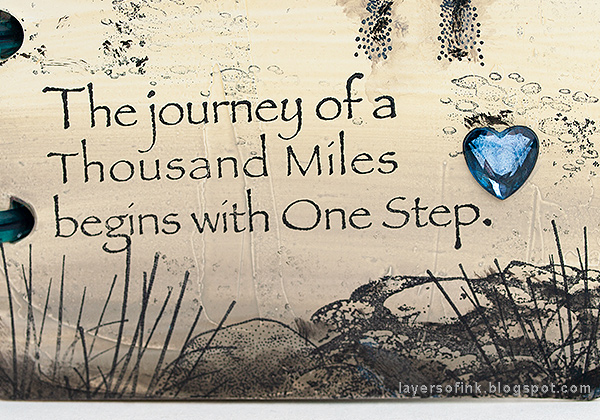
I always like this quote, and it fits for many different themes. The mirrored heart was colored blue with Denim alcohol ink.

Layers of ink - Nautical Mini Album Tutorial by Anna-Karin Evaldsson with Eileen Hull Book Club dies by Sizzix

Here's the back cover, with another beautiful Stampscapes sentiment stamp.

Layers of ink - Nautical Mini Album Tutorial by Anna-Karin Evaldsson with Stampscapes stamps

And a peaceful rowing boat.

Layers of ink - Nautical Mini Album Tutorial by Anna-Karin Evaldsson

I didn't aim for perfect stamping here, since I wanted a textured look to go with the papers I used on the inside. I used a pebble and a flower texture stamp to stamp the texture.

Layers of ink - Nautical Mini Album Tutorial by Anna-Karin Evaldsson

I used to play badminton until I injured my knee and here I had fun playing badminton with some kids from a family we visited. 

Layers of ink - Nautical Mini Album Tutorial by Anna-Karin Evaldsson

I used papers by Prima Flowers, especially from their St Tropez line, mainly from the A4 paper pad, but also from the 4 x 6 pad and a couple of pages straight from the 3 x 4 pad (no need to die cut those since they were already of a good size).

Layers of ink - Nautical Mini Album Tutorial by Anna-Karin Evaldsson

I still need to add journaling to the album, and left enough space for that.

Layers of ink - Nautical Mini Album Tutorial by Anna-Karin Evaldsson

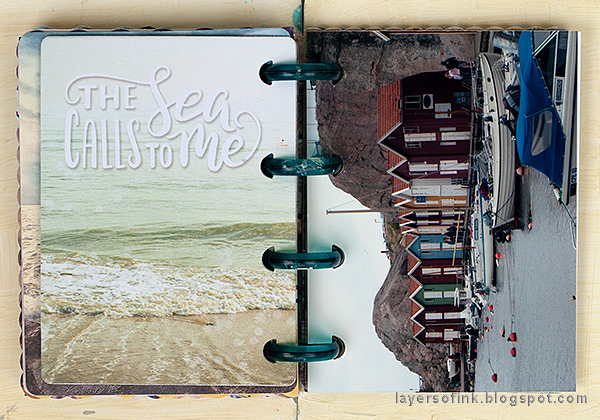
You can also die cut pages from photos only. The righthand page is two 2 x 3 photos adhered to the back of a 3 x 4 photo.

Layers of ink - Nautical Mini Album Tutorial by Anna-Karin Evaldsson

I love the look of those colorful houses up against the cliff. It was fun working with these photos again and remembering that special holiday.

Layers of ink - Nautical Mini Album Tutorial by Anna-Karin Evaldsson

The pocket pages were used both for die cut tags with journaling, and for additional photos.

Layers of ink - Nautical Mini Album Tutorial by Anna-Karin Evaldsson

To the right is another photo page. I wanted to use some 3 x 4 photos, and this was a very easy way to do so. 

Layers of ink - Nautical Mini Album Tutorial by Anna-Karin Evaldsson

The book is pretty full as it is and I wanted to focus on photos and text, but I might add some flat embellishments later too. I love the page to the right here, and I still use my yellow rain coat.

Layers of ink - Nautical Mini Album Tutorial by Anna-Karin Evaldsson

I used mainly 2 x 3 in photos, and had to cut them a little so that they would fit, but some of them were hard to cut down without affecting the photo too much, and then I just adhered them sideways instead.

Layers of ink - Nautical Mini Album Tutorial by Anna-Karin Evaldsson

As you can see, the book is nice and chunky. There are tiny hearts in the middle of the discs.

Layers of ink - Nautical Mini Album Tutorial by Anna-Karin Evaldsson

This book can easily be made for any topic or theme and would be a great gift too. It is the perfect place to use up some scrap paper. You could also turn it into a notebook or a small planner.

Thank you so much for stopping by here today!

Happy crafting!!

Anna-Karin

Supplies:

* Please note: the links are affiliate links, for which I receive a small percentage of sales generated by the link, at no extra cost to you.

Binding discs: Me & My Big Ideas Planner Mini Discs 9/Pkg - Clear Teal
Stamps: Stampscapes: 164A Fishing Boat, 256A Pebbles, 067B Reeds, 230B Running Kids, 299B 3 Rocks & Grass, 166A Row Boat, 210C Boulders with Lichen Sm., 152D Migrating Birds, Scenic Sentiment Sheet 1, Scenic Sentiment Sheet 4, Nature Sheet 4