Monday, March 9, 2020

Wildflowers Art Journal Page

Hello friends! What better way to start the week than with some stamping, watercoloring and art journaling.
 
I hope you had a good weekend! I had to take it a little easy since I have a cold and I missed my long walks. We played some Monopoly instead. I don't know how my eldest always manages to win at Monopoly. We have a South African version and it is fun to talk about the various places while playing. 



This week at the Simon Says Stamp Monday Challenge Blog our theme is 'A Bit O' Green'. I love green and one of my favorite things with spring is how almost each day brings new shades of green. Don't miss the project by our March guest designer Ann Chuang. 

Layers of ink - Wildflower Art Journal Page with watercoloring and stamping, by Anna-Karin Evaldsson.

I was in the mood for art journaling and wanted to use the new beautiful Simon Says Stamp Stronger Together set. The stamp set was in the March card kits, but you can also get it on its own. I decided to stick to just watercolors, stamping and some Paper Artsy Infusions colored stains.

The technique works perfectly for cards too, just use a smaller paper and fewer of the stamps. It is best to work on watercolor paper.

Layers of ink - Wildflower Art Journal Page with watercoloring and stamping, by Anna-Karin Evaldsson. Color with PaperArtsy Infusions.

Working on a cotton-rag watercolor page in my Dina Wakley Media Journal, I misted it heavily with water and then sprinkled in a tiny bit of Infusions powders. I have pierced a hole in the lid since you need so little powder. I used: Golden Sands, Emerald Isle and Olive Tree. Mist with more water to help the Infusions to blend. I dabbed off some of the brown pigment with a paper towel, to get a lighter look. This is a great background to start out from, it is interesting without being busy.

Layers of ink - Wildflower Art Journal Page with watercoloring and stamping, by Anna-Karin Evaldsson.

When dry, stamp flowers and leaves from Stronger Together on the page. I place a Sizzix cutting pad underneath the page to give me an even surface to stamp on. I still messed up some of the stamping, and added extra leaves to cover it up.

Layers of ink - Wildflower Art Journal Page with watercoloring and stamping, by Anna-Karin Evaldsson.

Mix two or three shades of green, a yellow green, a middle green and a darker cooler green. Paint the leaves, dropping in lighter and darker colors.
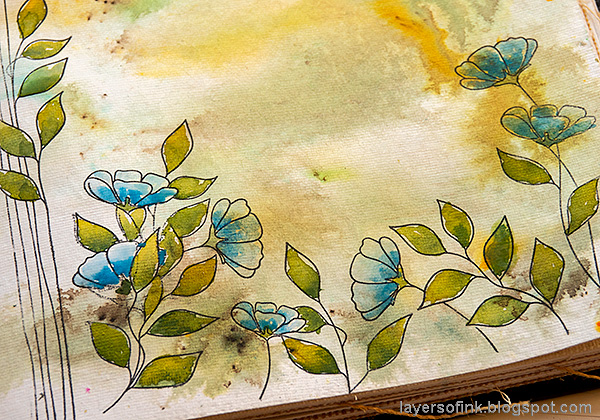
Layers of ink - Wildflower Art Journal Page with watercoloring and stamping, by Anna-Karin Evaldsson. Watercolor the flowers.

The flowers were painted with Cerulean blue, using more water for the lighter areas.

Layers of ink - Wildflower Art Journal Page with watercoloring and stamping, by Anna-Karin Evaldsson.

Paint a darker soil area at the bottom of the page and then splatter the background with the dark brown paint.

Layers of ink - Wildflower Art Journal Page with watercoloring and stamping, by Anna-Karin Evaldsson.

When everything was completely dry, I added details with a black pen and a white gel pen. You can also fill in some lines that have disappeared. The white pen works great when it comes to adding highlights.
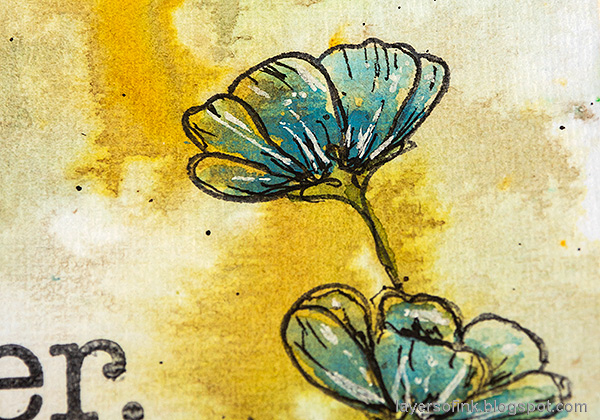
Layers of ink - Wildflower Art Journal Page with watercoloring and stamping, by Anna-Karin Evaldsson.

Here's a close up where you can see my added black scribbles and the white lines and dots.

Layers of ink - Wildflower Art Journal Page with watercoloring and stamping, by Anna-Karin Evaldsson.

Painting on a tinted background gives a nice muted look to the watercolor paint, since the background shows through.

Layers of ink - Wildflower Art Journal Page with watercoloring and stamping, by Anna-Karin Evaldsson.

I just love the look of this type of fluid and transparent background.

Layers of ink - Wildflower Art Journal Page with watercoloring and stamping, by Anna-Karin Evaldsson.

The stamping on the flower to the left got messed up, so I stamped another leaf in front of the flower, covering up the area that did get stamped.

Layers of ink - Wildflower Art Journal Page with watercoloring and stamping, by Anna-Karin Evaldsson. Stronger Together.

Adding strands of grass gives extra life to the page and helps to ground the flowers to the page.

I hope you will join us this week in our Bit O' Green challenge. As always, you have a chance to win a $50 gift voucher to do some fun shopping at Simon Says Stamp. You have until next Monday 8am Ohio time. 1pm UK time, 2 pm CET to join in.


Don't forget to follow Simon Says Stamp on Instagram, they post great stuff daily. 


Do you use Instagram? If so please add #sssmchallenge so we can see your entries there too.


Thank you so much for taking the time to visit my blog today!  

Happy crafting!

Anna-Karin

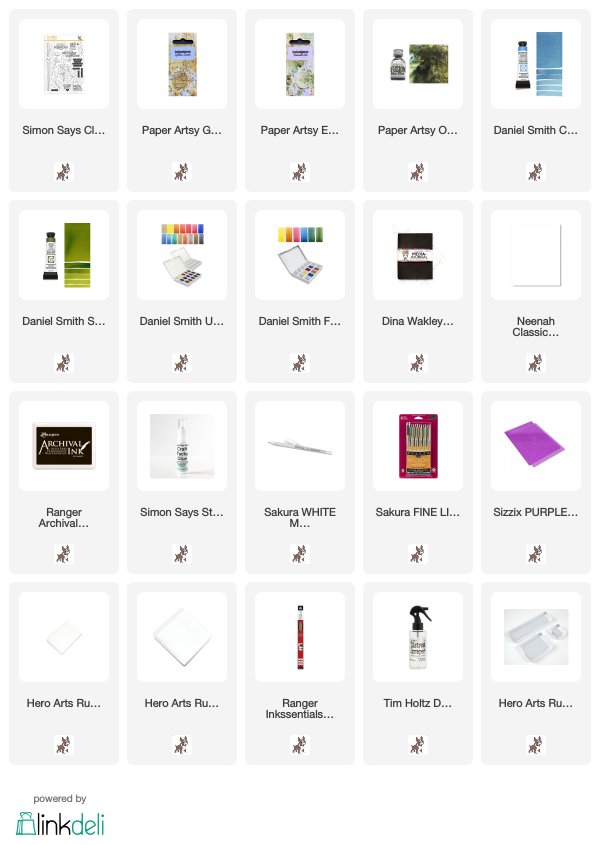
Supplies:

* Please note: the links are affiliate links, for which I receive a small percentage of sales generated by the link, at no extra cost to you.


Sunday, March 8, 2020

Kindness Tag

Hi friends! Today I have a tutorial on the Simon Says Stamp Store blog, for a mixed media tag, with an important message. Here is a sneak peek:

Layers of ink - Kindness Tag Mixed Media Tutorial by Anna-Karin Evaldsson.

I love to make die cuts a part of the background, by almost baking them into the background. If you touch the tag it doesn’t seem as if the die cuts have been glued onto the background, but more like they were there from the start. This works with almost any type of die and is very effective with detailed dies, such as the Rose Scribble Trio by Memory Box that I used here. I made a tag, but the techniques work just as well for cardmaking or art journaling.

You can find all the steps and details on the Simon Says Stamp blog.


Thank you so much for visiting today!

See you again tomorrow!

Anna-Karin

Supplies:

* Please note: the links are affiliate links, for which I receive a small percentage of sales generated by the link, at no extra cost to you.

Saturday, March 7, 2020

SSS Lucky To Know You Blog Hop

Hello crafters! I am so happy to be a part of the Simon Says Stamp Lucky To Know You blog hop, to celebrate the brand new release. If you are following along the hop, you should have come here from the very creative JD Collins.


The Lucky To Know You release is full of fantastic and versatile dies, stamps, stencils, sentiment cards, and sequins. There is also a free gift with every order (until supplies last), if you use the code WLY777 or FLF584, you get the Wooly Lucky stamp set or the Color the World enamel pin. This promotion will expire on 3/8 at 11:59 pm EDT.

I made a canvas board and a shaker card, both are tutorial. Let's start with the canvas board.

Layers of ink - Gnome Home Mixed Media Canvas Tutorial by Anna-Karin Evaldsson.

When I saw the Mushroom House stencil I knew I wanted to turn it into a house for the Spring Gnomes and make a a canvas. I am giving this to my youngest, who was stamping hearts next to me while I was making it. He was a little disappointed that the gnomes didn't look like Transformers, but thought the idea of tiny spring Christmas santas/gnomes/elfs was a fun. So this is where the Christmas gnomes live during spring, when they don't need to work so hard. There is a lot of old folklore in Sweden about these 'nissar', who helped out at farms, but could also be naughty. The canvas board is 5x7 in and I used Distress Paint to color it. You can turn it into a card instead.

Layers of ink - Gnome Home Mixed Media Canvas Tutorial by Anna-Karin Evaldsson. Add gesso to the stencil.

Coat the board with gesso and let dry.

Layers of ink - Gnome Home Mixed Media Canvas Tutorial by Anna-Karin Evaldsson. Apply texture paste through the mushroom home.

Apply texture paste through the stencil to create the base for the gnome home.

Layers of ink - Gnome Home Mixed Media Canvas Tutorial by Anna-Karin Evaldsson.

You can stamp the gnomes directly onto the background, but since the background has texture due to the gesso, I stamped them on tissue paper.

Layers of ink - Gnome Home Mixed Media Canvas Tutorial by Anna-Karin Evaldsson.

Tear around the edges of the tissue paper. A torn edge disappears better on the background. Add a layer of gloss multi-medium to the background. Carefully place one of the gnomes onto the board and then add a second layer of multi-medium on top. Don't use matte medium, since the tissue paper will show through more then.

Layers of ink - Gnome Home Mixed Media Canvas Tutorial by Anna-Karin Evaldsson.

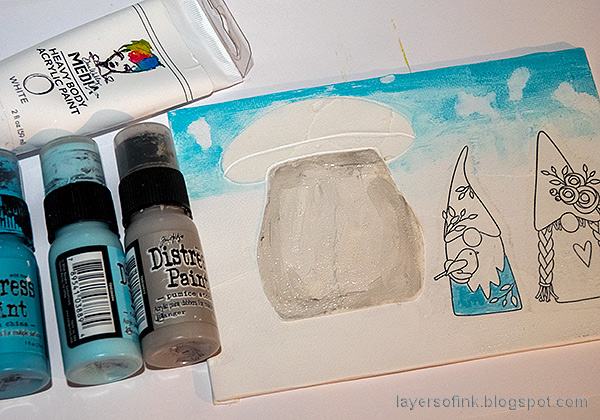
Start coloring the board with Distress Paint. I misted water in the sky area to create the clouds. Pumice Stone was mixed with white since I wanted a lighter first layer on the house.

Layers of ink - Gnome Home Mixed Media Canvas Tutorial by Anna-Karin Evaldsson. Paint the gnomes.

Continue adding color and don't worry if you are not happy with the result. At this stage of the project it often looks a bit flat.

Layers of ink - Gnome Home Mixed Media Canvas Tutorial by Anna-Karin Evaldsson.

Add a door to the house with red paint and the Mushroom House stencil.

Layers of ink - Gnome Home Mixed Media Canvas Tutorial by Anna-Karin Evaldsson. Add details to the mushroom house.

The Mushroom House stencil is meant to build up layers and detail of the house. Next add stones around the door and a window and door knob. I also added black dots to the roof.

Layers of ink - Gnome Home Mixed Media Canvas Tutorial by Anna-Karin Evaldsson.

Mix a little green paint into texture paste and apply through the tree design on the stencil.

Layers of ink - Gnome Home Mixed Media Canvas Tutorial by Anna-Karin Evaldsson. Add shading to the gnomes and their home.

Shadows and shading give dimension and life to the scene. Here you can decide if you want a softer and cleaner look - then stick to lighter shadows, for instance, done with grey paint. Or a somewhat more distressed look - then add darker shadows and messier textures. I also dry brushed green moss on the house.

Layers of ink - Gnome Home Mixed Media Canvas Tutorial by Anna-Karin Evaldsson.

Stamp a sentiment from the Just Because Word Mix 2 to the sky and stamp the You Matter stamp here and there on the background. Splatter white paint on the canvas. I tore rough masks with printer paper for the house and the gnomes, so that they didn't get too many splatters.

Layers of ink - Gnome Home Mixed Media Canvas Tutorial by Anna-Karin Evaldsson. Pen work.

Finally add details with a black pen and a white gel pen. You can use the black pen to fill in some of the lines that disappeared in the painting process, and to add more shading. I also added some details to the house. The white gel pen works great for highlights.

Layers of ink - Gnome Home Mixed Media Canvas Tutorial by Anna-Karin Evaldsson.

This is such a great sentiment and works for many types of projects.

Layers of ink - Gnome Home Mixed Media Canvas Tutorial by Anna-Karin Evaldsson. Mushroom house roof.

The texture paste gives just the right rough texture to the mushroom house. 

Layers of ink - Gnome Home Mixed Media Canvas Tutorial by Anna-Karin Evaldsson. Gnome house with moss.

Here you can also see some of the rough lines that I added.

Layers of ink - Gnome Home Mixed Media Canvas Tutorial by Anna-Karin Evaldsson.

The pens can also be used for grass. The white splattered dots are meant to be flowers.

Layers of ink - Gnome Home Mixed Media Canvas Tutorial by Anna-Karin Evaldsson. Spring gnomes.

These Spring Gnomes are so cute. The stamp set has three gnomes, but I only had space for two. There are also coordinating dies.

Layers of ink - Gnome Home Mixed Media Canvas Tutorial by Anna-Karin Evaldsson.

You don't need to be very precise when painting. If you look at these roses, you can see that I painted the quickly and then later added some line work.

Layers of ink - Gnome Home Mixed Media Canvas Tutorial by Anna-Karin Evaldsson.

I try to pick specific sentiments from the You Matter stamp, which I want to be more visible than the rest. 


Layers of ink - Easter Egg Shaker Card Tutorial by Anna-Karin Evaldsson.

Next, I made a quick and simple shaker Easter card. It's mainly green and yellow and I wanted something different than the more common pastel shades for Easter. The egg is from the Faberge Egg set.


Layers of ink - Gnome Home Mixed Media Canvas Tutorial by Anna-Karin Evaldsson.

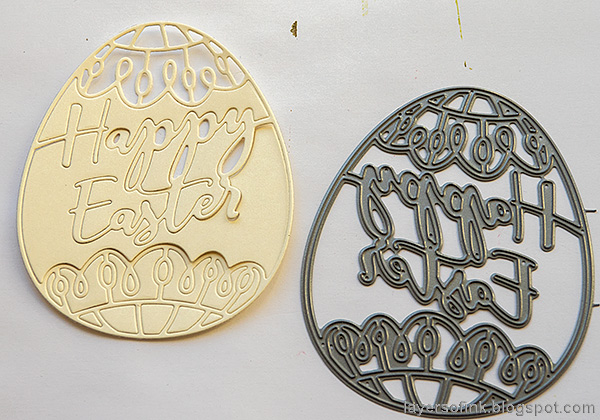
Start by diecutting the egg from one of Tim Holtz's Abandoned papers.

Layers of ink - Gnome Home Mixed Media Canvas Tutorial by Anna-Karin Evaldsson.

Next, die cut the detailed design from heavystock paper.

Layers of ink - Gnome Home Mixed Media Canvas Tutorial by Anna-Karin Evaldsson.

Ink the egg with Mustard Seed.

Layers of ink - Gnome Home Mixed Media Canvas Tutorial by Anna-Karin Evaldsson.

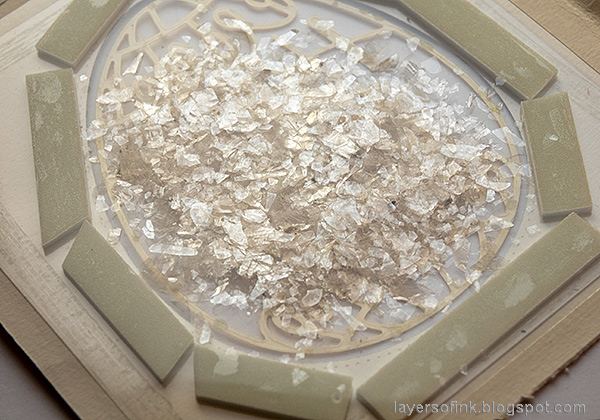
Fold a piece of cardstock and die cut the egg window from the front. Glue a piece of acetate to the back. Place foam tape around the window and fill with mica flakes. Add a second piece of acetate on top to seal the shaker.

Layers of ink - Gnome Home Mixed Media Canvas Tutorial by Anna-Karin Evaldsson.

You can also add color to the acetate or place a colored paper behind the shaker, but I wanted my shaker to look like a real egg, with just the decor and the mica flakes showing.

Layers of ink - Gnome Home Mixed Media Canvas Tutorial by Anna-Karin Evaldsson.

Glue the detailed egg to the front. I also added a piece of lace and to strings of twine. The mica gives great shine to the card.

Don't miss all the inspiration along the hop and of course there are prizes to be won too. SSS is giving away a $25 coupon to every stop on the hop and all you need to do is comment. Winners will be posted on the Simon Says Stamp blog on Wednesday 11 March.

This is the second day of the blog hop and don't miss all the inspiration from the blog hop that was yesterday. There is also a Lucky To Know You gallery where you will find even more inspiration. You can also  link your own projects made with the release and there are galleries for all SSS releases, and for the card kits too.

This is the last stop of the hop. If you have missed any of the inspiration you can find all the links below:

Anna-Karin Evaldsson (you are here)


Thank you so much for taking the time to visit my blog today!  

Happy crafting!

Anna-Karin

Supplies:

* Please note: the links are affiliate links, for which I receive a small percentage of sales generated by the link, at no extra cost to you.