Hello everyone! I am very happy to be teaching a class at May Flaum's online Creative Retreat Winter 2014.
The Creative Retreat will be an online learning environment where you can learn from a wide variety of amazingly creative instructors, learn at your own pace, and do so from the comfort of your own home. Here's the link to the introduction page with all the information you need. Start your year with a dozen mini-classes, lots of inspiration and unlimited access.
I'll be doing a fun mixed-media tutorial for a mini-book, using inks, stamps and stencils and more.
These are the instructors:
Anna-Karin Evaldsson
Janna Werner
Lisa Dickinson
Nichol Magouirk
Riikka Kovasin
Shari Carroll
Tammy Tutterow
Wanda Guess
May Flaum will also be joining in the fun with four brand new project tutorials.
For a limited time this class is available for just $20! You can pre-register here.
The classroom will be active (meaning, new content being added and all of the lessons being posted) between January 20-31. Students will not be limited or cut off from access after this time- the classroom will remain open and available for you to enjoy the materials at your own pace.
Included in class:
* Twelve separate lessons delivered between January 20-31st featuring projects and techniques ranging from scrapbook layouts to mixed media canvases
* Videos, photos, tutorials, and loads of ideas will be shared within these lessons!
* Unlimited access to the classroom to re-visit these materials and work at your own pace
* E-mail access to lead instructor May Flaum
* E-mails notifying you of new materials being added to classroom, as well as additional inspiration and ideas
note: not every lesson will have a video component, but there will be at least six video lessons
For more information about the instructors, click here!
I hope you will join in the fun!
Anna-Karin
Wednesday, January 8, 2014
Tuesday, January 7, 2014
Inky Artist Trading Blocks Tutorial
Hello and welcome! Today I am sharing a step-by-step tutorial on the Sizzix blog, for four Inky Photo Artist Trading Blocks.

To see how I made these and to see all the sides of the blocks, head over to the Sizzix blog.
Thank you for stopping by!
Anna-Karin
Monday, January 6, 2014
Something Blue Art Journal Page
Hello everyone! Our first challenge of the year at Simon Says Stamp Monday Challenge Blog is Something Blue. Lots of opportunities with this one!
I made a monochromatic blue art journal page, about not feeling blue. I used stencils and stamps mainly by Wendy Vecchi. I have a thing for trees and love the Layered Tree stencil. You can make differently shaped trees with it, I decided to make a fairly tall tree. Another two of Wendy's stencils, From the Garden and Flourishes, were used to create the garden at the base of the page, sponging Cornflower Blue ink through the stencils. I wasn't planning on using a photo at first, then I saw this one on my desk and decided to use it. It's a teenage photo of me, I've used it a few times before.
The background was covered in gesso using a palette knife and I pressed a Wendy Vecchi sentiment stamp repeatedly into the gesso ('All that we are is the result of what we have imagined'). Immediately clean your stamp, otherwise the gesso is hard to remove. The background was painted with watered-down Salty Ocean and Broken China Distress Paint, misting it with water to create a droplets and a dreamy feeling. The raindrops were stencilled with Cornflower Blue ink and the title was stamped with Jet Black ink. I stamped the background randomly with an art text stamp from the New York Art set.
One flower and the sentiments were stamped in black for contrast. Love the look of this flower. I also made a border with torn washi tape by Kelly Purkey.
I made a mat for the photo with washi tape, using both the Teal Polka Dots and the Triangles.
'Shine' comes from another stencil by Wendy. Here you can also see the effect of misting the paint with water before it dried.
It was this sentiment stamp that inspired the page. I also added some extra journaling after taking photos of the page. Use a little piece of washi tape as an arrow.
The sentiments stamped into the gesso add a layered dimension to the background. Love these cool Industrious sticker arrows by Tim Holtz.
I hope you will join is in our first challenge of the year! As always, one random participant wins a $50 gift voucher from Simon Says Stamp. And don't miss the fabulous inspiration by all the design team members, the variety of projects each week never cease to amaze me.


I hope you will join is in our first challenge of the year! As always, one random participant wins a $50 gift voucher from Simon Says Stamp. And don't miss the fabulous inspiration by all the design team members, the variety of projects each week never cease to amaze me.
Thank you for stopping by!
Happy crafting!
Anna-Karin
Supplies:
Stamps: Stampers Anonymous Wendy Vecchi: Forever Art, New York Art, Metro Art, Well Worn Art; Stampers Anonymous Tim Holtz: Worn Text
Ink: Ranger Archival Ink: Jet Black, Cornflower Blue
Paint: Distress Paint: Broken China, Salty Ocean
Stencils: Wendy Vecchi Stampers Anonymous: Layered Tree, From the Garden, Flourishes, Classic Words; The Crafter's Workshop: Mini Raindrops
Medium: Claudine Hellmuth Gesso
Embellishments: Kelly Purkey Washi tape: Triangles, Teal Polka Dots; Tim Holtz Idea-ology: Borders Industrious stickers, Chit Chat stickers, Label Letters
Sunday, January 5, 2014
Scenic Stamping Bike Art Journal
Hello and welcome! For the first month of the year we have make your own theme challenge at Craft a Scene, so any scene goes.
I started making a card using two photo stamps from Darkroom Door, but while I was inking them, I realised there was a bike featured on both stamps (it is a small parked bike on the second scene) and got the idea of using them in my art journal instead. I made a page about bikes. Because the stamps were city stamps and I was colouring them in black and white, I gave the page a grungy look.
The photo stamps were stamped with Jet Black ink on Ranger's Specialty Stamping paper. Great detail. I inked them using a Colorbox Stylus Tool, starting with Weather Vane grey and then continuing with Black Soot. After deciding to use the in my art journal, I added a little bit of brown (Pumice Stone and Frayed Burlap) to make them blend in better with the background.
Highlights were added with a white gel pen as usual, and a little bit of mist with white pigment ink dry-brushed on the scene. I used my Stampscapes stamps to add a little bit more life to the scenes, a biker on this one, and birds in the sky on both of them. The birds were stamped with Watering Can ink. I also stamped a few words on the scenes.
There is a bike parked to the right here, but I wanted a more visible bike in this scene too, which is why I stamped the biker there. There are two bikers on the stamp, but I only inked up one. A bit of shadow was added with grey ink under the biker.
I worked in my small Dylusions journal and the background was first covered in gesso using a palette knife. I pressed the lid of a paint bottle into the gesso repeatedly to create the textured circles. The background was painted with watered-down Distress Paints (Pumice Stone, Iced Spruce), with a little bit of watery Black Soot dropped in here and there.
I stamped a bike from the Enjoy the Ride set on the scene, most of the sentiments also come from that set. Washi tape was used for the finishing touches.
Such a great sentiment!
I hope you will join us this month, stamping any scene.
Happy Stamping!
Anna-Karin
Supplies:
Surfaces: Ranger Dyan Reaveley Small Creative Journal; Ranger Specialty Stamping paper; old dictionary paper
Stamps: Darkroom Door: Laneway, Bicycle, Enjoy the Ride, Brick Wall Background, New York Vol. 1; Stampscapes: Ducks in Formation 027A, Mountain Bikers 060A, Flock 112A
Dies: Sizzix: Gadget Gears, Mini Gears
Ink: Archival Ink: Jet Black, Watering Can; Distress Ink: Pumice Stone, Black Soot, Frayed Burlap; Jenni Bowlin: Weather Vane
Paint: Distress Paint: Pumice Stone, Iced Spruce, Black Soot
Stencil: The Crafter's Workshop Ronda Palazzari: Mini Arrows & Hearts, Mini Confetti
Embellishments: Tim Holtz Idea-ology: Elements Tissue Tape, Laboratorie Tissue Tape


The sentiments were stamped with black ink. The background was stamped with a brick stamp and Watering Can ink, holding the stamp in my hand instead of mounting it on an acrylic block. It gives a random impression and also makes it easier to avoid stamping too much on the sentiments. I used two stencils by Ronda Palazzari for the arrows and the black dots and lines, together with Watering Can and Jet Black ink. Gears were die cut from dictionary paper, inked with Pumice Stone and placed under the scenic images. 'Amsterdam' was also cut out from dictionary paper.


I hope you will join us this month, stamping any scene.
Happy Stamping!
Anna-Karin
Supplies:
Surfaces: Ranger Dyan Reaveley Small Creative Journal; Ranger Specialty Stamping paper; old dictionary paper
Stamps: Darkroom Door: Laneway, Bicycle, Enjoy the Ride, Brick Wall Background, New York Vol. 1; Stampscapes: Ducks in Formation 027A, Mountain Bikers 060A, Flock 112A
Dies: Sizzix: Gadget Gears, Mini Gears
Ink: Archival Ink: Jet Black, Watering Can; Distress Ink: Pumice Stone, Black Soot, Frayed Burlap; Jenni Bowlin: Weather Vane
Paint: Distress Paint: Pumice Stone, Iced Spruce, Black Soot
Stencil: The Crafter's Workshop Ronda Palazzari: Mini Arrows & Hearts, Mini Confetti
Embellishments: Tim Holtz Idea-ology: Elements Tissue Tape, Laboratorie Tissue Tape
CSI case file #104 - A White Paper
Hello everyone! The first CSI: Color, Stories, Inspiration challenge of the year is up. CSI is also turning two years old, I am happy to have been on the DT from the start and can clearly remember making my first layout. If you have never done the challenge, I hope you will. This week's case file:

My layout:

I really liked all the frames on the inspiration photo and used that on my layout too. From the evidence I used: frames, bird, hearts, and polka dots. The journaling is framed and is about smiles and art. There is more journaling at the back of the layout. When I was looking through some photos for the case file I came up on these, which are some of the first photos I took of my son drawing with crayons, something he's been doing almost every day since then. I called the layout 'A White Paper', because of all the things you can create with just a white paper and some crayons.
To fit with the theme, I used crayons on the background too, namely my Gelatos. A light wash of blue was painted on the background first and when that was dry, I just drew some random lines, pretty similar to what he was drawing on the papers in the photo. For the photos, I stamped a frame on acetate with white Stazon ink, also adding a circle.


Happy scrapping!
Anna-Karin
Supplies:
Surfaces: Derwent Hot Press Watercolour paper; acetate
Dies: Sizzix/7 Gypsies: Gypsy Frames stamp/die combo
Stamps: Hero Arts: Brushed Frame K5785, Remember AC028, My Favorite AC030, Time AC029, Texture and Shape LP283; Stampers Anonymous Wendy Vecchi: Art Comforts, New York Art, The Purpose of Art
Ink: Ranger Adirondack: Stream pigment ink; Archival Ink: Chrome Yellow, Jet Black; Distress Ink: Worn Lipstick; Tsukineko Stazon Cotton White
Paint: Faber-Castell Gelatos: Lemon, Watermelon, Aqua Dolce
Embellishments: Tim Holtz Idea-ology: Label Letters; Studio Calico: Tiny Hearts wood veneer; Kelly Purkey washi tape: Name & Date, Teal Polka Dots
Friday, January 3, 2014
2013 Favourite Posts Part 2
Hello again and Happy New Year! Today I am continuing my favourite posts of 2013 - you can see the first part here, again I picked 2 or 3 projects a month.
July
Summer Burlap Panel Tutorial - I did a fun patterned paper transfer technique on this burlap panel, combined with some favourite dies and embellishments.
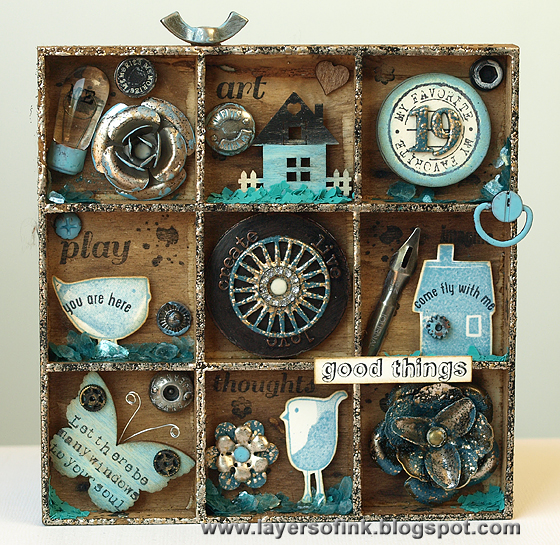
Tiny Stamps and Trinkets Shadow Box - I had fun making this altered Prima packaging shadow box, using a lot of small embellishments and stamps.
August
Dotty Gelli Print ATC Book - I got a gelli plate and I've been having lots of fun with it. This was one of my first projects with it, an ATC mini-book with quotes about summer, and some of my favourite stamps.
A Stroll in the Park - This is one of my favourite scenic stamping pieces of the year. The rich colours came out very nice.
September
Be Happy - I like the playfulness of this layout, using gelli prints, and stamps and dies from Simon Says Stamp.
Art Journaling Tutorial - I really like the size of the small Dylusions journal, and started doing some art journaling. This post has two pages and two ATCs, made for Simon Says Stamp Stamptember Blog Hop.
October
A Spooky Night Shadow Box - This configurations box was so much fun to decorate and fill with spooky little details.
Altered Wooden Blocks - I was real happy with these altered blocks, using Darkroom Door Stamps and some fun mixed-media techniques.
November
Advent Calendar - This interactive Advent calendar made from Eileen Hull's Candy Drawer die was another favourite.
Christmas Daily Worn Journal - I love Tim Holtz Worn Covers, since they make a great base for mini-books. This was my December Daily journal. I also made a Book of Random Things, with another worn cover.
December
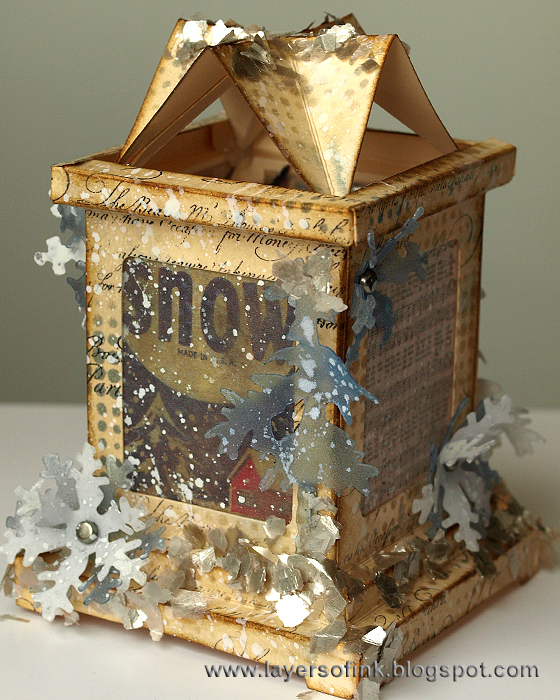
Winter Luminary (12 tags of 2013) - My version of Tim Holtz 12 tags of 2013 December, a winter luminary. I was also very happy to have this picked as one of the winners for that month.
Gesso Dry Embossing - This was another of my favourite tutorials during, a fun dry embossing technique that works with any embossing folder.
Time for a new year with new projects!
Thank you for stopping by!
Anna-Karin
July
Summer Burlap Panel Tutorial - I did a fun patterned paper transfer technique on this burlap panel, combined with some favourite dies and embellishments.
Tiny Stamps and Trinkets Shadow Box - I had fun making this altered Prima packaging shadow box, using a lot of small embellishments and stamps.
August
Dotty Gelli Print ATC Book - I got a gelli plate and I've been having lots of fun with it. This was one of my first projects with it, an ATC mini-book with quotes about summer, and some of my favourite stamps.
A Stroll in the Park - This is one of my favourite scenic stamping pieces of the year. The rich colours came out very nice.
September
Be Happy - I like the playfulness of this layout, using gelli prints, and stamps and dies from Simon Says Stamp.
Art Journaling Tutorial - I really like the size of the small Dylusions journal, and started doing some art journaling. This post has two pages and two ATCs, made for Simon Says Stamp Stamptember Blog Hop.
October
A Spooky Night Shadow Box - This configurations box was so much fun to decorate and fill with spooky little details.
Altered Wooden Blocks - I was real happy with these altered blocks, using Darkroom Door Stamps and some fun mixed-media techniques.
November
Advent Calendar - This interactive Advent calendar made from Eileen Hull's Candy Drawer die was another favourite.
Christmas Daily Worn Journal - I love Tim Holtz Worn Covers, since they make a great base for mini-books. This was my December Daily journal. I also made a Book of Random Things, with another worn cover.
December
Winter Luminary (12 tags of 2013) - My version of Tim Holtz 12 tags of 2013 December, a winter luminary. I was also very happy to have this picked as one of the winners for that month.
Time for a new year with new projects!
Thank you for stopping by!
Anna-Karin
Wednesday, January 1, 2014
Year in Review Layout
Hello and welcome! The first day of a new year, hopefully a very good year. We are not having a challenge this week at Simon Says Stamp Monday Challenge Blog, but the team is still posting inspiration. On Monday we'll be back with a normal challenge again.

The theme for the inspiration for today is to use old favourite supplies. I combined a bunch of old favourite products on this layout. I like to do year in review layouts, and sometimes also mini-books, at the end of a year. I picked out several older Hero Arts stamps to build a Birch forest for us to sit in and reflect on the year 2013. Making scenes are another favourite thing of mine.

When building up layers of dye ink, start with the lightest shade and gradually build up colour, since dye inks are transparent. It is also easier to get a smooth application of darker inks if there is a lighter ink underneath. The Adirondack Lights dye inks are perfect for that first layer. I used a Colorbox Stylus Tool for the inking, which is what I normally use for my scenic stamping. You can use other ink-blending tools too. For a tutorial on scenic stamping colouring with dye inks have a look at this post. I used Slate and a Ranger craft nib, to colour the grey on the trunks. The tree die cuts are from Simon Says Stamp, Tall and Small Forest Tree, love the thin branches.


I wish I had one of these little birds on my shoulder in real life!

Even though there isn't a challenge this week, you can of course still go shopping at Simon Says Stamp.
Thank you for the visit! I hope you will all have a very inky and stampy year 2014!! And lots of fun!
Anna-Karin
Supplies:
Surfaces: Ranger Specialty Stamping Paper
Stamps: Hero Arts: Tree Trunks S5477, Bird Trio LP139, Fabulous Florish S5449, Old Letter Writing S4878, Calendar D5791, Months 331485
Ink: Ranger Adirondack dye ink: Aqua, Stonewashed, Denim, Willow, Lettuce, Pesto, Salmon, Mountain Rose, Slate, Meadow; Archival Ink: Fern Green; Tsukineko: Versamark
Embossing powder: Ranger Clear
Dies: Simon Says Stamp: Tall Forest Tree, Small Forest Tree, Mini Hearts Set, Happy, Life, Family, Love; Sizzix: Word Play, Tag & Bookplates
Tools: Sizzix: Big Shot, Magnetic Platform; Colorbox Stylus Tool; Ranger Craft Nib
Embellishments: Tim Holtz: Crinkle Ribbon
Subscribe to:
Posts (Atom)