Hello crafters! It is Monday again and I hope you had a good weekend. School starts again here tomorrow. Today I have a fun shaker tag with multiple windows to share.
Please note: this post has affiliate links, for which I receive a small percentage of sales generated by the link, at no extra cost to you.
Our theme this week at the Simon Says Stamp Monday Challenge Blog is Shake It Up. Shakers are always such fun to make and I still remember making my first shaker card years ago. I hope you will join us and don't miss the project by our January guest designer Monica aka My Bonnet Bee.
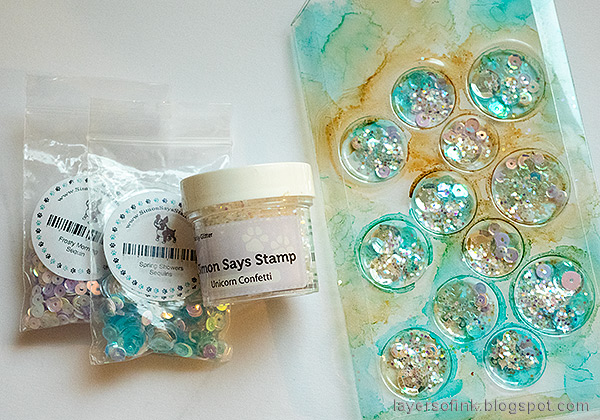
I recycled a piece of Tim Holtz idea-ology packaging to make my shaker tag. The blister pack forms windows in different sizes and gives a fun look to the shaker. You can fill the windows with different things: beads, sequins, mica flakes and glitter. I used sequins and glitter. Some of the glitter will sneak out of the windows, but I like the look since it gives almost a double shaker effect.
I think my packaging came from
idea-ology Sprocket Gears and usually save interesting packaging like this. Cut a tag from heavystock paper and cut the upper corners on both the packaging and the tag with
We R Memory Keepers Angle Corner Chomper. I used a
Crop-a-dile to cut the holes.
Color the packaging lightly with alcohol ink. I used Latte and Pool ink.
Ink the tag with Distress Ink and mist lightly with water.
The snowflakes were die cut with Simon Says Stamp
Aidan Snowflake and
Winter Flurries, from
Tim Holtz Winter Deco Sheets and
Simon Says Stamp Pawsitively Velvet paper. The deco sheets were adhered to cardstock first, for stability.
Slip the paper tag into the slots on the packaging and staple the edges. I also added staples here and there among the windows and covered the staples with snowflakes.
The sequins will stay put in the windows, but some of the glitter will sneak out. If you want to avoid that, don't use glitter, use more staples or use glue instead of placing the paper tag in the packaging slots. I liked the effect.
There is a mix of snowflake and normal sequins.
The resist snowflakes are now behind the plastic layer with the alcohol coloring. The pearls were meant to be in the center of the snowflake. They must have shifted since I photographed the tag before the adhesive was dry. I have fixed it now.
The tag is very shiny and glittery.
The combination of glittery deco sheet snowflakes and white velvet snowflakes add interest.
I hope you will join us this week in our Shake It Up challenge. You have a chance to win a $25 gift voucher to do some fun shopping at Simon Says Stamp. You have until Monday 8am Ohio time. 1pm UK time, 2 pm CET to join in.
Do you use Instagram? If so please add #sssmchallenge so we can see your entries there too.
Thank you so much for stopping by here today!
Happy crafting!
Anna-Karin
Supplies:
* Please note: the links are affiliate links, for which I receive a small percentage of sales generated by the link, at no extra cost to you.


No comments:
Post a Comment
Thank you so much for leaving a comment! Happy Crafting!