Tuesday, September 21, 2021

Foxglove Tag Tutorial

Hi friends! I have a sweet foxglove tutorial to share with you today. Foxgloves are such pretty flowers and I always stop to look whenever I see one.

Please note: this post has affiliate links, for which I receive a small percentage of sales generated by the link, at no extra cost to you.

Layers of ink - Foxglove Tag Tutorial by Anna-Karin Evaldsson.

I used products from the Simon Says Stamp STAMPtember® release for this tag. At first I meant to use the foxgloves on a different background, but it was too busy and they disappeared on it. A dry embossed background can add instant interest and texture, while still being neutral.

Layers of ink - Foxglove Tag Tutorial by Anna-Karin Evaldsson.

Start by die cutting the Fine Foxglove from watercolor paper. I die cut one batch of extra flowers, you can use even more flowers if you want to.

Layers of ink - Foxglove Tag Tutorial by Anna-Karin Evaldsson. Color with Tombow markers.

Color the flowers and stems with Tombow markers. I scribbled the markers on a clear acrylic block and picked up with a paint brush. Darker details were added directly with the markers. 

Layers of ink - Foxglove Tag Tutorial by Anna-Karin Evaldsson.

Shade the flowers and leaves with ball embosser tools. I used the Tonic Craft Tool set.

Layers of ink - Foxglove Tag Tutorial by Anna-Karin Evaldsson.

Glue the flowers to the stems. I decided to make one of the shorter, which is why there are no flowers at the top of the right-hand flower. I later cut off the green top.

Layers of ink - Foxglove Tag Tutorial by Anna-Karin Evaldsson.

Add highlights with a white gel pen and darker dots and lines with Tombows and a black pen. It is easier to do this step before you shape the flowers, but I forgot.

Layers of ink - Foxglove Tag Tutorial by Anna-Karin Evaldsson. Dry emboss the background.

Apply Distress Ink to a non-stick craft sheet and press a heavystock tag into the ink. Immediately place it in the Triangle Burst 3-D folder and dry emboss. This is such an amazing design.

Layers of ink - Foxglove Tag Tutorial by Anna-Karin Evaldsson. Ink with Distress Ink.

When dry, ink with Frayed Burlap and Ground Espresso.

Layers of ink - Foxglove Tag Tutorial by Anna-Karin Evaldsson.

Apply a little Sizzix Gold Luster Wax to the tag, with your finger. This step gives a really nice metallic shine.

Layers of ink - Foxglove Tag Tutorial by Anna-Karin Evaldsson.

Tie lace trim to the top. The dry embossed background gave enough interest, while not being too busy for the foxgloves.

Layers of ink - Foxglove Tag Tutorial by Anna-Karin Evaldsson. Add ideaology ephemera.

I added a little collection of Tim Holtz idea-ology Field Notes ephemera, inking the edges first. Paint was rubbed into the letters on the Thought Token.

Layers of ink - Foxglove Tag Tutorial by Anna-Karin Evaldsson.

Try to think of the shading when coloring the flowers, but aim for a loose look. No need for perfection.

Layers of ink - Foxglove Tag Tutorial by Anna-Karin Evaldsson.

The leaves comes alive with several shades of green, and some white and green lines.

Layers of ink - Foxglove Tag Tutorial by Anna-Karin Evaldsson.

The sentiment comes from the Simon Says Stamp Laugh In Flowers set. 

Layers of ink - Foxglove Tag Tutorial by Anna-Karin Evaldsson.

This is one of those projects which people will want to reach out and touch, since it has all that texture and dimension.


Also, don't miss all the STAMPtember® inspiration, surprises and exclusive products during the month. There has also been a huge Simon Says Stamp release for STAMPtember®, with stamps, dies, stencils, inks and paper products.


Thank you so much for taking the time to stop by here today! 

Happy crafting!

Anna-Karin

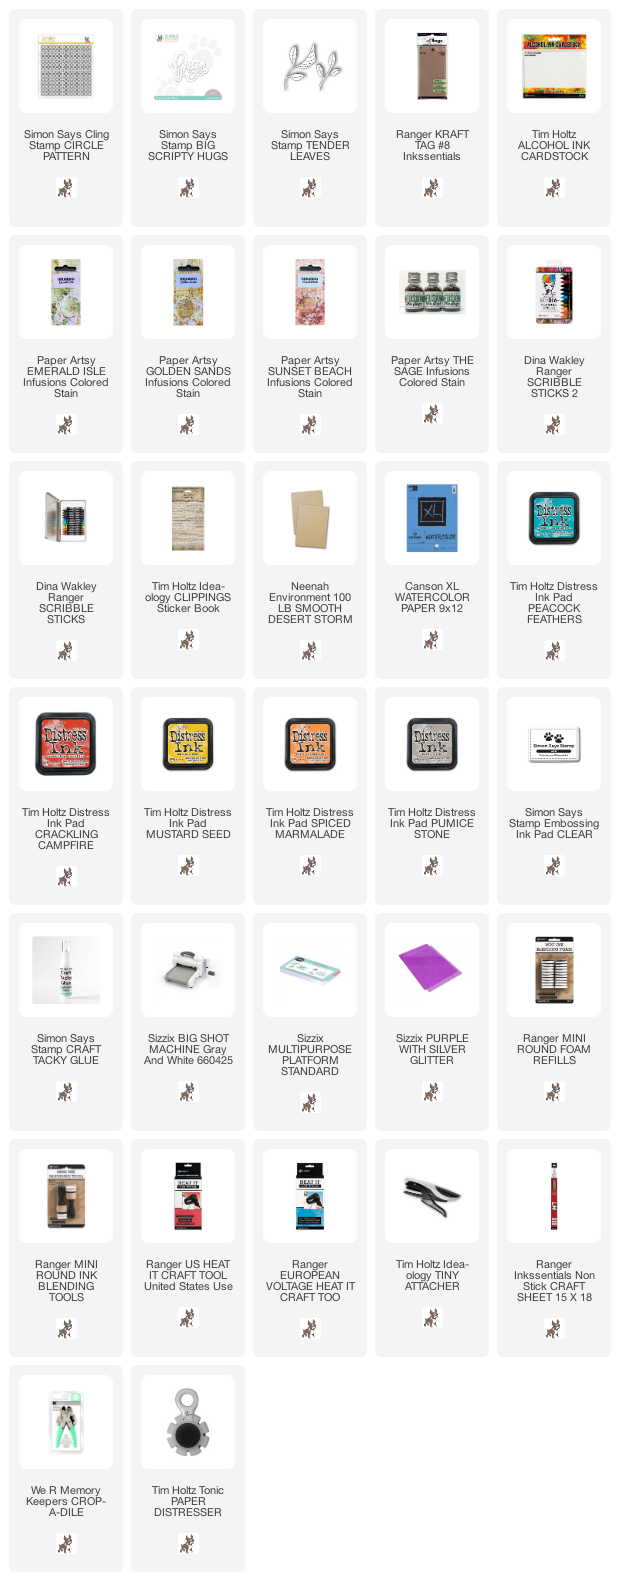
Supplies:

* Please note: the links are affiliate links, for which I receive a small percentage of sales generated by the link, at no extra cost to you.
Monday, September 20, 2021

Stitched Canvas Tag Tutorial

 Hello friends! I hope you are well and had a good weekend. Our theme this week at the Simon Says Stamp Monday Challenge Blog is 'Stitch it'. 

Please note: this post has affiliate links, for which I receive a small percentage of sales generated by the link, at no extra cost to you.

I like to stitch on my projects, since it gives a great texture and feel to the project. You can use real or faux stitching. I am looking forward to seeing everyone's creations. Don't miss the project by our September guest designer Susanne with her blog Susanne's Blog.

Layers of ink - Stitched Canvas Tag Tutorial by Anna-Karin Evaldsson.

I made a tag with a partial canvas background and some messy machine stitching. I also stitched the buttons to the tag. 

Layers of ink - Stitched Canvas Tag Tutorial by Anna-Karin Evaldsson.

I started out with these canvas scraps. They had been colored with Paper Artsy Infusions Color Stains and there was some white embossed letters on them too.

Layers of ink - Stitched Canvas Tag Tutorial by Anna-Karin Evaldsson. Stamp with Simon Says Stamp Circle Pattern.

Adhere a piece to a kraft tag and white emboss the Simon Says Stamp Circle Pattern.

Layers of ink - Stitched Canvas Tag Tutorial by Anna-Karin Evaldsson.

Tear a three more pieces of canvas and stitch everything to the background with messy stitching. Pull the threads out on the front.

Layers of ink - Stitched Canvas Tag Tutorial by Anna-Karin Evaldsson.

Add color and texture by splattering with Scribble Sticks.

Layers of ink - Stitched Canvas Tag Tutorial by Anna-Karin Evaldsson.

Die cut the Tender Leaves from watercolor paper. The paper had been smooched with Distress Inks. I think it was Pumice Stone, Spiced Marmalade, Mustard Seed and Crackling Campfire. 

Layers of ink - Stitched Canvas Tag Tutorial by Anna-Karin Evaldsson.

Simon Says Stamp Big Scripty Hugs was die cut from gloss cardstock and inked with Peacock Feathers.

Layers of ink - Stitched Canvas Tag Tutorial by Anna-Karin Evaldsson.

Four buttons were stitched to the tag with orange thread. I also added some other bits and pieces. This is a very tactile project.

Layers of ink - Stitched Canvas Tag Tutorial by Anna-Karin Evaldsson.

I usually use either white or black thread when stitching, it was fun with some color for a change.

Layers of ink - Stitched Canvas Tag Tutorial by Anna-Karin Evaldsson.

Dye ink looks wonderful on glossy paper.

I hope you will join us this week in our Stitch It challenge. You have a chance to win a $25 gift voucher to do some fun shopping at Simon Says Stamp. You have until Monday 8am Ohio time. 1pm UK time, 2 pm CET to join in.


Do you use Instagram? If so please add #sssmchallenge so we can see your entries there too.


Also, don't miss all the STAMPtember® inspiration, surprises and exclusive products during the month. There has also been a huge Simon Says Stamp release for STAMPtember®, with stamps, dies, stencils, inks and paper products.

Thank you so much for taking the time to stop by here today! 

Happy crafting!

Anna-Karin

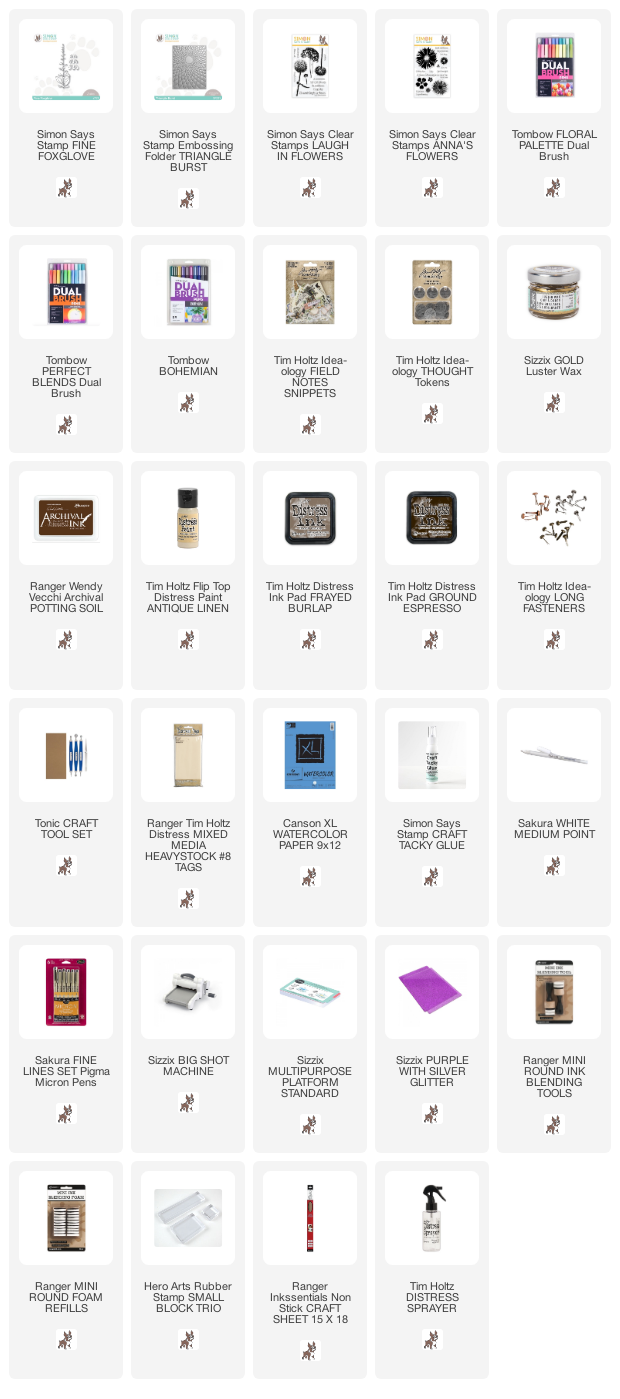
Supplies:

* Please note: the links are affiliate links, for which I receive a small percentage of sales generated by the link, at no extra cost to you.

Wednesday, September 15, 2021

Nature Journal and Box Tutorial

Hi friends! I took a lovely forest walk this evening and found an amazingly beautiful mushroom. It was a pity that I had forgotten my brand new nature journal and box at home, or I could have documented the mushroom in the journal.

Please note: this post has affiliate links, for which I receive a small percentage of sales generated by the link, at no extra cost to you.

Layers of ink - Nature Journal and Box Tutorial by Anna-Karin Evaldsson. With Eileen Hull Folio die.
This month the Eileen Hull Inspiration Team is creating nature journals. Don't miss all the inspiration and clever ways of using sides. I made a journal/sketchbook and a box or holder to keep it in. The box was made with the Eileen's Sizzix Folio Journal die. 

Layers of ink - Nature Journal and Box Tutorial by Anna-Karin Evaldsson. With Eileen Hull Folio die.

Inside there is a sketchbook and a pencil. This pencil just happened to be in front of me on my desk and the right length. It is not my ordinary sketching pencil.

Layers of ink - Nature Journal and Box Tutorial by Anna-Karin Evaldsson. With Eileen Hull Folio die.

Start by die cutting one folio journal piece. For a journal you need two, but for the box we only need one. You also need two side pieces.

Layers of ink - Nature Journal and Box Tutorial by Anna-Karin Evaldsson. With Eileen Hull Folio die.

Glue burlap to the flap part and a piece of Tim Holtz Backdrops paper to the rest of the box.

Layers of ink - Nature Journal and Box Tutorial by Anna-Karin Evaldsson. With Eileen Hull Folio die.

Stamp the front with stamps from Simon Says Stamp Forest Scenery and All Seasons Tree, using green and brown inks.

Layers of ink - Nature Journal and Box Tutorial by Anna-Karin Evaldsson. With Simon Says Stamp Forest Scenery stamp set.

Stamp sentiments with black ink.

Layers of ink - Nature Journal and Box Tutorial by Anna-Karin Evaldsson. With Eileen Hull Folio die.

Glue design tape to the side pieces.

Layers of ink - Nature Journal and Box Tutorial by Anna-Karin Evaldsson. With Eileen Hull Folio die.

Attach them as seen here, with Wonder Tape or another strong adhesive. 

Layers of ink - Nature Journal and Box Tutorial by Anna-Karin Evaldsson. With Eileen Hull Folio die.

Adhere the front side and you have a box. Ink the edges.

Layers of ink - Nature Journal and Box Tutorial by Anna-Karin Evaldsson. With Eileen Hull Folio die.

I added a little green ink and doodled lines to create hills.

Layers of ink - Nature Journal and Box Tutorial by Anna-Karin Evaldsson. With Eileen Hull Folio die.

Some of the trees were stamped with second generation stamping, to create a sense of perspective. 

Layers of ink - Nature Journal and Box Tutorial by Anna-Karin Evaldsson. With Eileen Hull Folio die.

This ledger paper adds just the right amount of interest to the background and fit well for a journal.

Layers of ink - Nature Journal and Box Tutorial by Anna-Karin Evaldsson. With Eileen Hull Folio die.

Stamp the deer and branch trees with Potting Soil ink.

Layers of ink - Nature Journal and Box Tutorial by Anna-Karin Evaldsson. With Eileen Hull Folio die.

The title of the box. The wonder of nature never ceases to amaze me.

Layers of ink - Nature Journal and Box Tutorial by Anna-Karin Evaldsson. With Eileen Hull Sizzix Folio die.

Fold the flap down and tie with twine.

Layers of ink - Nature Journal and Box Tutorial by Anna-Karin Evaldsson. With Eileen Hull Folio die.

The back was left simple, with just a piece of Design Tape added.

Layers of ink - Nature Journal and Box Tutorial by Anna-Karin Evaldsson. With Eileen Hull Folio die.

Inside, there is a journal/sketchbook and a pencil.

Layers of ink - Nature Journal and Box Tutorial by Anna-Karin Evaldsson. With Eileen Hull Folio die.

The sketchbook fits perfectly in the box together with a pencil. If you want to, you can cover up the holes on the inside of the flap, from the spine of the original folio journal.

Layers of ink - Nature Journal and Box Tutorial by Anna-Karin Evaldsson. With Eileen Hull Folio die.

For the book, I cut covers from mat board and adhered a piece of Backdrops paper to each cover. I like the organic shapes on this paper. Round the outer corners and punch holes with a crop-a-dile.

Layers of ink - Nature Journal and Box Tutorial by Anna-Karin Evaldsson. With Eileen Hull Folio die.

Cut sketch or watercolor paper just a little smaller than the covers and round the outer corners. Bind with rings.

Layers of ink - Nature Journal and Box Tutorial by Anna-Karin Evaldsson. With Eileen Hull Folio die.

The book was embellished with Tim Holtz Field Notes Ephemera and a Thought Token.

Layers of ink - Nature Journal and Box Tutorial by Anna-Karin Evaldsson. With Eileen Hull Folio die.

To see more Folio Journal examples check out my: Floral Folio, Foiled Folio, Vintage Floral Folio, and Foil and Stencil Album.


Thank you so much for taking the time to stop by here today! 

Happy crafting!

Anna-Karin

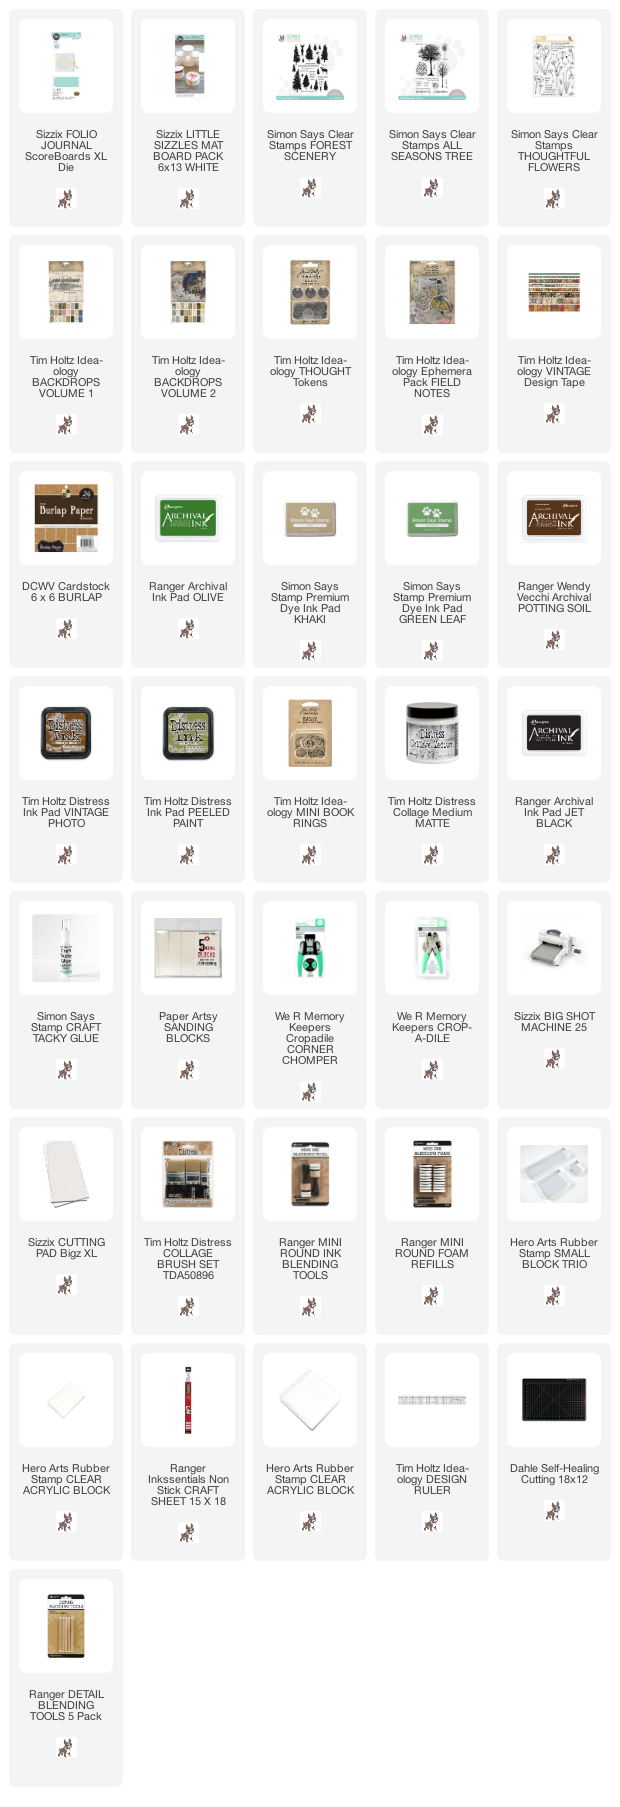
Supplies:

* Please note: the links are affiliate links, for which I receive a small percentage of sales generated by the link, at no extra cost to you.