Sunday, October 24, 2021

Halloween Village Tutorial

Hi friends! I hope you are well! Today I have a fun home decor Halloween tutorial to share with you. I made a new addition to my little village.

Please note: this post has affiliate links, for which I receive a small percentage of sales generated by the link, at no extra cost to you.

Layers of ink - Halloween Village Ornament Tutorial by Anna-Karin Evaldsson.

I have a paper village on a large shelf above the TV, with a whole lot of houses that I made through the years. Some are there all the time, some are seasonal. I wanted to add a new Halloween-themed item and made this homestead, on a wood disc base. It has lots of fun little details.

Layers of ink - Halloween Village Ornament Tutorial by Anna-Karin Evaldsson. Die cut Tim Holtz Paper Village.

Start by die cutting two of the houses from Tim Holtz Paper Village, using heavystock paper.

Layers of ink - Halloween Village Ornament Tutorial by Anna-Karin Evaldsson. Ink with Distress Ink.

Ink with Distress Ink. I wanted an old, warm wooden look.

Layers of ink - Halloween Village Ornament Tutorial by Anna-Karin Evaldsson.

Stamp with Simon Says Stamp Wood Planks background, to create wooden houses. I used both Watering Can and Jet Black ink.

Layers of ink - Halloween Village Ornament Tutorial by Anna-Karin Evaldsson.

Distress by stamping with the texture stamp from Simon Says Stamp All Seasons Tree. 

Layers of ink - Halloween Village Ornament Tutorial by Anna-Karin Evaldsson.

I covered the windows with modeling film and inked with Latte and Teakwood alcohol ink. Add some curtains/spider web with mummy cloth.

Layers of ink - Halloween Village Ornament Tutorial by Anna-Karin Evaldsson.

Assemble the houses and add roofs die cut from black kraft stock paper.

Layers of ink - Halloween Village Ornament Tutorial by Anna-Karin Evaldsson.

Die cut about five of each of the gravestones from Tim's Halloween Vault set. Glue them together with matte medium.

Layers of ink - Halloween Village Ornament Tutorial by Anna-Karin Evaldsson.

Cover them with Grit-Paste on all sides and edges. Let dry.

Layers of ink - Halloween Village Ornament Tutorial by Anna-Karin Evaldsson.

When dry, paint with Hickory Smoke and dry brush with Black Soot and Peeled Paint until you get the look of rough old stones.

Layers of ink - Halloween Village Ornament Tutorial by Anna-Karin Evaldsson. Emboss with Gunmetal Ranger powder.

Die cut the fence from Halloween Vault series and emboss on both sides with Gunmetal powder. Always be very careful when using a heat tool and never touch the melted powder until it has cooled down completely.

Layers of ink - Halloween Village Ornament Tutorial by Anna-Karin Evaldsson. Color mica flakes.

Dye Tim Holtz Mica Flakes with alcohol ink, so that you have an orange/yellow, red and green batch. 

Layers of ink - Halloween Village Ornament Tutorial by Anna-Karin Evaldsson.

I forgot to take a photo of the next step. Mix a little black paint into texture paste and smear a thick layer on top of the wooden disc. You can also use a different type of base. 

Layers of ink - Halloween Village Ornament Tutorial by Anna-Karin Evaldsson.

Press the houses, gravestones, a twig, a skull and two pumpkins into the paste, which will act as a glue. Sprinkle mica flakes on top and press lightly.

Layers of ink - Halloween Village Ornament Tutorial by Anna-Karin Evaldsson.

These pumpkins are so cute.

Layers of ink - Halloween Village Ornament Tutorial by Anna-Karin Evaldsson.

I wrote initials, RIP and a date on the three gravestones, with black paint. The texture on these is pretty cool.

Layers of ink - Halloween Village Ornament Tutorial by Anna-Karin Evaldsson.

The mica flakes are meant to look like leaves. They look nice against that black gooey ground.

Layers of ink - Halloween Village Ornament Tutorial by Anna-Karin Evaldsson.

I added a Curiosities Clippings Sticker number to the main house and left the door ajar.

Layers of ink - Halloween Village Ornament Tutorial by Anna-Karin Evaldsson.

The tall house is leaning slightly, as are the gravestones.

Layers of ink - Halloween Village Ornament Tutorial by Anna-Karin Evaldsson.

I glued the fence pieces around the back.

Layers of ink - Halloween Village Ornament Tutorial by Anna-Karin Evaldsson.

The embossing powder makes the fence almost look like real metal.

Layers of ink - Halloween Village Ornament Tutorial by Anna-Karin Evaldsson.

I found a twig outdoors which worked well as a spooky tree.

Layers of ink - Halloween Village Ornament Tutorial by Anna-Karin Evaldsson.

The third gravestone is placed behind the houses and might be hard to see.

Layers of ink - Halloween Village Ornament Tutorial by Anna-Karin Evaldsson.

I hope you enjoyed this tutorial! I have another two homesteads done on wooden disc, namely the Winter Village and Spring Village.


Thank you so much for taking the time to stop by here today! I'll see you again tomorrow.

Happy crafting!

Anna-Karin

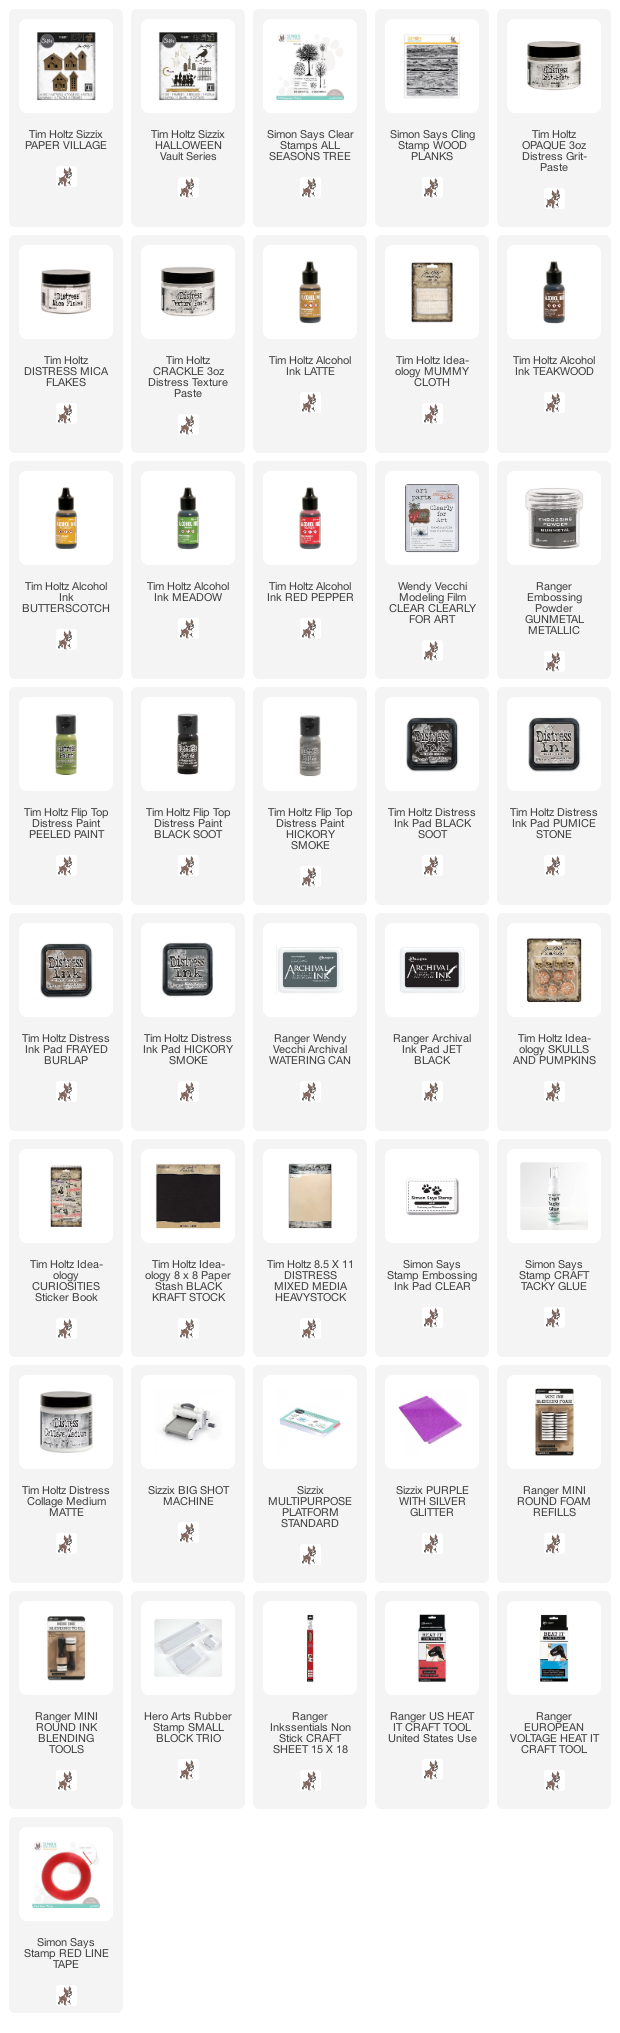
Supplies:

* Please note: the links are affiliate links, for which I receive a small percentage of sales generated by the link, at no extra cost to you.

Monday, October 18, 2021

Ghost House Tag Tutorial

Hello friends and welcome back to another Simon Says Stamp Monday Challenge. I hope your weekend has been good.

Please note: this post has affiliate links, for which I receive a small percentage of sales generated by the link, at no extra cost to you.

This week we have a Spooky/Halloween theme at the Simon Says Stamp Monday Challenge blog. I hope you will join us! Don't miss the project by our October guest designer Lyla aka A Chief’s Wife’s Heart’s A Fire.

Layers of ink - Spooky House Tag Tutorial by Anna-Karin Evaldsson.

I made a Halloween tag this week with a haunted house and lots of texture. There is also some heat embossing and a fun night-time inky sky.

Layers of ink - Spooky House Tag Tutorial by Anna-Karin Evaldsson.

Start by white embossing a spider web and a spider on a tag. Ink with various Distress Inks.

Layers of ink - Spooky House Tag Tutorial by Anna-Karin Evaldsson.

Mist and splatter with water.

Layers of ink - Spooky House Tag Tutorial by Anna-Karin Evaldsson. Add stars with a gel pen.

When dry, add stars with a white gel pen.

Layers of ink - Spooky House Tag Tutorial by Anna-Karin Evaldsson. Stamp with Simon Says Stamp Crackle Background stamp.

Stamp the ground with Simon Says Stamp Crackle Background. Stamp more than once to create denser crackles.

Layers of ink - Spooky House Tag Tutorial by Anna-Karin Evaldsson. Clear emboss.

Ink the ground with Hickory Smoke and emboss with clear embossing powder. The shiny, almost icy, ground gives a nice contrast to the sky.

Layers of ink - Spooky House Tag Tutorial by Anna-Karin Evaldsson. Die cut Tim Holtz Ghost Town 2.

Die cut one of the Tim Holtz Ghost Town 2 houses from heavystock paper.

Layers of ink - Spooky House Tag Tutorial by Anna-Karin Evaldsson.

Ink with Frayed Burlap.

Layers of ink - Spooky House Tag Tutorial by Anna-Karin Evaldsson. Emboss the roofs.

Ink the roofs again with Frayed Burlap and emboss with Ranger Hammered Mixed Media powder.

Layers of ink - Spooky House Tag Tutorial by Anna-Karin Evaldsson. Stamp with Simon Says Stamp Wood Planks Background.


Layers of ink - Spooky House Tag Tutorial by Anna-Karin Evaldsson.

Cut a piece of Clearly For Art Modeling film, or acetate, to fit behind the house. Ink with alcohol ink.

Layers of ink - Spooky House Tag Tutorial by Anna-Karin Evaldsson.

This becomes old and dirty windows. I also added some mummy cloth curtains.

Layers of ink - Spooky House Tag Tutorial by Anna-Karin Evaldsson.

Color the door and add details with a black marker. Stamp here and there with one of the texture stamps from Simon Says Stamp All Seasons Tree. This is meant to be a leaf stamp, but it works for many other things too.

Layers of ink - Spooky House Tag Tutorial by Anna-Karin Evaldsson. Die cut ghosts from vellum.

Die cut ghosts from vellum using the Tim Holtz Halloween Vault Series.

Layers of ink - Spooky House Tag Tutorial by Anna-Karin Evaldsson.

I also die cut some bats using the Halloween Vaults set. Tie a piece of folded over Design Tape to the top of the tag.

Layers of ink - Spooky House Tag Tutorial by Anna-Karin Evaldsson.

The roofs have a cool metallic texture.

Layers of ink - Spooky House Tag Tutorial by Anna-Karin Evaldsson.

I adhered the house with foam tape, for dimension. And of course it also has a street number.

Layers of ink - Spooky House Tag Tutorial by Anna-Karin Evaldsson.

I like that you can see a hint of the curtains.

Layers of ink - Spooky House Tag Tutorial by Anna-Karin Evaldsson.

The tag was finished with a couple of Clippings Stickers.

I hope you will join us this week in our Spooky/Halloween challenge. You have a chance to win a $25 gift voucher to do some fun shopping at Simon Says Stamp. You have until Monday 8am Ohio time. 1pm UK time, 2 pm CET to join in.


Do you use Instagram? If so please add #sssmchallenge so we can see your entries there too.


Thank you so much for visiting my blog today! 

Happy crafting!

Anna-Karin

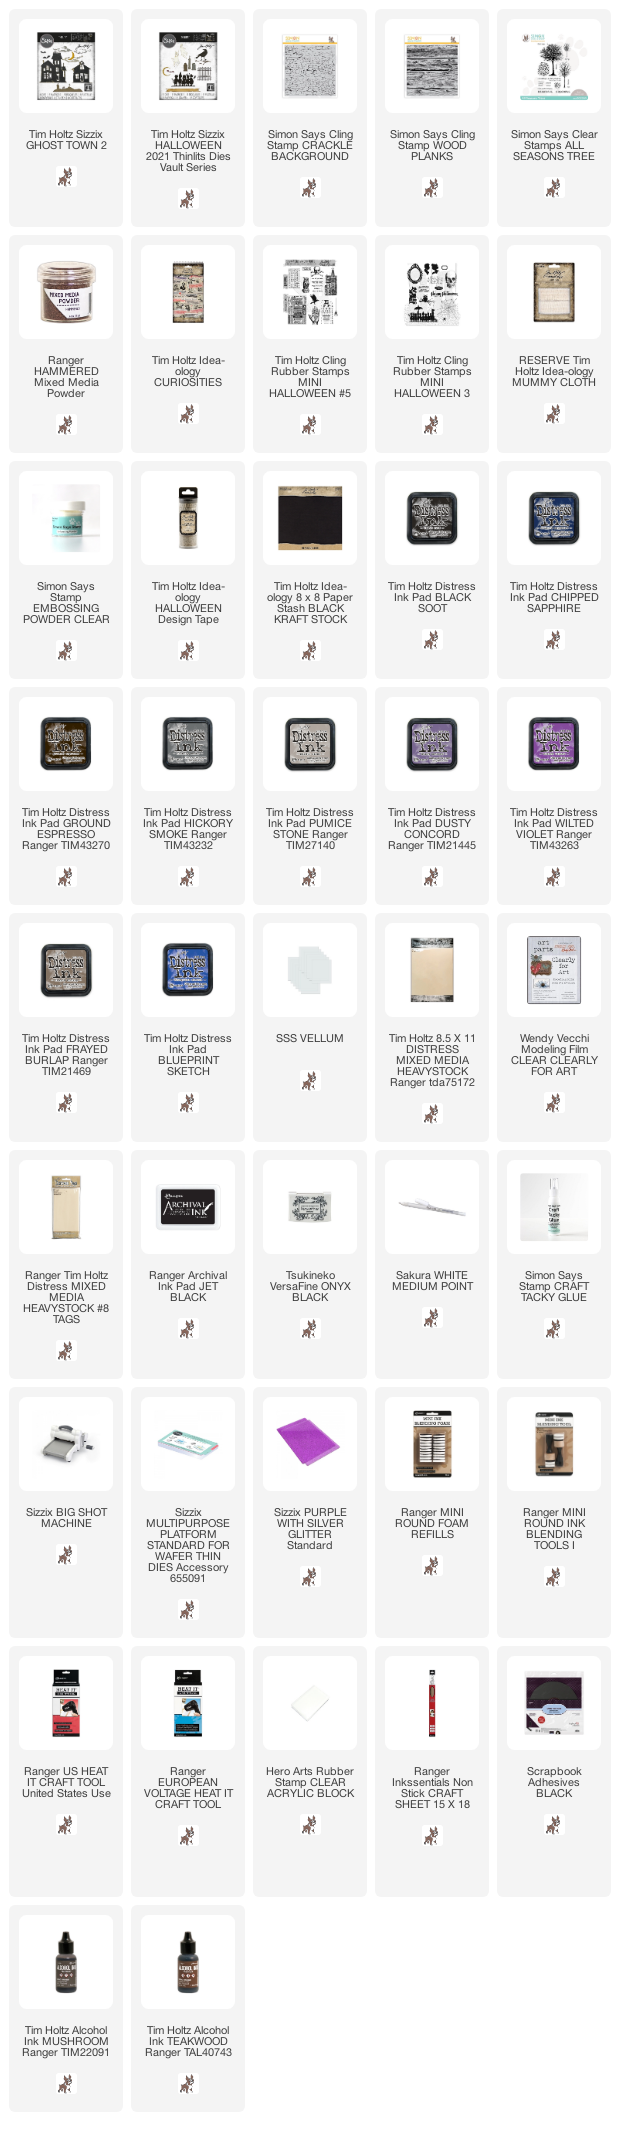
Supplies:

* Please note: the links are affiliate links, for which I receive a small percentage of sales generated by the link, at no extra cost to you.