Sunday, July 31, 2022

Mosaic Heart Tutorial

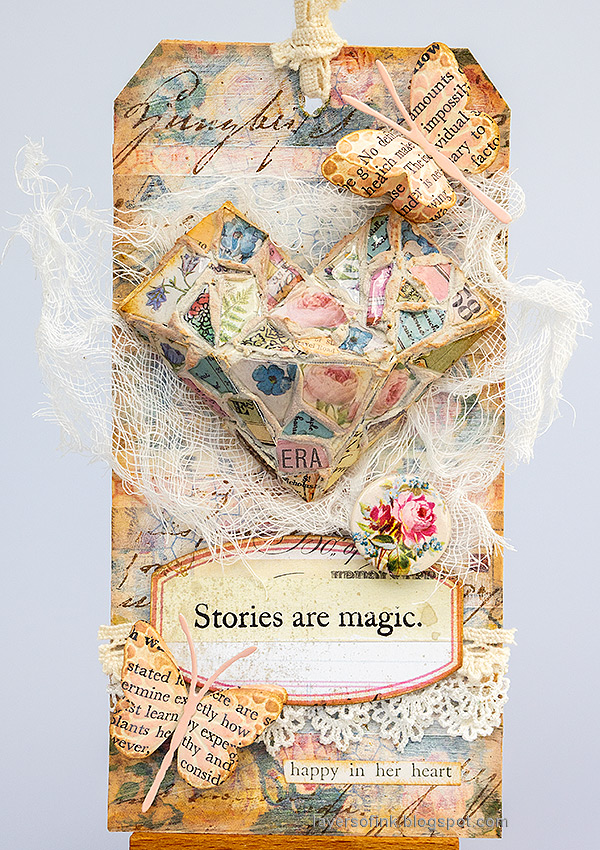
Hi friends! I hope you are well! I have a tag to share with a paper mosaic technique. 

Please note: this post has affiliate links, for which I receive a small percentage of sales generated by the link, at no extra cost to you.

Layers of ink - Paper Mosaic Heart Tutorial by Anna-Karin Evaldsson.

I made a heart, but you can use the technique for different types of projects and surfaces. If you use larger pieces of paper it is easy to cover an entire background with mosaic. This is also a perfect use for small paper scraps. 

Layers of ink - Paper Mosaic Heart Tutorial by Anna-Karin Evaldsson. Die cut Tim Holtz Faceted Heart.

Die cut Tim Holtz Faceted Heart from heavystock paper and assemble. 

Layers of ink - Paper Mosaic Heart Tutorial by Anna-Karin Evaldsson. Apply paper mosaic pieces.

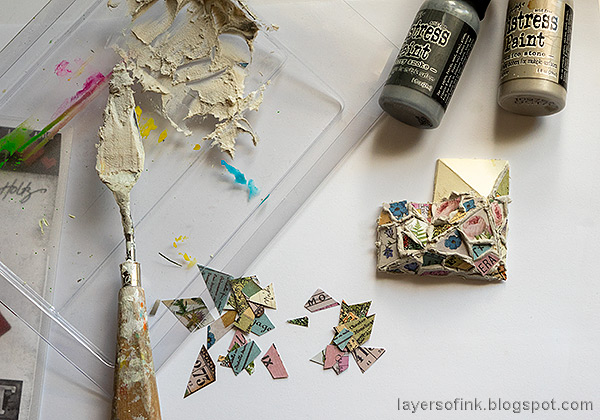
Mix a little Pumice Stone and Hickory Smoke paint into Distress Texture Paste to create grout. Cut paper into small pieces. I used Tim Holtz Pocket Cards and Journal Cards. Work one area at a time. Apply paste with a palette knife and then press the paper pieces into the grout. You might need to cut some of them so that they fit better. 

Layers of ink - Paper Mosaic Heart Tutorial by Anna-Karin Evaldsson.

Continue until you have covered the whole heart. Let dry.

Layers of ink - Paper Mosaic Heart Tutorial by Anna-Karin Evaldsson.

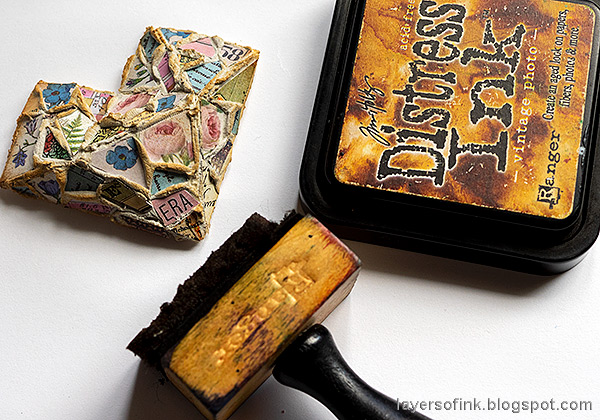
If you want to, you can ink the grout slightly.

Layers of ink - Paper Mosaic Heart Tutorial by Anna-Karin Evaldsson.

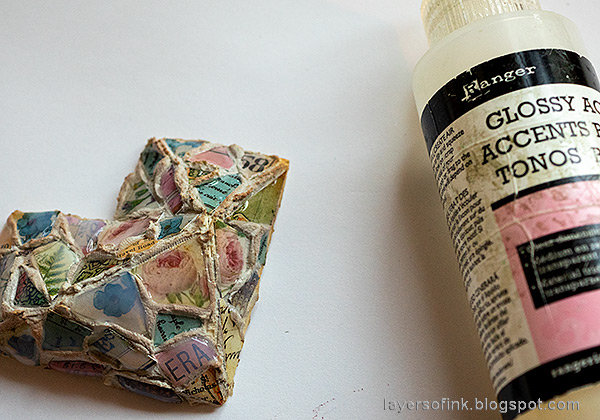
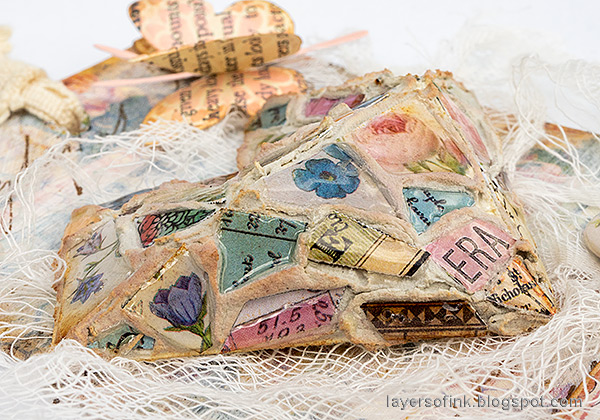
Next, add a relatively thick layer of Glossy Accents to all the paper pieces. This gives them a raised shiny surface and makes the patterns more visible. I worked one area at a time and left to dry for a while at an angle so that the Glossy Accents wouldn't be too uneven.

Layers of ink - Paper Mosaic Heart Tutorial by Anna-Karin Evaldsson. Add Tim Holtz design tape to the background.

Cover the background with Tim Holtz Design Tape. I added a layer of matte medium first and then another one on top, to make sure they were stuck.

Layers of ink - Paper Mosaic Heart Tutorial by Anna-Karin Evaldsson.

White wash with gesso.

Layers of ink - Paper Mosaic Heart Tutorial by Anna-Karin Evaldsson.

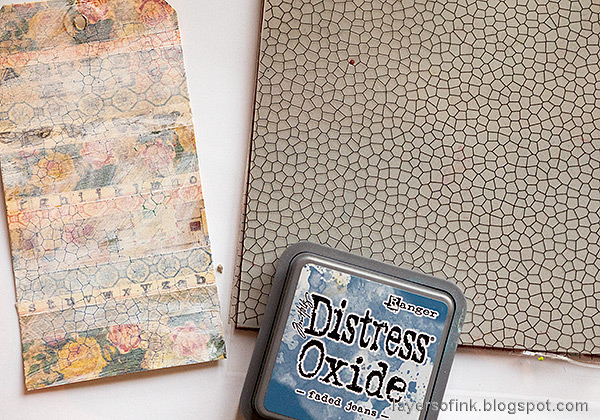
Stamp Simon Says Stamp Stain Glass Background here and there with Faded Jeans Oxide Ink.

Layers of ink - Paper Mosaic Heart Tutorial by Anna-Karin Evaldsson.

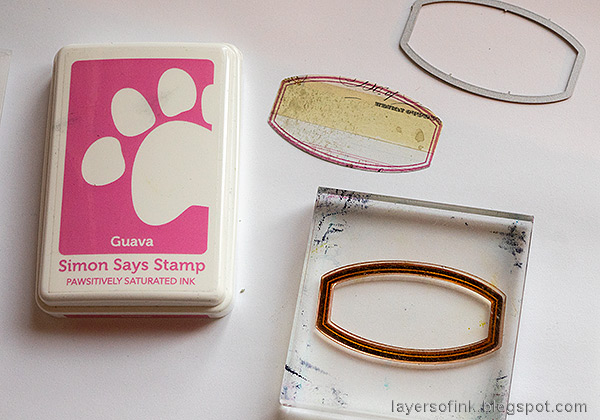
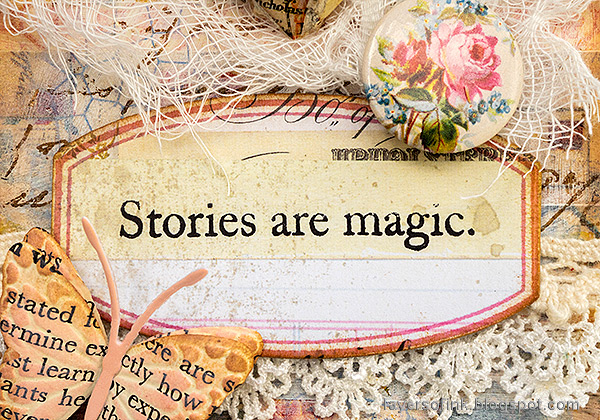
Stamp a label from Simon Says Stamp Mixed Labels with Guava Pawsitively Saturated ink on a piece of Journal Card and die cut with the coordinating die.

Layers of ink - Paper Mosaic Heart Tutorial by Anna-Karin Evaldsson. Die cut and emboss Simon Says Stamp Graceful Butterflies.

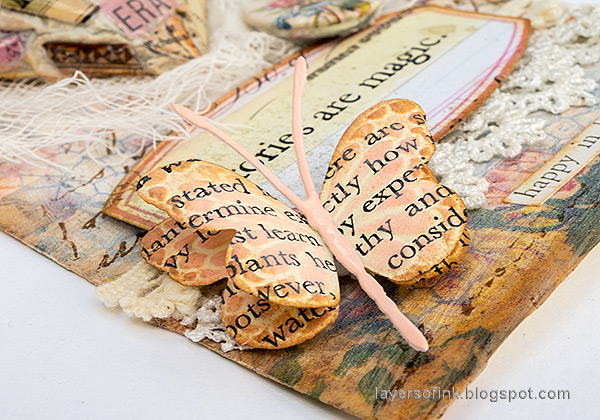
Die cut Simon Says Stamp Graceful Butterfly from old book paper and their bodies from glossy cardstock. The glossy cardstock had been inked with Saltwater Taffy Distress Ink. Emboss in the coordinating folder.

Layers of ink - Paper Mosaic Heart Tutorial by Anna-Karin Evaldsson.

Ink the butterflies with Taffy Saltwater Distress Oxide Ink and a little Vintage Photo ink. Shape the wings and glue together.

Layers of ink - Paper Mosaic Heart Tutorial by Anna-Karin Evaldsson.

I also stamped the background with Simon Says Stamp Old Letter and Potting Soil Archival Ink here and there.

Layers of ink - Paper Mosaic Heart Tutorial by Anna-Karin Evaldsson.

The glossy mosaic pieces look almost like glass or tiles and contrast nicely with the matte grout.

Layers of ink - Paper Mosaic Heart Tutorial by Anna-Karin Evaldsson.

I cut some of the pieces of paper to make sure that small images would show well and here and there you will find a word.

Layers of ink - Paper Mosaic Heart Tutorial by Anna-Karin Evaldsson.

Stamp a sentiment from Simon Says Stamp Mixed Labels. Add a few pieces of lace trim to the background and a Tim Holtz Mini Flair. Adhere the label with Simon Says Stamp 3D Foam Squares.

Layers of ink - Paper Mosaic Heart Tutorial by Anna-Karin Evaldsson.

I glued cheese cloth underneath the heart to separate it better from the background. 

Layers of ink - Paper Mosaic Heart Tutorial by Anna-Karin Evaldsson.

The butterflies were also adhered with foam squares. This Design Tape background is fun to do, and for more inspiration check out my Tape Mixed Media Background.


Thank you so much for taking the time to stop by here today! 

Happy crafting!

Anna-Karin

Supplies:

* Please note: the links are affiliate links, for which I receive a small percentage of sales generated by the link, at no extra cost to you.
No comments:

Post a Comment

Thank you so much for leaving a comment! Happy Crafting!