
Hi friends! I have a mixed media tag to share today, with a bunch of fun techniques, which can also be used for other types of projects.
Please note: this post has affiliate links, for which I receive a small percentage of sales generated by the link, at no extra cost to you.


Coat the tag with matte medium and apply torn pieces of Design Tape. Most of mine are placed vertically with a few horizontal pieces. It is Rose, Butterfly and Vintage design tape.

Apply gesso with a palette knife, using less on areas that you want to keep more visible.

When dry, paint with Distress Paint. Mist with water to make the paints blend.

When dry, stamp the Simon Says Stamp Solid Grid Background with embossing ink and emboss with Cracked Pistachio Distress Embossing Glaze.
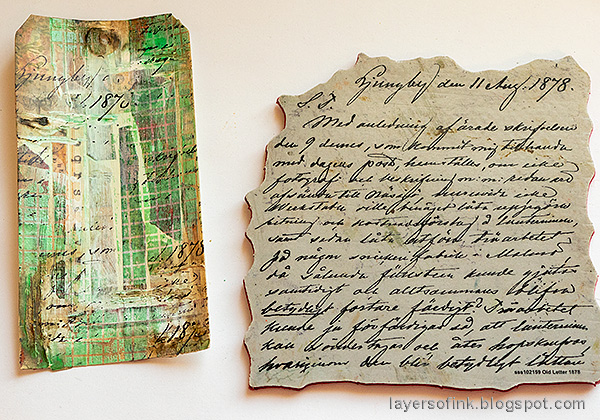
Stamp here and there with the Simon Says Stamp Old Letter background.

Finally, I added more squares with the Simon Says Stamp Mix and Match Squares stencil and texture paste.

The Etched Evening Blossom was die cut from Tim Holtz Backdrops paper.

Ink the flower with two shades of pink Distress Ink. The stamp with Worn Lipstick Distress Oxide ink and the Simon Says Stamp Halftone Circle background. Emboss with clear powder. I stitched a button in the center of the flower. The stem was inked with green shades and embossed with clear powder.

Die cut leaves with the Simon Says Stamp Tender Leaves die and ink.

The edges were inked with Vintage Photo Distress Ink and the mummy cloth was dyed with Distress Ink. I like that you can see the patters in the Design Tape through the other layers here and there.

The title was die cut with Tim Holtz Frienship Words Script, from Backdrops paper and black cardstock. I also used a piece of burlap, more dyed cheesecloth/mummy cloth, a sentiment from Simon Says Stamp Laugh in Flowers and some vintage buttons.

The flower stem was embossed with layers of clear powder, and the remaining leaves were only inked, giving a nice contrast.

Shape the flower a little bit and stitch a button to the center.
For more inspiration on Design Tape backgrounds check out my Shabby Chic Tag Tutorial.

Thank you so much for taking the time to stop by here today!
Happy crafting!
Anna-Karin
Supplies:
* Please note: the links are affiliate links, for which I receive a small percentage of sales generated by the link, at no extra cost to you.
* Please note: the links are affiliate links, for which I receive a small percentage of sales generated by the link, at no extra cost to you.
No comments:
Post a Comment
Thank you so much for leaving a comment! Happy Crafting!