
Hello everyone! I hope you all had a good weekend. We went to an art exhibition with sketches and finished paintings by a children's book illustrator. It was gorgeous. I particularly enjoyed seeing the sketches where pages were planned out in stages, and how much changed from the first sketch to the finished illustration. The ways in which art takes on its own life always interested me.

Since it is a new month, we also have a new guest designer and our November guest designer is Jo. I hope you will visit her wonderful blog Let's Art Journal, where she shares much inspiration and also gorgeous photos.

I made a forest inspired wrapped journal this week. I can't get enough of these journals and they are so fun to make and also perfect gifts. This one is going to my sister as a birthday gift. The background was created with a stencil, paint and a little bit of stamping, and reminded me of a forest, both in terms of colors and textures. The finished journal measures 4.7 x 5.1 in folded.
The journal is also inspired by a very cute squirrel that lives close to us, which I often spot when I am out walking.

Start by die cutting one Wrapped Journal by Sizzix / Eileen Hull from mat board. Die cut a second one from sticky-back canvas (I used white canvas, but the natural will work just as well). It won't be quite long enough, so you'll have to die cut the latter in two pieces. I placed the joint in the wrong place, since I was initially planning to wrap the journal the other way around. It would be better to have it on the flap that is covered, or, maybe even better, at the back. Glue down the canvas with matte medium.

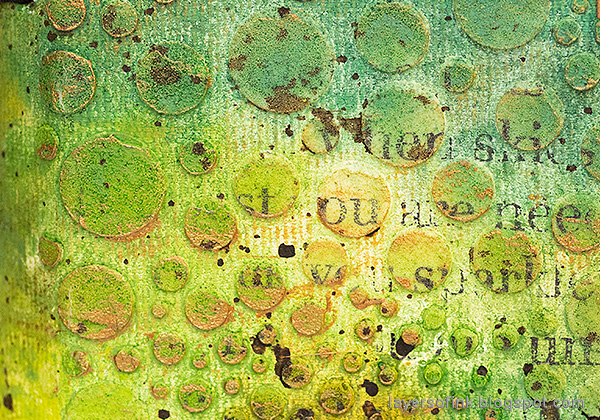
Coat the canvas with gesso and let dry, then apply texture paste through the Carabelle Studio Bulles stencil. I love the different sized circles on this stencil.

When the paste is dry, paint the background with: Pine Needles, Twisted Citron, Mowed Lawn and Peeled Paint Distress Paint. When the paint has dried, dry brush gold paint here and there and splatter with brown paint. Finally, add a little bit of stamping using the SSS You Matter stamp.
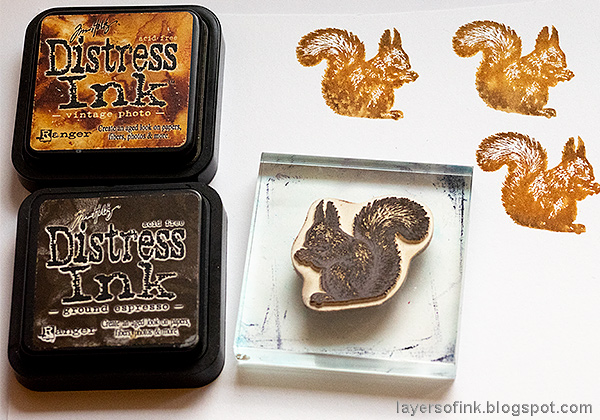
The cute Ecureuil stamp was first stamped with Distress Inks, inking up with two shades of brown and misting with water about four times. I stamped three impressions, since the technique I planned to use is unpredictable and I wanted to be able to choose the best one.
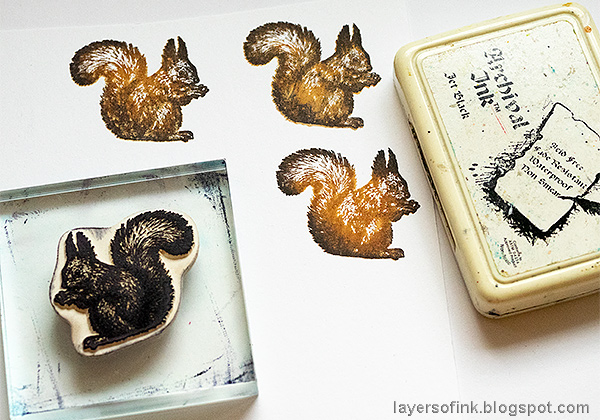
Ink the stamp with black ink and wipe some of it off. Use a stamp positioner and stamp directly on top of the Distress Ink impression. I use the EK Success Stamp-a-ma-jig, but you can also use Tim Holtz's stamp platform. This is a favorite technique of mine that I hadn't done in quite a while. It adds detail and interest. Funny story: Leo later wanted a squirrel of his own, but he said that the brown one looked too 'old', it had to be a newly stamped one using only red ink. He now carries around four red inked squirrels in his pocket.
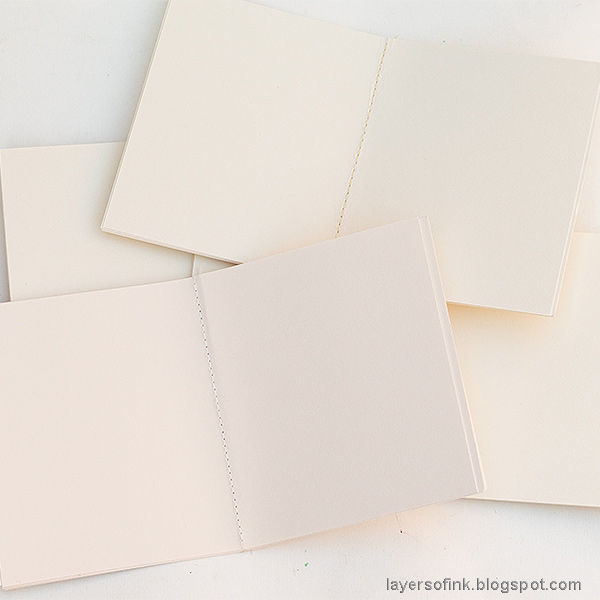
The papers were cut to about 7.7 x 4.7 in (19.5 x 12 cm) and folded in half. They were arranged into four signatures of about 6 papers each, and stitched down the center. You can also round the corners, but I didn't this time.

Punch an additional hole in the center of the spine, so that we can use to to create a closure for the book.

I used a black elastic to tie the journal, as shown here. You can also find instructions on the die packaging.

Slip the signatures under the elastics to keep them in place.

The finished journal has a nice chunky look to it.

This is how the right hand side wraps around the inserts.

All the shades of green, gold and brown, together with the texture from the stencil, made me think of a forest, maybe on a spring or summer day. Pine Needles Distress Paint is such a pretty shade of green, which I use too rarely.
The journal also feels nice to the touch and the canvas adds texture too. If you don't have canvas at home, you can skip that step though and work directly on the mat board.

Cut branches from burlap using Tim Holtz Branches die, and dye some cheese cloth with Antique Linen, for a cozy place for the squirrel.

Beads, pearls and sequins are meant to look like acorns, and also add a little bit of shine.

Here's the back of the journal. You can decorate it too, but I usually keep it plain. For more wrapped journal inspiration, check out my:
Wrapped Journal Tutorial
Blue Textured Wrapped Journal
Wrapped Leather Journal
Wrapped Felt Journal
I hope you will join us this week in our Make Your Own Background challenge. As always, you have a chance to win a $50 gift voucher to do some fun shopping at Simon Says Stamp. You have until next Monday 8am Ohio time. 1pm UK time, 2 pm CET to join in.


Do you use Instagram? If so please add #sssmchallenge so we can see your entries there too.


Thank you so much for taking the time to visit my blog today!
Happy crafting!
Anna-Karin
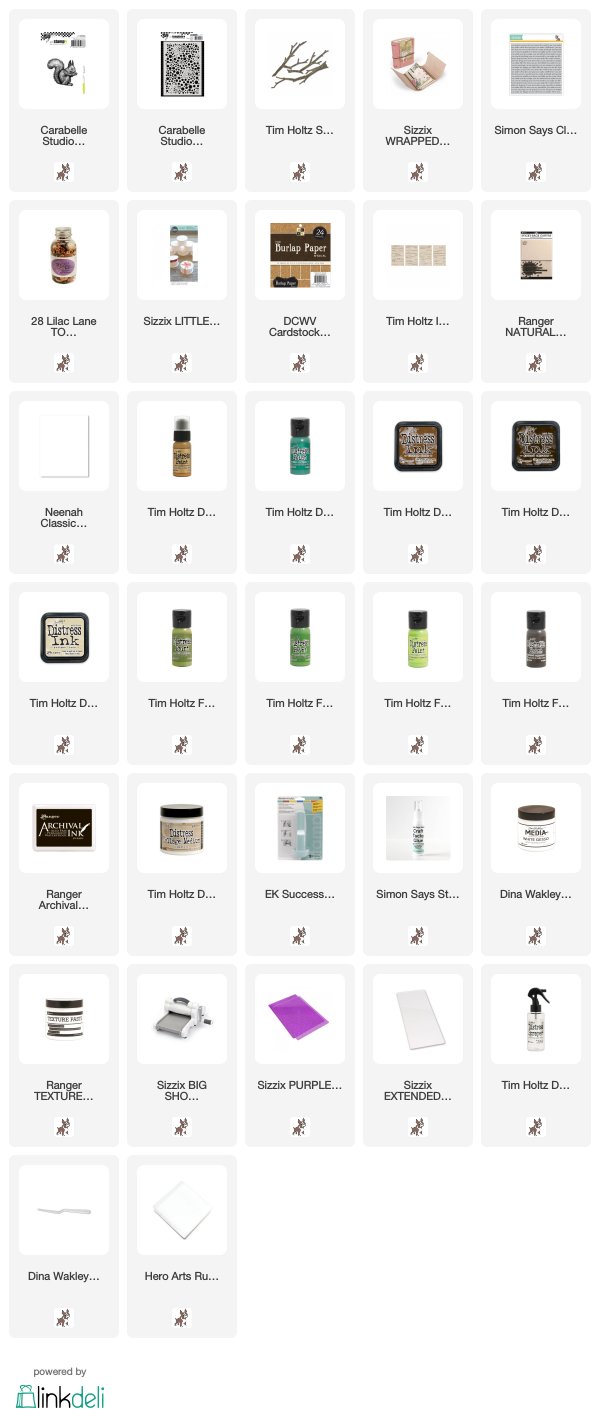
Supplies:
* Please note: the links are affiliate links, for which I receive a small percentage of sales generated by the link, at no extra cost to you.
* Please note: the links are affiliate links, for which I receive a small percentage of sales generated by the link, at no extra cost to you.
Wow, what a beautiful journal! The texture and colours of the background are the perfect home for that adorable squirrel and I love all of your adornments; those burlap branches are amazing 😀. I'm sure that your sister will love it - Happy Birthday wishes! It's wonderful to be able to join you in the Designer Spotlight this month, thanks so much! J 😊 x
ReplyDeleteAmazing indeed! Love all the details!
ReplyDeleteGorgeous journal Anna-Karin! I am sure your sister is going to love this! what a fabulous gift!! :-)
ReplyDeletehope you have a great week!
luv
Lols x x x
Wonderful wrapped journal, Anna-Karin! You've inspired me to make some. Love your story of the museum and watching the art change, and then seeing how you created this, and Leo changed the story. SO cute that he is carrying around his own squirrels! Love this! hugs,Maura
ReplyDeleteOooooohhhh..... LOVE, LOVE, LOVE this Journal!!! How wonderful gift!! It's a joy for the eyes!
ReplyDeleteI pinned it immediately! :)
https://www.pinterest.it/pin/534802524499359308/
Really inspiring and so much tactile, really LOVE any little detail! The colours and textures are fabulous and that squirrel sitting on the cheesecloth with pearls and sequins is a delight!
Thanks so much for sharing all the process!
This is such a lovely journal! I love the intensity of dots and the vibrancy of colors, the greens and yellows are so deep and fresh. Have a nice week, hugs, Macarena
ReplyDeleteWow! What an impressive piece! I love, love, LOVE big chunky notebooks and this is gorgeous. After seeing your work, I always want to order those Sizzix dies. I admire the way you're always exploring materials and techniques.
ReplyDeleteWhat a fabulous piece Anna-Karin! the little squirrel is so cute and your background is fantastic as always! Barbara
ReplyDeleteThis is such a stunning creation, Anna-Karin. The texture and colors on this journal are fantastic! Love the cute squirrel and beautiful embellishments, too. :)
ReplyDeletebeautiful art journal Anna-Karin and that squirrel is so cute just like the ones that tease Buddy on our forest walks, hugs kath xxx
ReplyDelete