Hello friends!! Today I have a really fun post for you, for a Sizzix Halloween project, but which could easily be turned into something fitting for a different theme all together. It's another house to add to my collection of homemade houses.
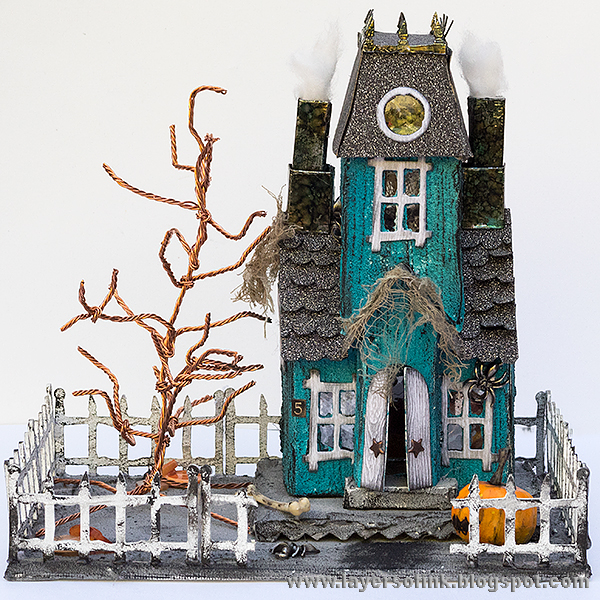

I really had fun making that wire tree, with a new Sizzix tool by Eileen Hull, the Twist & Style tool.

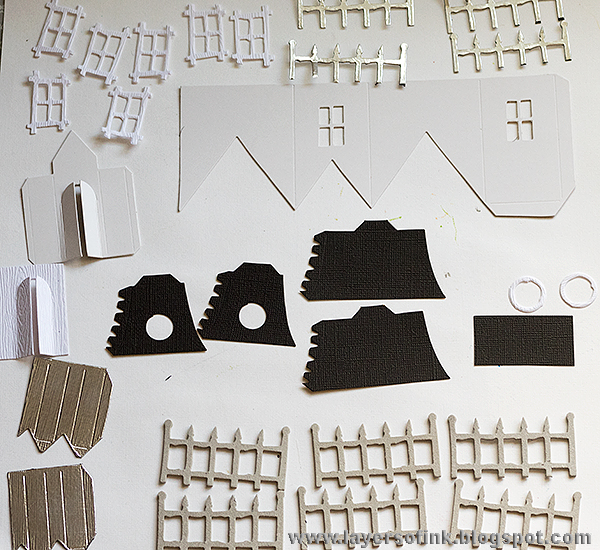
These are the pieces I die cut using the Village Manor die, except for the windows, which come from the Village Surf Shack die. Windows and the extra door are from Ranger's Woodgrain paper, roof pieces from black kraft-core, and chimney same as above. The door part and house structure is also die cut from patterned paper packaging. The fence is die cut from grungeboard (I later needed another three pieces) and the top of the fence (for the roof) from paper covered in foil tape.

Coat the above pieces with gesso.

Then coat them in Distress Grit-Paste, dragging a palette knife through the paint to create something looking like rough wooden boards. Leave to dry.

When the paste is dry, paint with Peacock Feathers and Mermaid Lagoon. Paint the step with Hickory Smoke. Do you see that I made a mistake here, and somehow ended up using two front pieces for the house? What happened was that I completely covered the door on the first front piece that I die cut, and thought I had two back pieces. So I prepared a second front piece, only to end up with two front pieces instead. Pretty funny.

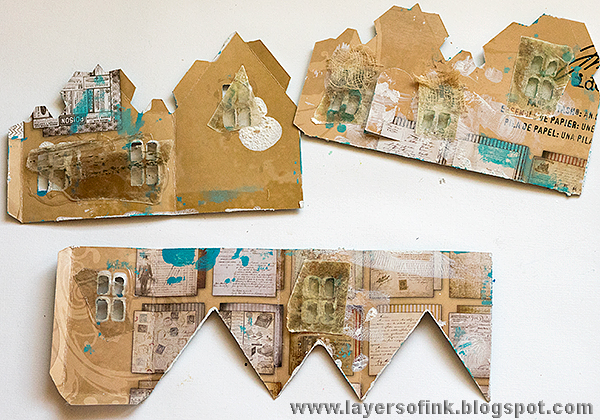


Assemble the Village Dwelling first, which is the base of the house. Check out my Autumn House if for another version of this house. Add the extended door part from the Manor House die. It fits right on top of the step. There are also instructions on the packaging of both dies. I used star brads as door handles. The Village Dwelling is also the base for my Winter Church Tutorial.

Adhere the roof tiles. To make it easier, you can do this before gluing the smaller roof in place. I die cut a piece of Deco Sheet for the smaller roof too.

Assemble the upper floor and glue it to the roof, as well as the chimneys. I also die cut Deco Sheet pieces for the upper part of the roof. At first I was going to cover it with tiles, but I changed my mind. Glue the spikes in place first, then you can cover up any glue with the Deco Sheet die cuts.

I really wanted a spooky tree next to my house and thought of a bunch of different options. Then I got the idea of constructing one out of copper wire using the Twist & Style tool. To read more about how to use this tool, have a look at my Felt and Wire Flowers tutorial. I made strands of four copper wires twisted together.

Add branches to the tree by twisting wires around the trunk and pinching them with pliers to make sure they are stuck. Twist and bend the branches until you are happy with the look.
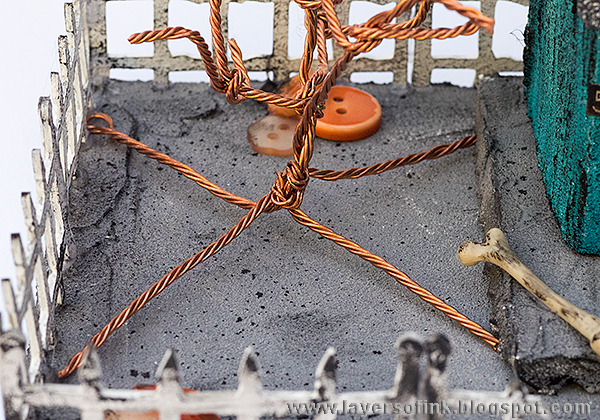
I gave the tree four legs to stand on, and made them pretty large, so that it wouldn't fall over. I didn't glue the tree down since I might use it for non-Halloween decorations too.

The base and a 5 x 7 canvas board were covered in Grit-Paste. When the paste was dry, I painted it to look like cement or gravel, and splattered some extra paint here and there.

I painted a very rough face on the idea-ology pumpkin.

The house and the tree are standing lose, but you could of course glue them in place. I wanted to be able to add a battery-driven tea light inside the house. I painted a path leading up to the house.

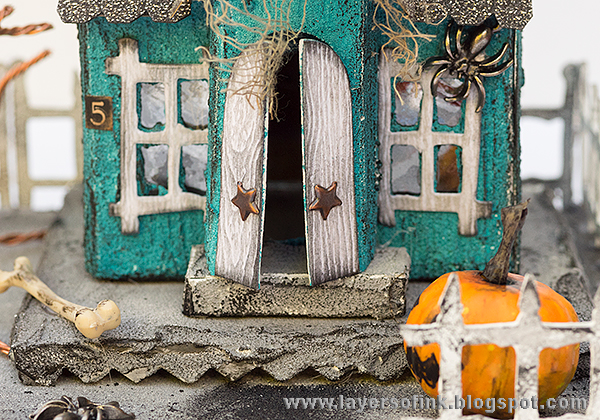


I wanted a few more orange elements and added some 28 Lilac Lane Pumpkin Spice buttons.


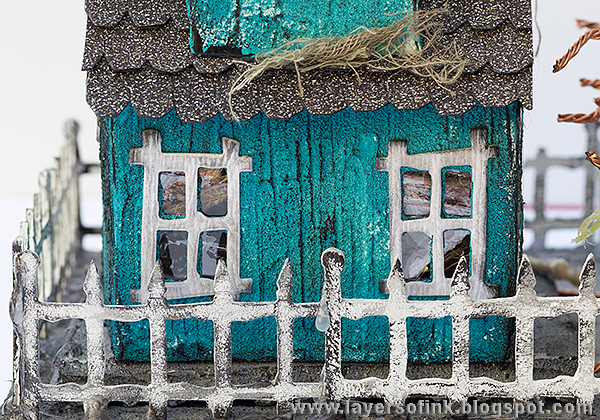

Here's another spider. You can add as many or as few details as you'd like to your house, and it really doesn't need to be a Halloween house. If you'd remove the Halloween embellishments on my house, it would look just like a grungy house.

Fold out some of the roof tiles. I really love the look of the glittery Deco Sheet roof, against the matte textured surface of the house.

I took a quick photo of the house with a battery-driven tea light inside. It looks nicer in real life.

This house was such fun to make and it will be fun to display. Anton thought it needed some greenery, so he added some to this photo. A little branch leaning against the house. There is plenty of space for more embellishments around the house.
I hope you enjoyed this tutorial!! I'll be back soon with another house, and that one looks totally different than this one.
Happy crafting!
Anna-Karin
Supplies:

Gorgeous house! I love the teal textured walls and the sparkly roof. Thank you for the very clear instructions.
ReplyDeleteThis is awesome! I love the grit-paste texture on the walls and your wire tree as well! It looks great with night light!
ReplyDeleteIn a word - Stunning!! I am quite addicted to these houses and love how you made the grit paste look like wood, the turquoise is a fantastic colour for Halloween and works beautifully with the black and orange. Your tree is amazing!! Anne xx
ReplyDeleteOh my gosh. So cool. Love the texture of the grit paste. Great idea to use mica for the windows.
ReplyDeleteFantastic. I adore your wire tree. Tracy x
ReplyDeleteAnna-Karin- you have done it again... totally awesome! All of it- the house and tree, techniques, tutorial, instructions- this is just amazing.
ReplyDeleteNow, would this house get lots of Trick or Treaters! You have definitely created a fabulous Halloween look here! Hugs, Chrisx
ReplyDeletethis is so awesome Anna-Karin! I absolutely love it!
ReplyDeleteLove love love this work!!!!! The wire tree is fbulous and every single detail is amazing! Barbara
ReplyDeleteyour house is beyond words. Anna-Karin you are such an amazingly talented artist!! love love love this!
ReplyDeleteSo so fabulous...the details are just amazing! ;-) Love it! ;-)
ReplyDeleteOne of the most amazing of the Tim Holtz buildings I've seen. Thanks so much for your instructions.
ReplyDelete