Saturday, April 13, 2019

SSS Blossoms and Butterflies Blog Hop

Hi friends! I am so happy to take part in the Simon Says Stamp blog hop in celebration of the new Blossoms and Butterflies release. It is is a gorgeous spring day here in Sweden and the new release is perfect for spring and summer crafting. You should have arrived here from the very creative Ankita Gupta.

The Blossoms and Butterflies collection contains a wide range of versatile dies, stamps, stencils, watercolor cards and sequins. You can see the whole collection here.


There is also a free gift for you. If you use the code BLSM999, when you make an order, you will get a free jar of Unicorn Dust Glitter (while supplies last!) with any purchase. The code will expire Sunday, 4/14 at 11:59 pm EDT.
I made two projects, a mixed media panel and a card, and both are tutorials. As usual the techniques can be used on many types of projects.
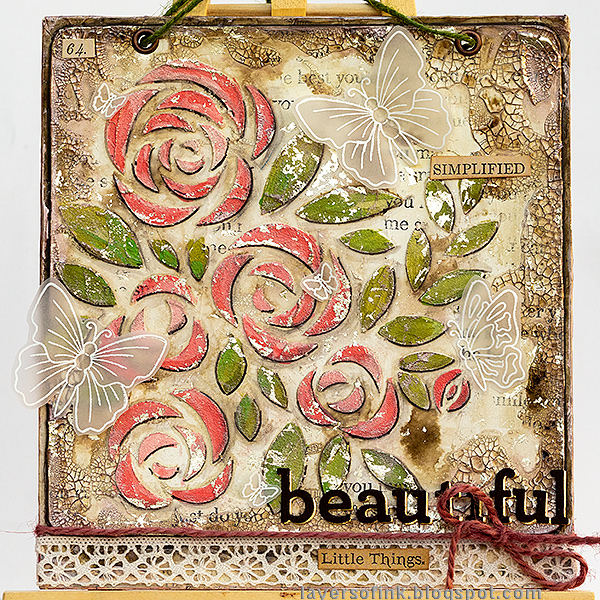
Layers of ink - Roses Mixed Media Panel Tutorial by Anna-Karin Evaldsson. With SSS Blossoms and Butterflies.

I loved the Bouquet of Roses stencil so much that I wanted it to be the center piece on a wall-hanger. It's a Mother's Day gift to my Mom. The panel is about 6 x 6.5 in. It might look complicated to make, but it is easy, and just requires a bit of patience to let paints and pastes dry in between layers. Let start.
Layers of ink - Roses Mixed Media Panel Tutorial by Anna-Karin Evaldsson. SSS Blossoms and Butterflies.

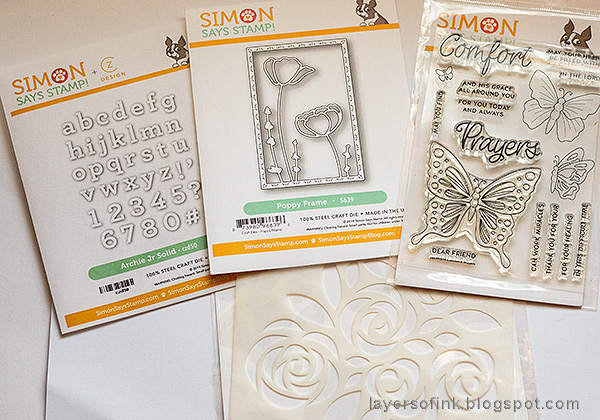
These are the products from Blossoms and Butterflies that I used on my projects: Archie Jr SolidPoppy FrameComfort & Prayers stamp set and Bouquet of Roses stencil.
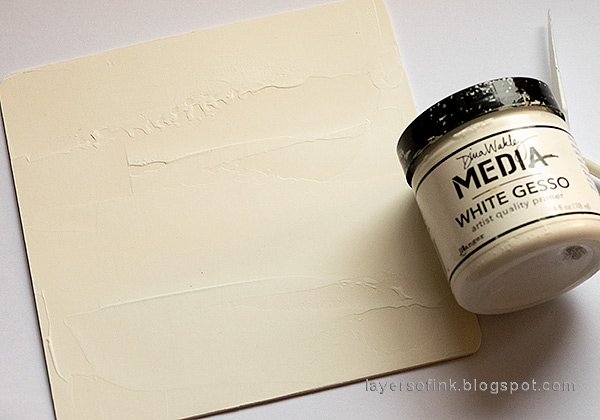
Layers of ink - Roses Mixed Media Panel Tutorial by Anna-Karin Evaldsson. Apply gesso.

I started with a piece of mat board and coated it with gesso. The edges were rounded with my Corner Chomper.
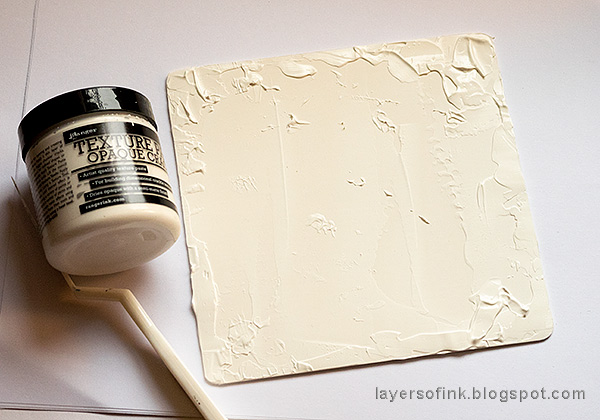
Layers of ink - Roses Mixed Media Panel Tutorial by Anna-Karin Evaldsson. Apply Crackle Paste.

When the gesso is dry, add Opaque Crackle Paste, especially around the edges. Vary the thickness to get both small and large cracks (the thicker the paste, the larger the cracks). Leave to dry.

Layers of ink - Roses Mixed Media Panel Tutorial by Anna-Karin Evaldsson.

When the paste was dry, I glued the panel to a second slightly larger panel, which was recycled from old packaging. Leave to dry under heavy books.
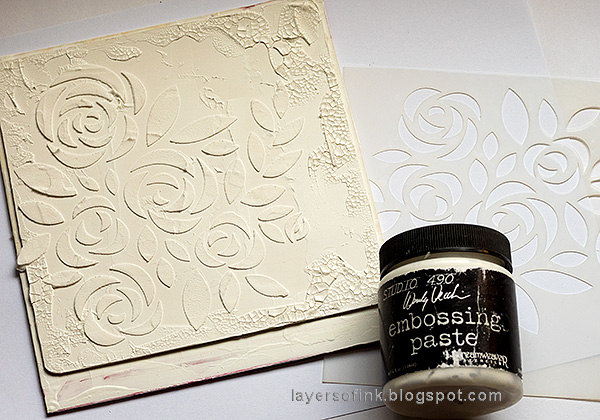
Layers of ink - Roses Mixed Media Panel Tutorial by Anna-Karin Evaldsson. Add paste through stencil.

Apply texture paste with a palette knife through the stencil.

Layers of ink - Roses Mixed Media Panel Tutorial by Anna-Karin Evaldsson. Paint with acrylic paint.

When the paste was dry, I painted it with watered-down Distress Paints, starting with Antique Linen. Mist with more water to get the shades to blend, and to get the darker brown to sink into the cracks. You can use quite a lot of water. Leave to dry.
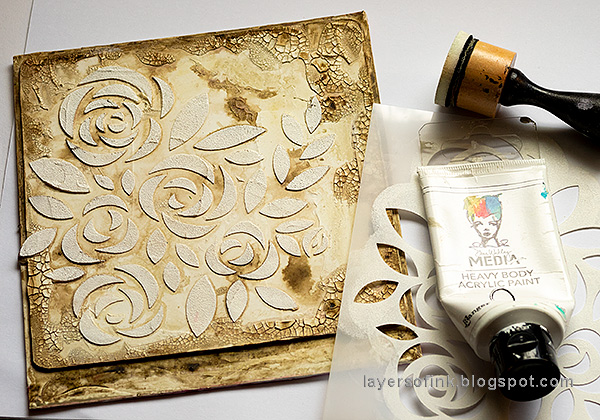
Layers of ink - Roses Mixed Media Panel Tutorial by Anna-Karin Evaldsson.

Place the stencil back over the design and sponge with white paint. This gives a lighter base for the painting of the flowers.

Layers of ink - Roses Mixed Media Panel Tutorial by Anna-Karin Evaldsson. Paint the roses with acrylic paint.

Paint the flowers and leaves with Distress Paints and Dina Wakley's Blushing pink. Add a second layer if needed.

Layers of ink - Roses Mixed Media Panel Tutorial by Anna-Karin Evaldsson. Stamp the background.

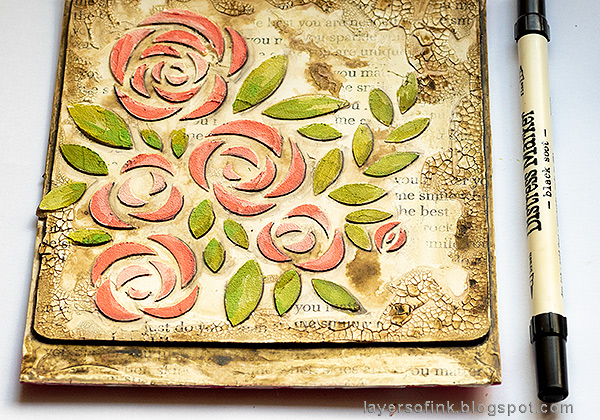
Stamp the background here and there with the SSS You Matter background stamp, for more texture.
Layers of ink - Roses Mixed Media Panel Tutorial by Anna-Karin Evaldsson. Add shading.

If you want to, add a shadow with a Black Soot Marker along some of the edges of the flowers. I imagined the light to come from the top left of the panel. You can smear the black out a bit with a Q-tip dipped in water. 

Layers of ink - Roses Mixed Media Panel Tutorial by Anna-Karin Evaldsson. Add metallic paint.

Dry brush metallic Rosy paint over the roses, and here and there on the background. This gives a lovely subtle metallic sheen to the panel.

Layers of ink - Roses Mixed Media Panel Tutorial by Anna-Karin Evaldsson. Adding foil.

Apply a glue stick randomly here and there and rub a vintage gold foil sheet on top. This gives a worn gilded effect.
 Layers of ink - Roses Mixed Media Panel Tutorial by Anna-Karin Evaldsson.

I love alpha dies and the ones in the Archie Jr Solid set are fantastic. Such a great font and size, perfect for cardmaking, but also for other types of projects. I die cut them from brown and gold, layering to offset the gold slightly.
Layers of ink - Roses Mixed Media Panel Tutorial by Anna-Karin Evaldsson.

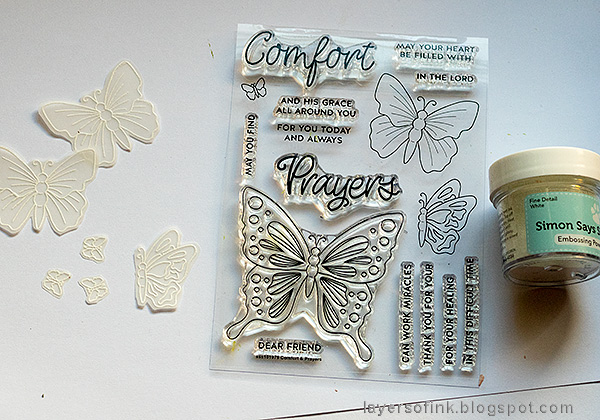
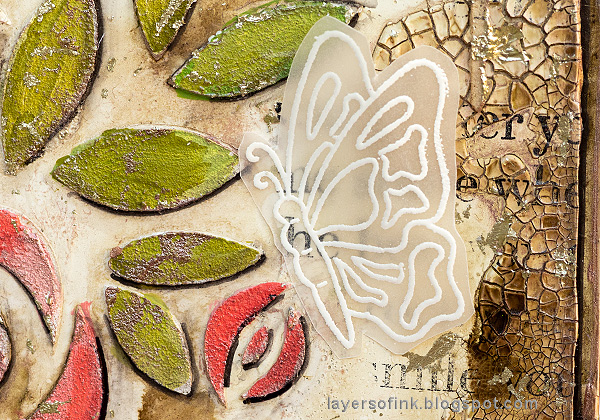
White emboss butterflies from the Comfort & Prayers set on vellum and cut out.

Layers of ink - Roses Mixed Media Panel Tutorial by Anna-Karin Evaldsson. Crackle texture.

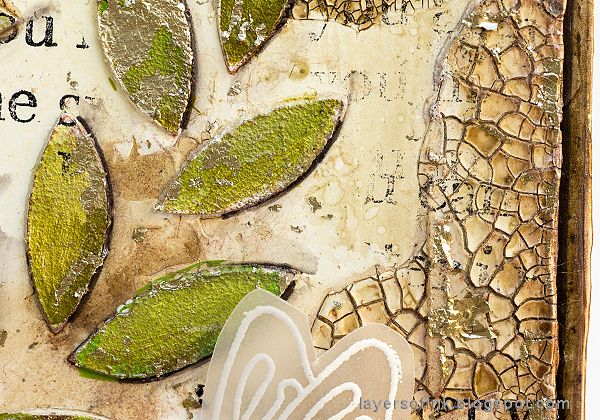
Bend out the wings of the butterflies slightly and glue them only along the body, using Matte Medium, which doesn't show at all.
Layers of ink - Roses Mixed Media Panel Tutorial by Anna-Karin Evaldsson.

Here you can see the lovely texture created with the crackle, paint, stamping and metallic bits.
Layers of ink - Roses Mixed Media Panel Tutorial by Anna-Karin Evaldsson. Close up roses

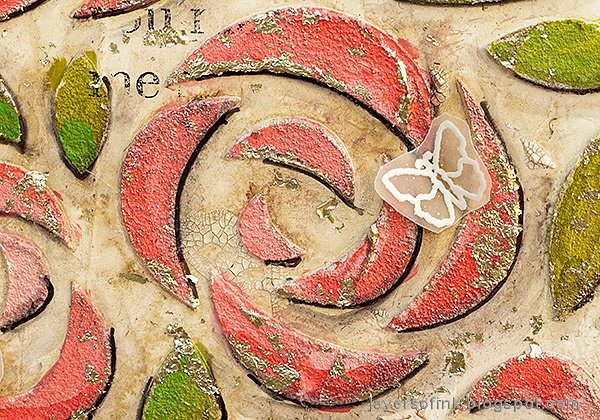
This rose design is so pretty and I love the bits of gold. Up close, some of the shadow lines look a bit harsh, but that makes them stand out a better from a distance.

Layers of ink - Roses Mixed Media Panel Tutorial by Anna-Karin Evaldsson.

The gold adds a nice shadow to the letters. I glued a piece of lace to the base and tied some twine around it. The sentiments come from Tim Holtz's Clippings stickers.

Layers of ink - Roses Mixed Media Panel Tutorial by Anna-Karin Evaldsson.

You can easily change the colors for a different look, and if you don't want all the grunge and distressing, just skip those steps.
Layers of ink - Roses Mixed Media Panel Tutorial by Anna-Karin Evaldsson.

White embossing on vellum is a favorite technique of mine. It looks great on its own, but if you want to, you can also color the vellum on the back.

Layers of ink - Poppy Card Tutorial by Anna-Karin Evaldsson. With SSS Blossoms and Butterflies.

The second project that I made is a card, using the wonderful Poppy Frame, together with the Archie Jr Alpha dies. I wanted the poppies to be the focal point and left everything else in shades of white.

Layers of ink - Poppy Card Tutorial by Anna-Karin Evaldsson. Die cut the Poppy Frame.

Start by die cutting the Poppy Frame from watercolor paper.
Layers of ink - Poppy Card Tutorial by Anna-Karin Evaldsson. Color the grass.

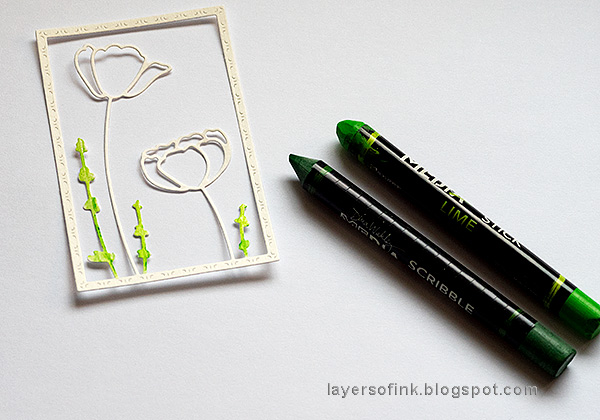
Color the grass with Dina Wakley Scribble Sticks and turn to watercolor with water and a paint brush. I used both Scribble Sticks and Scribble Sticks 2.

Layers of ink - Poppy Card Tutorial by Anna-Karin Evaldsson.

Color a piece of watercolor paper with Scribble Sticks and use water to turn them into watercolor.
Layers of ink - Poppy Card Tutorial by Anna-Karin Evaldsson. Die cut the poppies.

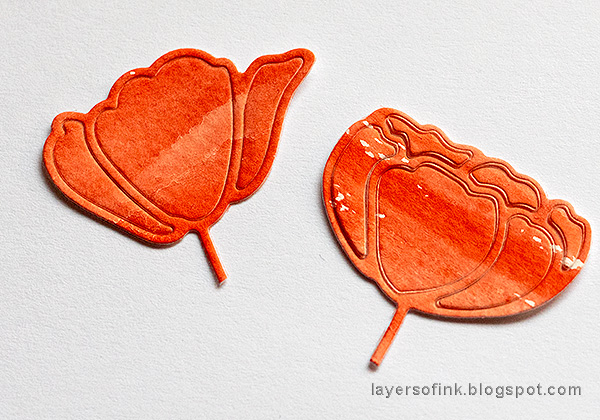
Die cut the poppies from the red paper.

Layers of ink - Poppy Card Tutorial by Anna-Karin Evaldsson.

If needed add some more shading to the petals.

Layers of ink - Poppy Card Tutorial by Anna-Karin Evaldsson.

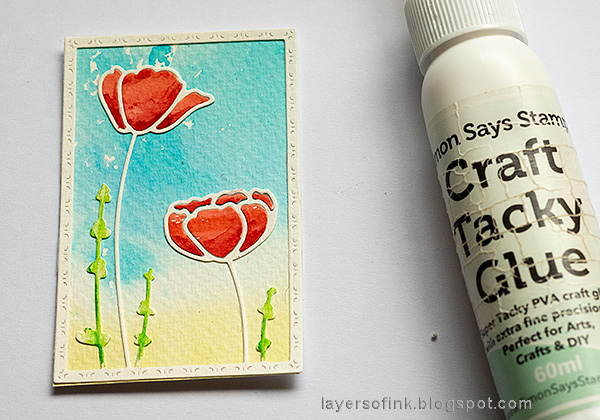
For the background, I just cut a piece of watercolor paper and colored it with Distress Inks.
Layers of ink - Poppy Card Tutorial by Anna-Karin Evaldsson.

Glue the red pieces into the poppies.
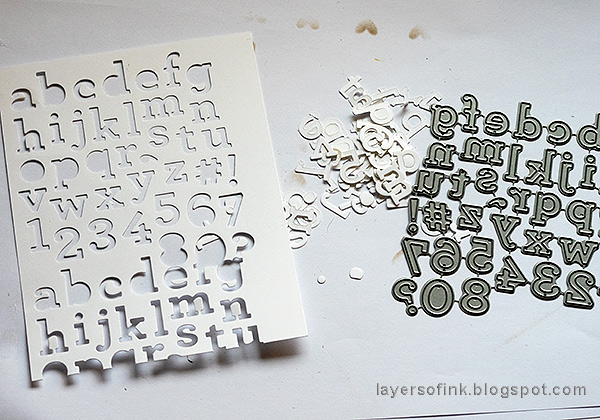
Layers of ink - Poppy Card Tutorial by Anna-Karin Evaldsson.

I kept the alpha dies intact for now, not separating them, so that I can use the for background elements. Die cut from a white piece of card. 
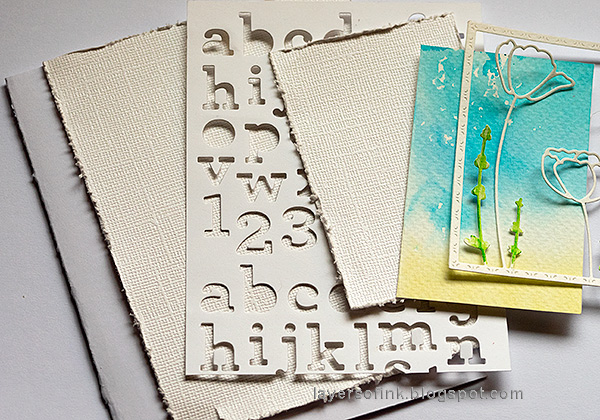
Layers of ink - Poppy Card Tutorial by Anna-Karin Evaldsson.

For the layers, I used a white folded cardstock, two pieces of SSS Glimmery White Diamond cardstock, and the alpha panel. Distress some of the edges.
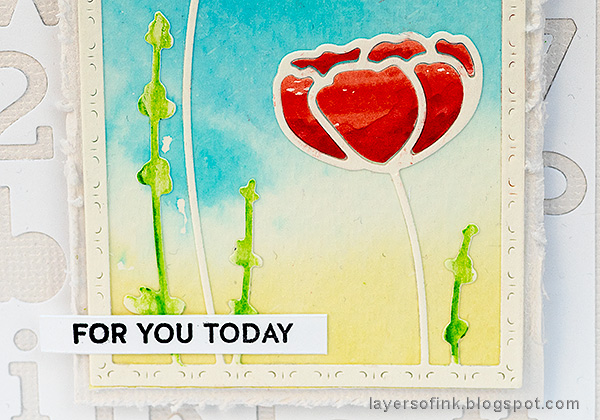
Layers of ink - Poppy Card Tutorial by Anna-Karin Evaldsson.

I used part of a sentiment stamp from the Comfort and Prayers set. The poppy panel was attached with foam tape.

Layers of ink - Poppy Card Tutorial by Anna-Karin Evaldsson. SSS Poppy Frame.

You can also color the outlines black, but I liked the lighter look of the white. Check out the lovely detailed frame of the Poppy Frame.

Layers of ink - Poppy Card Tutorial by Anna-Karin Evaldsson.

Using various shades of white gives dimension and interest without taking the focus away from the poppy panel.

There are of course prizes to be won, and at each stop on the hop SSS is giving away a $25 coupon, randomly drawn from those who leave a comment. The winners will be posted post on the Simon Says Stamp store blog on Wednesday, the 17th of April.

Your next stop on the hop is Gayatri Murali. Don't miss the inspiration you will be sure to find there.

Here are all the stops along the hop:


Anna-Karin Evaldsson (you are here)


For more Blossoms and Butterflies inspiration, remember to check out the Blossoms and Butterflies gallery at SSS, and if you make something with products from the range, it is fun if you post it in in the gallery too. There are galleries for all releases, and for the card kits, full of inspiration. Part one of the Blossoms and Butterflies blog hop was yesterday, so don't miss all the inspiration there.

Thank you so much for visiting today and I hope you will have a lovely weekend!

Happy crafting!

Anna-Karin

Supplies:

* Please note: the links are affiliate links, for which I receive a small percentage of sales generated by the link, at no extra cost to you.


Monday, April 8, 2019

Pastel Easter Tag Tutorial

Hello friends! It is a new week, and spring is taking a temporary break here it seems. On Friday and Saturday we had gorgeous weather though, and spent a lot of time outdoors. On Friday afternoon, Leo and I went to one of our favorite little lakes where there are lots of things to explore, such as pine-cones, spring flowers, and this year's very first bumblebee. 


At the Simon Says Stamp Monday Challenge Blog there is a Down On The Farm theme this week. I am looking forward to seeing all the creations, and don't miss the project by our April guest designer Sabrina Perna. It is a wonderful project.

Layers of ink - Pastel Easter Tag Tutorial by Anna-Karin Evaldsson.

Easter is coming soon, so I made an Easter tag, with two farm critters, and one additional friend. Lots of pastel colors make the tag look almost good enough to eat. The background and the grass were colored with Distress Oxides. I had planned to take out our Easter decorations this week, but time ran out, so I will try to do it one of the evenings this week instead. All the bright colors are so cheerful.

Layers of ink - Pastel Easter Tag Tutorial by Anna-Karin Evaldsson. Ink with Distress Oxides.

I started out by adding layers of Distress Oxides on a tag, by smearing the inks on a craft sheet, misting with water and pressing the tag into the ink. Dry with a heat tool in between layers, and mist with extra water if needed.

Layers of ink - Pastel Easter Tag Tutorial by Anna-Karin Evaldsson. Ink with Distress Oxides. Stamp with Distress Oxides.

Stamp with two background stamps using Worn Lipstick and Fossilized Amber. The stamps come from Tim Holtz's Tiny Textures set.

Layers of ink - Pastel Easter Tag Tutorial by Anna-Karin Evaldsson. Ink with Distress Oxides. White emboss.

When the background is dry, stamp with a texture stamp and white emboss.

Layers of ink - Pastel Easter Tag Tutorial by Anna-Karin Evaldsson. Ink with Distress Oxides.

I also added some script stamping with Wilted Violet.
 Layers of ink - Pastel Easter Tag Tutorial by Anna-Karin Evaldsson. Die cut Tim Holtz Critters die.

The animals come from Tim's Critters Sidekick set. Each die includes lots of little details.

Layers of ink - Pastel Easter Tag Tutorial by Anna-Karin Evaldsson. Ink with Distress Oxides.

Die cut from watercolor and black paper.

Layers of ink - Pastel Easter Tag Tutorial by Anna-Karin Evaldsson. Watercolor the animals.

Watercolor the animals with Distress Ink, by first smearing the ink on a craft sheet, misting with water and picking it up with a paint brush.

Layers of ink - Pastel Easter Tag Tutorial by Anna-Karin Evaldsson.

When dry, assembly the animals. I adhered some of the pieces with foam dots. Add a black outline shadow at the back, but slightly off-setting one a black die cut piece.

Layers of ink - Pastel Easter Tag Tutorial by Anna-Karin Evaldsson.

Add brown hearts with the Simon Says Stamp Heart Layers stencil.

Layers of ink - Pastel Easter Tag Tutorial by Anna-Karin Evaldsson. Ink with Distress Oxides.

The grass was die cut with the Simon Says Stamp Grassy Edges set from watercolor paper and colored with Cracked Pistachio and Twisted Citron, in the same method as above.

Layers of ink - Pastel Easter Tag Tutorial by Anna-Karin Evaldsson. Assemble the grass.

Layer the grass pieces on the tag, using foam tape for the front piece.

Layers of ink - Pastel Easter Tag Tutorial by Anna-Karin Evaldsson.

I also added some stickers as sentiments.

Layers of ink - Pastel Easter Tag Tutorial by Anna-Karin Evaldsson. Ink with Distress Oxides.

The layers of ink and stamping makes for a really nice effect and each little area of the background is different from the others.

Layers of ink - Pastel Easter Tag Tutorial by Anna-Karin Evaldsson.

Tuck the animals in among the grass.

Layers of ink - Pastel Easter Tag Tutorial by Anna-Karin Evaldsson.

The sheep is my favorite.

Layers of ink - Pastel Easter Tag Tutorial by Anna-Karin Evaldsson.

And the happy duck. I really like the speckled effect in the background, which you can see here.

Layers of ink - Pastel Easter Tag Tutorial by Anna-Karin Evaldsson. Paper flowers.

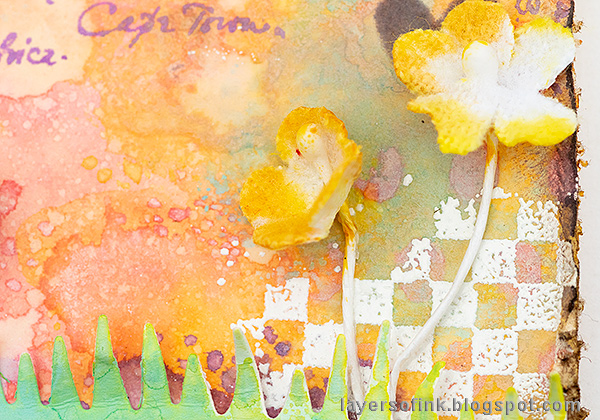
I also added some Bouquet Findings flowers, colored with Distress Ink.

Layers of ink - Pastel Easter Tag Tutorial by Anna-Karin Evaldsson.

And a title die cut using Tim's Calendar Words set.

Layers of ink - Pastel Easter Tag Tutorial by Anna-Karin Evaldsson.

Here you can better see the dimension of the animals.

Layers of ink - Pastel Easter Tag Tutorial by Anna-Karin Evaldsson.

I tied the tag with a piece of ribbon and a twine, which I found on my desk.

I hope you will join us this week in our Down On The Farm challenge. As always, you have a chance to win a $50 gift voucher to do some fun shopping at Simon Says Stamp. You have until next Monday 8am Ohio time. 1pm UK time, 2 pm CET to join in.


Don't forget to follow Simon Says Stamp on Instagram, they post great stuff daily. 


Do you use Instagram? If so please add #sssmchallenge so we can see your entries there too.


Thank you so much for taking the time to visit my blog today!  

Happy crafting!

Anna-Karin

Supplies:

* Please note: the links are affiliate links, for which I receive a small percentage of sales generated by the link, at no extra cost to you.