Wednesday, April 5, 2017

Scribble Stick Tree

Hello everyone! Today I have an art journaling page to share with you, made in the new Dina Wakley Media Journal, and using her Scribble Sticks, also by Ranger.

Layers of ink - Scribble Stick Tree by Anna-Karin with Dina Wakley's Media Journal and Scribble Sticks

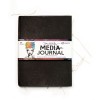
I knew I was going to like the Media Journal, and when I had it in my hand, I loved it. I keep opening it to feel the pages every time I walked past it. It has four types of surfaces: cotton rag watercolor  paper, burlap, canvas and kraft. The pages measures 7.25 x 10, which is a great size and the journal has a lovely black cover and very pretty binding. I thought I had taken a photo of the cover, but had forgotten. I have another project in the journal on Friday, so I will include a photo then. The different surfaces are wonderful and they have such a nice feel to them. I worked on a watercolor page here.

Layers of ink - Scribble Stick Tree by Anna-Karin with Dina Wakley's Media Journal and Scribble Sticks

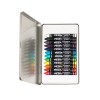
At the same time, I got Dina's new Scribble Sticks, which I was looking forward to trying out, so I immediately started working on the first page of the journal, without much of a plan. The Scribble Sticks are solid pigment sticks, like a coloured pencil, but as a solid crayon. Best of all, they are water-soluble like watercolour pencils. As I am sure you know, I love a watercolour effects, but the crayons look great without water too, and are opaque then.

Layers of ink - Scribble Stick Tree by Anna-Karin with Dina Wakley's Media Journal and Scribble Sticks

I am posting a tutorial on the Scribble Sticks on Friday, and for this page, I just wanted to play around and get a feel for them. I coloured the sky with shades of blue and then added water. The birds were painted after the background dried.

Layers of ink - Scribble Stick Tree by Anna-Karin with Dina Wakley's Media Journal and Scribble Sticks

The tree was first sketched with the Scribble Sticks, and I then continued adding more layers of colour to create texture and depth. I used green, yellow and blue to mix a varied green spring tree. I wanted some of my handwriting on this first page of the journal, and wrote some words with the pigment from the sticks, but picking it up with a paint brush. As you might see, I first wrote 'Sping' and the reason for that was that Leo woke up when I started writing the word. The wrongly spelled word annoyed me at first, and I was planning to cover it with a strip of paper with a new word on top, but then I decided that I will always remember the fact that I missed that 'r' because he woke up, and that real life memory was more important to keep in my journal, than to have a better looking word.

Layers of ink - Scribble Stick Tree by Anna-Karin with Dina Wakley's Media Journal and Scribble Sticks

I added journaling words to the tree. It is easy to paint the trunk of a tree too brown, if you look closely it often has other colours too, and here I used quite a bit of green. I also added a few lines with a black marker.

Layers of ink - Scribble Stick Tree by Anna-Karin with Dina Wakley's Media Journal and Scribble Sticks

I wrote this with the black Stick and misted with water.

Layers of ink - Scribble Stick Tree by Anna-Karin with Dina Wakley's Media Journal and Scribble Sticks

It is very easy to create great looking splatters with the Scribble Sticks. Make sure there is water at the tip of the stick and flick a paint brush against it, aiming at the paper. I splattered both when the background was wet, and when it was dry, for different effects. If you look at the pink splatters towards the top, you can see that they were done on a moist background, while the darker ones at the front were done on a dry background.

Layers of ink - Scribble Stick Tree by Anna-Karin with Dina Wakley's Media Journal and Scribble Sticks

Everyone should sit under a tree now and then.

I have a thing for watercolor paper and the handmade cotton rag paper in this journal is really interesting. It is different from most watercolor papers, and has almost a fabric feel to it. I am looking forward to filling this book with journaling, and I have already done a couple of more pages, which I will share soon.

Happy crafting!

Anna-Karin

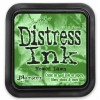
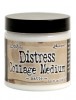
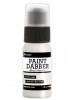
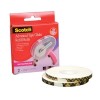
Supplies:


Monday, April 3, 2017

Bright Words in a Frame

Hello friends! I hope your weekend was good. I try to spend a lot of time outdoors over the weekends and this one was no exception, especially since we had lovely spring weather. Today, it is colder again, nature can't quite make up its mind. 


This week at the Simon Says Stamp Monday Challenge Blog with have a Rainbow theme. How fun! Don't miss the explosion of color on the challenge blog. Since this is the first Monday of a new month, the team is showcasing a specific designer/company, and this month the turn has come to the very inventive Tim Holtz

Our guest designer during April is Amy Bethke from Amy's Card Obsession. Don't miss her lovely project for this week. 

Layers of ink - Bright Words in a Frame by Anna-Karin with Tim Holtz idea-ology

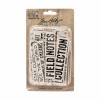
I recently got a big batch of photos printed, and finally have some new photos to use. I don't print photos at home since I never had a printer which could print as good photos as the professional printers. But it was a while since I had photos printed and is fun to have new ones. Here's a recent one of Leo. As you know, I love words, and I got the idea of covering the entire background with Tim Holtz's Quote Chips. I love these chipboard words and phrases and the sizes are great too. They were inked with Distress Inks to create the bright multi-colored effect. Very easy and quick. 

Layers of ink - Bright Words in a Frame by Anna-Karin with Tim Holtz idea-ology

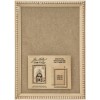
I worked in the larger Framed Panel (6.5 x 9 in) and moved the words around until I was happy with the look, almost like a puzzle. I took a photo of this before moving on, so that I knew where everything would go.

Layers of ink - Bright Words in a Frame by Anna-Karin with Tim Holtz idea-ology

The frame was painted with several coats of gesso. I glued the frame to the back piece and then added Chatter Design Tape along the edges, to get even more words on my projects. Use Matte Medium under and on top of the tape to make sure it is stuck down well.
  Layers of ink - Bright Words in a Frame by Anna-Karin with Tim Holtz idea-ology

The frame was dry-brushed with Mermaid Lagoon, and then I painted the whole thing with Ranger's Pearl Metallic paint, which gives a wonderful shine too it. I didn't want the frame to be too busy, but I also didn't want it to be plain white and the pearl gave just the right amount of interest to it.

Layers of ink - Bright Words in a Frame by Anna-Karin with Tim Holtz idea-ology

The Quote Chips were inked with Distress Inks and misted with water to create subtle texture. They were all adhered with Matte Medium.

Layers of ink - Bright Words in a Frame by Anna-Karin with Tim Holtz idea-ology

I just love all these words and phrases and picked pieces that I wanted to say to Leo as important life lessons.

Layers of ink - Bright Words in a Frame by Anna-Karin with Tim Holtz idea-ology

I left an open spot for an Alpha Transparent Tile number (his age), and also added a silver L. In the remaining gaps, I glued metallic Stars Adornments

Layers of ink - Bright Words in a Frame by Anna-Karin with Tim Holtz idea-ology

There was a little bit of space at the bottom of the frame, but not enough for more chipboard words. I adhered an Industrious Sticker border there.

Layers of ink - Bright Words in a Frame by Anna-Karin with Tim Holtz idea-ology

And another look at the Design Tape border. It also hides the joint between the frame and the back piece.

I really hope you will join us in our Rainbow challenge. As every week, you have a chance to win a $50 gift voucher from Simon Says Stamp. You have until Monday 8am Ohio time. 1pm UK time, 2 pm CET to join in.


Don't forget to follow Simon Says Stamp on Instagram, they post great stuff daily. 


new-instagram-icon22

Do you use Instagram? If so please add #sssmchallenge so we can see your entries there too.


Thank you so much for stopping by here today!

Happy crafting!

Anna-Karin

Supplies: