
Hello crafters! I hope you had a good weekend! We had lovely sunny weather and even more spring flowers are not visible.
Please note: this post has affiliate links, for which I receive a small percentage of sales generated by the link, at no extra cost to you.

This week we have an A bit o' Green challenge at the Simon Says Stamp Monday Challenge Blog. I hope you will join us! And don't miss the gorgeous project by our March guest designer Rox aka Red Dirt Crafter.


I have a bunch of pages in my art journals where I have used up left-over paste and/or paint and this was one of them. I had used Tim Holtz Woodgrain stencil together with texture paste and Distress paints. It is in my large Dylusions journal.

Start by stamping here and there with Simon Says Stamp Old Letter.

Apply Ranger Starshine Glitter gel to the paste areas.

Die cut Simon Says Stamp Monstera from heavystock paper. Smear Distress Inks on a non-stick craft sheet and mist with water. Press the paper into the ink. Let dry.

Repeat a couple of times until you are happy with the result.

The final layer is Distress Oxide Ink, but just touch the paper to the ink here and there.

Tim Holtz Sign Painter letters were stamped with Simon Says Stamp Green Meadows Pawsitively Perfect Saturated inks. Die cut with Simon Says Stamp Sign Painter Letters coordinating dies.

The smaller sentiments come from Tim Holtz Tiny Text and were stamped with green ink. Simon Says Stamp Circle Loops were die cut from green glitter cardstock.

Glue the sentiment strips here and there.

This technique with multiple layers of Distress Ink is one of my all-time favorite techniques. You can also use Simon Says Stamp Monstera stencil set together with this die.

The title needed to stand out better and I cut a strip of Simon Says Stamp Color-Blend and glitter cardstock as borders.
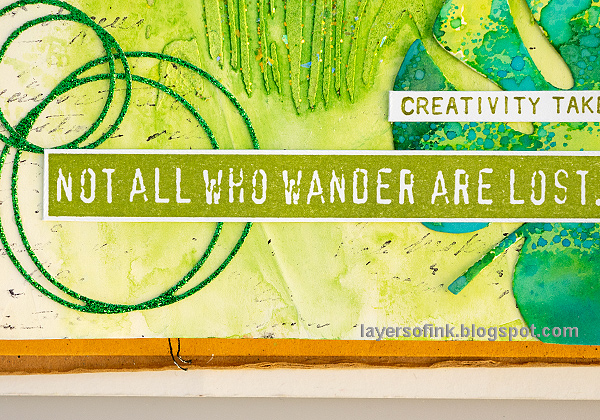
This sentiment come from Tim Holtz World Traveller.

More yummy ink texture.
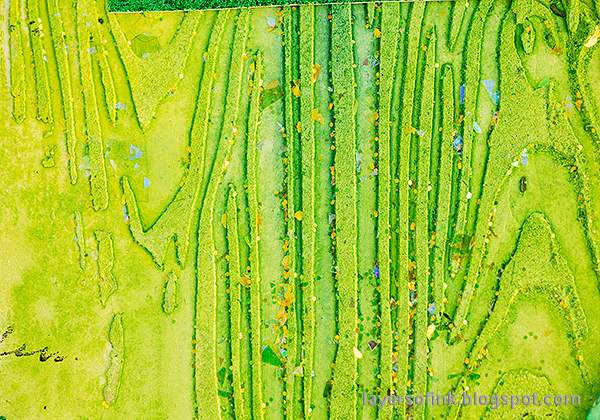
The yellow glitter gel adds a bit of shine to the background.

Simon Says Stamp Simple Peace was die cut from Color-Blend paper. The Color-Blend papers are glossy, adding an additional texture to the page.

Join us this week in our A bit o' Green challenge! You have a chance to win a $25 gift voucher to do some fun shopping at Simon Says Stamp. You have until Monday 8am Ohio time. 1pm UK time, 2 pm CET to join in.
%20(1).jpg)
Do you use Instagram? If so please add #sssmchallenge so we can see your entries there too.


Thank you so much for visiting today!
Happy crafting!
Anna-Karin
Supplies:
* Please note: the links are affiliate links, for which I receive a small percentage of sales generated by the link, at no extra cost to you.
* Please note: the links are affiliate links, for which I receive a small percentage of sales generated by the link, at no extra cost to you.
No comments:
Post a Comment
Thank you so much for leaving a comment! Happy Crafting!