Monday, June 17, 2024

Mixed Media Seascape Tutorial

Hello friends! It is a new Monday, the best day of the week since there is also a new Simon Says Stamp Monday Challenge. This week our theme is Let's Paint.

Please note: this post has affiliate links, for which I receive a small percentage of sales generated by the link, at no extra cost to you.


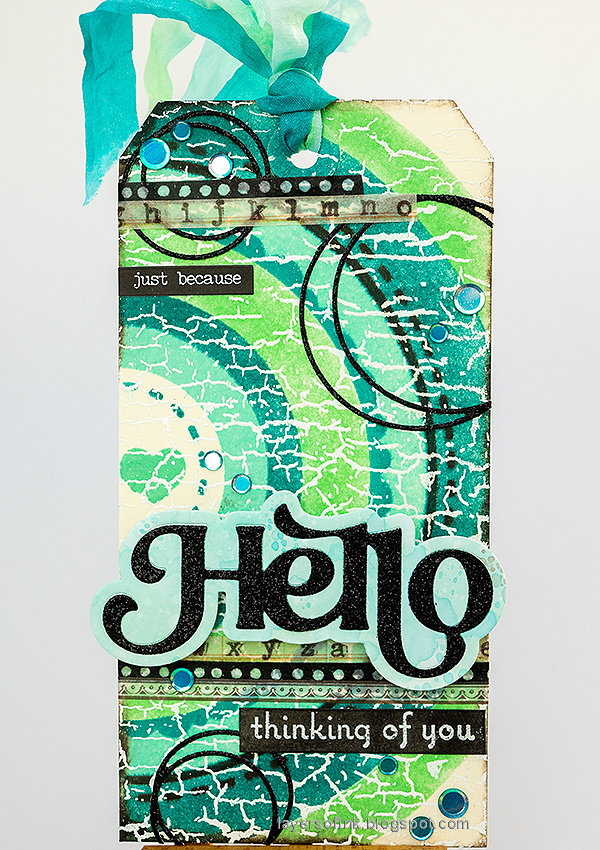
I hope you will join us in the challenge and don't miss the project by our June guest designer Thom Santilla.


Layers of ink - Mixed Media Seascape Tutorial by Anna-Karin Evaldsson.

I painted a scene with Distress Paint in one of my Small Creative Journal. The colors were inspired by the colors of the sky on one of my evening walks this week. I snapped a photo of the sky to remember to use it as inspiration for my project. Lots of textures and stamped sentiments here. The boats were cut from Tim Holtz Eclectic Elements fabric. 

Layers of ink - Mixed Media Seascape Tutorial by Anna-Karin Evaldsson. Apply texture paste.

Coat the page with gesso and when dry, add texture paste through Simon Says Stamp Clouds for Days. Also add paste to the base of the page as the beach.

Layers of ink - Mixed Media Seascape Tutorial by Anna-Karin Evaldsson. Add cheese cloth.

Glue cheese cloth to the beach with matte medium. You can also use Tim's Mummy Cloth.

Layers of ink - Mixed Media Seascape Tutorial by Anna-Karin Evaldsson. Paint with distress paint.

Use Simon Says Stamp Very Very Low Tack tape to mask the sea from the sky. Paint the clouds.

Layers of ink - Mixed Media Seascape Tutorial by Anna-Karin Evaldsson.

Paint the sky and then remove the tape. Add it back but on the sky instead of the sea and then paint the sea (I forgot to take a photo of that step).

Layers of ink - Mixed Media Seascape Tutorial by Anna-Karin Evaldsson.

Paint the beach with watered-down Distress Paint: Antique Linen, Frayed Burlap and Ground Espresso.

Layers of ink - Mixed Media Seascape Tutorial by Anna-Karin Evaldsson. Darken the colors.

Add darker blue to the sky and the sea. The light comes from the right, so the sea is darker on the left-hand side. Mist with water and let the paint run, but only a little. I also let it run into the beach area. Add some more Dried Marigold too.

Layers of ink - Mixed Media Seascape Tutorial by Anna-Karin Evaldsson. Make fabric boats.

Cut the sails from Tim Holtz Memoranda Fabric. Cut the boats from brown cardstock.

Layers of ink - Mixed Media Seascape Tutorial by Anna-Karin Evaldsson. Add Sizzix Luster Wax.

Add Sizzix Gold Luster Wax to the cheese cloth.

Layers of ink - Mixed Media Seascape Tutorial by Anna-Karin Evaldsson. Add stickles glitter gel.

Add Moon Dust Stickles to the clouds and to a few areas in the sea.

Layers of ink - Mixed Media Seascape Tutorial by Anna-Karin Evaldsson.

Here you can see the stickles on the clouds. I stamped sentiments both directly on the background and on paper and cut into strips.

Layers of ink - Mixed Media Seascape Tutorial by Anna-Karin Evaldsson. Stamp with Simon Says Stamp Forest Scenery.

Repeat 'summer' three times without reinking. The birds come from Hero Arts Sunset Over Waves.

Layers of ink - Mixed Media Seascape Tutorial by Anna-Karin Evaldsson.

Sand the boats. Connect the sail to the boat with a black pen.

Layers of ink - Mixed Media Seascape Tutorial by Anna-Karin Evaldsson. Fabric and paper boat.

I cut this sail so that the word 'transfer' would be clearly visible.

Layers of ink - Mixed Media Seascape Tutorial by Anna-Karin Evaldsson.

Summer dreaming comes from Simon Says Stamp Dandelion Messages.

Layers of ink - Mixed Media Seascape Tutorial by Anna-Karin Evaldsson.

The combination of texture paste and cheese cloth gives a great texture. Here I only added a few strands of thread onto the background.

Layers of ink - Mixed Media Seascape Tutorial by Anna-Karin Evaldsson. Beach textures.

The sentiment comes from Tim Holtz Odds & Ends. The Luster Wax adds a really nice texture and shine to the cheese cloth.

Layers of ink - Mixed Media Seascape Tutorial by Anna-Karin Evaldsson.

The paint will run into the cheese cloth texture in interesting ways.

Layers of ink - Mixed Media Seascape Tutorial by Anna-Karin Evaldsson.

I added pebbles with a black pen.

Layers of ink - Mixed Media Seascape Tutorial by Anna-Karin Evaldsson.

The last sentiment comes from Simon Says Stamp Forest Scenery.

Join us this week in our  Let's Paint challenge! You have a chance to win a $25 gift voucher to do some fun shopping at Simon Says Stamp. You have until Monday 8am Ohio time. 1pm UK time, 2 pm CET to join in.


Do you use Instagram? If so please add #sssmchallenge so we can see your entries there too.


Thank you so much for stopping by here today! 

Happy crafting!

Anna-Karin

Supplies:

* Please note: the links are affiliate links, for which I receive a small percentage of sales generated by the link, at no extra cost to you.


Sunday, June 16, 2024

Infusions with Stencils

Hi crafters! Today I am happy to have a tutorial on Simon Says Stamp Store Blog. I made two mixed media cards.


Layers of ink - Infusions with stencils tutorial by Anna-Karin Evaldsson.

I am sharing fun backgrounds made with stencils and Paper Artsy Infusions Colored Stains. I made two cards since I couldn’t choose which of the two backgrounds to use. Infusions Colored Stains can be used for many techniques and here I used them with stencils and to make backgrounds for die cut shapes.

Head over to the Simon Says Stamp Store Blog for all the details and the tutorial. 

Thank you for stopping by today and see you again tomorrow!

Happy stamping!

Anna-Karin

Monday, June 10, 2024

The World Tag Tutorial

Hello friends! I hope you are well and had a good weekend. We went on a small outing to look for one of the villages where my great grandfather used to work. We found it, but only one building remained. 

Please note: this post has affiliate links, for which I receive a small percentage of sales generated by the link, at no extra cost to you.


This week we have a Let the Music Play theme at the Simon Says Stamp Monday Challenge. I hope you will join us and don't miss the stunning project by our June guest designer Thom Santilla.

Layers of ink - We are the world tutorial tag by Anna-Karin Evaldsson.

I made a tag inspired by a song written almost 40 years ago. Unfortunately the message of the song is just as relevant today as it was then. The title and the globe was die cut with Tim Holtz Vault World Travel set and I used a music paper from Backdrops vol. 3 to add notes to the background.

Layers of ink - We are the world tutorial tag by Anna-Karin Evaldsson. Emboss the background.

The tag was die cut from kraft paper and embossed in Tim's Dotted folder.

Layers of ink - We are the world tutorial tag by Anna-Karin Evaldsson. Die cut Tim Holtz Word Travel.

Die cut the globe from Simon Says Stamp Audrey Blue cardstock, Teal Glitter cardstock and the continents twice from kraft cardstock. Color one of the kraft continents with Prismacolor pencils. Use the white pencil to blend the colors.

Layers of ink - We are the world tutorial tag by Anna-Karin Evaldsson.

Ink the background with Frayed Burlap and Scorched Timber Distress Ink and tie ribbons and twine to the tag.

Layers of ink - We are the world tutorial tag by Anna-Karin Evaldsson. Peace.

Off-set the non-colored kraft continents slightly and glue the various pieces together with Simon Says Stamp craft glue. The sentiment comes from Simon Says Stamp Season's Greetings.

Layers of ink - We are the world tutorial tag by Anna-Karin Evaldsson.

The title was die cut from left-over Infusions colored paper and from black Simon Says Stamp cardstock. Off-set to create a shadow and to make the letters stand out from the background.

Layers of ink - We are the world tutorial tag by Anna-Karin Evaldsson.

The sentiment at the bottom comes from Simon Says Stamp Mixed Labels. I also added Design Tape Trims and sequins.

Layers of ink - We are the world tutorial tag by Anna-Karin Evaldsson.

Join us this week in our  Let the Music Play challenge! You have a chance to win a $25 gift voucher to do some fun shopping at Simon Says Stamp. You have until Monday 8am Ohio time. 1pm UK time, 2 pm CET to join in.


Do you use Instagram? If so please add #sssmchallenge so we can see your entries there too.


Thank you so much for stopping by here today! 

Happy crafting!

Anna-Karin

Supplies:

* Please note: the links are affiliate links, for which I receive a small percentage of sales generated by the link, at no extra cost to you.


Monday, June 3, 2024

Vintage Watch Tag Tutorial

Hi friends! I hope you are well and that you had a good weekend with some crafty time. I can't believe that it is already June!

Please note: this post has affiliate links, for which I receive a small percentage of sales generated by the link, at no extra cost to you.


This week we have a Masculine theme at the  Simon Says Stamp Monday Challenge Blog. I hope you will join us. Since it is the first Monday of a new month, the team is showcasing products by a specific company/designer and this week it is Tim Holtz. You can find Tim's fantastic range of products here

We also have a new guest designer and during June Thom Santilla will be joining us. I hope you will visit him on Instagram to see the project he has created this week.

Layers of ink - Vintage Watch Tutorial by Anna-Karin Evaldsson.

I made a tag this week with a grungy gear background and a vintage watch. It was made mainly with Tim Holtz Vault Watch Gears set and lots of Distress Paint. I really like the big watch that comes in the set and used embossing powder, foil tape and Clearly For Art Modeling Film to create it.

Layers of ink - Vintage Watch Tutorial by Anna-Karin Evaldsson. Color with Distress Paint.

Apply gesso to a tag and let dry. The apply Distress Paint to the tag with a palette knife. If you scrape/press relatively hard with the palette knife, you get interesting textures and blends of colors.


Adhere foil tape to cardstock and die cut a die cut a whole lot of gears from it.

Layers of ink - Vintage Watch Tutorial by Anna-Karin Evaldsson. Glue gears to background.

Let dry and cover the whole tag with Distress Matte Medium. Place the gears into the medium. 

Layers of ink - Vintage Watch Tutorial by Anna-Karin Evaldsson. Glue gears to background.

When dry paint with slightly watered-down Distress Paint. 

Layers of ink - Vintage Watch Tutorial by Anna-Karin Evaldsson. Glue gears to background.

Let the black paint dry for a short while and then wipe some of it off. Add more black paint and Salvaged Patina to the gears.

Die cut the clock from Tim Holtz Watch Gears


Layers of ink - Vintage Watch Tutorial by Anna-Karin Evaldsson.

Die cut the watch from Clearly For Art Modeling Film (I cut off the top part to make it easier to glue together the two paper clocks), Backdrops paper and heavystock paper.

Layers of ink - Vintage Watch Tutorial by Anna-Karin Evaldsson.

Ink with shades of grey.

Layers of ink - Vintage Watch Tutorial by Anna-Karin Evaldsson. Emboss the watch.

Apply embossing ink to the watch and emboss with several layers of silver powder. Add darker powders into the silver in the last layer. Be very careful when using a heat gun and do not touch the melted powder until it has cooled down completely.

Layers of ink - Vintage Watch Tutorial by Anna-Karin Evaldsson. Glue numbers to watch.

Die cut the clock numbers from the foil tape sheet and glue to the clock.

Layers of ink - Vintage Watch Tutorial by Anna-Karin Evaldsson. Color with alcohol ink.

Color the Modeling Film with alcohol ink, to give it an aged look.

Layers of ink - Vintage Watch Tutorial by Anna-Karin Evaldsson.

Die cut watch arms and add gears to the clock. Gently shape the Modeling Film slightly by warming it with a heat tool.

Layers of ink - Vintage Watch Tutorial by Anna-Karin Evaldsson.

I stamped sentiments on inky paper and cut into strips. This stamp is from Simon Says Stamp Mixed Labels.

Layers of ink - Vintage Watch Tutorial by Anna-Karin Evaldsson.

The layers of embossing powder and last layer of two additional darker powders give an interesting and dimensional look to the watch.

Layers of ink - Vintage Watch Tutorial by Anna-Karin Evaldsson.

Sandwich the Modeling Film between the Backdrops clock and the embossed clock. It is meant to look like the glass of the watch. The sentiment comes from Tim's Tiny Text.

Layers of ink - Vintage Watch Tutorial by Anna-Karin Evaldsson.

The title was die cut with Tim Holtz Vault World Travel set from Simon Says Stamp Teal Glitter cardstock. I also added some Design Tape to the tag.

Layers of ink - Vintage Watch Tutorial by Anna-Karin Evaldsson.

This sentiment also comes from Simon Says Stamp Mixed Labels.

Layers of ink - Vintage Watch Tutorial by Anna-Karin Evaldsson.

The combination of gesso, paint and the gears gives a lot of texture to the background.

Join us this week in our Masculine challenge! You have a chance to win a $25 gift voucher to do some fun shopping at Simon Says Stamp. You have until Monday 8am Ohio time. 1pm UK time, 2 pm CET to join in.


Do you use Instagram? If so please add #sssmchallenge so we can see your entries there too.


Thank you so much for stopping by here today! 

Happy crafting!

Anna-Karin

Supplies:

* Please note: the links are affiliate links, for which I receive a small percentage of sales generated by the link, at no extra cost to you.