
Hello friends! I hope you are well and had a good weekend. We had sun, rain and some snow.
Please note: this post has affiliate links, for which I receive a small percentage of sales generated by the link, at no extra cost to you.

This week we have an Emboss It theme at the Simon Says Stamp Monday Challenge Blog. It is also the last week for our March guest designer Ann Chuang. Be sure to check out the stunning card she has created.

I combined heat and dry embossing on this tag, for a quick textured background. The background technique can be done with many types of embossing folders. The tag was embellished with flowers made with various flower dies by Simon Says Stamp, and vellum leaves.


The flowers are quite dimensional. If you want to make a flatter project, layer the flowers without shaping the petals first.


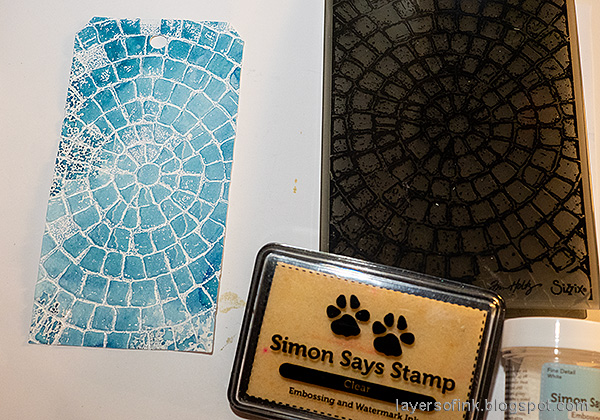
I started out with an inky watercolor paper left-over from another project. It had been inked with Uncharted Mariner Distress Ink. Die cut a tag from the paper. Drag an embossing ink over Tim Holtz Mosaic embossing folder and emboss. Cover with white embossing powder and return the excess to the jar. Emboss. Do not touch the melted powder until it has cooled down completely.

Ink with first Uncharted Mariner and then Scorched Timber, in a pattern following the circles of the design.

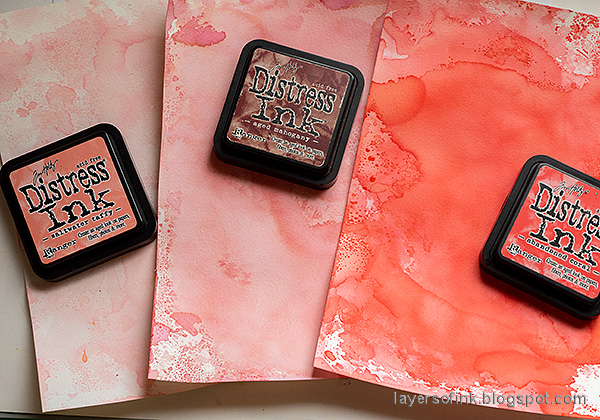
The flowers were die cut from watercolor paper which had been colored with Distress Inks. I made three shades of pink paper. Smear the inks on a non-stick craft sheet, mist with water and press the paper into the ink. Let dry and repeat.

I also made three shades of orange/peach papers, using the inks you see on the photo.

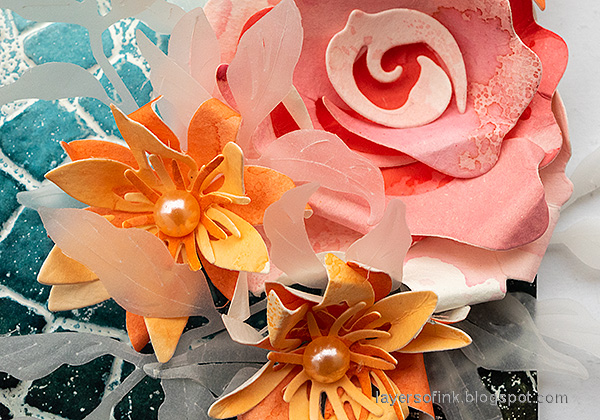
Die cut Simon Says Stamp Layered Rosebud from the pink papers.

Shape the petals with Tim Holtz Shaping Kit.

The orange flowers were die cut using the Dreamy Daisy Layers and the Etched Magnolia Blossom.

Again, shape with Tim Holtz Shaping Tool Kit.

The May Arts Faux Silk Ribbon was dyed with Distress Ink to coordinate with the tag.

Tie the ribbons to the top of the tag.

The sentiment comes from Tim Holtz Tiny Text and was stamped on one of the inked papers and matted on vellum. The little heart beads have been in my stash for many years and were bought in a tiny craft shop in South Africa, long ago.

The texture from the combined dry and heat embossing is pretty cool. Don't worry about stray embossing powder since it only adds to the effect.

Glue the flowers together and add a pearl to the center of the orange ones.

Glue the pieces of the rose together as shown here.

The leaves were die cut from vellum using Simon Says Stamp Tattered Leaves.

I hope you will join us this week in our Emboss It challenge. You have a chance to win a $25 gift voucher to do some fun shopping at Simon Says Stamp. You have until Monday 8am Ohio time. 1pm UK time, 2 pm CET to join in.
Do you use Instagram? If so please add #sssmchallenge so we can see your entries there too.

Thank you so much for stopping by here today!
Happy crafting!
Anna-Karin
Supplies:
* Please note: the links are affiliate links, for which I receive a small percentage of sales generated by the link, at no extra cost to you.
* Please note: the links are affiliate links, for which I receive a small percentage of sales generated by the link, at no extra cost to you.
No comments:
Post a Comment
Thank you so much for leaving a comment! Happy Crafting!