Hi everyone! Today I have a card to share with a dry embossed resist background and lots of sparkle and shine.
Please note: this post has affiliate links, for which I receive a small percentage of sales generated by the link, at no extra cost to you.
I wanted to combine a distressed and somewhat grungy background with gold, shine and shimmer. The background technique is also a fun one, with an embossing folder, mica spray, stamping and clear embossing powder. The card was made with new products, from the Simon Says Stamp STAMPtember® release.
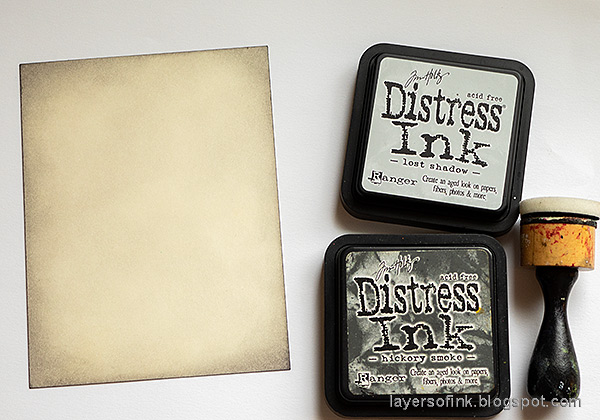
Start by inking a piece of heavystock cardstock with grey inks.
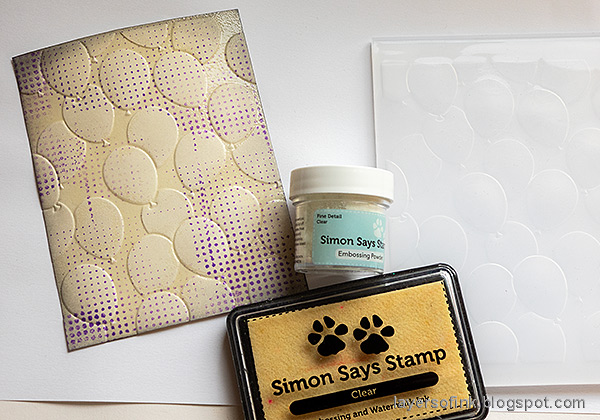
Stamp the background with Simon Says Stamp Halftone Background and Wilted Violet ink. The background doesn't look that good at this stage, but it will change.
Apply embossing ink to the Simon Says Stamp Party Balloons embossing folder and die and emboss the cardstock. Cover with clear embossing powder. Tap off the excess powder and melt. Always be very careful when using a heat gun and don't touch the melted until it has cooled down completely.
Mist heavily with Tim Holtz Mica Stain Phantom Mist and Ominous Twilight. The embossing will resist the ink and protect the purple dots, while the spray will cover the dots on the balloons.
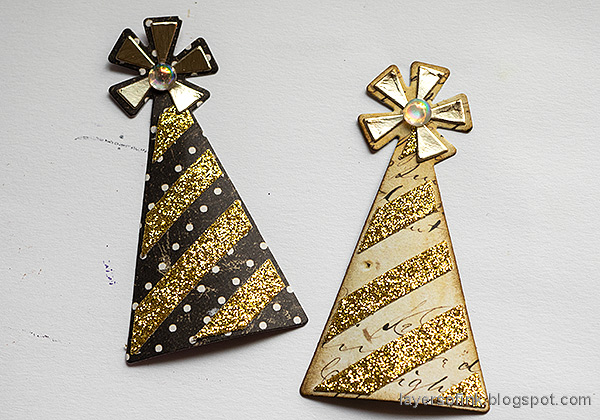
Die cut the Party Hat from Tim Holtz Halloween Backdrops paper, Tim Holtz gold metallic paper and Simon Says Stamp gold glitter cardstock. Assemble.
I thought the card needed a second hat and die cut it from dotted paper also from the Halloween Backdrops stack.
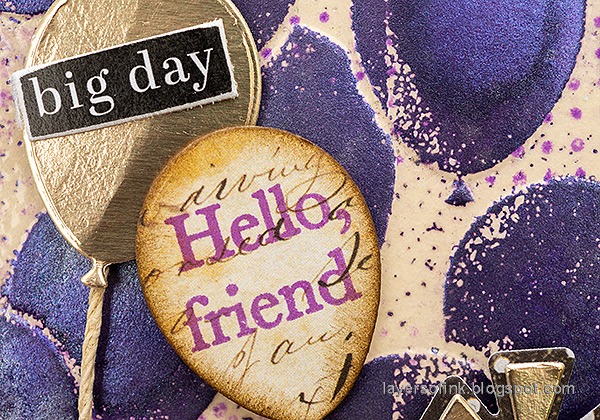
Die cut balloons with the coordinating Party Balloons die, from gold metallic paper and from a piece of Backdrops paper. Stamp a sentiment from Simon Says Stamp Happy Days on one of the balloons.
Don't worry if there is stray embossing powder on the balloons, it gives them a great textured look. Here you can maybe also see how shiny they are from the mica spray.
I added a piece of twine to the balloons and adhered them with Simon Says Stamp Pawsitively Perfect Foam Tape. The black sentiments were cut from a sheet of Simon Says Stamp Sentiment strips.
There is a Studio Katia Iridescent Bubble in the middle.
I used every second stripe of the gold glitter paper, but you can also cover the hats almost completely in die cut stripes.
The embossed background has a textured look, with the purple dots, the shiny embossing and the sparkly areas where there was no embossing powder. For another example using the Simon Says Stamp Party Balloons and die see my Happy Days Tag Tutorial.









No comments:
Post a Comment
Thank you so much for leaving a comment! Happy Crafting!