
Hi crafters! We got a whole lot of snow lately and I hope it will stay for a while since it really lights up the dark November afternoons and evenings.
Today, I have one of my yearly projects to share, my tags for my December Countdown Calendar. These tags will later go into my December journal.
Please note: this post has affiliate links, for which I receive a small percentage of sales generated by the link, at no extra cost to you.

This year I did the tags differently than previous years. I normally use larger tags and they function as journaling cards in my December Daily journal. This year, I am making a different journal (to be posted soon) and there is space for journaling in the journal. Therefore, I decided to use smaller countdown tags and to add Christmas quotes and poems to them. Instead of journaling spots, they will be embellishments in the December journal. There is a mix of Swedish and English on the tags.

I went with a traditional color scheme this year. Smear Distress Inks on a non-stick craft sheet, mist with water and press watercolor paper into the ink.

I made a template in Adobe InDesign, but you can also use Word or write quotes by hand. Print on the inked papers, making sure they are dry first.

Use the Simon Says Stamp Large Standard Tag to die cut tags. I used Very Very Low Tack Tape to keep the die in place to make sure the text was where I wanted it to be.

Stamp numbers with Tim Holtz Worn Text and Lumberjack Plaid Distress Ink. Some of the quotes were matched with fitting numbers, as they were about a particular Christmas event or tradition.

Now for the best part, pick out a whole bunch of Christmas stamps. Ink, mist with water and stamp. I used mainly stamps by Tim Holtz. For texture and to bring all the tags together, I stamped each tag with Simon Says Stamp Halftone Background and Abandoned Coral ink, misting with water first.

The tags hang from a hook, but can be arranged in other ways too. If you want to see how I made the original base canvas, you can find that Christmas Countdown Calendar here.

Let's have a closer look at the tags. When I took this photo, I realized that 'White Christmas' is on two tags - I had printed it twice since the first print was hard to read and then by mistake included it anyway. I will make a new tag for day 5.


I stamped the notes from Tim Holtz Department Store here and there, with brown ink.

I always add pine trees to my countdown tags, since the forest is my favorite place.

And of course, some beautiful poinsettias, which reminds me that I need to get one for us. I always have a poinsettia on the table at Christmas and found a beautiful red pot for it in a second-hand shop recently.

I didn't print text on all the tags, since I wanted some variation.

The snowman tag has a stamped sentiment instead of a printed one.

I see more deer than normally on my walks at the moment, sometimes three different families during a single walk.

I just had to use at least one larger Santa stamp. These tags are a great way to get to use a whole lot of Christmas stamps at once.

This is such a lovely saying.

The 24th is the day when Santa arrives in Sweden and is often seen as the main Christmas celebration day, while the 25th is usually a calmer day. I used my favorite Swedish winter poem for the 24th, about a little gnome (one or the origins of the Swedish Santa) is the only one who is awake in the middle of a winter's night at the rural farm where he is secretly helping out.

So true! In particular when there is also snow.

For the 25th I used the Swedish version of Silent Night and I finished the tags with a beautiful Charles Dickens' quote.

I hope this inspired you to create your own December countdown calendars. You can find my previous countdown calendars here: 2015, 2016, 2018, 2019, 2020 and 2021.
I will be back soon to share my December Daily journal.

Thank you so much for stopping by here today!
Happy stamping!
Anna-Karin
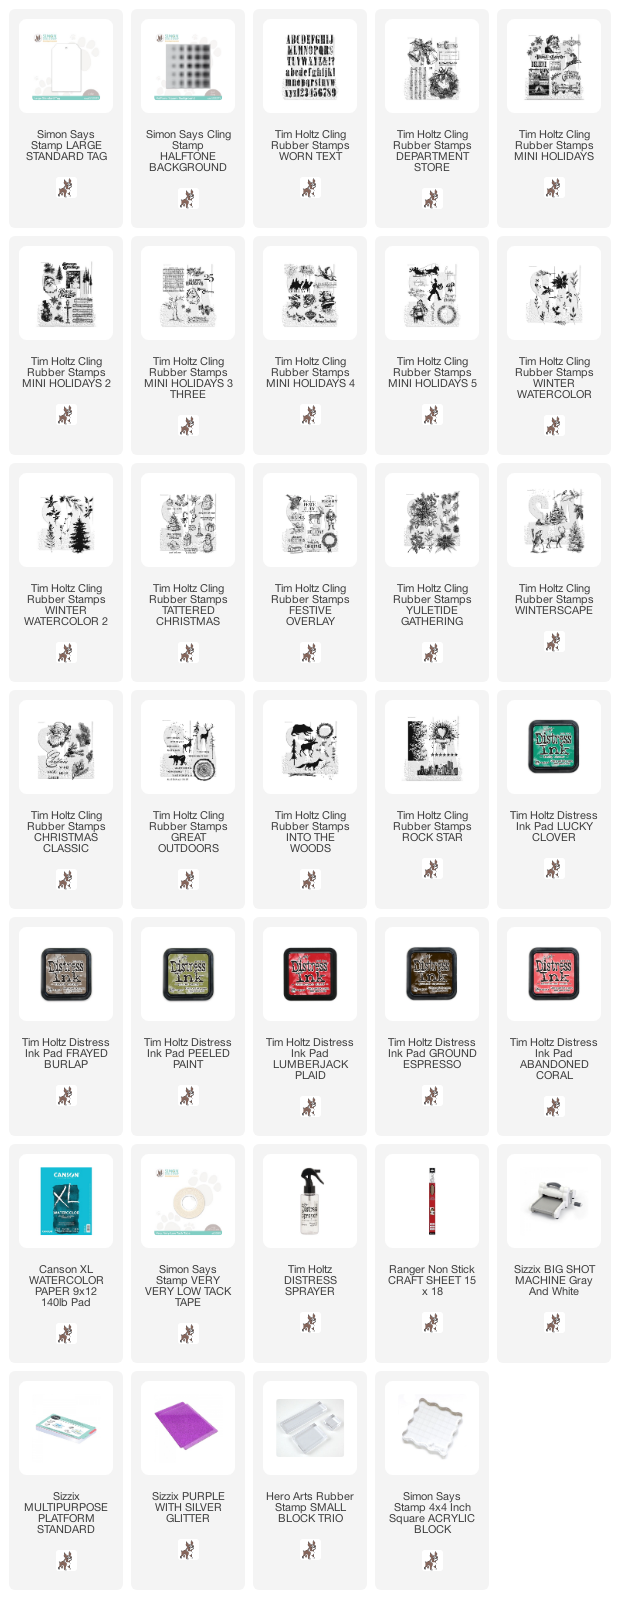
Supplies:
* Please note: the links are affiliate links, for which I receive a small percentage of sales generated by the link, at no extra cost to you.
No comments:
Post a Comment
Thank you so much for leaving a comment! Happy Crafting!