Hi stampers! It is STAMPtember®, a month-long celebration of stamping at Simon Says Stamp, with inspiration, new products and lots of surprises. Today, I am happy to take part in a huge blog party to celebrate the Simon Says Stamp exclusive STAMPtember® release.
You can find the start of the blog part on the Simon Says Stamp Store Blog.
Please note: this post has affiliate links, for which I receive a small percentage of sales generated by the link, at no extra cost to you.
The STAMPtember® release is full of fantastic new stamps, dies, stencils, inks and paper products. So much! You can find it all here. I am also happy to have designed three of the products, namely these: Document It stamp set, Foxglove stamp set and the Ledger background stamp.
For today, I made an art journal page and a tag to share, with tutorials.
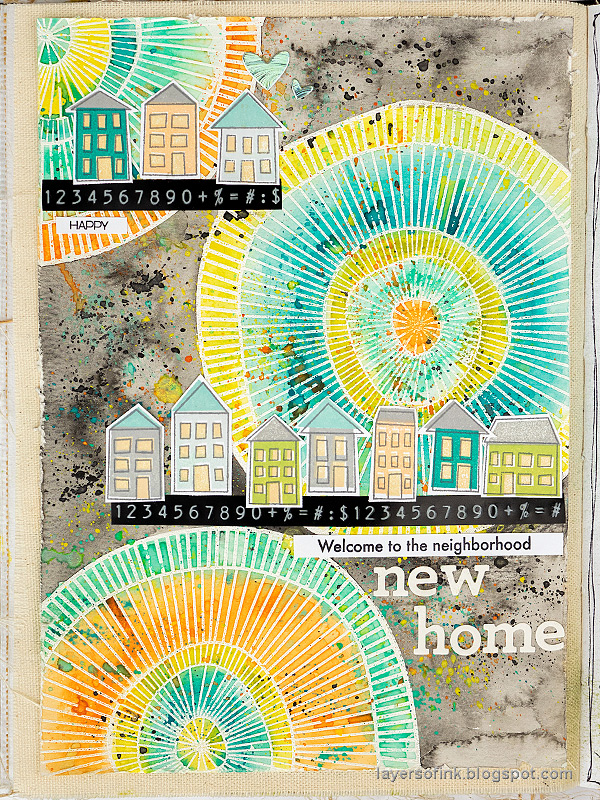
The art journal page is full of color and is a celebration of or recent move. The awesome Printmaking Houses set was perfect for my theme. I also used the Concentric Doodle for the fun background. You can use the techniques for cards too of course.
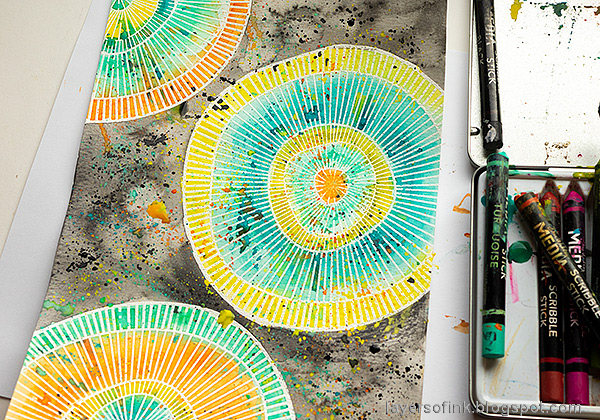
Continue with some black splatters, especially on the darker areas.
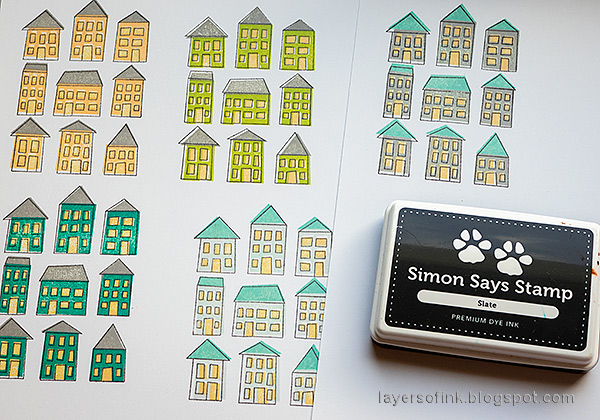
The continue with the window stamp and the roofs. If you use a stamp positioner like the Misti, you will get a more perfect result, but I like the slightly imperfect stamping. It also creates a shadow effect.
Finally stamp the outline stamp with Slate ink.
Cut the houses out. I used Label Tape as a road for my houses. 'Happy' comes from the Happy Poinsettia set.
The splatters are a combination of wet-on-wet and wet-on-dry, which gives a mix of splatters and great blending effects.
The colorful splatters stand out well on the dark background too.
More houses. My favorite are actually the ones where the stamping doesn't line up perfectly.
The title was die cut with the Archie Jr. Solid set.
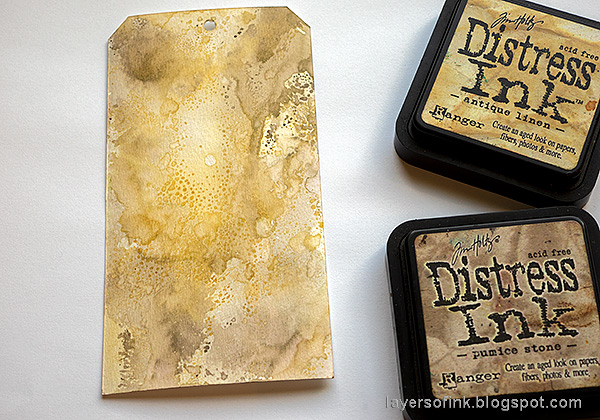
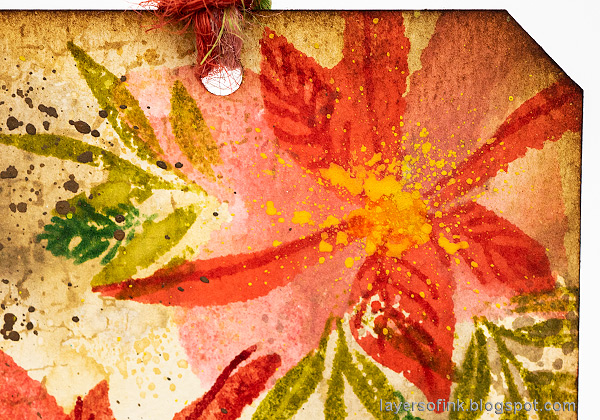
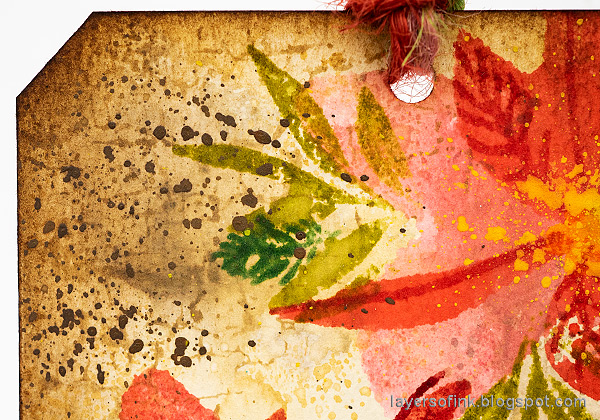
Start by cutting a tag from watercolor paper. I used the Crop-a-Dile Angle Corner Chomper to cut the upper corners. Smear Distress Inks on a non-stick craft sheet and press the tag into the ink. Let dry, and repeat until you are happy with the look.
Ink the larger poinsettia with Distress Ink, mist with water about four times and stamp.
Repeat with more petals and leaves.
Stamp the flower center with Mustard Seed Distress Oxide Ink.
For more texture stamp the background here and there with the Crackle Background and Frayed Burlap ink.
Add some Scribble Stick splatters to the tag too, and ink the edges.
I didn't think the yellow center stood out enough on this flower and splattered extra yellow there.
Starting out with a tinted background is often easier than to ink or color around the flowers after stamping, and it is quicker too.
One of the flowers has deeper red shades.
- Adelle Emery
- Aheba Tomlinson
- Amanda Korotkova
- Amber Rain Davis
- Amy Rysavy
- Andy Granick
- Angela Simpson
- Anna-Karin Evaldsson
- Barb Engler
- Barbara Tarayao
- Beth Opel
- Betty Wright
- Bibi Cameron
- Bobbi Lemanski
- Bonnie Crane
- Caly Person
- Cathie Cowles
- Cathy Zielske
- Cheiron Brandon
- Christine Smith
- Cindy Norberg
- Dana Joy
- Daniel West
- Debby Hughes
- Diane Morales
- Dilay Nacar
- Emma Williams
- Hannelie Bester
- Heather Hoffman
- Heather Ruwe
- Ilda Dias
- Jenn Shurkus
- Jennifer Kotas
- Jennifer McGuire
- Jessica Vasher
- Jessie Banks
- Jill Dewey Hawkins
- Joe Sysavath
- Joy Ott
- Kailash Naidoo
- Karen Boyce
- Karen Bull
- Kath Stewart
- Kathy Racoosin
- Keisha Charles
- Kim Hamilton
- Kulbir Kirkland
- Laura Bassen
- Laura Serdiuk
- Lea Lawson
- Lin Brandyberry
- Lisa Addesa
- Lisa Hetrick
- Lorraine Aquilina
- Lydia Fielder
- Mandy Stacey
- Megin Brooks
- Melissa Philips
- Michelle Lupton
- Michelle Murray
- Michelle Peckham
- Michelle Short
- Mindy Eggen
- Miriam Prantner
- Natasha Vacca
- Nichol Spohr
- Nina-Marie Trapani
- Norine Borys
- Pam Sparks
- Pam Torkelson
- Rosemary Dennis
- Sandi MacIver
- Sandra Mouwen
- Seeka
- Shari Carroll
- Sidnie Des Jardins
- Susan R. Opel
- Suzy Plantamura
- Tina Smith
- Tracy Ware
- Vera Yates
- Vicky Papaioannou
- Virginia Lu
- Yana Smakula
- Yoonsun Hur
- Zoey Emanuela Scarpelli
- Crystal Thompson
- Jana Millen
- Marcea Watkins
- Meihsia Liu
- Veronica Zalis
* Please note: the links are affiliate links, for which I receive a small percentage of sales generated by the link, at no extra cost to you.















Very cool piece. I love seeing mixed media, but wouldn't know where to begin, your step by step instructions are very helpful.
ReplyDeleteThank you for sharing your process
Wonderful journal page with geometric look that reminds me of Spirograph. The Poinsettia tag has a wonderful Tim Holtz feel to it with the coloring and distress inks.
ReplyDeleteMelissa
"Sunshine HoneyBee"
I love your projects, hard to choose a favorite but that doodle circle coloring and that gorgeous poinsettia are really at the top of the list!
ReplyDeleteGreat cards 😊
ReplyDeleteWow! Just wow!! So beautiful!! And very inspiring!! Thanks for such a detailed list as well!!
ReplyDeleteBeautiful cards! Thanks for the tutorials!
ReplyDeleteGreat cards!
ReplyDeleteVery creative creations!!
ReplyDeleteBeautifully done, now I need Scribble Sticks!
ReplyDeleteYour poinsettia tag is a showstopper.
You have totally brought life to these great new products..
ReplyDeleteJust when I thought I didn't need that Concentric Doodle stamp!!!!!!
ReplyDeleteLove the poinsettias
ReplyDeleteLove the doodle circle and all the fun colors you used, and the cute little houses how cute are those!!
ReplyDeleteWhat awesome pieces! Love the doodle circle coloring and the poinsettias are gorgeous!
ReplyDeleteGreat card and tag. I especially like the tag. I may have to try some of what you did and see what comes out.
ReplyDeleteLove your creative touch!
ReplyDeleteGorgeous!! Love the tag!
ReplyDeleteWow!!! Absolutely Stunning projects!!!!
ReplyDeleteLove your bold colors and the many creative ways you showed to use Concentric Doodles! TFS!
ReplyDeleteLove,Love! The colors you used are amazing
ReplyDeleteLovely artsy card!!!!
ReplyDeletewonderful journal page with the houses and concentric circle and your Christmas tag is so vintage. thanks for sharing
ReplyDeleteBarb Housner
Great cards!
ReplyDeleteI love your tag! Looks very vintage.
ReplyDeleteI love the tag! Perfectly vintage
ReplyDeleteLovely card and tag. Thank you.
ReplyDeleteThis is such a great art journal page plus a beautiful, autumn tag.
ReplyDeleteI love the painted look, I love mixed media cards! This is so amazing!! I love the little houses with that rubber stamped background :D
ReplyDeleteI absolutely applaud you for the tag! Using distress inks to stamp an image is so against the norm, but it really looks like you painted those flowers. Awesome tag!
ReplyDeleteEvery time I see the geometric circle stamp I like it better.
ReplyDeleteI absolutely love the Christmas tag! It is beautiful.
ReplyDeleteYour tutorial was so helpful and detailed! You thought of so many questions I didn't even know I had until you answered them. Thank you for the care and thoughtfulness you put into this post!
ReplyDeleteThese projects are awesome. I love the colors and the inspiration! Thanks for sharing--off to shop SSS!
ReplyDeleteGreat journal page and tag!
ReplyDeletelove how you used the stamps in a mixed media LO
ReplyDeleteYour journal page is gorgeous! You really made that circle stamp pop. The tag has the perfect vintage look. Very pretty.
ReplyDeleteLove the colors on this!
ReplyDeleteGreat creative use of stamps ,dies, and inks.
ReplyDeleteSimply gorgeous!!
ReplyDeleteWow. Thank you for your tutorial on making a background with the splatter technique. Must try now that I’ve seen your beautiful cards.
ReplyDelete