Hello and welcome to my blog! I am happy to take part in the Simon Says Stamp DieCember® release blog hop today. You should have come here from the creative Bibi Cameron.
The DieCember® release is full of fantastic and versatile dies and most of them are perfect for any time of the year. You can see the full release here. If you use the code JINGLE when ordering and you will get an American Crafts Christmas Tag Kit. This promotion will expire 12/4 at 11:59 pm EST.
I made two projects, an art journaling page and a shaker card. Both are stepped tutorials and the techniques can be used for many types of projects.
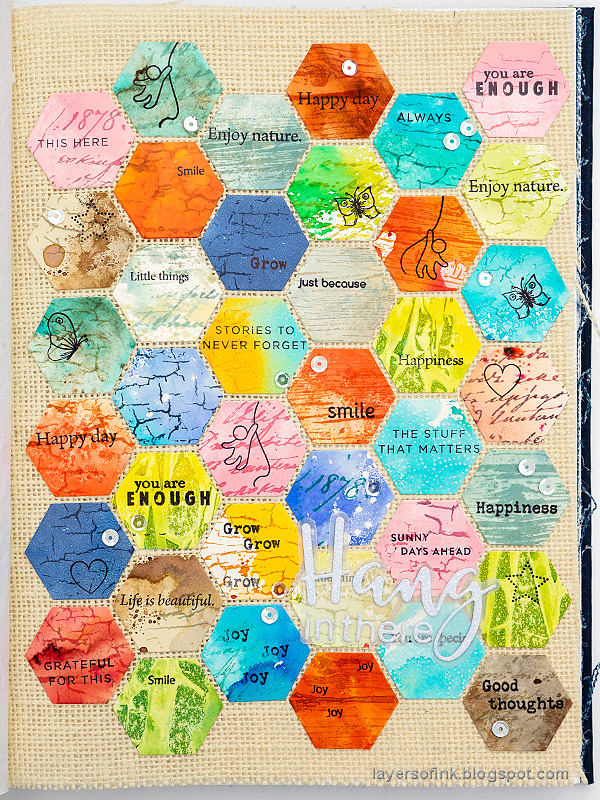
Start by die cutting lots of hexagons from various scrap papers. You can also get a similar effect by using patterned paper scraps. I only used the solid tile, but you can use the other two as well.
Most of the tiles were stamped with SSS background stamps and SSS inks, in a similar shade as the tile, creating a tone-on-tone effect. I used the Old Letter, Crackle Background and Wood Planks background stamps.
Next I used small sentiments from quite many SSS stamp sets (you can see them all in the supply list below). Stamp with black ink.
Hang In There was die cut from SSS white glittery paper and the mat was die cut from vellum.
Glue the glitter letters to the vellum mat. The vellum helps the sentiment stand out, without covering up the background completely.
The tiles were glued to a burlap page in Dina Wakley's Blue Edition Media Journal, alternating the colors. The butterfly comes from SSS Thoughtful Flowers.
I thought the little people from the Just Miss You set were perfect together with the Hang In There sentiment. The pink and orange tiles are glossy paper, which adds a nice touch, but might be hard to see here.
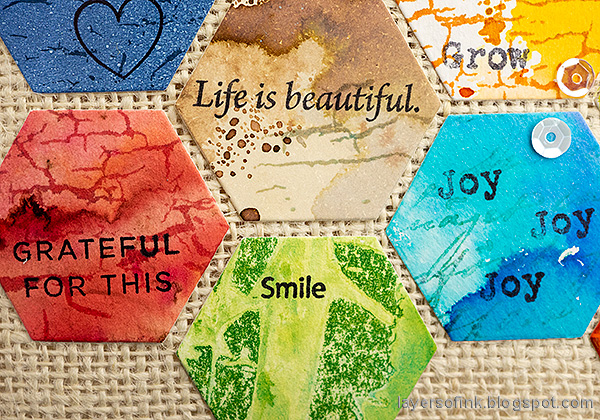
The scraps carry a bit of their former projects with them, since I can remember every single project that these came from. Some of them were made long ago. That is one of the reasons why I like to use these types of inky scraps.
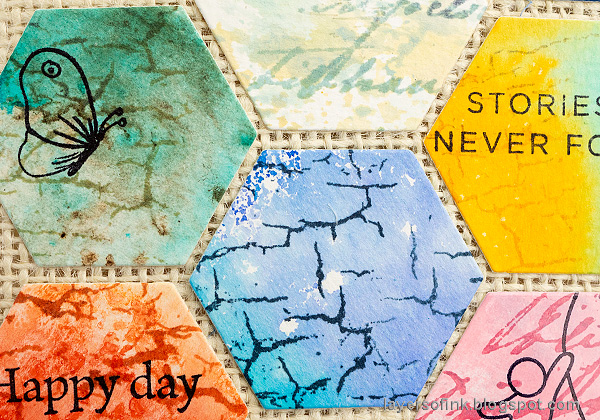
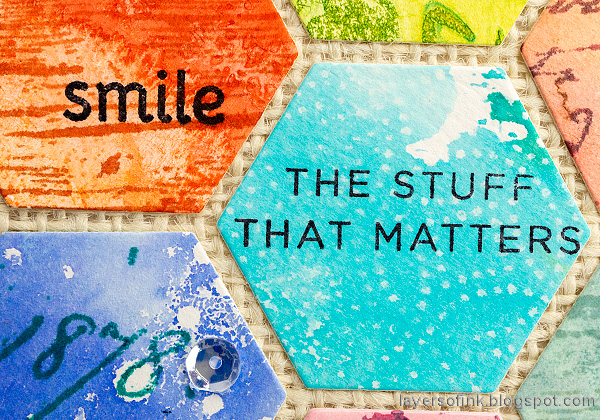
If you look closely, each tile has interesting textures. This tile came from my Distress Ink Blocks card.
If you want to see how I made the green tile in the middle, it comes from my Cling Wrap Watercolor Floral Tutorial.
The light blue tile is a left-over from a video I made on Wax Paper Resist.
The blue tile is glossy paper, inked with Distress Ink and misted with water.
I also added some sequins to the page, for a fun touch.
And now to the shaker card.
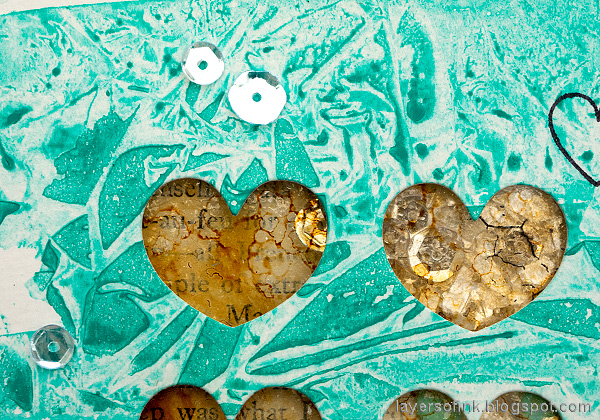
The Chunky Hearts Panel is so versatile and I love the shape of the hearts. Hearts work for any time of the year and you can use both the panel as such and the die cut hearts. I saved my hearts for a future project. I used a previous background here too, from my Cling Wrap Watercolor tutorial. I thought it looked a bit like ice and fit with a winter card.
Start by die cutting the Chunky Hearts Panel from a left-over paper or from patterned paper.
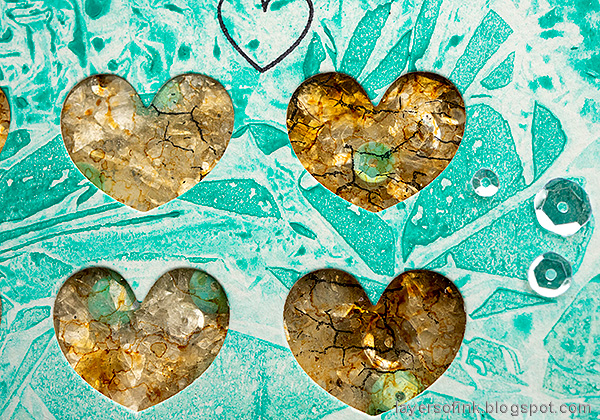
Cut a piece of acetate or Clearly For Art Modeling Film and color with alcohol inks, to create the look of an old stained window.
Stamp on the other side in a few places with the Crackle Background stamp.
Adhere the inky acetate to the back of the heart panel, add foam tape around the edges and fill with Seaglass Sequins and Tim Holtz Mica Flakes. Place another acetate sheet on top to create a sandwich.
Die cut the Simple Stem from SSS white glitter paper, aqua glitter paper and kraft cardstock. This is such a lovely stem.
Apply gesso to an old book paper, but don't cover the text up completely.
Adhere the old book paper to the back of the shaker and then mount everything on folded kraft cardstock. Glue some sequins to the background. I really like to add sequins to my projects at the moment and they are within easy reach on my desk too.
The mica flakes and sequins look lovely behind the windows, as if a treasure is hiding there.
And when you don't see the flakes, you can read some of the words in the background.
Don't miss all the inspiration along the hop. There are of course prizes to be won too, and at each stop on the hop SSS is giving away a $25 coupon, randomly drawn from those who leave a comment. The winners will be posted post on the Simon Says Stamp store blog on Wednesday, the 9th of December.
Your next stop on the hop is Bobbi Lemanski and she will show you wonderful card inspiration.
Here are all the stops along the hop:
Anna-Karin Evaldsson (you are here)
For more DieCember® inspiration, remember to check out the DieCember® gallery at SSS, and if you make something with products from the range, it is fun if you post it in the gallery too. There are galleries for all releases, and for the card kits, full of inspiration. Part one of the DieCember® blog hop was yesterday, so don't miss all the inspiration there.
Thank you so much for taking the time to visit my blog today!
Happy winter crafting!
Anna-Karin
Supplies:
* Please note: the links are affiliate links, for which I receive a small percentage of sales generated by the link, at no extra cost to you.
* Please note: the links are affiliate links, for which I receive a small percentage of sales generated by the link, at no extra cost to you.












Thank you for the awesome inspiration!
ReplyDeleteOh my goodness! Such intricate work and beautiful!
ReplyDeleteWow you are so creative. Love it
ReplyDeleteOMG these projects are amazing. Love what you've done with the hexagons. Such a cool idea to make the journal page. It's a wonderful way to use scraps and provide a real source of encouragement. Thanks for the awesome inspiration.
ReplyDeleteHang in there, the theme for March 2020 and beyond!
ReplyDeleteOMGoodness! These are beautiful cards. You are so very talented!
ReplyDeleteWow love all your projects, the scrapbook page is fabulous!
ReplyDeleteTim Holtz would be proud of you - great projects
ReplyDeleteI love your style! Very cool.
ReplyDeleteWOW WOW WOW the mixed media on your cards and sentiments are incredible!
ReplyDeleteBeautiful creations! Love the hexagon journal page and the idea of using leftover scraps because I hate throwing away any pieces of paper! Thank you for the inspiration and sharing!
ReplyDeleteBeautiful! Love the hexagon card with all the uplifting messages. Great idea!
ReplyDeleteYou have such great ideas and I love the cards. My favorite has to be the one using the heart die cut!
ReplyDeleteYour art journal page is fantastic! I love all the positive messages. Love your shaker card, too.
ReplyDeleteI really like the hearts. They can be used in so many ways, and are cute even if they are kept simple.
ReplyDeleteLOVE these mixed media projects! So creatively done.
ReplyDeleteGreat ideas-love the quilt vibe!
ReplyDeleteWow! That shaker card is awesome!
ReplyDeleteLove your art journal page.
ReplyDeleteI can see this making lots of
fun greeting cards - would be
colorful, cheering, and
inspirational for the recipient.
thanks for sharing
txmlhl(at)yahoo(dot)com
Your work is simply stunning. Enjoyed your post immensely
ReplyDeleteWow!!! These are Gorgeous and sooooo Creative!!!
ReplyDeleteLove your mixed media. Love the hexagon cards and putting sentiments on them. Great way to use up scraps
ReplyDeleteLove what you did with the hexagons.
ReplyDeleteWOWza... I'm over the moon for that journal page!! Gorgeous and your other projects are wonderful, too!!
ReplyDeleteLove your art journaling piece. I find something new every time I look at it.
ReplyDeleteYour hexagon tile creationist wonderful and looks like it was fun to make, too! So many good ideas here, thank you!
ReplyDeleteLove your use of shape and color!
ReplyDeleteThank you very much for the inspiration! Love your use of the hexagon shapes!! Your cards are beautiful. Thank you
ReplyDeleteI love your journal page and your card - thank you for the inspiration.
ReplyDeleteExcellent!!! When I saw the hexagon dies I couldn't really picture a good use for them but you have shown a fabulous one! Love your mixed media work.
ReplyDeleteBeautiful! Definitely a great die for using up all your colorful paper scraps!!
ReplyDeleteLove the scrapbook page that you made. Stunning!
ReplyDeleteBoth projects are amazing! I love the way you have used up the paper scraps in the layout. And the shaker card is gorgeous!
ReplyDeleteWow, wonderful, love all the detail!
ReplyDeleteBoth projects are very creative!
ReplyDeleteYou have given me lots of inspirational ideas to try, thank you!
Love the mosaic card as a way to use paper scraps and project leftovers. And the card with the heart cover die combines so many different techniques! Fabulous!!
ReplyDeleteWOW, that is amazing.
ReplyDeleteWow! That first card looks like a lot of work. Good job! I really like the second card you did too. The techniques are different and interesting. I am going to go back and take a closer look and give these ideas a try. Thanks so much for freely sharing your inspiration and how-to knowledge.
ReplyDeleteI love the backgrounds! Such fun techniques. They coordinate so well with the release dies
ReplyDeleteWow, great mixed media use on your cards. Love the various hexagons. thank you for the inspiration.
ReplyDeleteI love how you work with different kinds of mix media and layering. How fun. I had to follow your Instagram and YouTube. Crystal Strumberger
ReplyDeletealways fun to see mixed media projects, you rocked both of them, nice to see journal pages done with card making supplies
ReplyDeletethanks for sharing
Barb Housner
wow - very clever use of these new products - you are an inspiration
ReplyDeleteLove the mixed media vibe!
ReplyDeletebeautiful cards!! love the mixed media also!
ReplyDeleteWow, I admire your patience lining up all those hexagons, lol!
ReplyDeleteWOW! This is so different, but good different, so cute. Thank you
ReplyDeleteI like your different spin on things. Thanks for sharing
ReplyDeleteTruly Fabulous! Thank you!
ReplyDeleteWow! Lovely projects! The backgrounds are beautiful! I love the wax paper technique video- I'm definitely giving that a try!
ReplyDeleteThis is amazing! I love it and the new techniques.
ReplyDeleteAmazing backgrounds and techniques.
ReplyDeleteI am in love with those hexagons! Those might be my favorite dies froths release!
ReplyDeleteLove the quilt like effect on your journal page, the scraps came together beautifully. The texture and dimension on the shaker is fab, thanks for the inspiration.
ReplyDeletePretty projects! I liked all the techniques you used! The mosaic is really fun and bright! Thanks for the inspiration!
ReplyDeleteOooh, those are fantastic projects!
ReplyDeleteI am so impressed with both of your creations! I really like geometric shapes & the time you must have spent on your first project had to have made it a labour of love.
ReplyDeleteThese are so much fun! I love the way you used the hexagons with all your scraps and made a collage.
ReplyDeleteI admire your creativity.
ReplyDeleteLove your different style of cards. I see something different each time I look! Awesome
ReplyDeleteThe creativity in these projects is off the charts. Thanks for sharing.
ReplyDeleteReally pretty shaker card. I've never thought to use alcohol inks on acetate. [Bunny]
ReplyDeleteGorgeous shaker card and journal page.
ReplyDeleteThanks for sharing...
Such unique and beautiful cards!!
ReplyDeleteBeautiful projects! You've been very busy!
ReplyDeleteOh my goodness, what wonderful projects!
ReplyDeleteLove the journal page!
ReplyDeleteYour projects are AWESOME!! I love those hexagon tiles and the words you used on them! And that chunky hearts die has stolen my heart! Thanks for such great inspiration. :)
ReplyDeleteAngie
abcammack@comcast.net
Very cool projects! I love the hexagon!
ReplyDeleteI love the journal page! Thanks for the inspiration!
ReplyDeleteAll your work is awesome! I love all the intricate details.
ReplyDeleteLove the hexagon designs, such a creative piece of art! Fabulous shaker card too!
ReplyDeleteI love how you decorated the backgrounds of the hexagon dies. It would make a great card front.
ReplyDeleteI love that fabulous journal page & the shaker card is truly awesome! I love all the detail you add to your creations.
ReplyDeleteso fun! I love the patchwork vibe!
ReplyDeleteLovely card. I think just about everyone could use a layout like yours as a reminder that we are doing are best and to just hang in there!
ReplyDeleteSo many wonderful ideas! Love how you stamped on each of the geometric figures. So awesome!
ReplyDeleteLove your page and your pretty shaker card!
ReplyDeleteAmazing cards! I love the hexagon one. It looks like a lot of work, but the result is incredible!
ReplyDeleteLove the hexagon and mixed media look! Gonna dive into your tutorials this weekend - thank you!!
ReplyDeleteLove your projects!
ReplyDeleteLove, love, love this!!! Beautiful colors and love the layering on top of the colors. Great use of dies!
ReplyDeleteAnna-Karin, you are amazing! I love subscribing to your blog and you always make such beautiful projects. I love how you made each hexagon special and they all create such a fabulous page. The shaker card is amazing as well, and I just love the antique look of each layer!
ReplyDeleteWow! I love how you used the background stamps on the hexagon tiles and then stamped a sentiment or a tiny stamp on each one. It looks amazing!
ReplyDeleteSuch creative and unique projects. Your mixed media look is so beautiful!
ReplyDeleteWow, Anna-Karin, you have shared so much with us and I love that you did a scrapbook page and it is amazing. ❤️
ReplyDeleteYour journaling page is fantastic. I love the use of different papers but also the little sentiments and images stamped within. Perfect!
ReplyDeleteWow! This is an absolutely beautiful project and a beautiful idea! I love the geometric design and the way you've up cycled your inky scraps. Brilliant!
ReplyDeleteAmazing cards!
ReplyDeleteWow! Gorgeous projects and so unique!
ReplyDeleteWhat beautiful projects! I love the sentiments on your hexagon page and your card is beautiful! Thank you so much for sharing your work! :)
ReplyDeleteWonderful mixed media projects. I especially like the hexagons.
ReplyDeleteLOVE! LOVE! LOVE! all of your beautiful creations! You are so creative!
ReplyDeleteYou got me thinking.... it would be so cool to keep a huge pile of hexagons on the craft place and with every card made you could stamp or embellish one and it would slowly morph into an art of it's own. Fun!
ReplyDeleteHexagons are amazing!
ReplyDeleteGreat projects and products!
ReplyDeleteLove your backgrounds. I dig that hexagon shape.
ReplyDeleteLove the journal page - fun details and a great way to use artsy scraps
ReplyDeleteSo creative Anna-Karin. Loved all of your creations.
ReplyDeleteI so love both your creative projects. The journal pape blew me away... such a creative use of the hexagon tiles; aweskme touch to stamp the tiles OMG , sk aweskme!! Always love your creative work !!
ReplyDeleteWhat an insanely WONDERFUL idea .... adding tiny sentiments to the hexagon shapes....I have a lot of those tiny sentiments that I never use so will be breaking them out of their storage envelop and put them to good use!!! I loved your card designs!!
ReplyDeleteI love your hexagon card, it’s like a quilt on a card.
ReplyDeleteI just love your use of leftover papers! It’s so clever & cute! Adding the little stamps was inspired!
ReplyDeleteGreat projects! The shaker card is my favorite - lots of dimension to it.
ReplyDeleteYour mixed media projects are impressive. I also love the hexagon scrapbook page and inspirational quotes. We all need that right now. We will definitely Hang In There!
ReplyDeletewow, stunning!
ReplyDeleteYour hexagon card is really interesting and I like the messages all over it! The heart card has so many cool elements!
ReplyDeleteDear Anna-Karin - I love that hexagon tile die set! I like your work - it's forward-thinking and edgy! Happy holiday to you!
ReplyDeleteLori S in PA (USA)
Amazing backgrounds! What a wonderful way to use scraps.
ReplyDeleteFab projects and such a great way for using up scraps.
ReplyDelete