
Hello stampers! Today I have a video tutorial with a fun resist technique using wax paper, die cutting and dye ink.

I hadn't used wax paper techniques in a long time. They are such fun to do and gives great texture and patterns. This is a an easy technique and you can experiment with different dies and colors. I used the Simon Says Stamp Detail Ringlet Plate for the background. I made lots of backgrounds and turned two of them into butterfly cards.
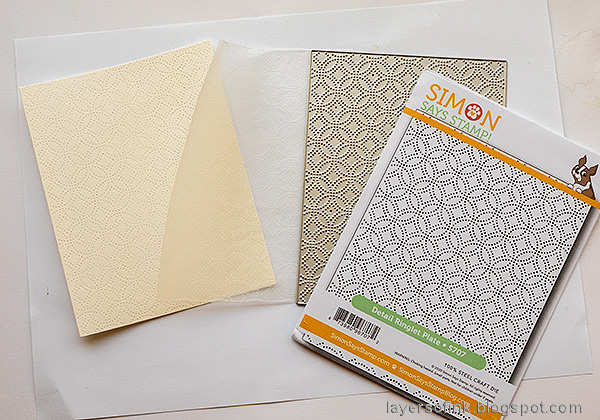
Start by die cutting the Detail Ringlet Plate from watercolor paper and wax paper in one go, placing the wax paper between the watercolor paper and the die. This is also a great method for die cutting intricate dies, which is actually what I had initially planned to do. But then the wax paper looked so pretty, that I switched techniques.
Here is the video, if you want to watch it in HD click here to come to YouTube. You have to excuse my inky hands in the video - I had already made quite a few backgrounds before I decided to do a video. I had picked blueberries too, which stain my hands badly. So it was either a video with inky/blueberry hands, or no video at all.
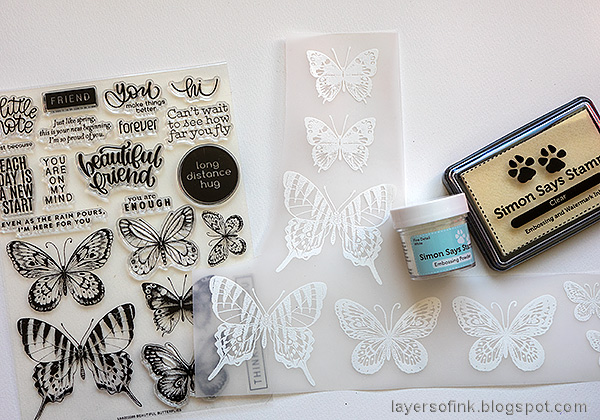
White emboss butterflies from Simon Says Stamp Beautiful Butterflies set on vellum.
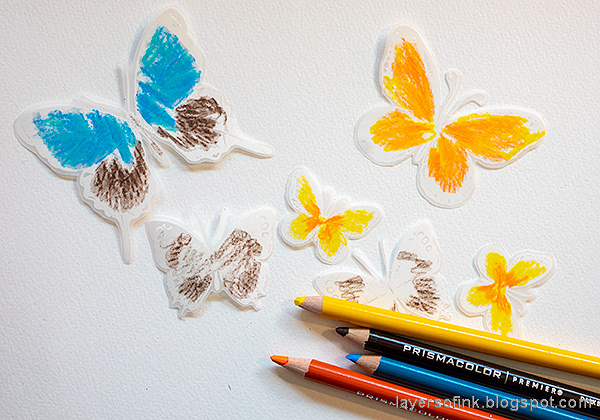
Color them at the back with Prismacolor pencils. As you can see, the back doesn't have to be pretty.

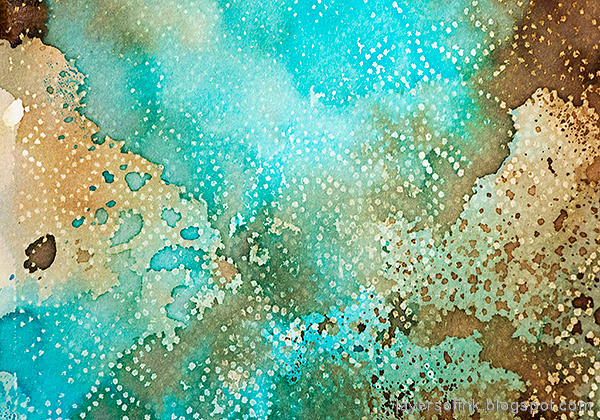
I picked one of the brown and blue/turquoise backgrounds for this card. The leaves were die cut from old book paper with the Tender Leaves die.

As you can see here, there are two large butterflies layered on top of each other, to give dimension.
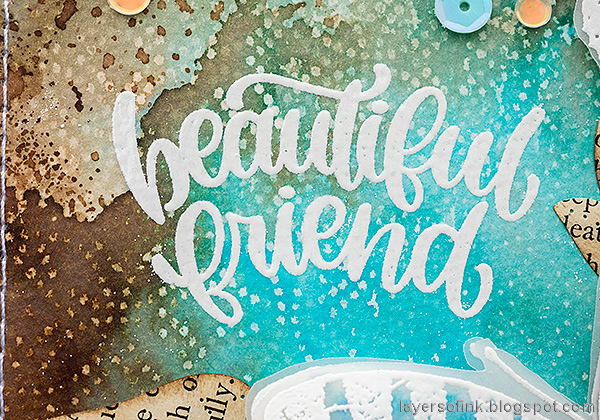
White emboss a sentiment from Beautiful Butterflies on the background.

The brown color at the back of the butterfly is just barely visible.
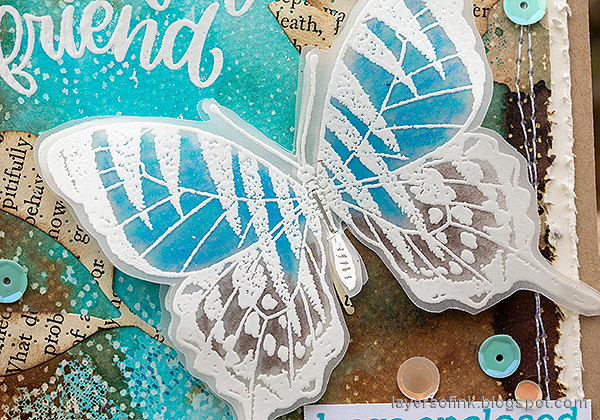
On this butterfly, there is more open space and you can see the colors better.

I stitched around the panel with my sewing machine and added some sequins.

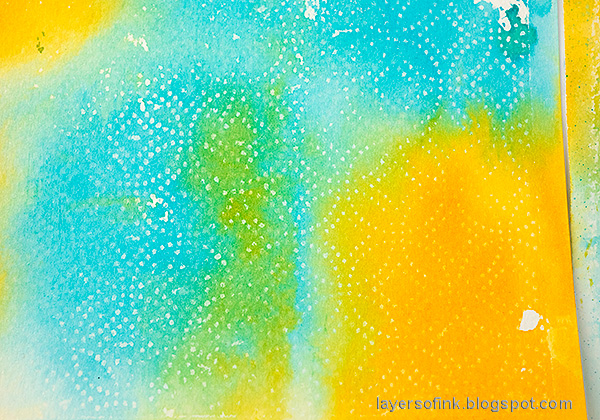
The second card has shades of orange, blue and green. I like how this color combo turned out. It's very cheerful.

There are two big layered butterflies on this card too.
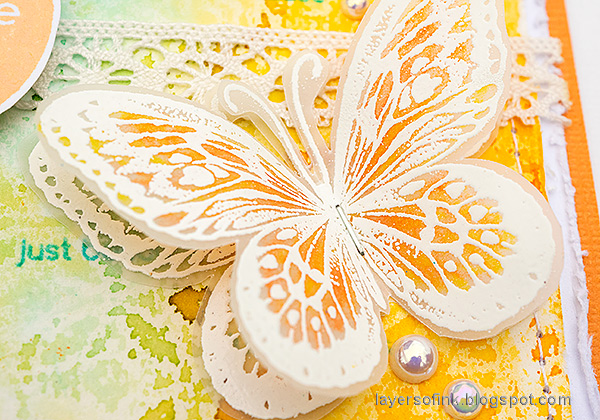
I like the look of this orange butterfly, with all the lovely details. Note that I didn't flick off the stray embossing powder, but kept it for extra texture. Check out my Stray Embossing Powder tutorial for more inspiration on this technique.
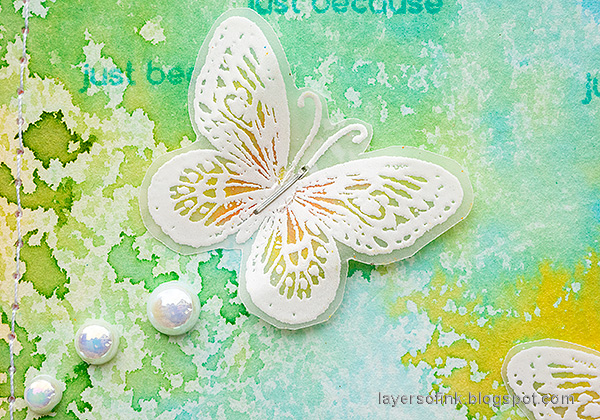
On this card, I used pearls instead of sequins as embellishments. The Beautiful Butterflies set is so pretty.

Just because also comes from the Beautiful Butterflies set.

This sentiment was stamped with SSS Melon ink.

Here are some photos where you can see the different textures. Since the wax paper was sandwiched between two sheets of watercolor paper, you get different patterns on each side, since the wax transfers differently. A more dotty pattern to the left, similar to the die cut, and a different, more solid, but also more textured pattern to the left.
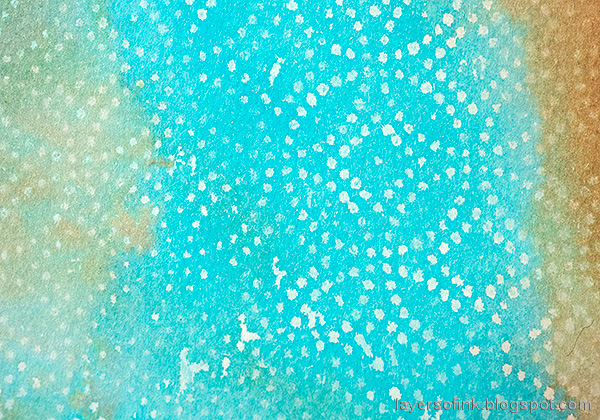
I just love the dotted pattern from the Detail Ringlet Plate die.


These were both made in the video. You will get a different result every time you use this technique.
Try using different color combos and test doing the technique with other dies too.

I hope you enjoyed this tutorial and that it inspired you to use wax paper for resist techniques.


Just two more days remain of STAMPtember®, but the stamping inspiration will remain.
Thank you so much for taking the time to visit my blog today!
Happy crafting!
Anna-Karin
Supplies:
* Please note: the links are affiliate links, for which I receive a small percentage of sales generated by the link, at no extra cost to you.
* Please note: the links are affiliate links, for which I receive a small percentage of sales generated by the link, at no extra cost to you.
No comments:
Post a Comment
Thank you so much for leaving a comment! Happy Crafting!