
Hello friends! Today I am sharing a tutorial showing how you can start with a simple shape and turn it into something else. In this case, dots will become blueberries, but that is not the only option. Basic shapes, such as circles and squares, can easily become other objects in your projects, since they are so versatile. I made an art journal page, but if you reduce the size this would make a great card too.

This has been a fantastic blueberry year here and I have picked a huge amount of blueberries in the forests on my walks. Not only are they delicious, they are also free and most of the forest floor here is covered with blueberry plants. I just walk into the forest and everywhere I look, there are blueberries. It is also very peaceful to pick blueberries. They are not the same as what we call American blueberries, but instead low bushes which grow wild. About 17% of the surface of Sweden is said to be covered with blueberries, so there is plenty. I wanted to document my blueberry picking excursions in my art journal. You can also turn the dots into other berries, fruit, vegetables, marbles or anything else you can think of.
I used the Bubble Wrap stencil from the Simon Says Stamp STAMPtember® release.

I started with a piece of watercolor paper. Smear Distress Inks next to each other on a craft sheet, covering an area roughly the same size as the paper. Mist with water and press the paper into the ink.

Let the paper dry and continue adding more Distress Ink and some Distress Oxide Ink, until you are happy with the look.

Ink through the Bubble Wrap stencil, starting with the Distress Inks and an ink-blending tool. I always start with the lightest shade. Continue with Distress Oxide ink, using a blending brush. Just add a little, for a mottled effect, perfect for blueberries. Then splatter some water on the background to make the inks blend and run. I like this new size stencil from SSS, it is 6x9 and perfect for art journaling.

When dry, doodle blueberries on the dots using a black pen. Don't worry about getting it perfect. I aimed for a loose look. I also added some highlights and lines with a white gel pen.


Distress the edges of the paper. I glued the page to one of the denim pages in my Dina Wakley Blue Edition Media Journal, and also added some Tim Holtz Label Tape and rub-ons.

I like the look of the mix of Distress Ink and Distress Oxide Ink, combined with the water. As you can see, the blueberries were sketched quickly, with some broken lines and they are not completely round.

I added some rub-ons from the Tiny Text and Specimen Remnant Rubs sets.

When the forest floor is covered with snow, this page can help me remember picking blueberries while the sun was shining down through the trees.
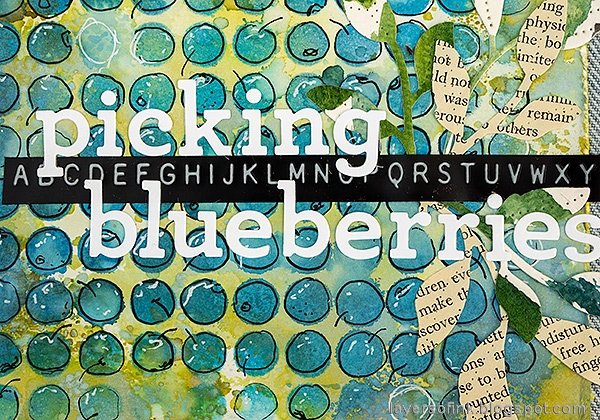
The title was die cut from white paper using the Simon Says Stamp Archie Jr Solid set.

These Tender Leaves are so pretty and I used them even though blueberry leaves have a slightly different shape.
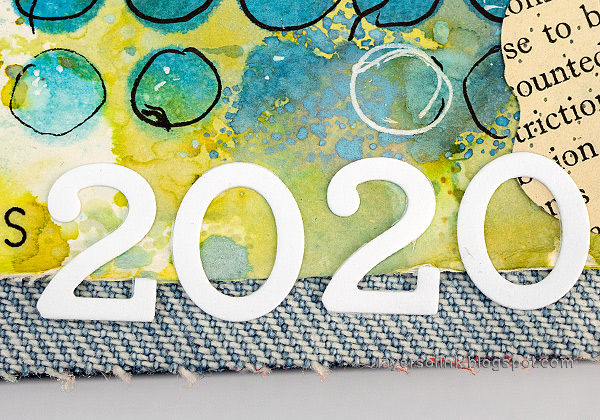
The year was also die cut with the Archie Junior set.


Thank you so much for taking the time to visit my blog today! See you soon again!
Happy crafting!
Anna-Karin
Supplies:
* Please note: the links are affiliate links, for which I receive a small percentage of sales generated by the link, at no extra cost to you.
* Please note: the links are affiliate links, for which I receive a small percentage of sales generated by the link, at no extra cost to you.
No comments:
Post a Comment
Thank you so much for leaving a comment! Happy Crafting!