
Hello crafters and welcome to my blog! I hope you are all well and healthy. I am so happy to take part in the Simon Says Stamp Sunny Days Ahead blog hop, to celebrate the new release. You should have come here from the very creative JD Collins.

The Sunny Days Ahead release is filled with wonderful and versatile products. You can see them all here. I think the name for the release is perfect, there are sunny days ahead. You will find gorgeous graduation products, lots of ways to celebrate Mother's Day, and an many pretty spring florals. If you use the code sssink you get a free Intense Black ink pad with any purchase (offer valid until 4/26 at 11:59).

I made two projects for the blog hop and they are very different from each other. There is a mixed media canvas featuring a trio of roses, and a quick stamped and watercolored Mother's Day card.

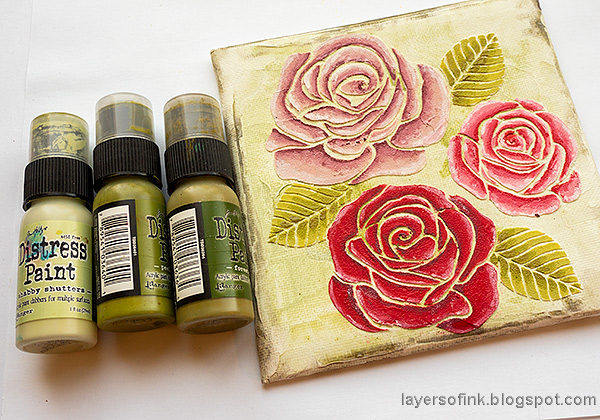
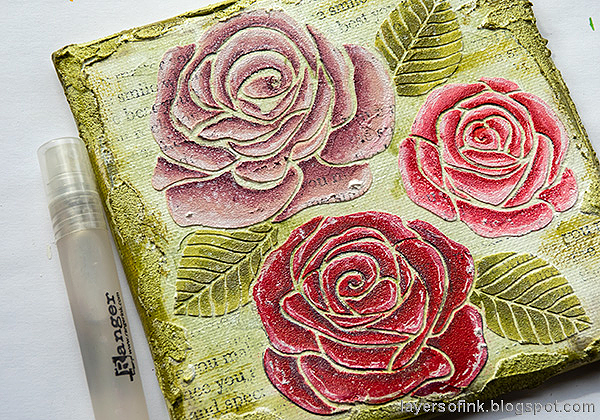
Here's the finished canvas. Mixed media projects look harder to do when you just see the finished product, but if you follow along in the tutorial below, you will discover that it isn't so hard. It is created layer upon layer. This would be a great Mother's Day gift and it is easy to send too, since many of us might not be able to see our mother in person on Mother's Day. Especially in these days. It's a 6 x 6 in canvas, but you can also turn the design into a card, if you use sturdy paper as a base. It was made with the Rose Trio Stencil.

Start with a layer of gesso (I forgot to take a photo of that step) and let it dry. The paint watered-down Distress Paints on the background, misting heavily with water.
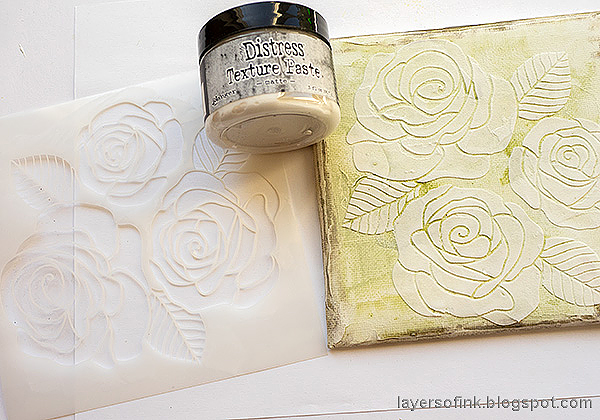
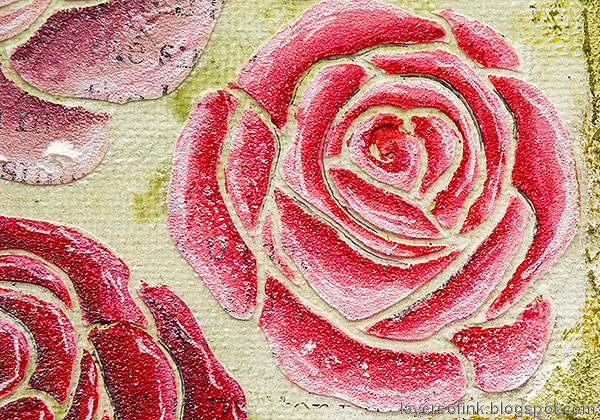
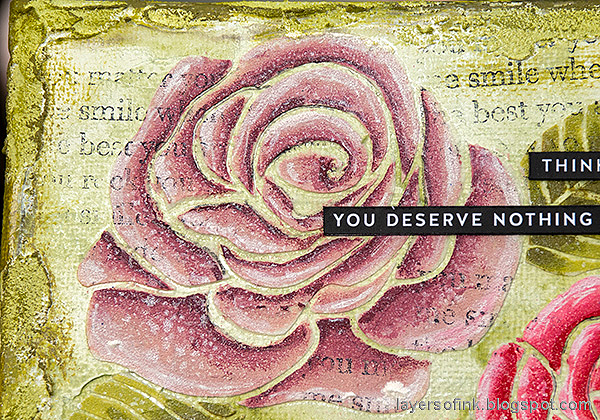
When dry, apply Texture Paste through the Rose Trio stencil.
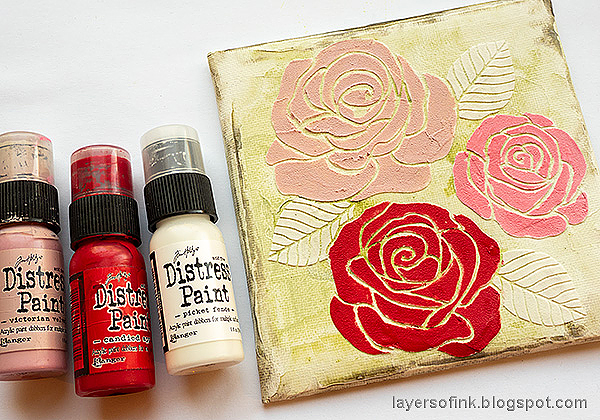
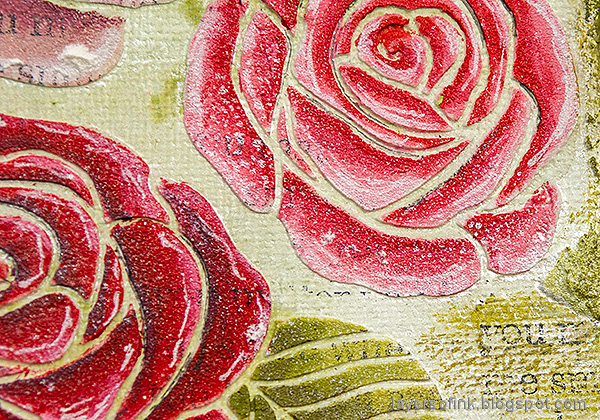
Paint the roses with three shades of pink and red. The pink shade to the right is a mix of Picket Fence and Candied Apple.
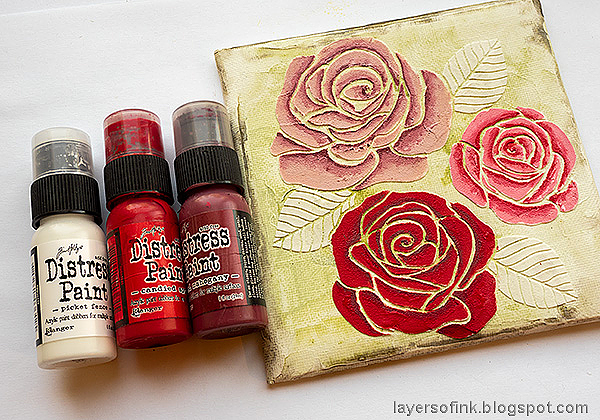
Continue with darker shades, adding shadow areas on the inside of the petals. Blend into the lighter shade by using some of the lighter colors.
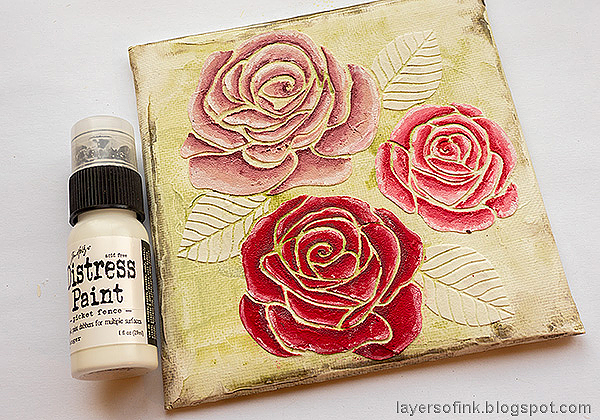
Add a little white for highlights.
Paint the leaves with three shades of green, starting with the lighter one.
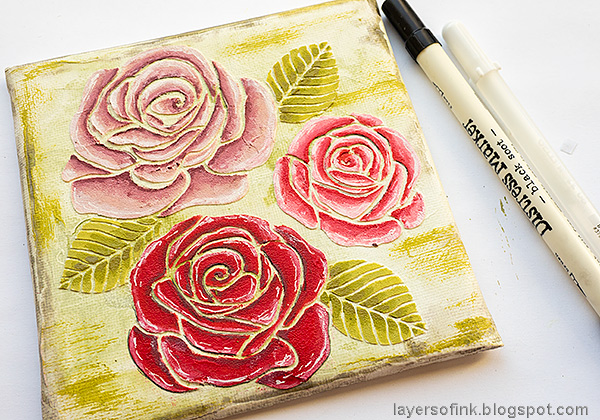
I wanted this canvas to have a light look and didn't add as many shadows as I often do, just a few lines here and there with a black marker. I also scribbled a white gel pen here and there for more highlights.
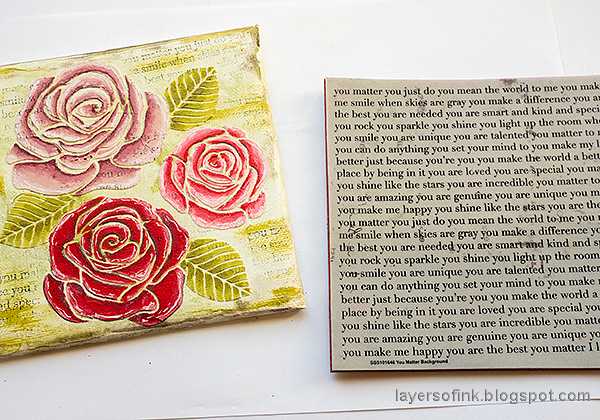
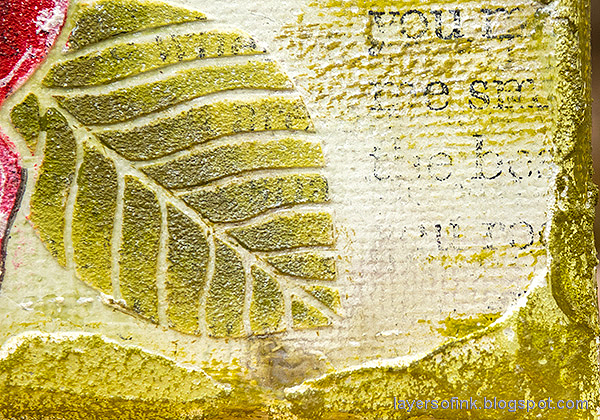
Stamp randomly with the You Matter background stamp. It's an older SSS stamp, and one of my favorites.

For more texture, apply Opaque Grit-Paste around the edges with a palette knife. You can also use Texture Paste, but it will give a little less texture. Let dry.
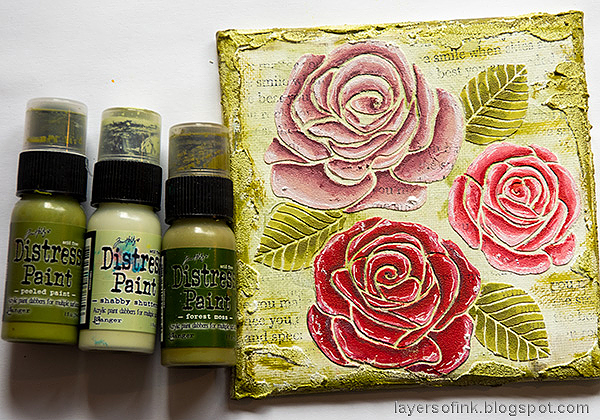
At first, I was going to use brown for the edges, but then I decided that I wanted to skip the brown and have more of a green feeling to the background. So I painted the grit-paste with Shabby Shutters, and added darker shades of Peeled Paint and Forest Moss. You can add paint directly to the grit-paste before applying it, but I usually like to paint it afterwards when it is dry. Some of the white will be visible and you get a better and more varied texture.
And for some shimmer, I mixed an ice-cream stick scoop (just the tip of an ice cream stick is enough) of Perfect Pearls into water to make my own shimmer mist, and misted on the project.

Cut sentiments from the Sentiment Strips Reverse Mom Days and drag a black ink pad along the edge to hide the white cutting line.
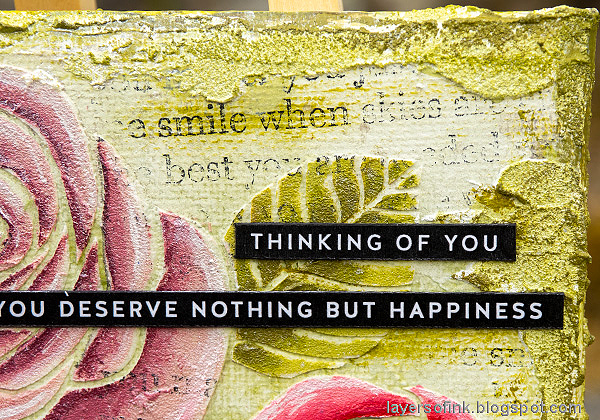
I used two sentiment strips and liked the contrast of the black strips against the background. Here you can see the texture of the grit-paste better.
Don't worry too much about mistakes when painting the roses, mistakes won't be visible in the end, especially not when you see the canvas from a little distance.
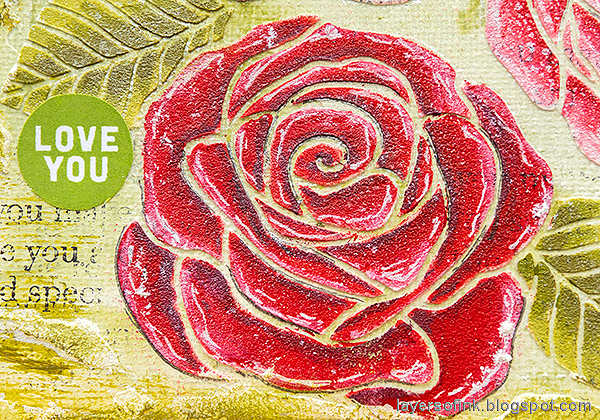
You can of course also paint all the roses in the same color, or make them white or yellow instead. The circle words was stamped with the Mom Word Mix 2 and Green Leaf ink.
I like the shape of these leaves, with the soft curving lines.
The glimmer is a little hard to capture on photo, but you might see it better here.
For a more grungier example with similar techniques, check out my Bouquet of Roses canvas tutorial.

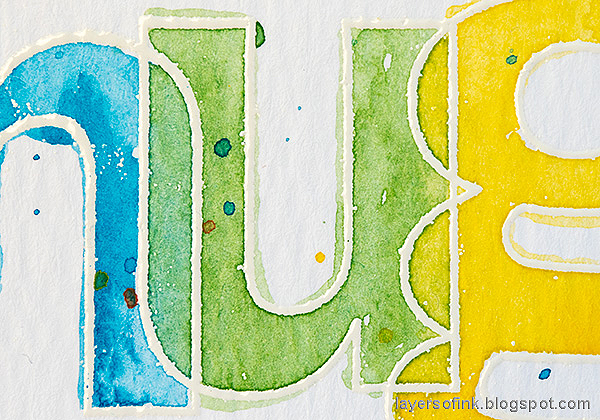
The Mother's Day card is very different from the canvas and is quick and easy to make. You can use any colors that you'd like. I used the wonderful Luck and Hugs set. The circle flowers and overlapping open letters are so cool and fun to color. You can also use Distress Ink instead of watercolor paint.
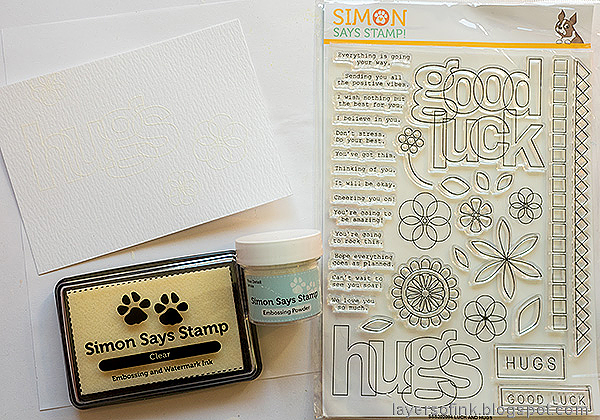
Start by white embossing the stamps that you want to use on watercolor paper. As you can see, there are lots of options in this great set, and many different sentiments.
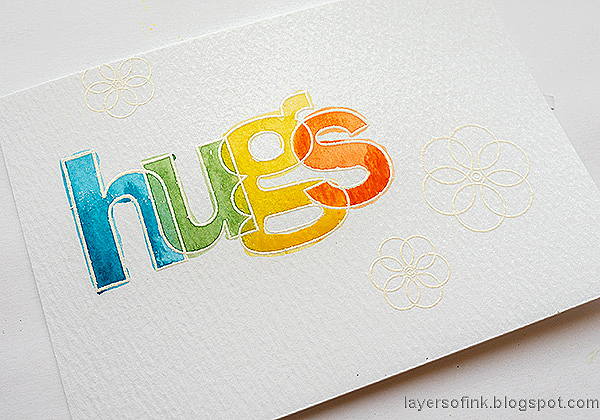
Mix and test watercolors on a piece of scrap paper first. I always test my colors and how they will blend before painting on the actual project. Start with the 'h' and paint the whole letter, also the overlapping part. Continue with the next letter before the 'h' dries. You want the paints to blend. Paint over the edge here and there so that the outline of the letters will be visible.
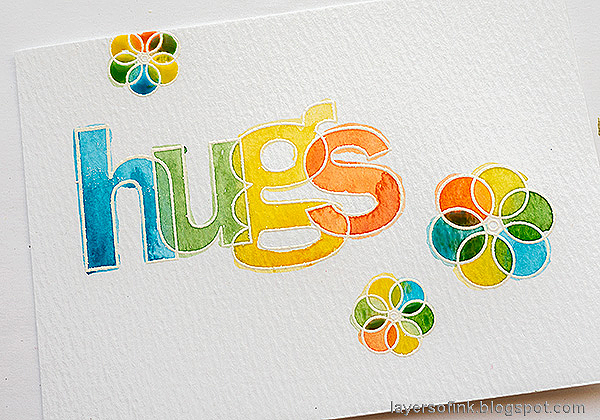
Continue with the flowers. This is also a good exercise in wet-on-wet paint blending. As you can see the orange and the blue create a darkish color, which is why I didn't place them next to each other in the word. On the flowers, the dark areas add interest, but on the word, they would have been too strong.

Splatter a little paint on the card. The stamp the sentiments. They come from the Mom Word Mix 2 set.
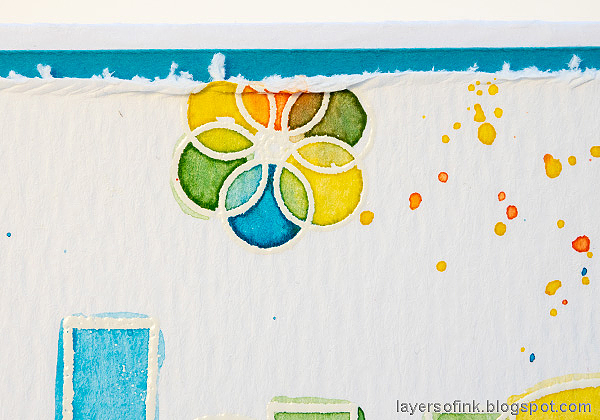
Distress the edges of the watercolor panel before adhering it to a piece of blue cardstock and then to folded white cardstock.
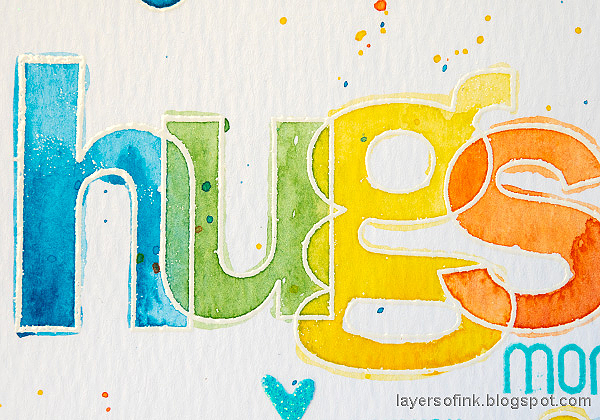
You can cover the word when splattering, but I liked having just a few splatters in the letters.
Here you can see how the paints blend with each other on the paper.
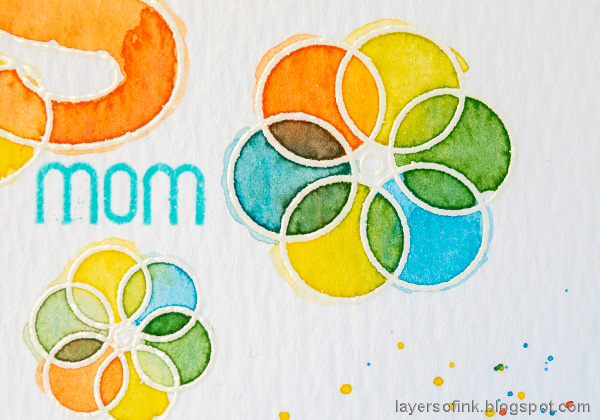
These flowers made up by overlapping circles are such a fun design.
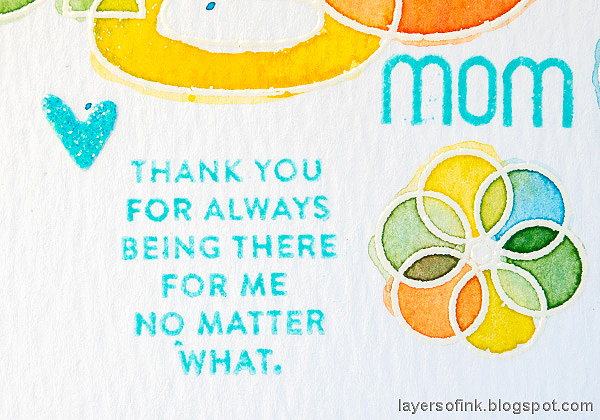
The heart was die cut with Tim Holtz Falling Hearts die from SSS glittery paper. It was a left-over from another project.

The colorful splatters add a nice playful touch to the card.
There are of course prizes to be won, and at each stop on the hop SSS is giving away a $25 coupon, randomly drawn from those who leave a comment. The winners will be posted post on the Simon Says Stamp store blog on Wednesday, the 29th of April.
Your next stop on the hop is Amanda Korotkova and she will show you wonderful inspiration using the previously released Mother’s Day, Graduation, and spring floral Simon Exclusive products.
Here are all the stops along the hop:
Anna-Karin Evaldsson (you are here)
ADDITIONAL INSPIRATION using previous released Simon branded products.
ADDITIONAL INSPIRATION using previous released Simon branded products.

Thank you so much for visiting today and I hope you will have a lovely weekend!
Happy crafting!
Anna-Karin
Supplies:
* Please note: the links are affiliate links, for which I receive a small percentage of sales generated by the link, at no extra cost to you.
* Please note: the links are affiliate links, for which I receive a small percentage of sales generated by the link, at no extra cost to you.
Your rose canvas was awesome. Thanks for sharing
ReplyDeleteI especially like your hugs card. The watercoloring looks awesome. I'm going to try some more watercoloring today...
ReplyDeleteYour canvas is beautiful, I hope you hang it. I love your bright happy mother's day cardtoo.
ReplyDeleteYour canvas is just beautiful! I love it and your Mother's day card is very pretty too!
ReplyDeleteWhat an amazing canvas, I love it.
ReplyDeleteHave never done any mixed media on canvas. Yours is lovely! I really like the card the best. I do have a question, or rather a comment about your ice cream scoop. Cant imagine one that small!
ReplyDeleteThank you so much for your comment Sarah and for discovering my mistake. It was supposed to be 'ice cream stick'. That would otherwise have had to have been some type of miniature ice cream scoop. So funny!
DeleteGreat projects. Thank you for sharing.
ReplyDeleteWOW! The texture and coloring is simply incredible! I LOVE THESE!
ReplyDeleteFabulous projects! Gorgeous canvas with amazing layers and textures. Beautiful, fresh and happy card design.
ReplyDeleteI absolutely love the art panel! Amazing!!
ReplyDeleteLove the colors you used.
ReplyDeleteThe mix media project looks awesome, and the card is so pretty!! Thanks for the photo tutorial!!
ReplyDeleteSo pretty! Great cards!
ReplyDeleteAbsolutely gorgeous! You are a true artist!!
ReplyDeleteLoved your canvas. Thank you
ReplyDeleteThe mixed media one is awesome (Both are beautiful) I want to touch it! I can see the texture. Very cool
ReplyDeleteWow! Although I've never done mixed media this is stunning! And I also LOVE your hugs card...clean, simple, and colorful! My kind of card!
ReplyDeleteYour cards are terrific.
ReplyDeleteWow! Your canvas is gorgeous! Fun card too
ReplyDeleteI love the mixed media work you did, very pretty. Lots of texture really makes it work.
ReplyDeletethe mixed media project is
ReplyDeletegorgeous. thanks for the
detailed explanation.
txmlhl(at)yahoo(dot)com
Your canvas is awesome and is a perfect gift idea. I also love your card for it's bright and cheery vibe!
ReplyDeleteLove the hugs card with pretty watercolors
ReplyDeleteOH MY WORD!!! The mixed media canvas is breathtaking!! I need to save to my Mixed Media board on Pinterest! I'm intrigued! Your HUGS cards are so refreshing and cheerful!
ReplyDeleteThe card is pretty but my favorite is the canvas. It is absolutely gorgeous! Thank you for sharing with us. Stay safe and healthy.
ReplyDeleteBoth of your projects are amazing! Thanks for explaining your process in such detail. I love Mixed Media.
ReplyDeleteThis comment has been removed by the author.
ReplyDeleteYour rose canvas is my favorite!
ReplyDeleteI LOVE this! Usually a pastel cutsie gal but have just started to dabble with grunge- wow great dimension-colors-background awesome? Thanks for the inspiration and please be healthy!
ReplyDeleteAwesome Sunny Days Ahead Release! Awesome creations! I especially love the textured flower canvas!
ReplyDeleteVery cool projects!! Love the colors!! Thanks for the inspiration!!
ReplyDeleteWOW! Thanks for the step by step of the canvas - it is beautiful. Always did love your style!
ReplyDeleteGreat canvas! And the card is very bright and cheerful. Thanks for sharing.
ReplyDeleteYour canvas is gorgeous!!!
ReplyDeleteYour rose canvas looks like a piece of tapestry. Thanks so much for sharing the great details.
ReplyDeleteLove your mixed media use of the roses stencil and the hugs stamp!
ReplyDeleteLove that new rose stencil, your canvas is lovely!
ReplyDeleteLovely projects. I love the canvas. And the tutorial is much appreciated. I love the card too.
ReplyDeleteThank you for sharing, you do wonderful work!
ReplyDeleteWhat a great canvas and love the card too.
ReplyDeletei especially love the way you colored the card. Thank you!
ReplyDeleteVery creative. Your canvas is very cool and your card so pretty.
ReplyDeleteLoved the texture of the roses card. So realistic. Thanks for sharing.
ReplyDeletebeautiful canvas piece I love roses
ReplyDeleteI love your canvas project! It is really special!
ReplyDeleteLovely canvas and card!
ReplyDeleteThank you so much for the step-by-step instructions. Both pieces are lovely, and I really like the bright colors on the "hugs" card.
ReplyDeleteI love the depth and texture of your floral canvas! It is just stunning!
ReplyDeleteLovely creations, love that stencil.
ReplyDeleteGorgeous projects. Your mixed media canvas is amazing.
ReplyDeleteLove the watercolor hugs! Very pretty.
ReplyDeleteAwwww I love the hugs card. It is so pretty and colorful.
ReplyDeleteWonderful mixed media project and sweet card.
ReplyDeleteThanks so much for sharing.
The rose canvas is so pretty, with a vintage vibe.
ReplyDeleteYour mixed media flowers are beautiful, but so is your water colored hugs card! Amazing!
ReplyDeleteYour card & mixed media project are both so pretty, each in their own way. I've not done much mixed media, so I enjoy seeing what people create.
ReplyDeleteI haven't yet attempted mixed media canvas, but your work is inspiring! Love the mother's day card and its colors!
ReplyDeleteGosh, these are both so very beautiful! I love mixed media.
ReplyDeleteThat canvas is just, WOW, and your hugs card is awesome!
ReplyDeleteTwo beautiful projects! Thank you so much for taking us through the process step by step!
ReplyDeleteYour mixed media canvas is very nice and I like your colorful hugs card!
ReplyDeleteYour canvas piece is so pretty and with the steps laid out it doesn't seem so hard. The colorful card is so cheery and fun.
ReplyDeleteLove your projects today - BUT OMG what a fabulous canvass project - LOVE the distresses and antique look of it - so yummy:)
ReplyDeleteWow, love the colors and the torn edge on the blue base card!!
ReplyDeleteYour mixed media card is stunning!
ReplyDeleteHugs, we all need them these days! Love your projects always,hugs.
ReplyDeleteLove both of your examples. The canvas with the distress paints is gorgeous.
ReplyDeleteLove your cards!! So pretty! Thanks for the inspirations!
ReplyDeleteLove your work. But, absolutely fell in love with your first project! Thanks for the step by step instructions!
ReplyDeleteOhhh wow, love it. Beautiful
ReplyDeleteWhat a beautiful title for a beautiful release. So many wonderful products and artists for us to follow. As an Australian 🇦🇺 I especially love the “Mum” die. A lot of the cards I used to make for my Mum, before she passed, had the top of the “O” cut out of them🙂 Thank you to Simon for the release and to you for the beautiful inspiration 💖
ReplyDeleteI love your mixed media canvas!! It makes me want to try it!! Beautiful!
ReplyDeleteYour canvas is gorgeous and I love your card too, so cheerful and pretty.
ReplyDeleteWow. The canvas is gorgeous!
ReplyDeleteBeautiful projects with these new stamps! I especially love the canvas artwork you created.
ReplyDeleteThank you for sharing 2 wonderful projects with us. They are both very pretty.
ReplyDeleteLove the mixed media canvas and the card
ReplyDeleteBeautiful projects - your canvas is stunning!
ReplyDeleteLove your cards. Crazy for that new stencil.
ReplyDeleteFabulous projects!
ReplyDeletePretty canvas and card! Love the stencil you used for the canvas project! Awesome colors and textures! Beautiful card too, and a great color combo!
ReplyDeletes gorgeous project - love all the texture and colours!
ReplyDeleteSuch a lovely canvas...made me smile,scrolling down was so much fun...Thanks for beautiful inspirations!!
ReplyDeleteNice instruction for the rose canvas build.
ReplyDeleteI especially like the "Hugs" card. Thank you for sharing.
ReplyDeleteWOW, absolutely amazing, I love all the details that went into creating your amazing projects, especially the first canvas!
ReplyDeleteWhat great projects. Very different from each other. I love your pretty floral canvas!
ReplyDeleteGreat job!! Such lovely work
ReplyDeleteWow... I love your first project.. It looks fantastic... Woww.
ReplyDeleteThe rose canvases are very pretty. Love the hugs card.
ReplyDeleteSuch a pretty canvas! You are right - it can be so intimidating. Thanks for breaking it down!
ReplyDeleteBoth the creations are lovely, love the second card with embossing.
ReplyDeleteSWOON!! This is BEAUTIFUL!! I LOVE this technique and can't wait to try it!! THANKS SO MUCH for sharing and have a FABULOUS WEEK!!
ReplyDeletethe texture paste roses! WOW! love that
ReplyDeleteThanks for taking the time for the step by step photo's appreciated. Lots of great texture ...
ReplyDeleteI was very impressed with the steps to creating that lovely mixed media canvas. Thanks for sharing. And the 2nd card is very sweet. How much Mom deserves these expressions of love.
ReplyDeleteYour canvas is Stunning and I love your colorful card!!!
ReplyDeleteWhat a fabulous canvas!! Your Mother's Day card is sweet and pretty!
ReplyDeleteThe canvas is stunning. You inspired me.
ReplyDeleteSimply gorgeous inspiration!
ReplyDeleteBeautiful canvas and cute card.
ReplyDeleteWow! Gorgeous projects! Your color blending is amazing. TFS!
ReplyDeleteGreat mixed media roses and very pretty card! Wonderful ways to use the great items in this new release! Thanks for sharing!
ReplyDeleteThe vintage card is beautiful, and the watercolouring on the second colour is done so well! love the colours you chose
ReplyDeleteLovely projects, once again :) It's true that your mixed media projects look complicated and difficult, but when you explain the process, it makes me think even I could create something similar. Thank you.
ReplyDeleteI love the watercolor card as well, especially the torn edges against the vibrant blue mat; striking!
Beautiful work love the mix media tyfs
ReplyDeleteLove the roses! Wish it was a video though.
ReplyDeleteloved seeing the mixed media project, it is beautiful
ReplyDeleteI love your card also
thanks for sharing
Barb Housner
Ooh the mixed media card is amazing! Lots of textures! Awesome work :)
ReplyDeleteLove both your projects. The colors on the card were bright & beautiful. Thanks!
ReplyDeleteYour canvas is beautiful. I love the layers and textures. Thanks for the tutorial. You make it sound very easy and I like easy:) Your card makes me feel happy with all the bright and pretty colors. Thanks.
ReplyDeleteall I can say is WOW.....Wow......wow ....thanks for sharing
ReplyDeleteI can't believe you can create such amazing mixed media and then go clean and simple! What talent. I have never been able to do a mixed media distressed look before. Both are amazing and stunning creations. The floral's are beautiful!
ReplyDeleteYour mixed media canvas is inspiring. And your card delightful.
ReplyDeleteLove the canvas with the text over the flowers!
ReplyDeleteBoth are such beautiful projects and your tutorials are great. I love the water color card - so simple but a lot of *pop*.
ReplyDeleteJust beautiful, can't decide which one I like the most. Love them!
ReplyDelete