
Hello crafters! I have another quick Christmas tutorial to share with you. It's a Sizzix tutorial with two tea light candle trees. This would be a great last minute gift (which it is for me) and children would also enjoy making some trees during Christmas.

These were made with Tim Holtz's Tree Light die set, which includes trees in two sizes, and three different patters for die cutting the holes. You can make all three sides different, as I did, or use the same pattern on all sides. The trees can be colored in different ways, or for a really quick version, die cut them from patterned paper, cardstock or metallic cardstock. The trees are approximately 2.75 x 5 x 2.375 and 2.75 x 3.75 x 2.375 inches.
As you can see, we have had our first snow now.
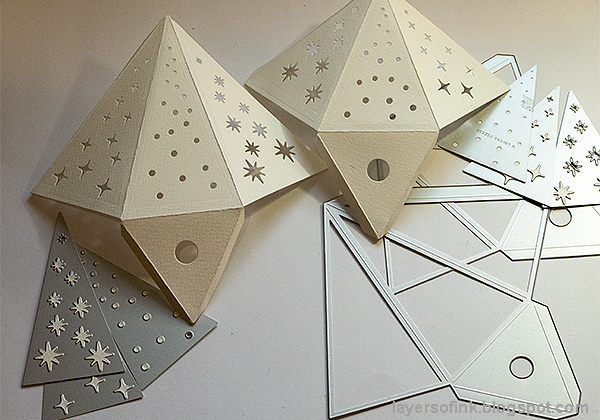
Start by die cutting one large and one small tree from watercolor paper (or another sturdy paper) and then die cut each pattern, one at a time. The dies fit into the Foldaway, Big Shot or Vagabond, but you'll just have take care that you place the largest ones at a correct angle, since they don't go through otherwise.

Coat with a layer of gesso.
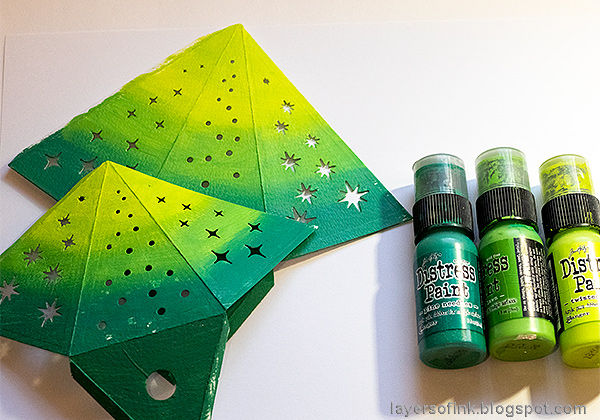
Paint in an ombre fashion using three green shades of Distress Paint.
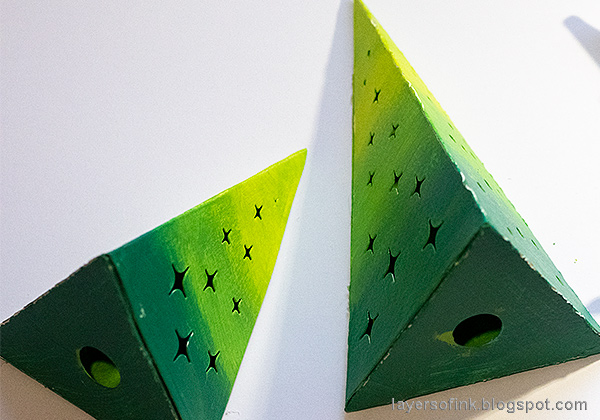
I also painted the inside, using Mowed Lawn. When the paint is dry, assemble by applying adhesive along the flaps. I used Sizzix new glue gun, but you can also use, for example, Wonder Tape. Take care not to burn yourself if you use a glue gun.

If you want to give your trees a snowy look, smear some texture paste at the top and here and there, and sprinkle with Rock Candy Glitter.

I also splattered the trees with white paint.
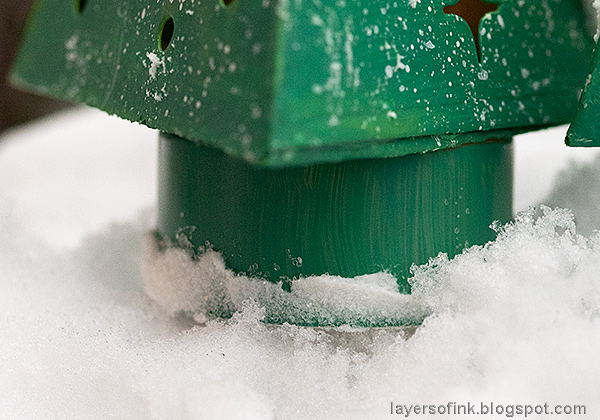
The trees can of course only be used together with battery-driven tea lights, and the light itself forms the trunk. You can paint it with Distress Paint if you want to. I also added a tiny bit of paste and glitter to the base.

Here's a look at the painted battery-driven tea light.


You can arrange the trees in different ways, either with different patterns at the front, or the same, as here. Make a whole bunch to place out on a Christmas dinner table, and the guests can take a tree home as a gift. It is easy to make them in any color to fit your decor.

The trees also work great as decorations. Here I placed them in my little winter village. I have a shelf in the living room where I display some of the houses that I have made, and I change the set up according to the season. Right now it is a winter village. In the background, you can spot my Medieval Castle, Winter Cottage, Winter Wonderland House, Pastel Gingerbread House and my Space Rocket. The kids love the space rocket, so it is always a feature of the village.

The trees look lovely in the dark with the battery-driven tea lights shining.
Thank you so much for stopping by today. I will be back tomorrow with one last quick Christmas decor/gift project.
Happy Christmas Crafting!
Anna-Karin
* Please note: the links are affiliate links, for which I receive a small percentage of sales generated by the link, at no extra cost to you.
I'm so glad I came over to your blog to take a look at this exquisite Christmas DIY decoration. You did a wonderful job on this and I have ordered the dies through your affiliate links (Simon) If you look at my IG gallery you will see my dinning room table decoration. I used an antiqued bread bowl and arranged some things I have had for several years. These TH Trees would look wonderful added to the scene. Thank you so much for the beautiful inspiration!
ReplyDeleteThank you so much for your sweet comment Susie! I am so glad to hear you like my trees. And I think the trees will look wonderful in your dining table scene. Happy crafting!! / Anna-Karin
DeleteThese are beautiful!
ReplyDeleteThank you Marci!!
Delete