Thursday, March 23, 2023

Paper Tole Flowers Tutorial

Hi friends! Today I have a card tutorial to share with dimensional flowers made from patterned paper using a paper tole technique.

Please note: this post has affiliate links, for which I receive a small percentage of sales generated by the link, at no extra cost to you.


Layers of ink - Paper Tole Flowers Tutorial by Anna-Karin Evaldsson.

This card is inspired by the old art of paper tole. Paper tole is sometimes also called 3-D decoupage and has to do with cutting and shaping parts of identical prints and then to build 3-D paper images with those cut outs. If you have a patterned paper with images that repeat, you can use that. You can also achieve a similar look with stamping. For this card I used Simple Stories Wildflower 6 x 8 in patterned paper. It was included in the Simon Says Stamp Happy Hello March card kit. The kit is sold out, but you can get all the parts individually.

Layers of ink - Paper Tole Flowers Tutorial by Anna-Karin Evaldsson. Cut out the flowers from patterned paper.

Look at the images which appear more than once on the printed paper. Cut out one full image. On the next image, cut away the outer parts of the flower. On the third image, cut away more of the flower. I did the larger flowers in three layers and the smaller ones in two. I cut off most of the leaves, but you can also use more leaves.

Layers of ink - Paper Tole Flowers Tutorial by Anna-Karin Evaldsson. Ink the edges.

Ink the edges to hide the white edge from the cutting. 

Layers of ink - Paper Tole Flowers Tutorial by Anna-Karin Evaldsson. Shape with Simon Says Stamp Shaping Kit.

Use Tim Holtz Shaping Kit to shape the flowers. 

Layers of ink - Paper Tole Flowers Tutorial by Anna-Karin Evaldsson.


Layers of ink - Paper Tole Flowers Tutorial by Anna-Karin Evaldsson.

Cut one of the sentiment panels in the Simple Stories Wilflower paper pad a little smaller. Stamp a sentiment from Simon Says Stamp Happy Hello Smoke ink. Stamp another sentiment on left-over patterned paper and cut into a strip. 

Layers of ink - Paper Tole Flowers Tutorial by Anna-Karin Evaldsson. Round the edges.

Sand the edges of the papers and round the corners. I used another sentiment panel as a mat to the main one, since I wanted to include that shade of grey. 

Layers of ink - Paper Tole Flowers Tutorial by Anna-Karin Evaldsson. Stitch around the edges.

The base is Simon Says Stamp Smoke Cardstock, which is the same color as the ink used for the stamping. Stitch along the edges with a sewing machine. 

Layers of ink - Paper Tole Flowers Tutorial by Anna-Karin Evaldsson.

I cut out a few extra leaves since I thought they were missing, but forgot the ink the edges, but since I had sanded the edges of the background papers, I thought the white cutting line didn't matter so much. 

Layers of ink - Paper Tole Flowers Tutorial by Anna-Karin Evaldsson.

Glue pearls to the center of the flowers. 

Layers of ink - Paper Tole Flowers Tutorial by Anna-Karin Evaldsson.

I added two pearls to the stamped sentiment strip too.

Layers of ink - Paper Tole Flowers Tutorial by Anna-Karin Evaldsson.

The flowers were adhered to the background with Simon Says Stamp foam tape, using two layers of tape under some of them, for extra dimension.

Layers of ink - Paper Tole Flowers Tutorial by Anna-Karin Evaldsson. Made with Simon Says Stamp Card Kit.

I don't often use patterned paper and had fun creating this card. Look at your patterned paper and stamps to see what dimensional projects that you can create. 


Thank you for taking the time to visit my blog today!

Happy stamping!

Anna-Karin


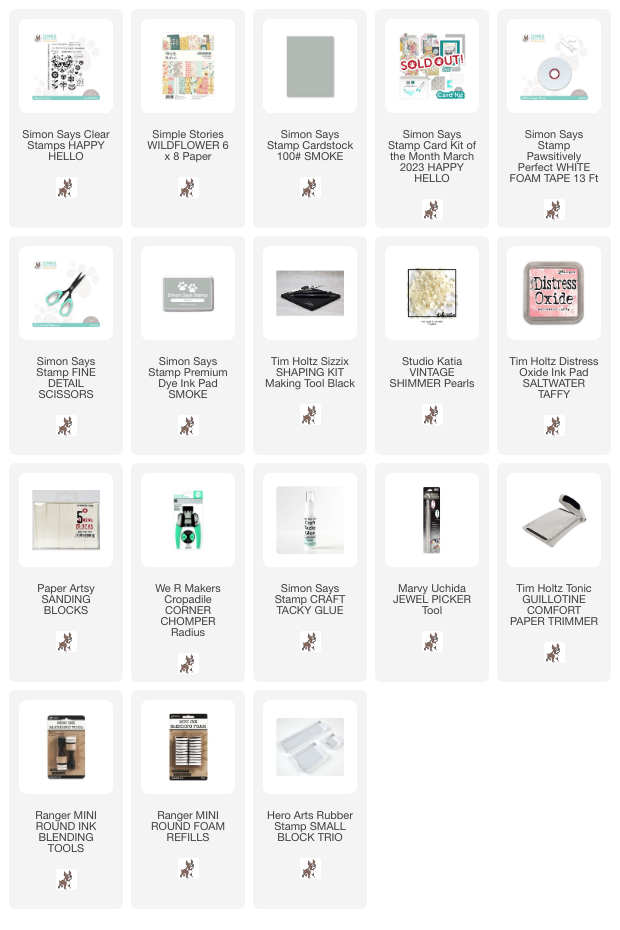
Supplies:

* Please note: the links are affiliate links, for which I receive a small percentage of sales generated by the link, at no extra cost to you.
Monday, March 20, 2023

Easter Bunnies Card

Hi everyone! I hope you had a good weekend! We had a fun weekend with the movies and Pokémon catching.

Please note: this post has affiliate links, for which I receive a small percentage of sales generated by the link, at no extra cost to you.



This week we have an Easter / Spring theme at the Simon Says Stamp Monday Challenge Blog. Don't miss the stunning project by our March guest designer Pauline C

Layers of ink - Easter Bunnies Card Tutorial by Anna-Karin Evaldsson.

I made a sweet bunny card this week, using mainly dies and ink. The group of friends are hopping around looking for carrots. 

Layers of ink - Easter Bunnies Card Tutorial by Anna-Karin Evaldsson. Die cut Tim Holtz Bunny Stitch.

Start by die cutting the Tim Holtz Bunny Stitch dies from heavystock paper.

Layers of ink - Easter Bunnies Card Tutorial by Anna-Karin Evaldsson. Color with Distress Ink.

Smear Distress Ink on a non-stick craft sheet, mist with water and press the shapes into the ink.

Layers of ink - Easter Bunnies Card Tutorial by Anna-Karin Evaldsson.

Let dry and add additional layers, using Distress Ink. Finish with just a touch of Distress Oxide Inks.

Layers of ink - Easter Bunnies Card Tutorial by Anna-Karin Evaldsson. White Emboss Simon Says Stamp Leaf Edges.

White emboss the Simon Says Stamp Leaf Edge from the new Just For You release on heavystock paper. I used Simon Says Stamp Anti Static Brush Powder tool first. 

Layers of ink - Easter Bunnies Card Tutorial by Anna-Karin Evaldsson.

Color in the same way as the bunnies, with layers of Distress Ink and a little Distress Oxide Ink to finish.

Layers of ink - Easter Bunnies Card Tutorial by Anna-Karin Evaldsson.

Sentiments were stamped on the background and I also added a Clippings Sticker. I die cut the cross-stitch die from Bunny Stitch on the background.

Layers of ink - Easter Bunnies Card Tutorial by Anna-Karin Evaldsson.

Shape the bunnies with Tim Holtz Shaping Kit and and assemble with a layer of Simon Says Stamp Pawsitively Perfect Foam tape between the colorful bunny and the mat and between the latter and the background. 

Layers of ink - Easter Bunnies Card Tutorial by Anna-Karin Evaldsson.

The left-over cross-stitches were glued to the bunnies. Isn't this one so cute?

Layers of ink - Easter Bunnies Card Tutorial by Anna-Karin Evaldsson.

On the grey and blue bunny, I glued pink paper behind the ears. 

Layers of ink - Easter Bunnies Card Tutorial by Anna-Karin Evaldsson.

Tie twine around the card before adding the bunnies and carrots.

Layers of ink - Easter Bunnies Card Tutorial by Anna-Karin Evaldsson.

The Distress Oxide adds a nice opaque texture to the bunnies and the background. I also found some white pom poms in a drawer and used them as tails. 

Layers of ink - Easter Bunnies Card Tutorial by Anna-Karin Evaldsson.

The heart was also adhered with foam tape, giving it more dimension.

Layers of ink - Easter Bunnies Card Tutorial by Anna-Karin Evaldsson.

Here you can see the dimension of the finished card. 

I hope you will join us this week in our Easter / Spring challenge. You have a chance to win a $25 gift voucher to do some fun shopping at Simon Says Stamp. You have until Monday 8am Ohio time. 1pm UK time, 2 pm CET to join in.


Do you use Instagram? If so please add #sssmchallenge so we can see your entries there too.


Thank you so much for stopping by here today! 

Happy crafting!

Anna-Karin

Supplies:

* Please note: the links are affiliate links, for which I receive a small percentage of sales generated by the link, at no extra cost to you.


Sunday, March 19, 2023

Easter Egg Hunt Mixed Media Tutorial

 Hi crafters! I am happy to have a tutorial on the Simon Says Stamp store blog today

Layers of ink - Easter Egg Hunt Mixed Media Tutorial by Anna-Karin Evaldsson.

Here's a sneak peek. I created an Easter Egg Hunt scene. I am very fond of making my own ornaments and little scenes like these. The eggs in the scene are easy to find, because there are lots of them. It might even be where the Easter Bunny stores the eggs and other little treasures. There are also glittering diamonds, pearls and mica flakes.

I wanted a round base and repurposed the metallic lid of a glass jar. You could even put the lid back on the jar and fill the jar with sweets. It would make a great gift. 

You can find all the details and the step-by-step tutorial on the Simon Says Stamp store blog


Happy stamping!

Anna-Karin


Supplies:

* Please note: the links are affiliate links, for which I receive a small percentage of sales generated by the link, at no extra cost to you.

Saturday, March 18, 2023

SSS Just For You Blog Hop

Hi and welcome to my blog! I am so happy to take part in the Simon Says Stamp Blog Hop to celebrate the new Just For You release. If you are following along in the hop, you should have come here from the creative Miriam Prantner.

Please note: this post has affiliate links, for which I receive a small percentage of sales generated by the link, at no extra cost to you.


Simon Says Stamp Just For YOu


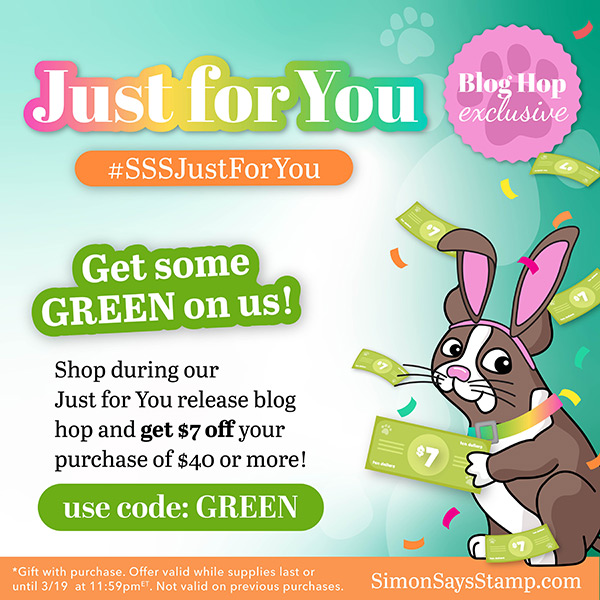
The Just For You release is full of wonderful new stamps, stencils, dies, and tools. There are even a great pair of Pawsitively Everyday Scissors. You can find the Just For You release here. If you use the code GREEN you can get $7 off with a purchase of $40 or more! This promotion will expire 3/19 at 11:59 pm EDT.


Simon Says Stamp Just For You

 Just For You is perfect for Easter and spring-time, but also for so many other themes. 

Layers of ink - Missing You Art Journal Page Tutorial by Anna-Karin Evaldsson.

I made an art journal page today, in memory of my aunt who recently passed away suddenly. We shared a love for arts and crafts and she is the one who taught me how to embroider. We also sold hand-crafted items at some markets together. I think she would have liked the Simon Says Stamp Layered Folksy Heart and made that my focal point. I worked on a jeans fabric page in my Dina Wakley Blue Edition journal.

Layers of ink - Missing You Art Journal Page Tutorial by Anna-Karin Evaldsson.

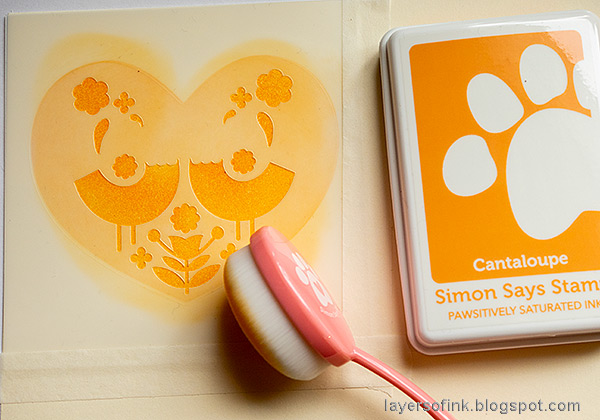
Start by applying Melon Pawsitively Saturated ink through the heart in the Simon Says Stamp Layered Folksy Heart stencil. I used Ranger Heavystock paper. Hold the stencil in place with Simon Says Stamp Very Very Low Tack Tape.

Layers of ink - Missing You Art Journal Page Tutorial by Anna-Karin Evaldsson. Ink with Simon Says Stamp Cantaloupe.

Continue with the second stencil, suing Cantaloupe ink.

Layers of ink - Missing You Art Journal Page Tutorial by Anna-Karin Evaldsson.

And then the third stencil, with Grapefruit ink.

Layers of ink - Missing You Art Journal Page Tutorial by Anna-Karin Evaldsson.

For the fourth stencil in the set, I used Distress Oxide Ink. 

Layers of ink - Missing You Art Journal Page Tutorial by Anna-Karin Evaldsson. Color with Prismacolor pencils.

I stamped flowers from Simon Says Stamp Magical Spring on heavystock paper and colored them with Prismacolor pencils.

Layers of ink - Missing You Art Journal Page Tutorial by Anna-Karin Evaldsson.

Add highlights with a white paint pen and then die cut with the coordinating Magical Spring dies.

Layers of ink - Missing You Art Journal Page Tutorial by Anna-Karin Evaldsson.

Stamp sentiments with the Simon Says Stamp So Sorry set and die cut with the coordinating dies. I ended up not using the larger sentiment.

Layers of ink - Missing You Art Journal Page Tutorial by Anna-Karin Evaldsson.

Stamp the Simon Says Stamp Leaf Edges with Cappuccino ink on Tim Holtz Journal Cards. These leaf stamps are so cleverly designed, to fit perfectly into a 6x6 in surface, the ordinary Simon Says Stamp background stamp size.

Layers of ink - Missing You Art Journal Page Tutorial by Anna-Karin Evaldsson.

Color the leaves with pencils.

Layers of ink - Missing You Art Journal Page Tutorial by Anna-Karin Evaldsson.

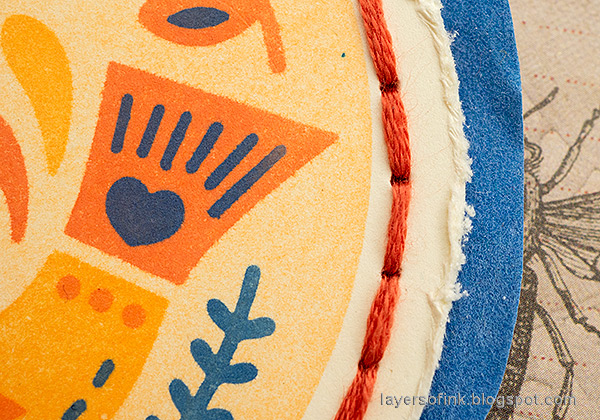
Since my aunt loved both embroidery and sewing, I wanted to include that on my page. I pricked a border around the heart and stitched with embroidery floss. The heart was matted on Simon Says Stamp Velvet paper.

Layers of ink - Missing You Art Journal Page Tutorial by Anna-Karin Evaldsson.

Glue the flowers to the page. The sequins comes from Simon Says Stamp Pretty Pastels.

Layers of ink - Missing You Art Journal Page Tutorial by Anna-Karin Evaldsson.

The different textures with the jeans fabric, velvet paper and embroidery floss creates a project you want to reach out and touch.

Layers of ink - Missing You Art Journal Page Tutorial by Anna-Karin Evaldsson.

I also added a few strips of Design Tape, with floral, butterfly and postal themes. My aunt used to be a postwoman.

Layers of ink - Missing You Art Journal Page Tutorial by Anna-Karin Evaldsson.

Neutral patterned papers are great for stamping on.

Layers of ink - Missing You Art Journal Page Tutorial by Anna-Karin Evaldsson.

The sentiment strips comes from Simon Says Stamp Missing You sentiment strips and were inked with Melon.

Layers of ink - Mushroom Tag Tutorial by Anna-Karin Evaldsson.

If you want more Just For You inspiration I posted a mushroom tag yesterday, using the Simon Says Stamp Mushroom Stems dies and the Leaf Edges stamp. You can find the Mushroom Tag tutorial here.


Don't miss all the inspiration along the hop. There are of course prizes to be won too, and at each stop on the hop SSS is giving away a $25 coupon, randomly drawn from those who leave a comment. The winners will be posted post on the Simon Says Stamp store blog on Wednesday the 22nd of March.

Your next stop on the hop is Dilay Nacar. Don't miss to see the wonderful project she has created. If you get lost along the way, here are all the stops:


For more inspiration, remember to check out the Just For You gallery at Simon Says Stamp, and if you make something with products from the range, it is fun if you post it in the galleries too. There are galleries for all releases, and for the card kits, full of inspiration.

This is the second Just For You blog hop, don't miss blog hop day number 1 which was yesterday.


Thank you so much for stopping by here today! 

Happy crafting!

Anna-Karin

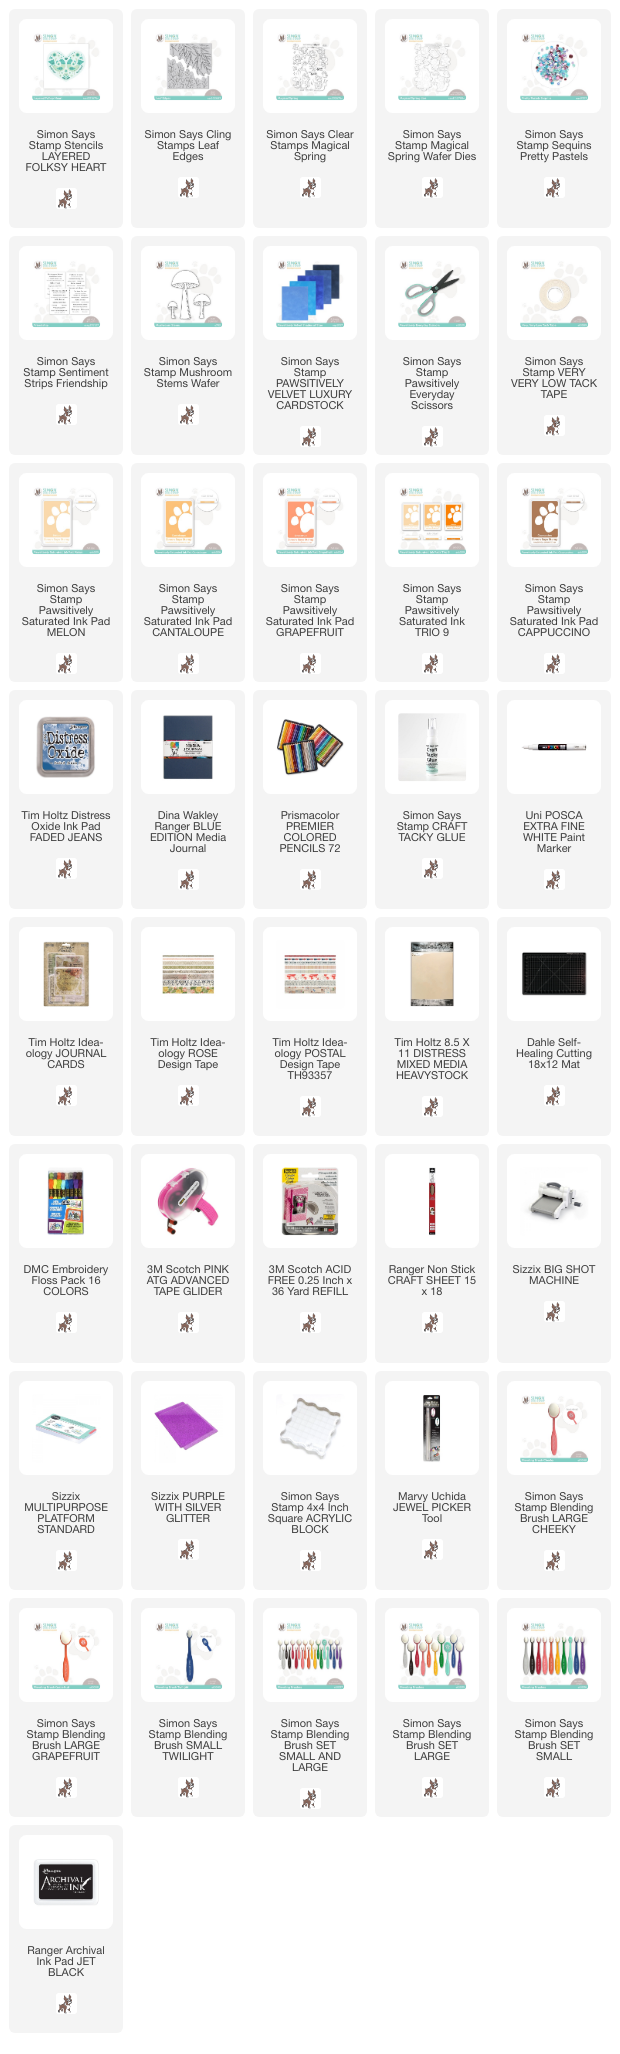
Supplies:

* Please note: the links are affiliate links, for which I receive a small percentage of sales generated by the link, at no extra cost to you.