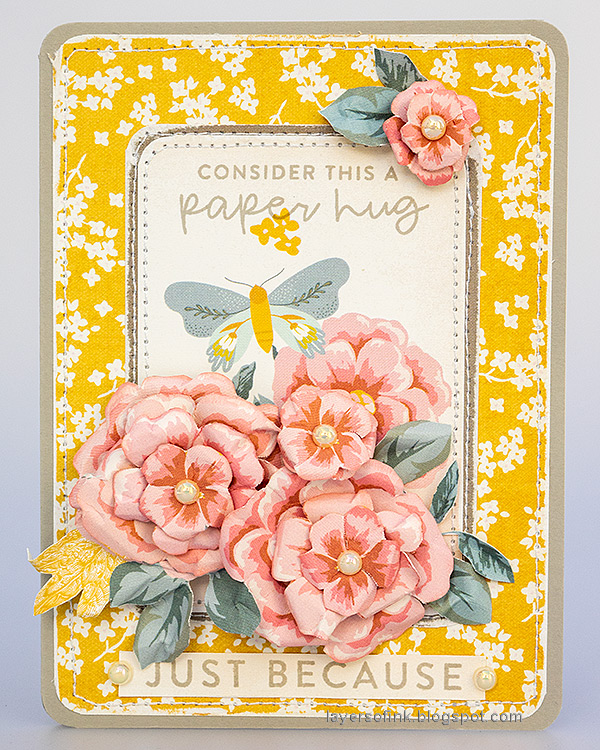
Hi friends! Today I have a card tutorial to share with dimensional flowers made from patterned paper using a paper tole technique.
Please note: this post has affiliate links, for which I receive a small percentage of sales generated by the link, at no extra cost to you.
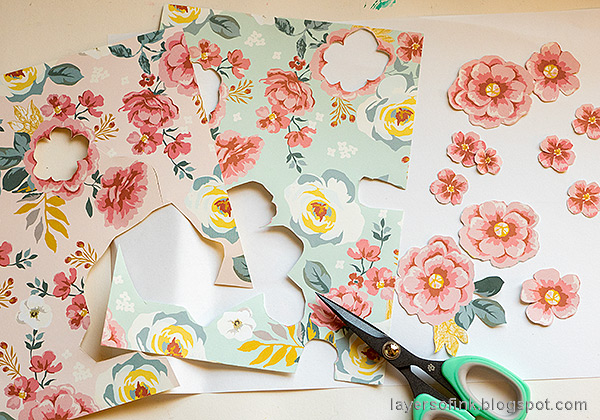
This card is inspired by the old art of paper tole. Paper tole is sometimes also called 3-D decoupage and has to do with cutting and shaping parts of identical prints and then to build 3-D paper images with those cut outs. If you have a patterned paper with images that repeat, you can use that. You can also achieve a similar look with stamping. For this card I used Simple Stories Wildflower 6 x 8 in patterned paper. It was included in the Simon Says Stamp Happy Hello March card kit. The kit is sold out, but you can get all the parts individually.
Look at the images which appear more than once on the printed paper. Cut out one full image. On the next image, cut away the outer parts of the flower. On the third image, cut away more of the flower. I did the larger flowers in three layers and the smaller ones in two. I cut off most of the leaves, but you can also use more leaves.
Use Tim Holtz Shaping Kit to shape the flowers.
I used Simon Says Stamp Pawsitively Perfect White Foam Tape between the layers.
Cut one of the sentiment panels in the Simple Stories Wilflower paper pad a little smaller. Stamp a sentiment from Simon Says Stamp Happy Hello Smoke ink. Stamp another sentiment on left-over patterned paper and cut into a strip.
Sand the edges of the papers and round the corners. I used another sentiment panel as a mat to the main one, since I wanted to include that shade of grey.
The base is Simon Says Stamp Smoke Cardstock, which is the same color as the ink used for the stamping. Stitch along the edges with a sewing machine.
I cut out a few extra leaves since I thought they were missing, but forgot the ink the edges, but since I had sanded the edges of the background papers, I thought the white cutting line didn't matter so much.
Glue pearls to the center of the flowers.
I added two pearls to the stamped sentiment strip too.
The flowers were adhered to the background with Simon Says Stamp foam tape, using two layers of tape under some of them, for extra dimension.
Thank you for taking the time to visit my blog today!
Happy stamping!
Anna-Karin
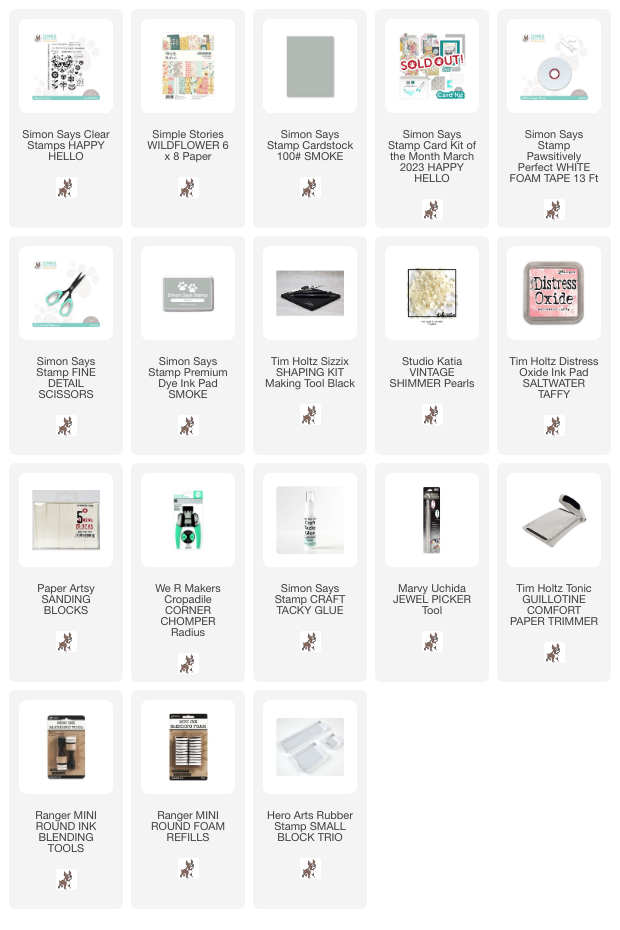
Supplies:
* Please note: the links are affiliate links, for which I receive a small percentage of sales generated by the link, at no extra cost to you.


No comments:
Post a Comment
Thank you so much for leaving a comment! Happy Crafting!