Monday, March 22, 2021

Rain Art Journal Page

Hello friends! I hope you are well and that you had a good weekend! Today I have an art journal page to share, with a fun way of using scrap papers.

At the Simon Says Stamp Monday Challenge Blog we have a 'Whatever the Weather' theme this week. I hope you will join us! And don't miss the project by our March guest designer Sandra Rupp.

Layers of ink - Rain Art Journal Page Tutorial by Anna-Karin Evaldsson.

We have a saying in Sweden that there is no bad weather, only bad clothes, meaning that if you are just dressed for it, any weather is good weather. That is not always true of course, but there is beauty also on rainy days, which is what this art journal page is about. I don't let rain keep me from enjoying my walks. 

Layers of ink - Rain Art Journal Page Tutorial by Anna-Karin Evaldsson.

This project started out by me spotting these strips of left-over inky and stamped papers. They were left-overs from my December Daily journal, from the inside pages, which is also why they are all basically the same size.

Layers of ink - Rain Art Journal Page Tutorial by Anna-Karin Evaldsson.

I picked out some papers at random and adhered them to a canvas page in my Dina Wakley Media Journal. The stamped dots on the background paper were done with the Circle Pattern Background stamp.

Layers of ink - Rain Art Journal Page Tutorial by Anna-Karin Evaldsson. Stamp with Simon Says Stamp Forest Scenery.

The pine trees come from the Simon Says Stamp Forest Scenery set and I inked them with shades of blue. Mist the inked stamp with water before stamping. I used a little more water than normally, since I wanted a fluid and misty look. 

Layers of ink - Rain Art Journal Page Tutorial by Anna-Karin Evaldsson.

Use an ink blending brush and apply Distress Oxide inks through the Bubble Wrap stencil, focusing on the sky area.

Layers of ink - Rain Art Journal Page Tutorial by Anna-Karin Evaldsson.

I wanted more textures and rainy splatters and used the leaf texture stamp from the All Seasons Tree for that. It is a great stamp for general texture. Ink and mist with water before stamping. 

Layers of ink - Rain Art Journal Page Tutorial by Anna-Karin Evaldsson. Stamp with Simon Says Stamp Crackle Background.

Next, I stamped the Crackle Background with Faded Jeans and Deep Sea ink on the ground area, to increase the texture there and separate it from they sky. 

Layers of ink - Rain Art Journal Page Tutorial by Anna-Karin Evaldsson.

The sentiment was die cut with Simon Says Stamp Capital B Beautiful die, from aqua holographic paper and blue glimmery cardstock. 'Rain' was die cut with the Archie Jr Solid set.

Layers of ink - Rain Art Journal Page Tutorial by Anna-Karin Evaldsson.

I painted a faint shadow under the trees, to ground them to the background. This sentiment stamp comes from Tim Holtz Tiny Text.

Layers of ink - Rain Art Journal Page Tutorial by Anna-Karin Evaldsson.

The green shade on one of these trees was a mistake, it was left on the stamp from a previous project, but I liked the mottled look it created. The largest pine tree is very watery and misty and you can see the background through it. The sentiment comes from Follow the Rainbows.

Layers of ink - Rain Art Journal Page Tutorial by Anna-Karin Evaldsson.

Here I combined two sentiments, stamping only the first line of the one on top. It continues with 'I am there for you', but that didn't fit my page. The sentiment and raindrop stamp are from Follow the Rainbows and the second sentiment comes from Beautiful Butterflies.

Layers of ink - Rain Art Journal Page Tutorial by Anna-Karin Evaldsson.

The hearts were die cut from holographic paper with the Clipping Heart die, and the glittery hearts were on my desk, left-over from die cutting Aqua glitter paper with one of the Slimline Borders and Edges dies.

Layers of ink - Rain Art Journal Page Tutorial by Anna-Karin Evaldsson. Simon Says Stamp Holographic paper.

Here you can see the holographic effect better, it is so cool, and it also look great together with the glimmer cardstock.

I hope you will join us this week in our Whatever the Weather challenge. You have a chance to win a $25 gift voucher to do some fun shopping at Simon Says Stamp. You have until Monday 8am Ohio time. 1pm UK time, 2 pm CET to join in.


Do you use Instagram? If so please add #sssmchallenge so we can see your entries there too.


Thank you so much for taking the time to stop by here today! 

Happy crafting!

Anna-Karin

Supplies:

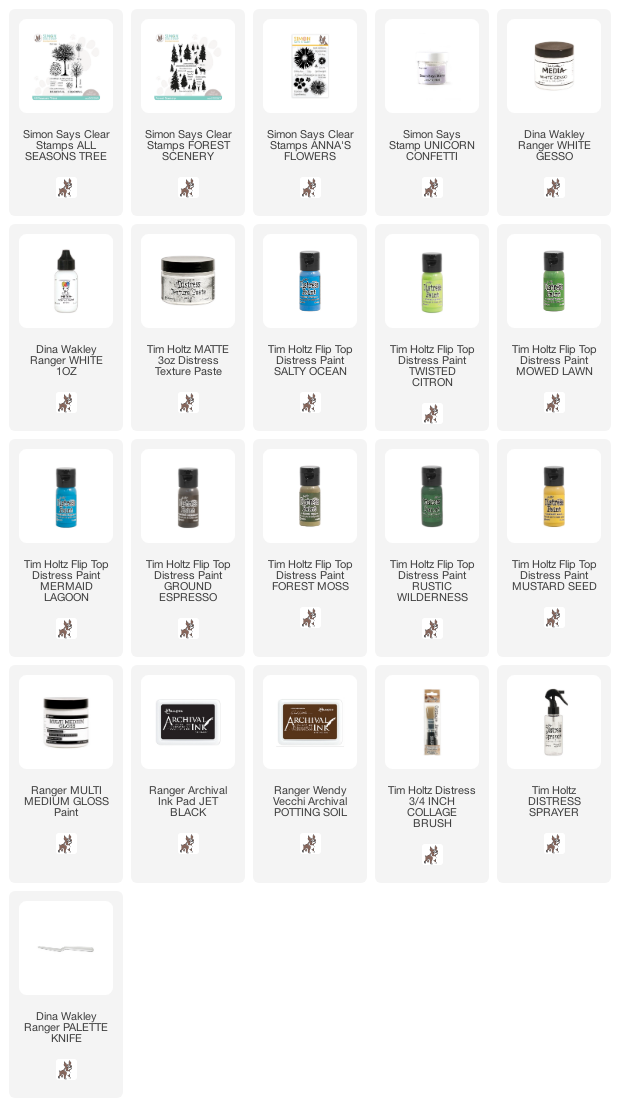
* Please note: the links are affiliate links, for which I receive a small percentage of sales generated by the link, at no extra cost to you.

Sunday, March 21, 2021

Spring Canvas Mixed Media Tutorial

Hello friends! I have a spring canvas to share with you today, with fun and easy mixed media and stamping techniques. You can use the techniques for cardmaking and art journaling too.


Layers of ink - Spring Canvas Mixed Media Tutorial by Anna-Karin Evaldsson. With Simon Says Stamp All Seasons Tree and Forest Scenery stamp sets.

It is still a little chilly here, but spring is definitely on the way. One of my favorite things with spring is all the shades of green that you will find where ever you look and that is what inspired this 7 x 9.5 in canvas. I wanted to create green hills with a sprinkle of leafy trees. I used Simon Says Stamp All Seasons Tree and Forest Scenery stamp sets.

Layers of ink - Spring Canvas Mixed Media Tutorial by Anna-Karin Evaldsson. Coat canvas with gesso.

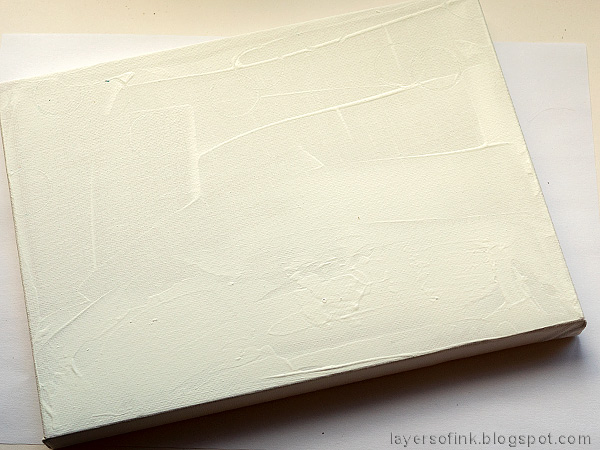
Start by coating the canvas with gesso. 

Layers of ink - Spring Canvas Mixed Media Tutorial by Anna-Karin Evaldsson. Apply texture paste.

Apply texture paste where you plan the grassy hills to be. I applied it with a palette knife and made a hill-looking texture. Let dry.

Layers of ink - Spring Canvas Mixed Media Tutorial by Anna-Karin Evaldsson. Paint with acrylic paint.

When dry, paint with watered-down Distress Paints.

Layers of ink - Spring Canvas Mixed Media Tutorial by Anna-Karin Evaldsson. Stamp Simon Says Stamp All Seasons Tree on tissue paper.

It is difficult to get a good stamped impression on such a textured surface, so I reached for my favorite solution to that, namely stamping on tissue paper. Stamp on the glossy side of the tissue paper, with Archival Ink, or another waterproof ink. I hadn't yet decided if I wanted black or brown trees, so I stamped both. The trees from from the All Seasons Tree and the deer from the Forest Scenery set.

Layers of ink - Spring Canvas Mixed Media Tutorial by Anna-Karin Evaldsson.

I went with the brown trees this time since I wanted a softer look. Tear around the images as a cut edge will be more visible. Place them out to try out different compositions.

Layers of ink - Spring Canvas Mixed Media Tutorial by Anna-Karin Evaldsson. Adhere the tissue paper trees.

Use gloss medium to glue down the tissue papers. Apply medium on the background, place the paper into the medium and add another layer of medium on top. As you can see the tissue paper disappears almost completely. I turned one of the deer around so that they would face each other. At this stage, I often think the canvas looks terrible, but we will fix that.

Layers of ink - Spring Canvas Mixed Media Tutorial by Anna-Karin Evaldsson.

Add more green to the grass to deepen the shades. I made it darker in the foreground, which adds a sense of distance.

Layers of ink - Spring Canvas Mixed Media Tutorial by Anna-Karin Evaldsson.

Add more color to the sky too.

Layers of ink - Spring Canvas Mixed Media Tutorial by Anna-Karin Evaldsson.

I wanted my trees to have a leafy texture. Mix a tiny bit of paint into texture paste. I did one lighter version with Twisted Citron and a darker version with Mowed Lawn. Apply to the trees with a palette knife, creating lots of texture. Don't apply it smoothly and let some of the branches show through, as they would on a real tree. I had a jar of Simon Says Stamp Unicorn Confetti on my desk and decided to toss some of it on top of the paste leaves. Add some of the texture to the background too.

Layers of ink - Spring Canvas Mixed Media Tutorial by Anna-Karin Evaldsson. Add shading and words.

I painted the sky with gloss medium and sprinkled just a little bit of Unicorn glitter on top. The sentiment was stamped on tissue paper and applied in the same way as the other stamps. Use darker brown and green to add shading to the tree trunks, deer, and under the trees and deer.

Layers of ink - Spring Canvas Mixed Media Tutorial by Anna-Karin Evaldsson. With Simon Says Stamp All Seasons Tree and Forest Scenery stamp sets.

I also splattered some white and yellow paint on the background, to create the look of spring flowers growing in the grass. This sentiment comes from Anna's Flowers.

Layers of ink - Spring Canvas Mixed Media Tutorial by Anna-Karin Evaldsson.

The glitter was added on a whim and I thought it gave a fun sparkle and added to the happy spring feel of the canvas. 

Layers of ink - Spring Canvas Mixed Media Tutorial by Anna-Karin Evaldsson.

I also stamped some sentiments from the Forest Scenery right on the background, placing a closed ink pad underneath the spot for a firm surface to stamp on.

Layers of ink - Spring Canvas Mixed Media Tutorial by Anna-Karin Evaldsson.

The trees have a cool texture that you want to reach out and touch.

Layers of ink - Spring Canvas Mixed Media Tutorial by Anna-Karin Evaldsson.

With tissue paper stamping you can easily flip an image, to get a mirror effect. I added shading and some highlights to the deer, which adds dimension.

Layers of ink - Spring Canvas Mixed Media Tutorial by Anna-Karin Evaldsson.

Here you can see that I painted a darker brown on one side of the deer. The 'shades of green' sentiment was originally inspired by spring-time trees.

Layers of ink - Spring Canvas Mixed Media Tutorial by Anna-Karin Evaldsson. With Simon Says Stamp All Seasons Tree and Forest Scenery stamp sets.

The tissue paper is a little more visible on this sentiment stamp, if you look closely. The reason for that is that it was applied over darker paint. Tissue paper disappears better over light colored shades. I wanted that sentiment in a place with lots of texture, otherwise I would have stamped it directly on the background.

Layers of ink - Spring Canvas Mixed Media Tutorial by Anna-Karin Evaldsson. With Simon Says Stamp All Seasons Tree and Forest Scenery stamp sets.

The small trees have shading on the trunks too. I used mainly the lighter green paste for these, so that they would look further away.

Layers of ink - Spring Canvas Mixed Media Tutorial by Anna-Karin Evaldsson. With Simon Says Stamp All Seasons Tree and Forest Scenery stamp sets.

Here you might be able to see the tree texture a little better.


Thank you so much for taking the time to stop by here today! I will see you again tomorrow.

Happy crafting!

Anna-Karin

Supplies:

* Please note: the links are affiliate links, for which I receive a small percentage of sales generated by the link, at no extra cost to you.

Tuesday, March 16, 2021

Foiled Folio Journal Tutorial

Hello friends! Today I have a fun tutorial to share with you for a mixed media journal or sketchbook, with lots of shiny foil texture.

Layers of ink - Foiled Folio Tutorial by Anna-Karin Evaldsson.

During March, the Eileen Hull Inspiration Team is sharing idea with the Folio Journal die. My journal was a challenge to photograph, because of the shiny foil pieces. It doesn't look the same from every angle. The shiny parts look pretty cool in real life. If you don't want to make a journal, you can also use the techniques on other types of projects.

Layers of ink - Foiled Folio Tutorial by Anna-Karin Evaldsson.

From this angle, the journal looks a little different and the foil catches the light in a nice way. 

Layers of ink - Foiled Folio Tutorial by Anna-Karin Evaldsson. Die cut Eileen Hull Sizzix Folio Journal from mat board.

Start by die cutting two covers from Sizzix Little Sizzles Mat Board using the Eileen's Sizzix Folio Journal die. This is an XL die, so you need the XL (or extended) cutting pads. It fits perfectly in the ordinary Big Shot or Vagabond. I cut off the flaps on this journal. 

Layers of ink - Foiled Folio Tutorial by Anna-Karin Evaldsson.

Apply gesso with a palette knife, aiming for an uneven look. Let dry.

Layers of ink - Foiled Folio Tutorial by Anna-Karin Evaldsson. Apply texture paste through Simon Says Stamp Mix and Match Circles Stencil.

Apply texture paste through the Simon Says Stamp Mix and Match Circles Stencil, using a palette knife. I hadn't cleaned the stencil since I used it on my Stenciled Circle Background art journal page, which is why some of that ink transferred to the dots.

Layers of ink - Foiled Folio Tutorial by Anna-Karin Evaldsson.

When the paste is dry, paint with a three shades of purple paints. Mist heavily with water. When the background is almost dry, you can wipe some of the paint off with a moist cloth.

Layers of ink - Foiled Folio Tutorial by Anna-Karin Evaldsson.

Die cut flowers from old book paper, Memory Box glitter paper and Simon Says Stamp pink cardstock, using Eileen's Folio Page, Pocket & Flowers set.

Layers of ink - Foiled Folio Tutorial by Anna-Karin Evaldsson.

I wanted my journal to be a little thinner and cut off one of the three spine pieces.

Layers of ink - Foiled Folio Tutorial by Anna-Karin Evaldsson.

When the paint is dry, apply glue to the dots, don't cover them completely, unless you want to. Wait a few minutes and then place a piece of foil on top, with the shiny top up. I used Therm-O-Web Lilac Deco Foil. Rub with a your fingers and a bone folder. Pull off the foil and it will stick to the glue.

Layers of ink - Foiled Folio Tutorial by Anna-Karin Evaldsson.

Use your favorite paper for the inside. I use different papers depending on what I am planning to use a journal/sketchbook/notebook for. Sometimes I use watercolor paper, sometimes sketching paper, sometimes a mix of both.

Layers of ink - Foiled Folio Tutorial by Anna-Karin Evaldsson.

For the binding, I used an elastic string. I also added an extra hole, which you can see here, because I wanted to be able to hold the album closed with the same string. 

Layers of ink - Foiled Folio Tutorial by Anna-Karin Evaldsson.

On the outside of the spine it looks like this. The twine was tied through a button to secure it.

Layers of ink - Foiled Folio Tutorial by Anna-Karin Evaldsson.

I tied two glass beads to the ends of the strings.

Layers of ink - Foiled Folio Tutorial by Anna-Karin Evaldsson.

The sentiment comes from the Paper Artsy The Time Edition set, by Alison Bomber. Stamp on cream paper and cut into strips.

Layers of ink - Foiled Folio Tutorial by Anna-Karin Evaldsson.

The flower was assembled with a pearl in the center. Bend up the petals slightly.

Layers of ink - Foiled Folio Tutorial by Anna-Karin Evaldsson.

The foil is purple too, which is a little hard to see on the photos. The technique creates a very textured and shiny look.

Layers of ink - Foiled Folio Tutorial by Anna-Karin Evaldsson.

Here you might see the shine and color of the foil better.

Layers of ink - Foiled Folio Tutorial by Anna-Karin Evaldsson.

I left the back plain. 

Layers of ink - Foiled Folio Tutorial by Anna-Karin Evaldsson.

For a different version of the Folio Journal, check out my Floral Folio tutorial.


Thank you so much for taking the time to stop by here today! 

Happy crafting!

Anna-Karin

Supplies:

* Please note: the links are affiliate links, for which I receive a small percentage of sales generated by the link, at no extra cost to you.