Tuesday, December 17, 2019

Eileen Hull Favorite Projects 2019

Hello crafters! During December, the Eileen Hull Inspiration Team is sharing some of their favorite projects from the past year. Here's a little recap post from me, I will be back some time between Christmas and New Year, with a more general favorites of the year 2019 post. I can't believe we are soon entering a new decade.

Layers of ink - Watercolor Meadow Journal Tutorial by Anna-Karin Evaldsson.

Let's start with my Watercolor Meadow Notebook. Just looking at this notebook makes me feel like it is springtime. I love birch trees and really enjoyed painting this cover with watercolors. There's a fun resist effect too.

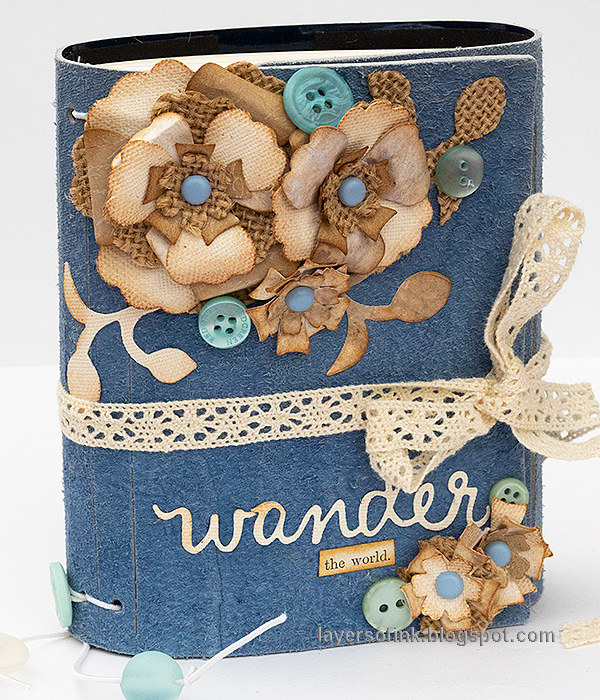
Layers of ink - Wrapped Journal Tutorial by Anna-Karin Evaldsson.

And then a wrapped journal, where I used some old glass beads that I have had for a very long time. The journal is made of patent leather, with the inside out, giving the journal a lovely soft feeling. You can find the tutorial here.

Layers of ink - Heat Embossed Journal Tutorial by Anna-Karin Evaldsson.

Next up, another journal, with a cover that has been completely heat embossed.

Layers of ink - Watercolor Birds Pen Holder by Anna-Karin Evaldsson.

I love to make my own storage holder, and this Watercolor Birds Pen Holder can contain lots of pens, paint brushes and other tools. You can also make it larger and create more compartments. It was stamped with the beautiful Darkroom Door Garden Birds set.

Layers of ink - Autumn Notebook Tutorial by Anna-Karin Evaldsson.

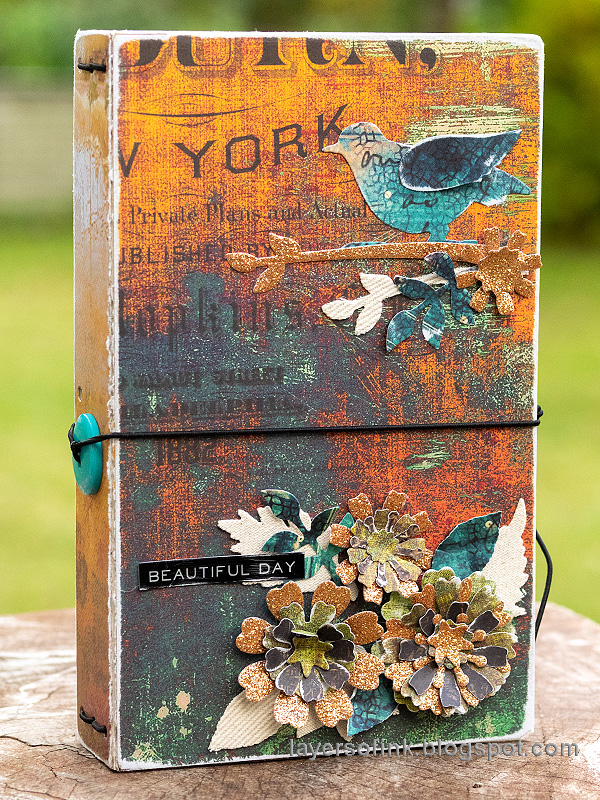
I just have to add one more journal, namely this autumn inspired one, made with the new Pocket Notebook die, and my favorite papers from this year, Tim Holtz's Abandoned Paper Stash.


Thank you so much for taking the time to visit my blog today!  

Happy crafting!

Anna-Karin

* Please note: the links are affiliate links, for which I receive a small percentage of sales generated by the link, at no extra cost to you.
Monday, December 16, 2019

Winter Cottage in a Snowglobe

Hello friends! I hope your weekend was good! I did the last of our decorations for Christmas and got a little tree. Leo loves to help decorate the tree and this year he managed to place the decorations over a larger area of the tree. Last year, our tree was very heavily decorated in one small area.


It is Monday again and this week we have a Cityscape challenge at the Simon Says Stamp Monday Challenge Blog. Don't miss the wonderful project by our December guest designer Autumn Clark, with her blog SewPaperPaint.

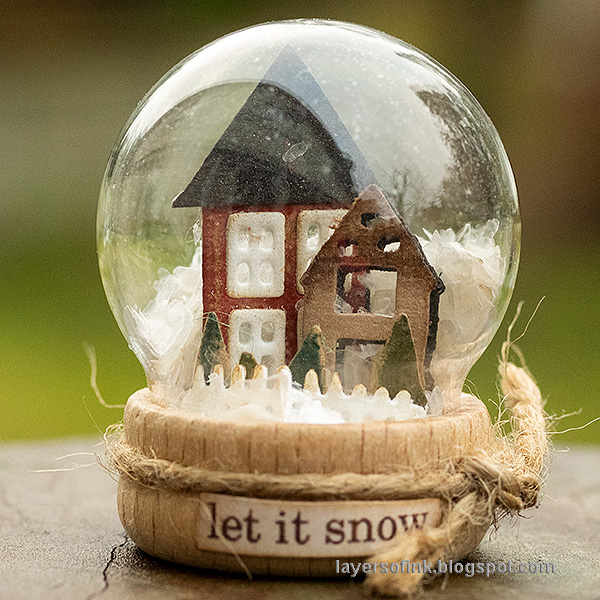
Layers of ink - Winter Cottage in a Snowglobe by Anna-Karin Evaldsson.

I didn't make an entire cityscape, but was inspired to focus on just one part of a city, namely people's homes, and what an important part that is. So here's a cosy home inside a mini snowglobe. Now and then it is fun to do a miniature or really small project and this one is just 1.7 in tall.

Layers of ink - Winter Cottage in a Snowglobe by Anna-Karin Evaldsson. Die cut Tim Holtz Snowglobe 2.

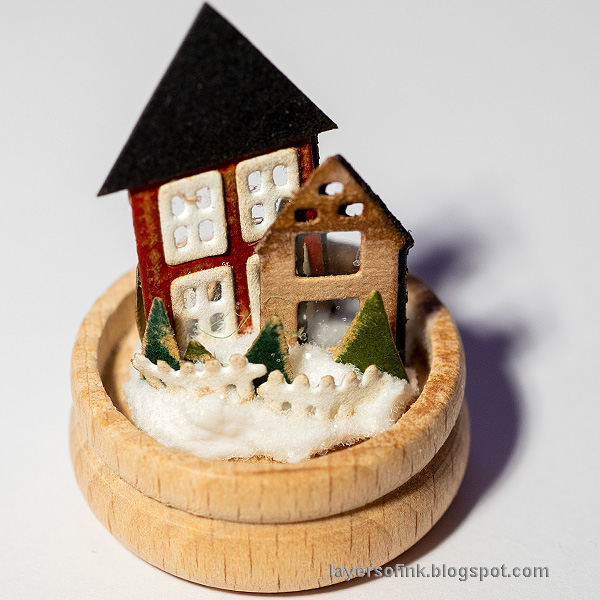
I die cut houses, trees and a fence from kraft stock paper with Tim Holtz Snowglobe 2 die set, and glued a piece of acetate for windows.

Layers of ink - Winter Cottage in a Snowglobe by Anna-Karin Evaldsson.

Add texture paste to the wooden base of a snowglobe and press the houses and trees into the paste. There are some trees at the back too. Sprinkle with Rock Candy Distress Glitter.

Layers of ink - Winter Cottage in a Snowglobe by Anna-Karin Evaldsson. Pour mica flakes into the snowglobe.

Pour some mica flakes into the glass dome and add a little bit of matte medium around the bottom edge. Adhere to the wooden base. If the texture paste isn't dry yet, you need to leave the snowglobe upside down until it is dry, to prevent the mica flakes from sticking to the paste. I added a bit too much mica flakes, and I think less will be better.

Layers of ink - Winter Cottage in a Snowglobe by Anna-Karin Evaldsson.

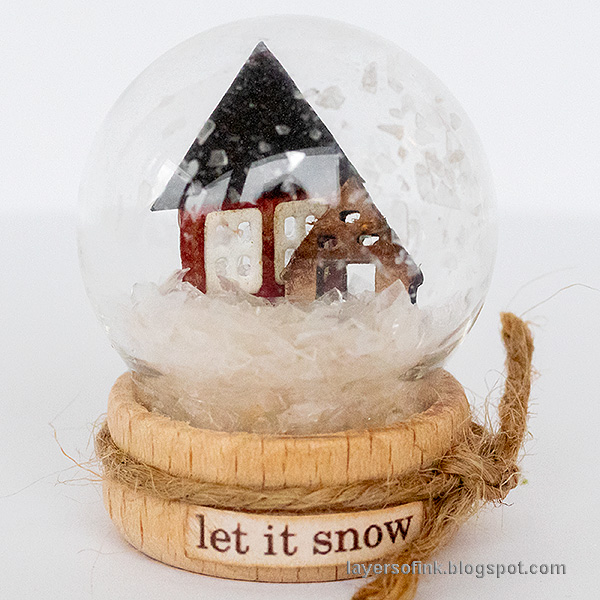
Here you can see that I added too much mica, if you shake the snowglobe and the mica ends up in the front, it looks like one very snowy garden.

Layers of ink - Winter Cottage in a Snowglobe by Anna-Karin Evaldsson.

Here's a close up of the icy and shiny look of the mica flakes.

Layers of ink - Winter Cottage in a Snowglobe by Anna-Karin Evaldsson.

If you leave the mica behind the houses after shaking it, the snow effect is better and it doesn't cover the trees and fence.

I hope you will join us this week in our Cityscape challenge. As always, you have a chance to win a $50 gift voucher to do some fun shopping at Simon Says Stamp. You have until next Monday 8am Ohio time. 1pm UK time, 2 pm CET to join in.


Don't forget to follow Simon Says Stamp on Instagram, they post great stuff daily. 


Do you use Instagram? If so please add #sssmchallenge so we can see your entries there too.


Thank you so much for taking the time to visit my blog today!  

Happy Christmas crafting!

Anna-Karin

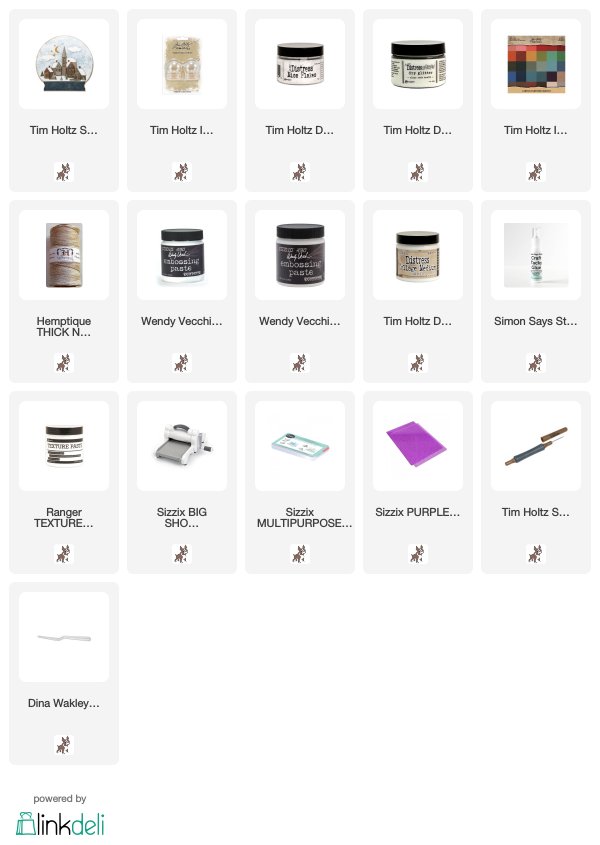
Supplies:

* Please note: the links are affiliate links, for which I receive a small percentage of sales generated by the link, at no extra cost to you.


Saturday, December 14, 2019

Winter Wonderland Scene

Hello friends! We had one day of gorgeous snow weather this week, but now we are back to grey and rainy days. Luckily, I can make my own winter wonderland, and today I am sharing a tutorial for a winter scene.

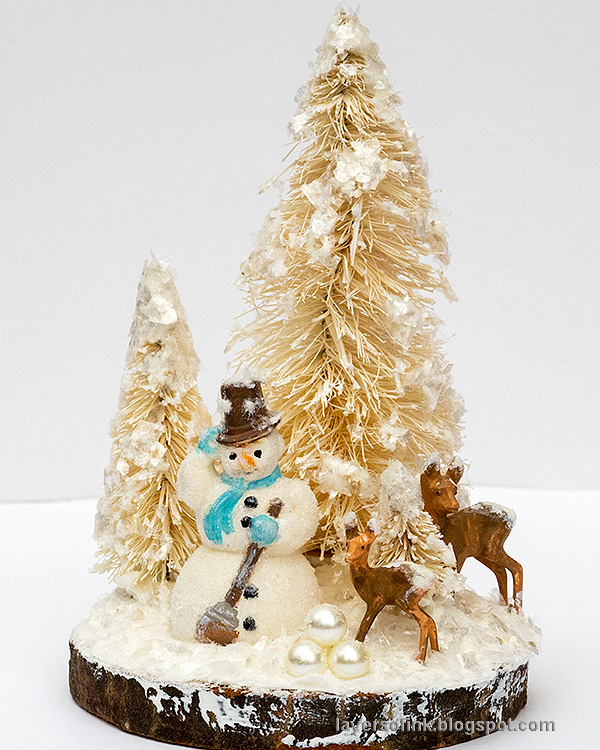
Layers of ink - Winter Wonderland Scene by Anna-Karin Evaldsson.

This winter wonderland is very sparkly, with both glitter and mica flakes. It would make a great gift, or you can keep if for yourself. I was going to give it away, but then it looked so good in one my Christmas decorations areas, so it will stay here. This project started as a wooden coaster, which I found in a local shop. You can of course also saw your own coaster from a piece of wood, or use any kind of sturdy surface. A small canvas board, or layered pieces of mat board would also work well. 

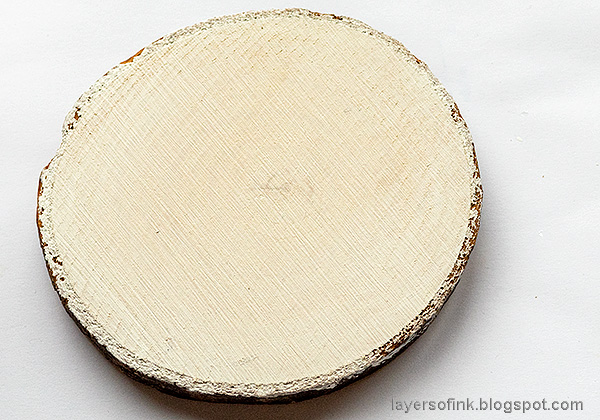
Layers of ink - Winter Wonderland Scene by Anna-Karin Evaldsson. Wooden coaster base.

I started out by coating the wooden coaster with a couple of layers of gesso. The coaster is about 4 x 3.5 inches.

Layers of ink - Winter Wonderland Scene by Anna-Karin Evaldsson.

Paint three trees with Picket Fence Distress Paint, rubbing the paint into the trees. It's a bit messy, so protect your work area and clothes. I used three sizes of trees, but couldn't find the larger one in the SSS shop now. You can put two half trees together if you want a large tree, or just leave the half part at the back.

Layers of ink - Winter Wonderland Scene by Anna-Karin Evaldsson.

When dry, paint the thicker Dina Wakley white paint here and there on the branches. You can make them completely white if you want to.

Layers of ink - Winter Wonderland Scene by Anna-Karin Evaldsson. DIY snow.

Apply white texture paste on the trees with a palette knife. Add as much or as little as you'd like. Sprinkle Tim Holtz Mica Flakes on the trees, or press the trees into a pile of mica flakes. Next, sprinkle lots of Rock Candy distress glitter on the trees and return the leftovers to the jar.

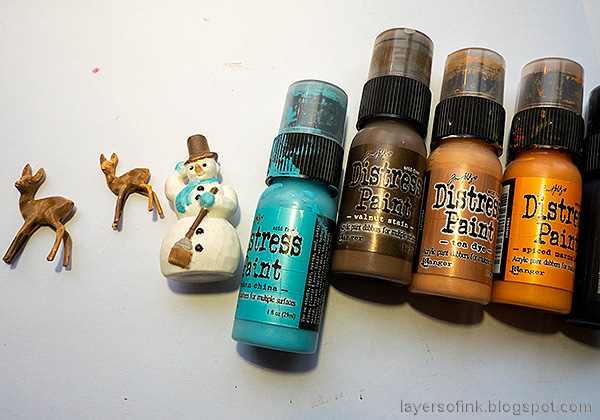
Layers of ink - Winter Wonderland Scene by Anna-Karin Evaldsson. Tim Holtz Salvaged Snowman and Deer.

Paint a Salvaged Snowman and two deer with Distress Paint. I by mistake took two deer from an older pack, the larger deer to the left now looks even nicer, with horns.

Layers of ink - Winter Wonderland Scene by Anna-Karin Evaldsson. Add Rock Candy Glitter to the snowman.

Apply gloss multimedium to most of the snowman, and apply texture paste to parts of the deer. Sprinkle Rock Candy glitter over them.

Layers of ink - Winter Wonderland Scene by Anna-Karin Evaldsson. DIY snow with mica flakes and glitter.

Apply a thick layer of texture paste on the wooden coaster and press the elements into the paste. Add extra paste around the trunks of the trees. The paste acts as a glue. Sprinkle mica flakes on top and then Rock Candy Glitter.

Layers of ink - Winter Wonderland Scene by Anna-Karin Evaldsson.

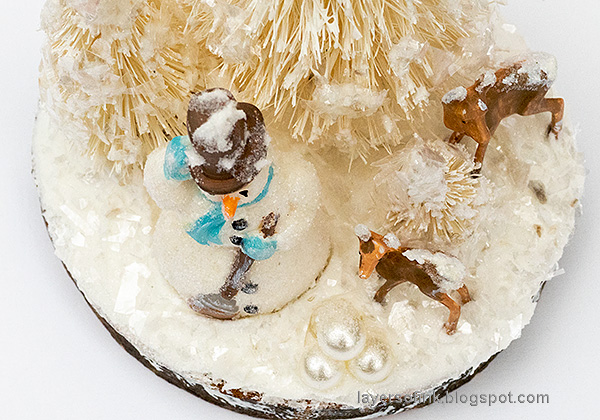
I made a snow lantern with four baubles. As you can see, I also dry brushed some gesso around the edges of the coaster.

Layers of ink - Winter Wonderland Scene by Anna-Karin Evaldsson.

The combination of mica flakes and Rock Candy glitter makes for a super sparkly winter project, mimicking both snow and ice.

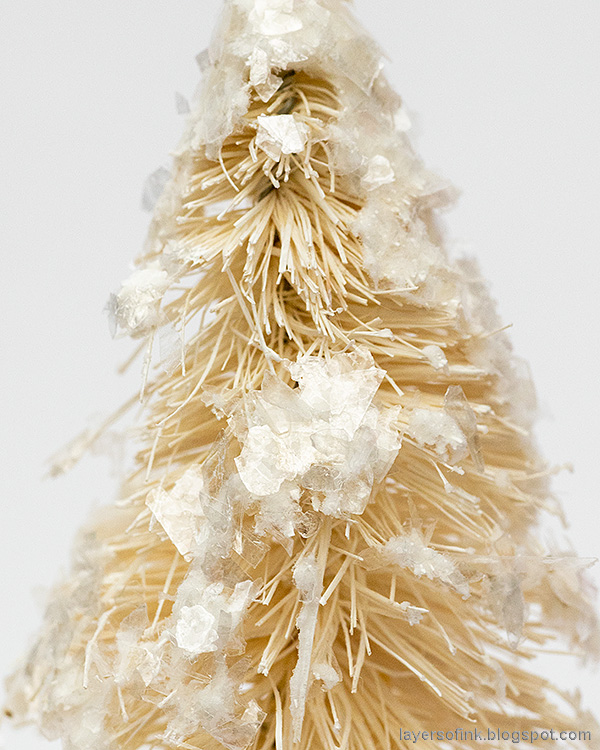
Layers of ink - Winter Wonderland Scene by Anna-Karin Evaldsson. DIY winter trees tutorial.

If you want to, you can add even more mica and glitter on the trees.

Layers of ink - Winter Wonderland Scene by Anna-Karin Evaldsson.

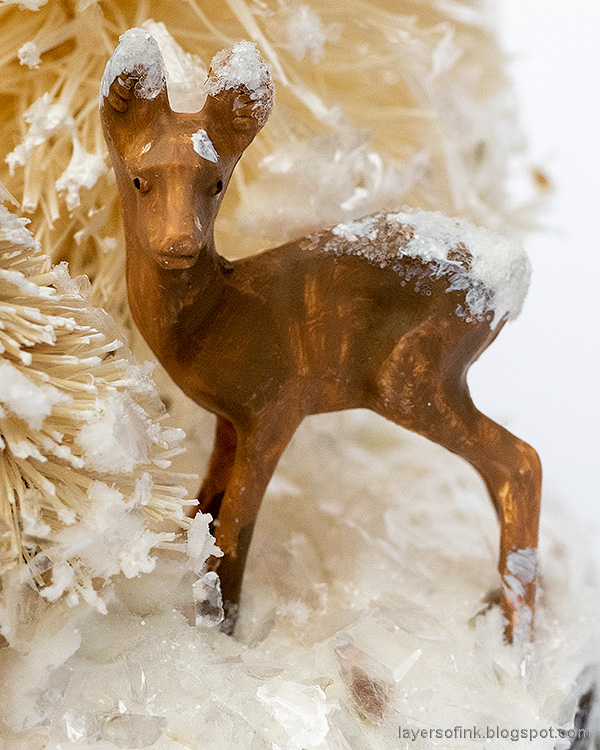
I just love these little deer and have used them before. Last year, I colored them gold for a Christmas altered tin. In the new pack, this larger deer has beautiful horns and a raised front leg.

Layers of ink - Winter Wonderland Scene by Anna-Karin Evaldsson. Salvaged Snowman.

I love the look of the snowman with the Rock Candy. You can use the same techniques for the Santa that comes in the same pack as the snowman. 

Layers of ink - Winter Wonderland Scene by Anna-Karin Evaldsson. Rock Candy Glitter snow.

Here's a close up of the glitter. As you can see, I applied the gel medium mainly to the snow parts of the snowman. 

Layers of ink - Winter Wonderland Scene by Anna-Karin Evaldsson.

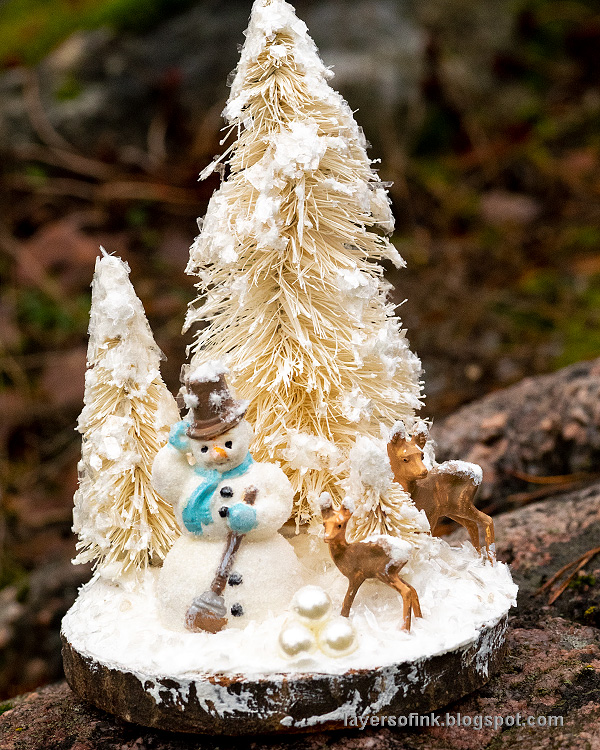
The winter wonderland scene looks good from all sides, and would work well as a small center piece on a table. Since it is winter-themed rather than Christmas-themed, I am planning to leave it out for the whole winter.

Layers of ink - Winter Wonderland Scene by Anna-Karin Evaldsson.

This photo would have looked so much better with some snow in the background. But no luck there!

Layers of ink - Winter Wonderland Scene by Anna-Karin Evaldsson.

You can wrap lights around the scene to make it shine and glitter when it is dark too. I only found larger snowflakes lights for this photo, but I think it will look even better with tiny fairy lights.


Thank you so much for taking the time to visit my blog today!  

Happy Winter Crafting!

Anna-Karin

Supplies:

* Please note: the links are affiliate links, for which I receive a small percentage of sales generated by the link, at no extra cost to you.


Monday, December 9, 2019

Twinkle Twinkle Little Star

Hello friends! I hope you had a great weekend! We visited a Christmas market at an old manor, where my Mom and I recently discovered that her grandfather was a foreman. The simple house that they lived in is still preserved almost as it was, and my grandfather was born in that very house. It was quite something to visit for the first time. My grandfather told us stories about that place, but my Mom thought the manor house and farm was situated somewhere else and that it had been destroyed. While in fact, it is preserved and fairly close by. We also visited the church where we think he was Christened. 


This week at the Simon Says Stamp Monday Challenge Blog we have a Star challenge. Perfect for the season! Don't miss the gorgeous project by our December guest designer Autumn Clark, with her blog SewPaperPaint.

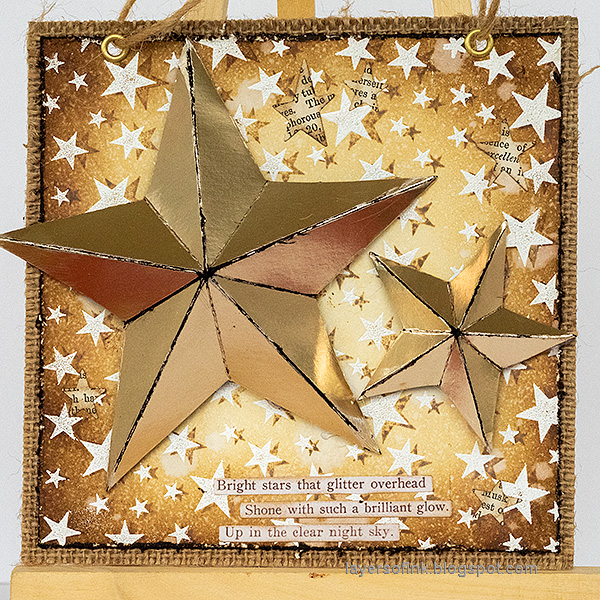
Layers of ink - Star Panel Tutorial by Anna-Karin Evaldsson.

I made a wall-hanging with lots and lots of stars in different sizes. It's about 6 x 6 inches and will probably end up as a gift this Christmas. I love both real stars and to use stars in projects, and they work equally well any time of the year. This particular panel is meant to be Christmas themed, but if you make the background in shades of blue, it can work any time of the year. I used the Star Bright die by Tim Holtz and the pretty Starry Night background stamp by Darkroom Door.

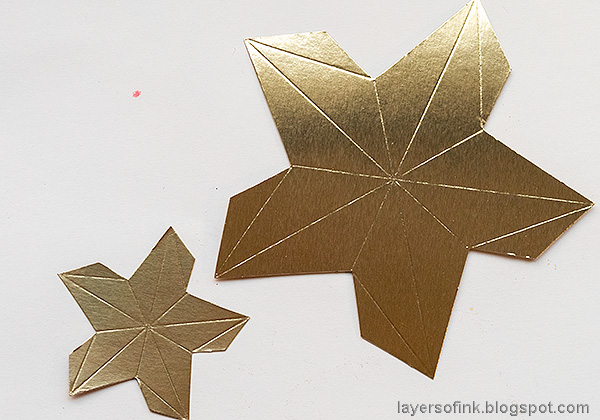
Layers of ink - Star Panel Tutorial by Anna-Karin Evaldsson. Die cut Tim Holtz Star Bright from gold paper.

Start by die cutting the two stars from Champagne metallic paper. I have used this paper a lot lately, since it is such a lovely soft shade of gold.

Layers of ink - Star Panel Tutorial by Anna-Karin Evaldsson.

Fold along the score lines and use a bone folder.

Layers of ink - Star Panel Tutorial by Anna-Karin Evaldsson.

Sand the folds carefully.

Layers of ink - Star Panel Tutorial by Anna-Karin Evaldsson. Ink the stars.

Ink by smearing brown Distress Ink directly on the stars, and wipe it off from the metallic areas. If you want the stars to be even more distressed, sand more.

Layers of ink - Star Panel Tutorial by Anna-Karin Evaldsson.

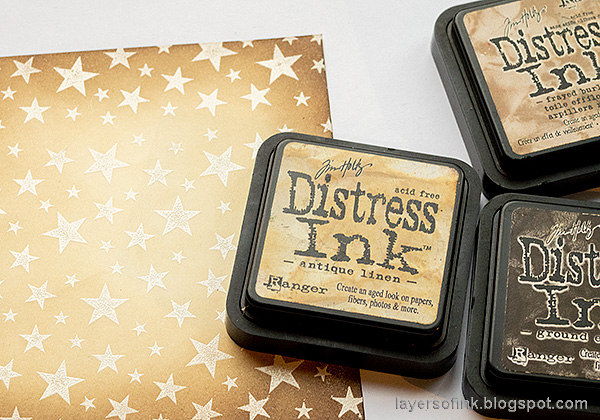
White emboss the Starry Night stamp on cream paper and ink with brown shades of Distress Ink.

Layers of ink - Star Panel Tutorial by Anna-Karin Evaldsson.

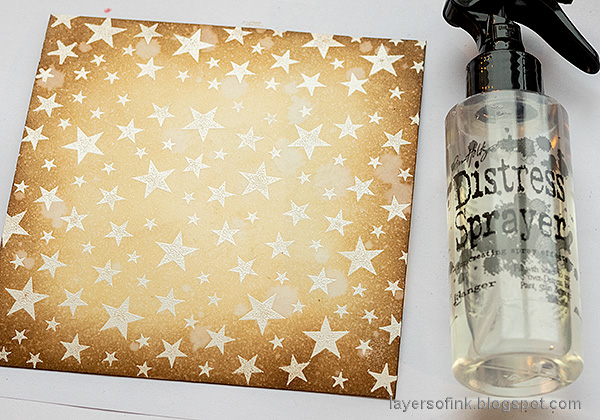
Splatter with water and let dry.

Layers of ink - Star Panel Tutorial by Anna-Karin Evaldsson.

I wanted a shadow effect and used a stamp positioner, even though I wasn't aiming for perfect placement. Stamp with Frayed Burlap. Wipe the ink off from the embossed stars.

Layers of ink - Star Panel Tutorial by Anna-Karin Evaldsson.

Distress and ink the edges and mount on burlap and on Little Sizzles Mat Board. Die cut stars with the Tim Holtz Stars set from old dictionary paper, ink and glue to the panel. Here you can see the effect of the stars, ink, splatters and shadow stars.

Layers of ink - Star Panel Tutorial by Anna-Karin Evaldsson.

I picked sentiments among Tim's clipping stickers.

Layers of ink - Star Panel Tutorial by Anna-Karin Evaldsson. DIY gold stars.

The stars are quite dimensional, as you can see here.

I hope you will join us this week in our Stars challenge. As always, you have a chance to win a $50 gift voucher to do some fun shopping at Simon Says Stamp. You have until next Monday 8am Ohio time. 1pm UK time, 2 pm CET to join in.


Don't forget to follow Simon Says Stamp on Instagram, they post great stuff daily. 


Do you use Instagram? If so please add #sssmchallenge so we can see your entries there too.


Thank you so much for taking the time to visit my blog today!  

Happy crafting!

Anna-Karin

Supplies:

* Please note: the links are affiliate links, for which I receive a small percentage of sales generated by the link, at no extra cost to you.