Tuesday, September 11, 2018

Wrapped Leather Journal

Hi friends! During September, the Eileen Hull Inspiration Team is sharing Fall-o-Ween projects. It's such a beautiful time of the year. Don't miss all the inspiration posted by the team this month.
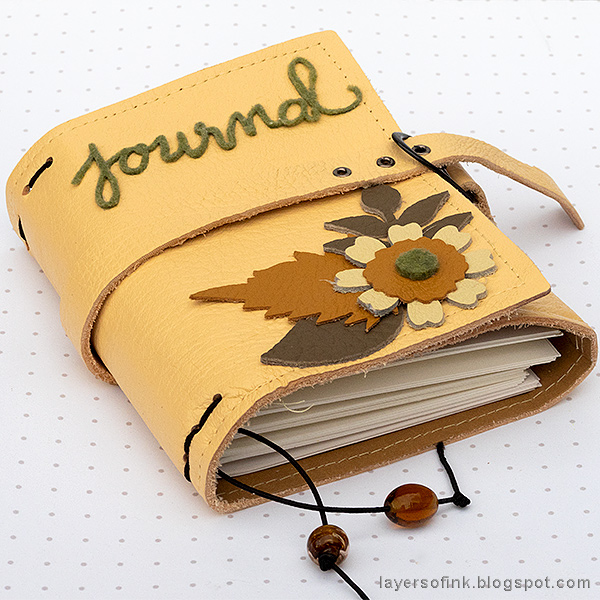
Layers of ink - Wrapped Leather Journal by Anna-Karin Evaldsson

I have been wanting to make a wrapped journal for myself, after having given away all the wrapped journals that I have made so far. When we visited an historical theme market recently, I came across a pile of scrap leather. After having looked through the entire pile to find a piece that was the right size for a wrapped journal, I found this pretty yellow/beige piece.This is a quick and easy project and if you can also use faux leather, or mat board covered with patterned paper or cardstock. The finished journal measures 4.7 x 5.1 in folded.

Layers of ink - Wrapped Leather Journal by Anna-Karin Evaldsson with Eileen Hull Sizzix dies

I started by test cutting just a tiny piece of leather, to make sure that the scorelines of the Wrapped Journal die wouldn't cut through the leather. I only had enough leather for one cover and I didn't want to mess it up. I die cut it with the outside up, so that the scorelines are actually on the inside. If you use mat board, die cut it the other way around.

Layers of ink - Wrapped Leather Journal by Anna-Karin Evaldsson with Eileen Hull Sizzix dies

I used Eileen's Heart & Soul Flower and Spring Leaves Bigz dies to die cut flowers and leaves from various tiny pieces of leather which I have had in my stash for years. When typing up this post, I saw that the flower die that I used is retired, but Eileen has many flower dies that you can use instead.

Layers of ink - Wrapped Leather Journal by Anna-Karin Evaldsson with Eileen Hull Sizzix dies

I also die cut a title using the Journaling Words set from thick felt.
Layers of ink - Wrapped Leather Journal by Anna-Karin Evaldsson with Eileen Hull Sizzix dies

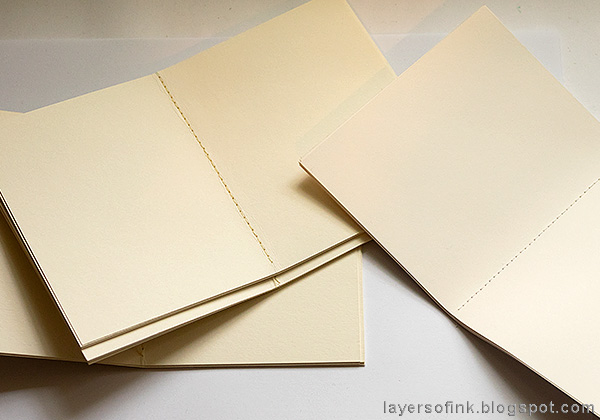
The signatures are very easy to do. I want this to be a sketch/notebook, so I used one of my favorite sketch papers. Mine are about 7.7 x 4.7 in (19.5 x 12 cm) and fold in half. Arrange in four signatures of about 6 papers each. Stitch down the center. You can also leave the papers lose or use staples.

Layers of ink - Wrapped Leather Journal by Anna-Karin Evaldsson with Eileen Hull Sizzix dies

I couldn't quite decide what do do on the inside. I wanted the covers to be flexible, but I think using only the leather, would have made it too soft, especially at the spine. Instead I used the Wrapped Journal die to die cut an inner cover from Sizzix Paper Leather, which is very flexible, but still strong. The paper leather isn't big enough for the journal, so you'll have do die cut two pieces. You could also use cardstock. 

Layers of ink - Wrapped Leather Journal by Anna-Karin Evaldsson with Eileen Hull Sizzix dies

I stitched the paper leather to the cover and got a border at the same time. My sewing isn't perfect, but that isn't what I was aiming for. I should have adhered the paper leather better to the inside before sewing, because I had to trim off some of the edges since it shifted a little.
Layers of ink - Wrapped Leather Journal by Anna-Karin Evaldsson with Eileen Hull Sizzix dies

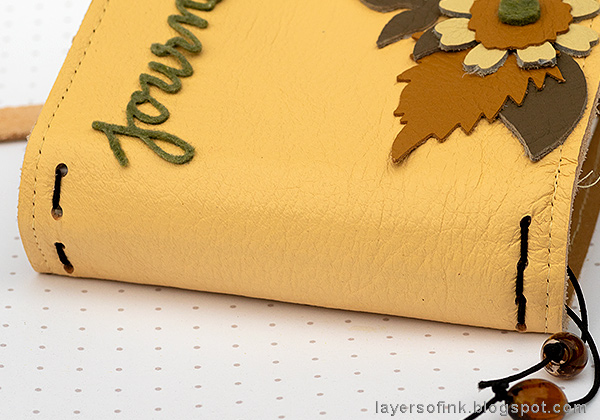
You can bind the journal in different ways - check the die packaging for ideas. I used a piece of black elastic string and did a simple bind.

Layers of ink - Wrapped Leather Journal by Anna-Karin Evaldsson with glass beads

Two glass beads were tied to the end of the strings.
 Layers of ink - Wrapped Leather Journal by Anna-Karin Evaldsson, signatures and binding

Simply slip the signatures under the elastic bands. I like that I can take signatures out and also replace them when they are full. It makes the journal last a lot longer too.
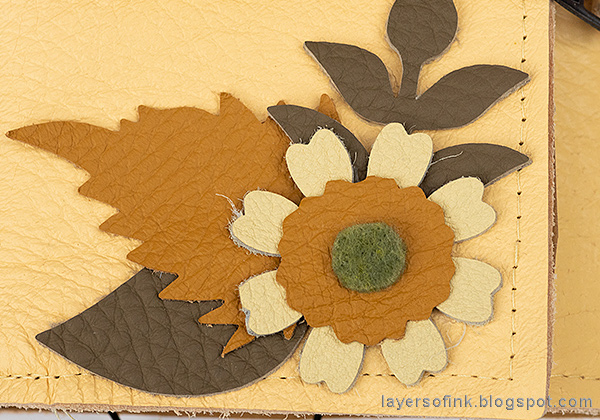
Layers of ink - Wrapped Leather Journal by Anna-Karin Evaldsson with leather leaves and flowers

Layer the leather leaves and flower on the cover and place a small felt circle in the center. 

Layers of ink - Wrapped Leather Journal by Anna-Karin Evaldsson with Eileen Hull Sizzix dies

Glue the felt word to the cover.

 Layers of ink - Wrapped Leather Journal by Anna-Karin Evaldsson with Eileen Hull Sizzix dies

To tie my journal, I made a super simple little belt, using a left over piece of leather, left on the one side when die cutting the journal. I found a buckle in my stash, made three holes and set eyelets in them. You can do a neater belt if you want to. I didn't even make sure it was the same width all the way.

Layers of ink - Wrapped Leather Journal by Anna-Karin Evaldsson with Eileen Hull Sizzix dies

The wrapped journal can be wrapped in two ways. Here I folded in the right hand flap first. You can do it the other way around too.

Layers of ink - Wrapped Leather Journal by Anna-Karin Evaldsson with Eileen Hull Sizzix dies

Then just add the simple belt, or tie with a piece of ribbon or string.

Layers of ink - Wrapped Leather Journal by Anna-Karin Evaldsson with Eileen Hull Sizzix dies

The wrapped journal has a very nice and chunky feel to it and I am happy with how my leather journal turned out. It would make a great gift too, but I am keeping this one for myself, since I have given away my previous wrapped journals. If you want more wrapped journal inspiration and tutorials, you can check them out: Wrapped Journal and Blue Textured Wrapped Journal.

Layers of ink - Wrapped Leather Journal by Anna-Karin Evaldsson with Eileen Hull Sizzix dies

Here's a look on the inside. You can also add pockets to the inside covers, if you want to.
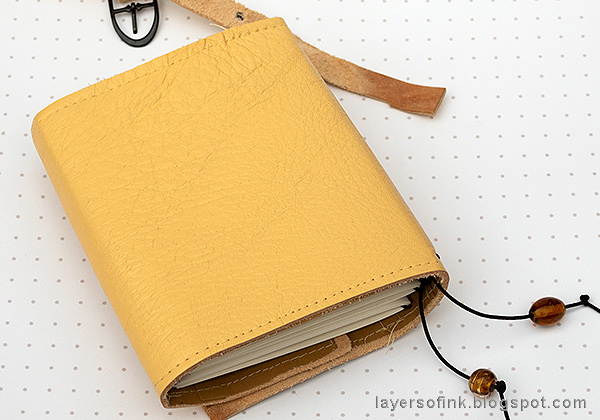
Layers of ink - Wrapped Leather Journal by Anna-Karin Evaldsson with Eileen Hull Sizzix dies

I didn't add any details to the back, but you can of course decorate it too.

Thank you so much for taking the time to visit my blog today!  

Happy stamping!

Anna-Karin

Supplies:

* Please note: the links are affiliate links, for which I receive a small percentage of sales generated by the link, at no extra cost to you.

Monday, September 10, 2018

Mixed Media Layers with Stencils and Stamps

Hello crafters! It is Monday again, and we had a nice weekend full of activities. A new play ground was opened and the kids absolutely loved it. We also had elections yesterday, and I took a lovely forest walk after voting, photographing mushrooms and other signs of autumn. On top of that, we visited some farm animals, built lego, and made apple mash and apple pie (I got lots of apples from friends). It's a big apple year here this year, and the trees are full of apples. Our favorite way of eating apple mash is to take it from the freezer and let it defrost a little bit, but to eat it before it has defrosted completely. I think we discovered this as children, when we were too impatient for the apple mash to defrost before eating it.

Our theme this week at the Simon Says Stamp Monday Challenge Blog is: Use More Than One Stencil. Fun! Don't miss the project by our September guest designer Terelisa Agosti.

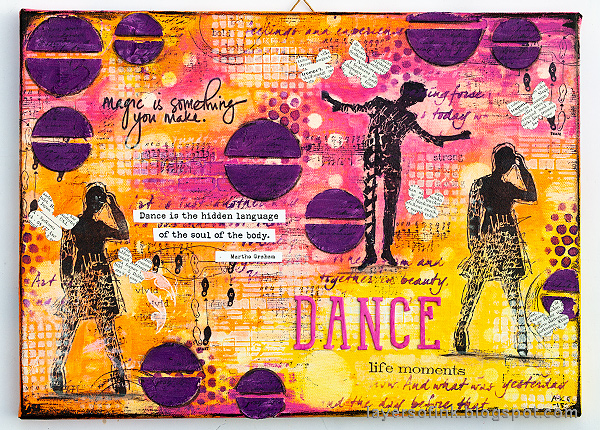
Layers of ink - Mixed Media Layers with Stencils and Stamps Canvas Tutorial by Anna-Karin Evaldsson, with acrylic paint.

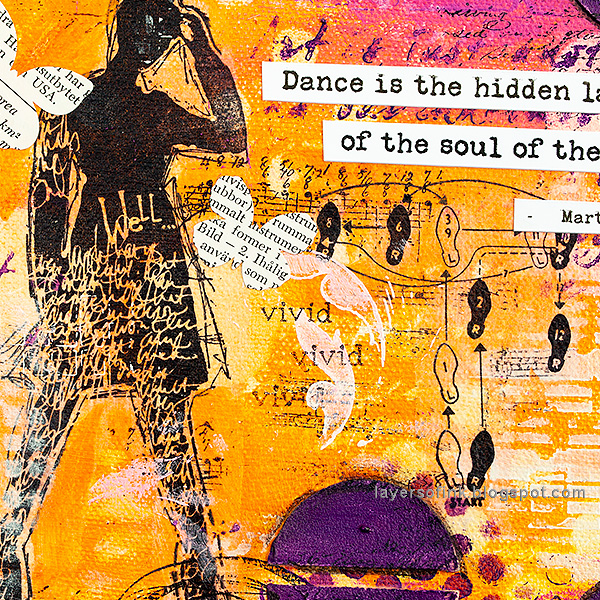
I made this canvas as a birthday gift to a good friend of mine. Dancing is one of her big interest, so it was easy to pick the theme for the canvas, which is also full of significant little details and words. I also used a color combo that I know that she likes. The background is built up with layers of acrylic paint, stenciling and stamping. You can of course use the techniques for any type of theme. The canvas is 33 x 24 cm or 13 x 9.5 in.

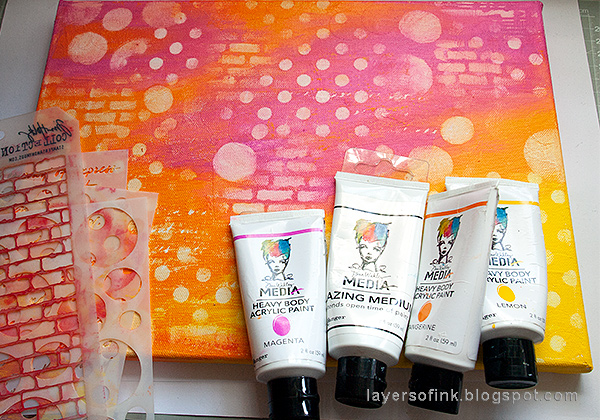
Layers of ink - Mixed Media Layers with Stencils and Stamps Canvas Tutorial by Anna-Karin Evaldsson with Dina Wakley Ranger Studio paints

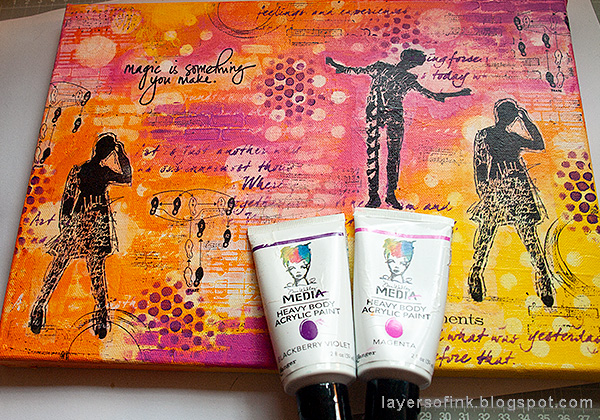
Start by coating a canvas with gesso. When the gesso is dry, paint it with acrylic paints. I used Dina Wakley's paint and also added some of her Glazing Medium to the paint, which gives you a little more time before the paint dries. Before the paint is completely dry, use various stencils and rub through them with a slightly moist cloth. This will remove paint. To make it easier to rub, I placed a Sizzix L Bigz die under the canvas. You can also use a book. The big dots come from the SSS Irregular Dots stencil.

Layers of ink - Mixed Media Layers with Stencils and Stamps Canvas Tutorial by Anna-Karin Evaldsson

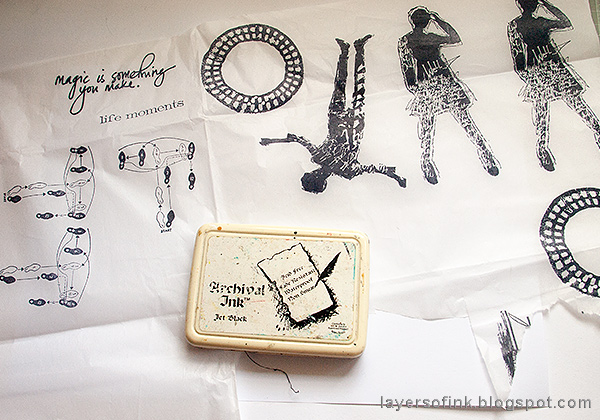
The easiest way to stamp on a flexible surface such as a canvas, is to stamp the images on tissue paper first. Stamp on the glossy side of the paper with a waterproof ink. I used stamps by Dina Wakley and Tim Holtz. The women come from Dina's Silhouetted Women set.

Layers of ink - Mixed Media Layers with Stencils and Stamps Canvas Tutorial by Anna-Karin Evaldsson

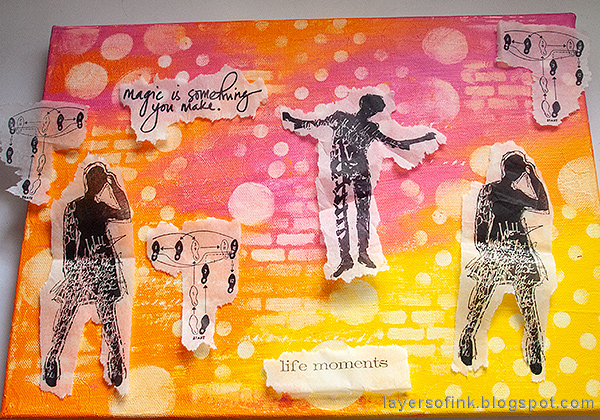
Stamping on tissue paper also makes it easy to plan the design. Tear around the images and move them around until you are happy. A torn edge disappears much easier than an edge cut with scissors.

Layers of ink - Mixed Media Layers with Stencils and Stamps Canvas Tutorial by Anna-Karin Evaldsson

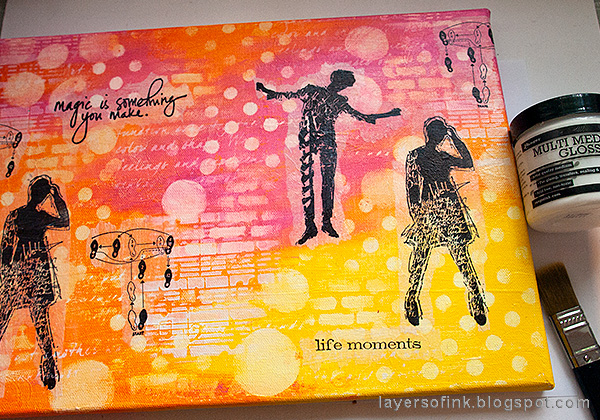
Use gloss multi medium to adhere the tissue paper to the background, working one image at a time. First, paint a thin layer of gloss multi medium where you want to place the image. Carefully place the image and then add another layer of medium on top. As you can see, some of the edges disappeared completely, others are more visible - it depends on the color of the paint underneath. We will eventually make them all disappear.

Layers of ink - Mixed Media Layers with Stencils and Stamps Canvas Tutorial by Anna-Karin Evaldsson

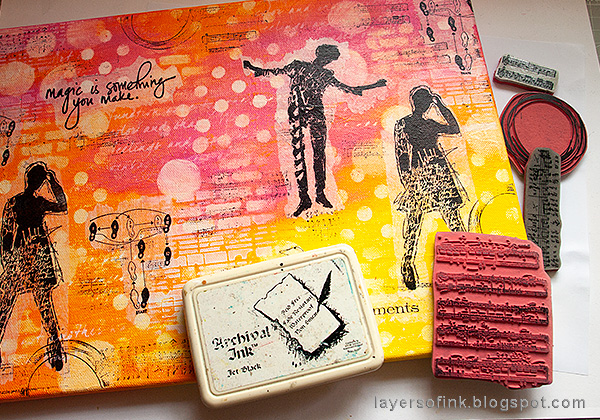
I stamped the background with a circle stamp and various musical note stamps.


Using the same paints as before, I painted over the areas where the tissue was still visible, and also added more stenciling through a bubble, brick, art definition, and a musical notes stencil.

Layers of ink - Mixed Media Layers with Stencils and Stamps Canvas Tutorial by Anna-Karin Evaldsson, embossing paste through a stencil

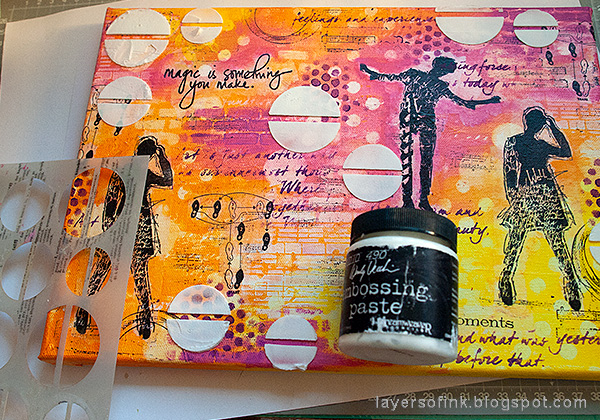
I really like Dina's Halves stencil and here I applied Embossing Paste through it. Let dry.

Layers of ink - Mixed Media Layers with Stencils and Stamps Canvas Tutorial by Anna-Karin Evaldsson, dictionary butterflies

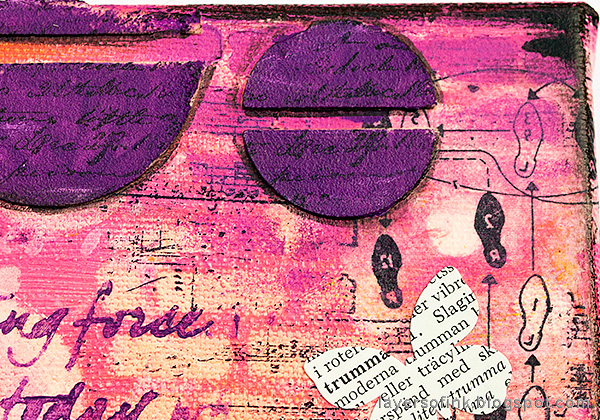
Place the stencil back on top of the halves and paint them purple. When the paint is dry, add a shadow with a Black Soot marker, blending with your finger. Place the stencil back over the halves and stamp them with a script stamp and black ink. I forgot to take a photo of these two steps.

Layers of ink - Mixed Media Layers with Stencils and Stamps Canvas Tutorial by Anna-Karin Evaldsson

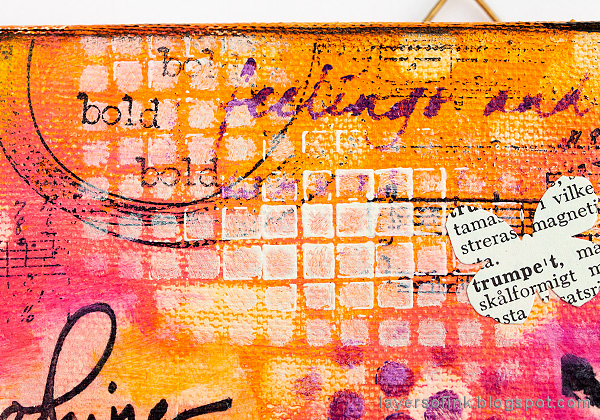
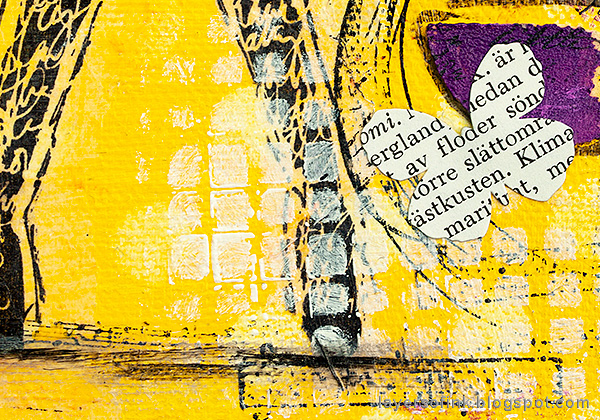
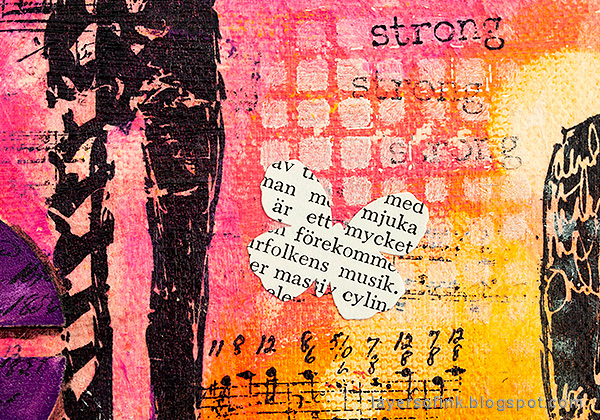
At this stage, I felt that the canvas needed more white, and I rubbed white paint through Tim's Linen stencil. I also die cut butterflies with the Springtime Side-Order set, picking words related to dance and music in an old word book. I also added more stamping, using small words from Dina's All The Gals set, which fit the theme of the canvas.

Layers of ink - Mixed Media Layers with Stencils and Stamps Canvas Tutorial by Anna-Karin Evaldsson with stamps by Dina Wakley

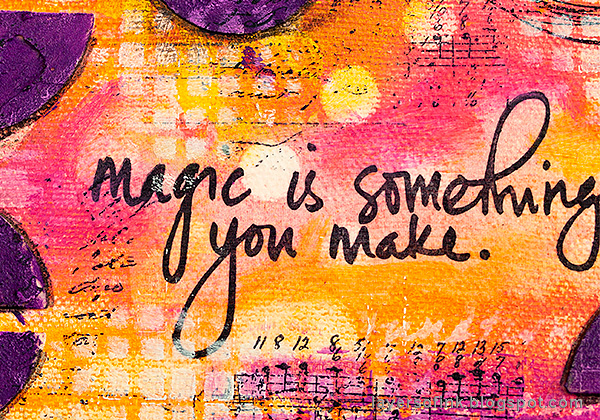
This is one of my favourite sentiment stamps, I've used it in my art journals too.

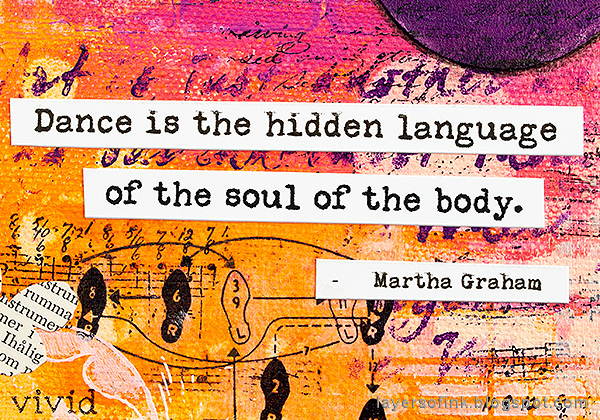
Layers of ink - Mixed Media Layers with Stencils and Stamps Dance Canvas Tutorial by Anna-Karin Evaldsson. Dance is the hidden language.

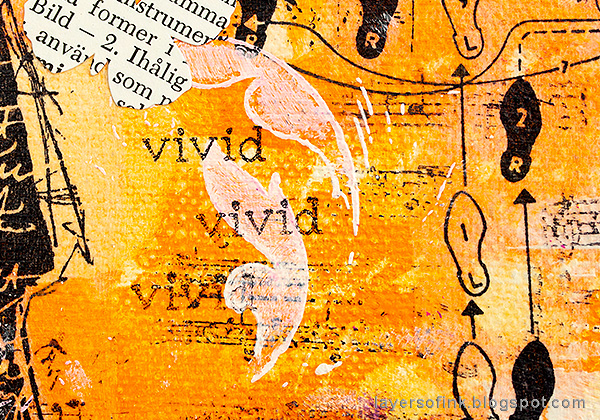
I looked for a quote about dancing, and thought this one fitted well. The fun dance step stamp comes from Tim's Purely Random set.

Layers of ink - Mixed Media Layers with Stencils and Stamps Canvas Tutorial by Anna-Karin Evaldsson

To ground the dancers to the canvas, I simply added a floor and a small shadow underneath them.

Layers of ink - Mixed Media Layers with Stencils and Stamps Canvas Tutorial by Anna-Karin Evaldsson, stamping on tissue paper technique.

You can add more stamping or stenciling where you feel that something is missing, or to cover up mistakes.

Layers of ink - Mixed Media Layers with Stencils and Stamps Canvas Tutorial by Anna-Karin Evaldsson, with Tim Holtz Sizzix Broadway

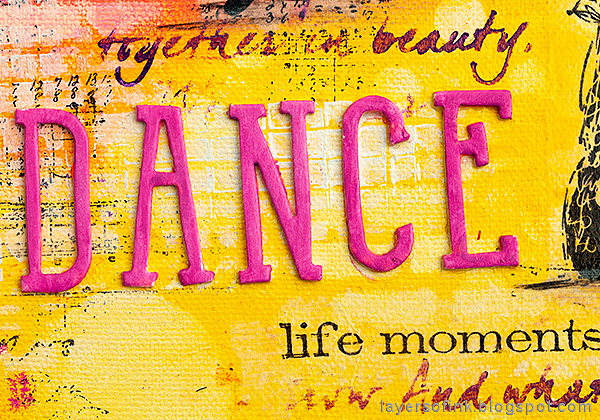
The title was die cut from mat board using Tim Holtz's Broadway Alpha Sizzix die, and painted pink.

Layers of ink - Mixed Media Layers with Stencils and Stamps Canvas Tutorial by Anna-Karin Evaldsson

There are also some white stencil swirls. I love these small word stamps and reach for them often.

Layers of ink - Mixed Media Layers with Stencils and Stamps Canvas Tutorial by Anna-Karin Evaldsson

Building up layers with stencils and stamps is a lot of fun and makes for an interesting looking background.

Layers of ink - Mixed Media Layers with Stencils and Stamps Canvas Tutorial by Anna-Karin Evaldsson

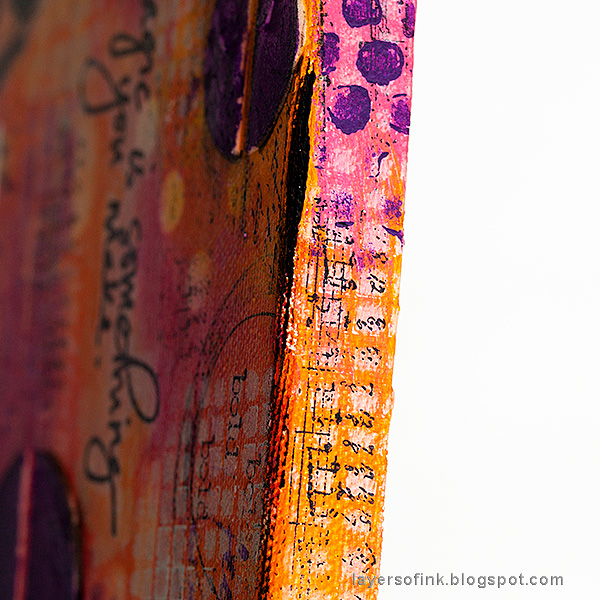
I also extended the design to the edges of the canvas. This is even more fun if you'd have a deep edge canvas.

Layers of ink - Mixed Media Layers with Stencils and Stamps Canvas Tutorial by Anna-Karin Evaldsson

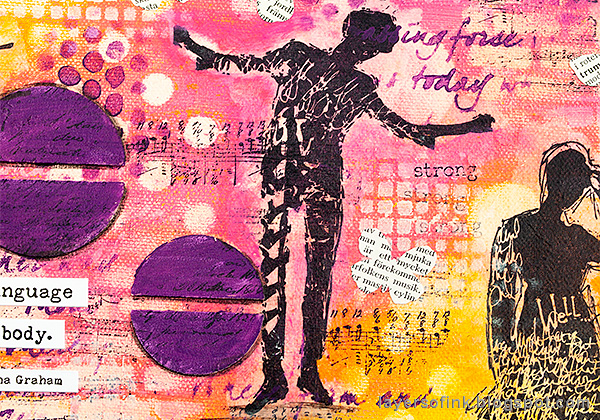
At first I was just going to use two women on the canvas, but three looked so much better, so I repeated this shape twice.


The STAMPtember® celebrations are continuing at Simon Says Stamp, with surprises and happenings almost every day. You can see the whole wonderful STAMPtember® release here. 

I hope you will join us this week in our Use More Than One Stencil challenge and in celebrating STAMPtember®. As always, you have a chance to win a $50 gift voucher to do some fun shopping at Simon Says Stamp. You have until next Monday 8am Ohio time. 1pm UK time, 2 pm CET to join in.


Don't forget to follow Simon Says Stamp on Instagram, they post great stuff daily. 


Do you use Instagram? If so please add #sssmchallenge so we can see your entries there too.


Thank you so much for taking the time to visit my blog today!  

Happy stamping!

Anna-Karin

Supplies:

* Please note: the links are affiliate links, for which I receive a small percentage of sales generated by the link, at no extra cost to you.


Monday, September 3, 2018

Fox Watercolor Journal Tutorial

Hi friends! The month-long STAMPtember® celebrations continues at Simon Says Stamp. Don't miss all the inspiration, special offers and surprises. Yesterday's big blog party was such fun, if you missed my post with two tutorials you can find it here.


We are continuing with STAMPtember® celebrations at the Simon Says Stamp Monday Challenge Blog, and we are showcasing products from the STAMPtember® release. You can see the whole wonderful release here. Our theme is Stamp It On. Fun! You can stamp on almost anything. One of the more unusual surfaces I have ever stamped on is a red plastic scooter. A lot of the kids had similar bikes and I wanted Anton to be able to easily recognize his own bike, so I stamped it with stars and his name. That stamping still looks perfect, after a lot of use. 


Our September guest designer is Terelisa Agosti, who creates fantastic projects, which you don't want to miss.

Layers of ink - Fox Watercolor Journal Tutorial by Anna-Karin Evaldsson with SSS STAMPtember products

I love to do nature themed pages in my art journals. They make me happy to do and happy to look at. One of my absolute favorite activities is to take walks in nature, and that reflects back on my art in a big way. Foxes are elusive and hard to spot - and even harder to photograph - but this die cut and watercolored fox was happy to jump into my art journal.

Layers of ink - Fox Watercolor Journal Tutorial by Anna-Karin Evaldsson, stamping techniques

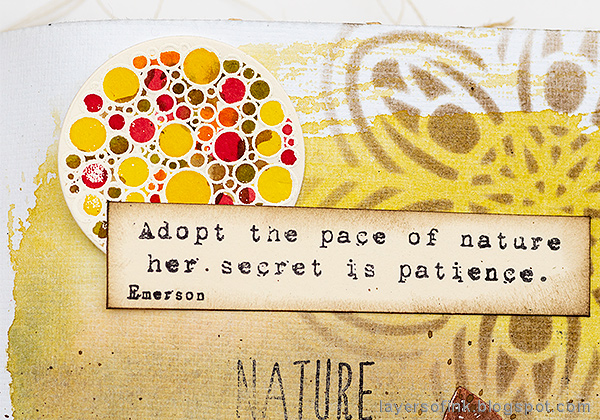
The cool bubble circles are actually meant to be baubles, and is my favourite stamp from the Ornate Ornaments set. White emboss it on watercolor cardstock.

Layers of ink - Fox Watercolor Journal Tutorial by Anna-Karin Evaldsson

Smear Distress Inks on a craft sheet, mist with water and pick up with a paint brush. Color the circles. You can also use watercolor paint.

Layers of ink - Fox Watercolor Journal Tutorial by Anna-Karin Evaldsson, bubble circles

Die cut the ornaments with the coordinating die and cut off the hanger part with a pair of scissors. Aren't these fun! For a more traditional use of this stamp, check out my Christmas tag from yesterday's post.
 Layers of ink - Fox Watercolor Journal Tutorial by Anna-Karin Evaldsson

Here's the cute Big Picture Book Fox. Die cut from watercolor paper.

Layers of ink - Fox Watercolor Journal Tutorial by Anna-Karin Evaldsson, painting the fox

I wanted the fox to have a body and a tail and drew them roughly on another piece of paper. The fox and its body was colored with watercolor paints, letting the paints blend on the paper. I used a very light shade of beige on the white areas, so that they wouldn't be stark white.

Layers of ink - Fox Watercolor Journal Tutorial by Anna-Karin Evaldsson

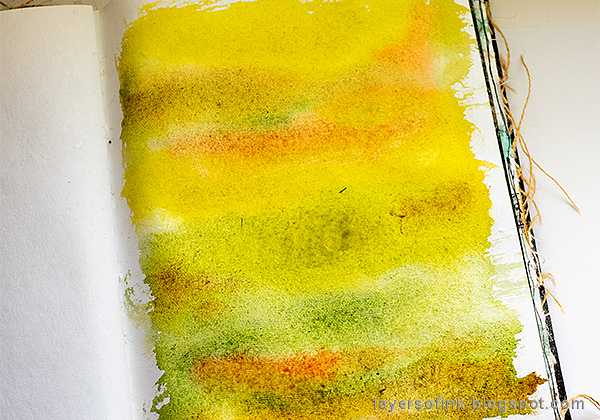
I painted one of the cotton-rag watercolor pages in my Dina Wakley Media Journal with watercolors, using autumn shades.

Layers of ink - Fox Watercolor Journal Tutorial by Anna-Karin Evaldsson, stenciling

When the page was dry, I sponged brown ink through the pretty Harvest stencil. For two more examples using this stencil, check out my STAMPtember post from yesterday.

Layers of ink - Fox Watercolor Journal Tutorial by Anna-Karin Evaldsson with SSS STAMPtember Big Picture Book Fox

Put the pieces of the fox back together again. I placed the head at a slight angle on the page. A littel big of brown was splattered on the page, using a brown Dina Wakley Scribble Stick. Some highlights were added with a white gel pen. Isn't she cute? If you'd rather use a cat instead, check out my art journal from yesterday for more ideas. There are also a bunch of other animals in the STAMPtember release.

Layers of ink - Fox Watercolor Journal Tutorial by Anna-Karin Evaldsson

I left the pencil marks on the body of the fox and splattered some brown Scribble Stick, for texture.

Layers of ink - Fox Watercolor Journal Tutorial by Anna-Karin Evaldsson, art journal layers

I die cut two pieces of vellum with the Eyelet Arch Borders die, to ground the fox to the page. The Spinner Trail was die cut from gold Deco Sheet, adhering it to paper first.

Layers of ink - Fox Watercolor Journal Tutorial by Anna-Karin Evaldsson, stamped sentiments

For my main sentiment, I used this quote from the One With Nature set. I've used it many times before, it is one of my favourite quotes.

Layers of ink - Fox Watercolor Journal Tutorial by Anna-Karin Evaldsson

I also used sentiments from Uplifting Thoughts and Tabbed Sentiments.

I hope you will join us this week in our Stamp It On challenge and in celebrating STAMPtember®. As always, you have a chance to win a $50 gift voucher to do some fun shopping at Simon Says Stamp. You have until next Monday 8am Ohio time. 1pm UK time, 2 pm CET to join in.


Don't forget to follow Simon Says Stamp on Instagram, they post great stuff daily. 


Do you use Instagram? If so please add #sssmchallenge so we can see your entries there too.


Thank you so much for taking the time to visit my blog today!  

Happy stamping!

Anna-Karin

Supplies:

* Please note: the links are affiliate links, for which I receive a small percentage of sales generated by the link, at no extra cost to you.