
Hi and welcome to my blog! I am so happy to join the big blog party in celebration of the start of STAMPtember® at Simon Says Stamp. It is the best stamping month of the year, full of inspiration and surprises. During the month there will be exclusive collaborations, contests, prizes, special promotions, announcements, and many more surprises. But most importantly lots of stamping inspiration.

Simon Says Stamp always releases a great new collection at STAMPtember® and this year is no exception. The STAMPtember release is full of wonderful stamps, dies, and stencils. You can see the whole release here. Since this is a party, there are special gifts to be found. Look carefully on the image above, because it has a little surprise, with the code AUTF39, you get the SSS exclusive Fall Leaves die set free with any purchase. There are other gifts sprinkled throughout the party, so don't miss them!
I made two projects for today, and both are tutorials. These is a Christmas tag, and a vintage-style art journal page. Let's start with the tag.

The tag that I made is very shimmery and I went with a silver, white and turquoise color combo. The tag is much easier to make than what it might look like, and you could easily turn it into a card instead. Or use the techniques for a non-Christmas project. I loved the designs on the Ornate Ornaments set and decided to use all of them on the tag.

These are the Ornate Ornaments stamps and the coordinating dies. You can also get a combined set of stamps and dies.

From the STAMPtember release, I also used: Harvest Stencil, Center Cut Holiday Icons Background stamp, and the Big Picture Book Kitty.

Start by smearing Texture Paste through the lovely Harvest stencil. Let dry.

When the paste is dry, paint with white paint or gesso.

I wanted my tag to really shine and painted the whole thing with Pearl Metallic Paint. I discovered that the Ranger paint that I used wasn't in stock at the moment, but this Metallique White Pearl paint by Prima should work the same way.

Dry brush two shades of Distress Paint on the tag. The Distress Paint will look almost metallic because of the metallic paint underneath.

White emboss the Ornate Ornaments design on watercolor paper.
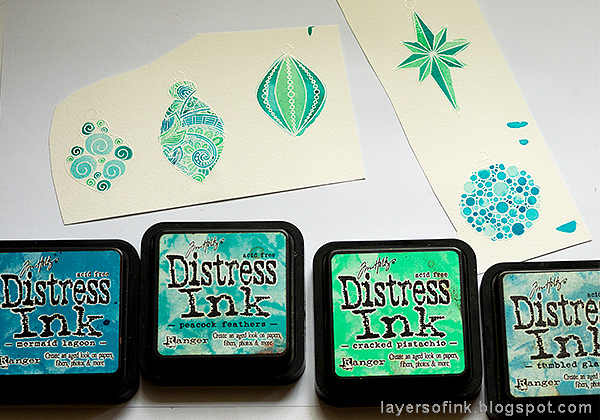
Smear Distress Inks on a craft sheet, mist with water and pick up with a paint brush. Watercolor the designs. I have fun watercoloring the various patterns, although I was not aiming for a perfect result. Die cut using the coordinating dies.

A big background stamp can be used for tiny details. Here I die cut three really small tags and stamped shapes from the Center Cut Holiday Icons stamp on them using SSS Island Blue and High Dive inks.

The three tags were tied to the dyed lace at the top of the tag.

The baubles were attached with foam tape, using a double layer for some of them. I also tied silver thread to the baubles.

I really like the different patterns on each bauble.

And I was reminded about often doodling this type of star in my notebooks in school. I also used to cover my text books with white paper, so that I could doodle on them.

This is my favorite bauble of the lot, and you will see it again on my project tomorrow for the Simon Says Stamp Monday Challenge Blog.
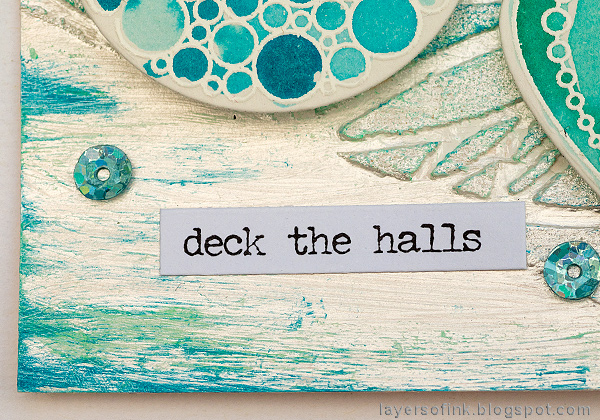
I used some Small Talk stickers as sentiments.

The tag was also embellished with sequins here and there.

The textured background is really cool and also easy to achieve. It would work for many different themes and projects. Let's move on to the second project.


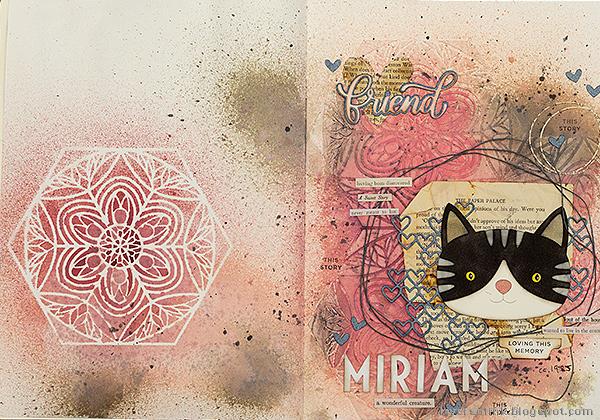
I worked in my large Dylusions journal and wanted to see if I could line up the Harvest stencil for the background. It worked great. You just have to let the paste dry before continuing.

And here's the third Harvest stencil area, to complete the background. I liked how the pattern lined up.
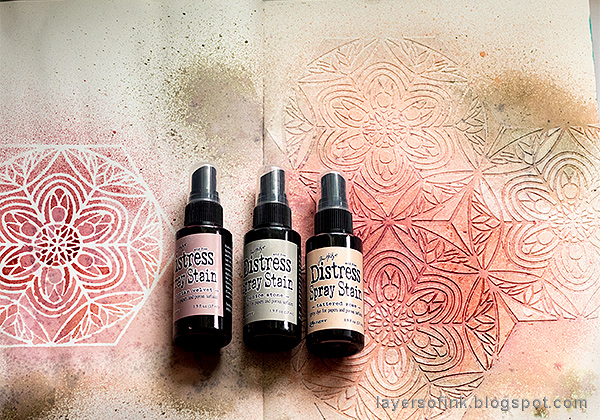
I placed the stencil itself on the right-hand page when misting with Distress Spray Stains. This gave me an instant background to use for another time.

I splattered some Hickory Smoke Stain on the background.

And then I thought I wanted a stronger shade of color here and there, and used Distress Crayons for that.

The Big Picture Book Kitty was die cut from mixed media cardstock.

Then I inked her with Distress Inks, in kind of the colors I remember Miriam to be.

Assemble her back together again. I also drew eyes, so that she would look more alive. If you would rather want a different animal, there are a bunch of Big Picture Book dies in the STAMPtember release.

To embellish the page, I used a variety of SSS die cuts, such as the friend word, which was die cut from mixed media paper and inked. The shadow die cut was done from SSS Glimmery Cardstock, which I love.

I also die cut the Stacked Heart design from the same glimmery cardstock. Some of the hearts were glued here and there.

'This story' comes from the Tabbed Sentiments set, and the circle was die cut from book paper with the Circle Loop die.

I found a bunch of sentiments from Tim Holtz Clippings Stickers, which worked well to tell the story.
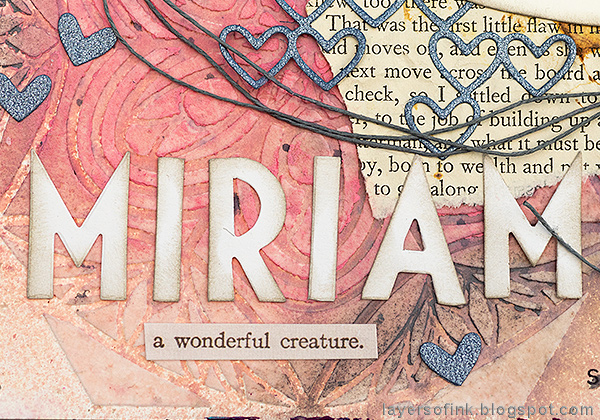
Her name had to be on the page too.

The tab and stamping comes from Tabbed Sentiments and Simple Tabs, and some more Clippings stickers.
Extending a background to the corresponding page, makes for a quick start to a new project.
Don't miss all the inspiration of this STAMPtember blog party, and keep an eye on the Simon Says Stamp Store blog every day this month for lots of inspiration and surprises. Have a fun STAMPtember!!
Thank you for stopping by!
Happy stamping!!
Anna-Karin
Supplies:
* Please note: the links are affiliate links, for which I receive a small percentage of sales generated by the link, at no extra cost to you.

Beautiful layers and textures!!!!! I love all the detailed layers - and that gorgeous ornament set! Great kitty mixed media too, the cat really pops against that very detailed background.
ReplyDeleteThat tag is so beautiful that I'd hate to give it away! Great job!
ReplyDeleteThese are all really cool! :)
ReplyDeleteBeautiful! Love the nontraditional colors of your Christmas tag.
ReplyDeleteAwesome tag! The art journal with the new big picture book die is great as well.
ReplyDeleteThe tag is gorgeous! Lucky folks on your gift list!
ReplyDeleteWow! All beautiful creations!
ReplyDeletebeautiful tag Anne. love the layers. thanks as always for sharing.
ReplyDeleteBeautiful projects! I love the stencil and the technique you used to color it and add texture!
ReplyDeleteI always love the look of mixed media projects but never have given them a try. These projects are explained sp well I think I willl finally give it a try. Thanks for the inspiration!
ReplyDeleteI really love your art journal page!
ReplyDeleteGreat cards/tags Anna! I love all of the textures, dimension, and colors. Thanks for the inspiration!🌻
ReplyDeleteAnna-Karin, both of your projects are fantastic however, I am loving the tag. WOW! So sweet!
ReplyDeleteThanks for such an awesome tutorial on the process for both projects. I can always count on you to teach me a thing or two!
I love these!!!! I haven't commented on anyone else's blog , but I couldn't pass by this without letting you know how wonderful these are.
ReplyDeleteBoth of your projects are just stunning! I love your use of layers and color and textures! Beautifully done!
ReplyDeleteBoth are gorgeous projects, but I really do love that tag! Great colors and texture!!!
ReplyDeleteWonderful techniques on a variety from ornaments, paste with die, etc.
ReplyDeleteMelissa
"Sunshine HoneyBee"
Really nice and interesting projects. Thank you.
ReplyDeleteLovely tags. I especially like the ornaments. :)
ReplyDeleteBeautiful layers and textures!!!!! I love all the detailed layers - and that gorgeous ornament set! Love the greens and blues together.
ReplyDeleteLove the look of the great tag! It is really beautiful.
ReplyDeleteI love both projects, the tags and the cat. Lots and work and well worth the effort.
ReplyDeleteThe rosy tones in the meow page are beautiful and The bauble Christmas tag gives a great funky Christmas look.
ReplyDeleteBeautiful warm rosy tones on the journal page and punchy funky blues look great for Christmas. Two wonderful projects
ReplyDeleteWowsers!!! Great pairing of so many of the new SSS products!! Gorgeously done too!!! Am in love with the kitty the bestest but they are so wonderful each of them!!!
ReplyDeleteAbsolutely stunning! Thanks so much for sharing how you created these beauties because I would never have been able to figure it out. Love your color choices -- just gorgeous!
ReplyDeleteBeautiful work. Thanks for sharing.
ReplyDeleteI mostly make cards, but all of your creations have inspired me to try some other things. Thanks.
ReplyDeleteI was really enjoying your ornaments tag and thought you were done but then -- the fabulous cat story. What a fabulous image and tale and memory. So original, so terrific!
ReplyDeletelove the lovely layers on the kitty card
ReplyDelete