Saturday, October 15, 2022

Grungy Textured Notebooks Tutorial

Hello crafters! Today I have a tutorial to share for two grungy and textured notebooks / sketchbooks / journals. I love to make my own notebooks and sketchboks and they also make great gifts. 

Please note: this post has affiliate links, for which I receive a small percentage of sales generated by the link, at no extra cost to you.

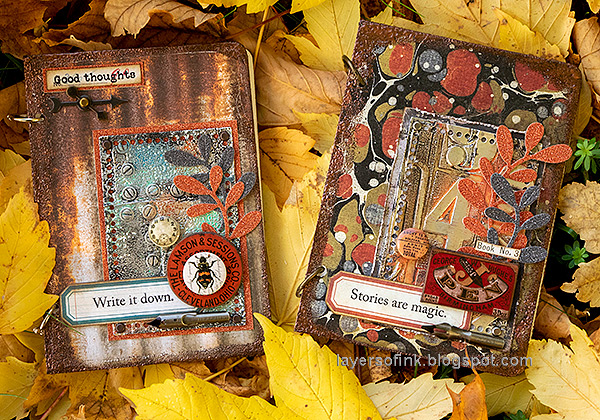
Layers of ink - Grungy Textured Notebook Tutorial by Anna-Karin Evaldsson.

Many leaves have fallen from the trees here and the ground is covered in some areas. I'd like them to have stayed on the trees a little longer, but they formed a nice backdrop for the notebooks. I used Tim Holtz idea-ology papers, ephemera and embellishments, combined with both dry and heat embossing. The books are about 4.3 x 6 in. You can also use the techniques for cardmaking or art journaling.

Layers of ink - Grungy Textured Notebook Tutorial by Anna-Karin Evaldsson.

For the embossed panels, start by adhering foil tape to watercolor paper and die cut with one of the Simon Says Stamp A2 Marquee dies.

Layers of ink - Grungy Textured Notebook Tutorial by Anna-Karin Evaldsson.

Emboss the panels in Sizzix Tim Holtz Numbered and Industrious. I placed the panels so that I would get a specific area of the embossed pattern.

Layers of ink - Grungy Textured Notebook Tutorial by Anna-Karin Evaldsson. Paint with Distress Paint.

Paint the panels with Distress Paint. 

Layers of ink - Grungy Textured Notebook Tutorial by Anna-Karin Evaldsson.

When the paint is almost dry, wipe most of it off. 

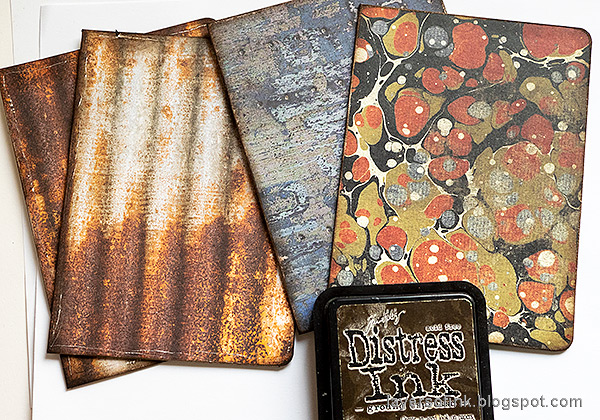
Layers of ink - Grungy Textured Notebook Tutorial by Anna-Karin Evaldsson. Cover with Tim Holtz Halloween Backdrops papers.

I used Sizzix Little Sizzles Matboard for my covers. It is one of my favorite surfaces. Cover with various Tim Holtz Halloween Backdrops papers. These papers are meant for Halloween, but they have great designs which fit many themes. I used Distress Matte Medium to glue them and placed under a heavy book. 

Layers of ink - Grungy Textured Notebook Tutorial by Anna-Karin Evaldsson.

Round the corners with a Crop-A-Dile Corner Chomper, sand and ink the edges.

Layers of ink - Grungy Textured Notebook Tutorial by Anna-Karin Evaldsson.

Apply embossing ink around the edges and emboss with Ranger Hammered Mixed Media powder.


Layers of ink - Grungy Textured Notebook Tutorial by Anna-Karin Evaldsson.

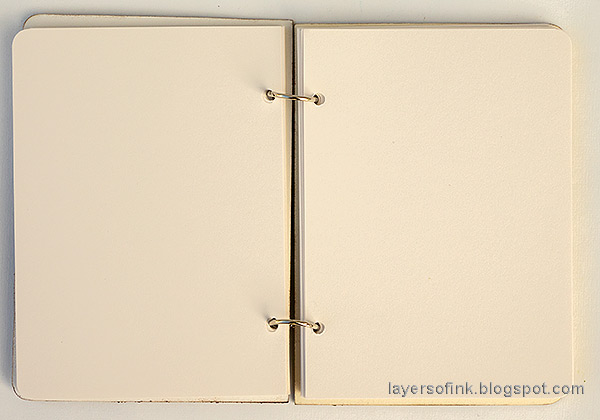
Bind the books with Tim Holtz Mini Book Rings. The best things with making your sketchbooks/notebooks is that you can use your favorite papers for the inside. I used sketching paper for these books. Cut the papers just a bit smaller than the covers, round the outer edges and punch holes with a Crop-a-dile.

Layers of ink - Grungy Textured Notebook Tutorial by Anna-Karin Evaldsson.

The first book was inspired by the cool Backdrops paper used for the cover, also picking up colors from that paper to use for the embellishments and the embossed panel.

Layers of ink - Grungy Textured Notebook Tutorial by Anna-Karin Evaldsson.

The label was stamped with Simon Says Stamp Mixed Labels on one of the Halloween Backdrops papers, with Crackling Campfire Distress Oxide Ink, and die cut with the coordinating die. The sentiment comes from the same stamp set. The tip of the Pen Nib was colored with black alcohol ink. I also used a Junk Drawer Baseboard pieces and Halloween Mini Flairs. 'Book no 3' is a Clippings sticker.

Layers of ink - Grungy Textured Notebook Tutorial by Anna-Karin Evaldsson.

The embossed panel was glued to a piece of backdrops paper and then adhered to the cover with brads. The two Simon Says Stamp Olive Leaves were die cut from Tim Holtz Halloween Deco sheets, which had first been adhered to cardstock to make them sturdier.

Layers of ink - Grungy Textured Notebook Tutorial by Anna-Karin Evaldsson.

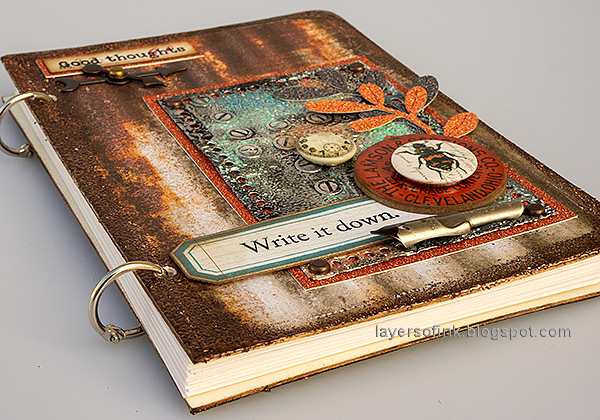
The second book uses the cool rusty corrugated metal backdrops paper for both the back and front cover. The Hammered embossing powder makes the cover look even rustier.

Layers of ink - Grungy Textured Notebook Tutorial by Anna-Karin Evaldsson.

I left the backcovers plain, with only the paper and the embossing. 

Layers of ink - Grungy Textured Notebook Tutorial by Anna-Karin Evaldsson. Simon Says Stamp Mixed Labels.

The label was stamped on a Tim Holtz Journal card with Uncharted Marine Oxide Ink. I layered a Junk Drawer piece and a Halloween Mini Flair.

Layers of ink - Grungy Textured Notebook Tutorial by Anna-Karin Evaldsson.

The embossed panel was layered on Halloween Deco Paper and the Simon Says Stamp Olive Leaves were die cut with the same paper. The texture of the Industrious embossing folder is so cool.

Layers of ink - Grungy Textured Notebook Tutorial by Anna-Karin Evaldsson. Simon Says Stamp Thoughtful Flowers.

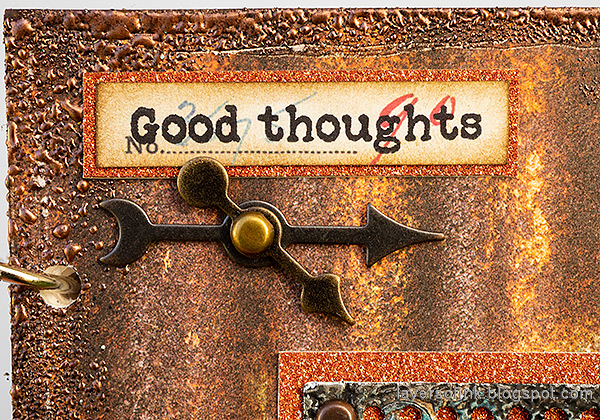
For the top, I stamped a sentiment from Simon Says Stamp Thoughtful Flowers on a Tim Holtz Number Strip, inked the edges and matted it on Deco paper. I also added two Game Spinners

Layers of ink - Grungy Textured Notebook Tutorial by Anna-Karin Evaldsson.

I hope you enjoyed this post and that it inspired you to make your own notebooks, sketchbooks or journals. 


Thank you so much for stopping by here today!

Happy stamping!

Anna-Karin


Supplies:

* Please note: the links are affiliate links, for which I receive a small percentage of sales generated by the link, at no extra cost to you.
No comments:

Post a Comment

Thank you so much for leaving a comment! Happy Crafting!