
Hi friends! Today I have a card tutorial to share, with sparkly dimensional dragonflies on a fun background. There has been many dragonflies around here lately, which inspired this card.
Please note: this post has affiliate links, for which I receive a small percentage of sales generated by the link, at no extra cost to you.


Start by cutting squares of heavystock paper. Smear Distress Inks on a non-stick craft sheet, mist with water and press the paper into the ink. I was aiming for a soft, light color.

Crumble up the papers.

Smear more Distress Ink on the craft sheet, mist with water and press the papers into the ink, here and there.

When dry, cut into squares with Tim Holtz Stacked Squares.

Ink the edges and some of the creases.

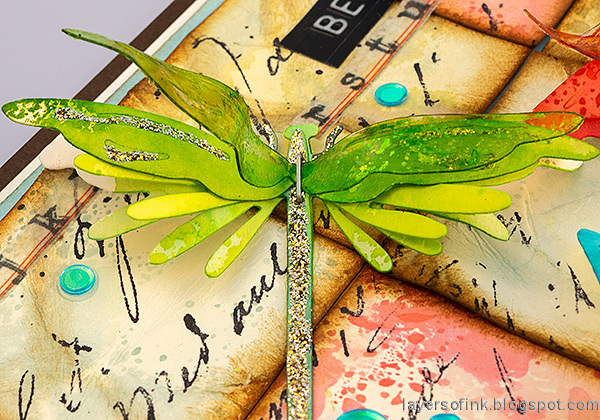
Glue to a piece of Simon Says Stamp Sea Glass cardstock. Stamp here and there with the Simon Says Stamp Old Letter Background.

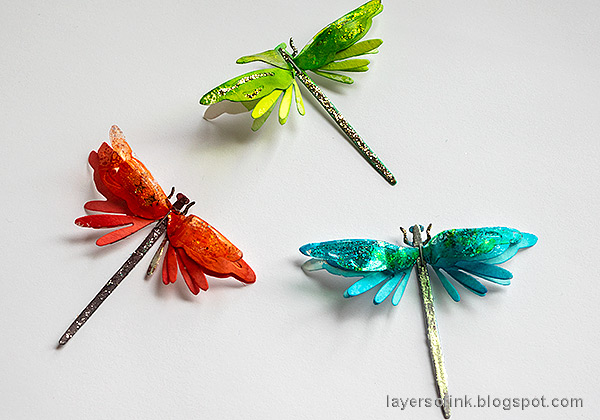
Color the Modeling Film pieces with alcohol ink.

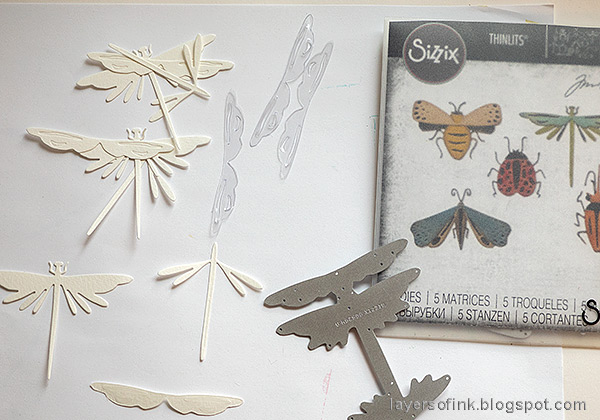
Watercolor the dragonflies with Distress Ink.

Shape the wings of the paper dragonflies. Gently heat the Modeling Film wings with a heat tool and shape them. Be careful not to burn yourself. Apply Stickles to the back of the wings and to some of the bodies and Opal Blaze Polish to the rest of the bodies.

Add some Design Tape and sequins to the card.

The sentiment is a Tim Holtz sticker.

I like the almost leathery texture of the crumbled heavystock paper. The paper is thick.

The dragonflies appear to fly across the paper.


Thank you so much for taking the time to visit my blog today!
Happy crafting!
Anna-Karin
Supplies:
* Please note: the links are affiliate links, for which I receive a small percentage of sales generated by the link, at no extra cost to you.
* Please note: the links are affiliate links, for which I receive a small percentage of sales generated by the link, at no extra cost to you.
No comments:
Post a Comment
Thank you so much for leaving a comment! Happy Crafting!