Hi and welcome to my blog! I am happy to take part in the blog hop to celebrate the new Good Luck Charm release by Simon Says Stamp. If you are following along the hop, you should have arrived here from Heather Ruwe.
Please note: this post has affiliate links, for which I receive a small percentage of sales generated by the link, at no extra cost to you.
The Good Luck Charm release is full of wonderful new stamps, stencils, dies, inks and other products. You can find the whole release here. It is perfect for spring-time crafting, but also for many other themes. If you use the code YUM20 you will get the cute 3x4 Birthday Cupcake stamp set FREE with purchase! This promotion will expire 2/20 at 11:59 pm EST.

I made an art journal page for the hop, which you can easily turn into a card.
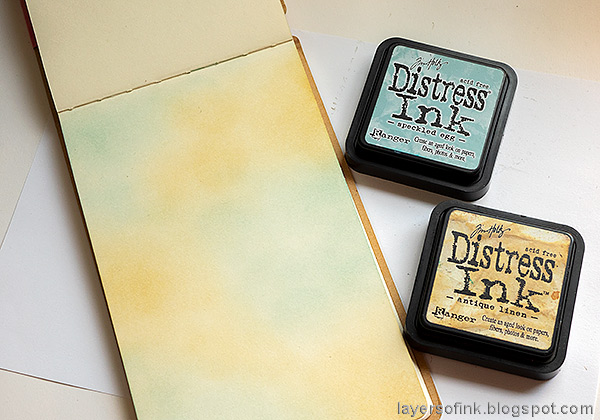
I wanted a hint of color in the background and inked it with Antique Linen and Speckled Egg, working on a page in my Small Creative Flip Journal.
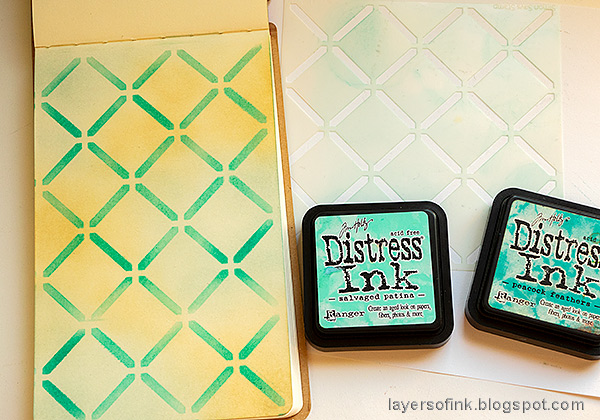
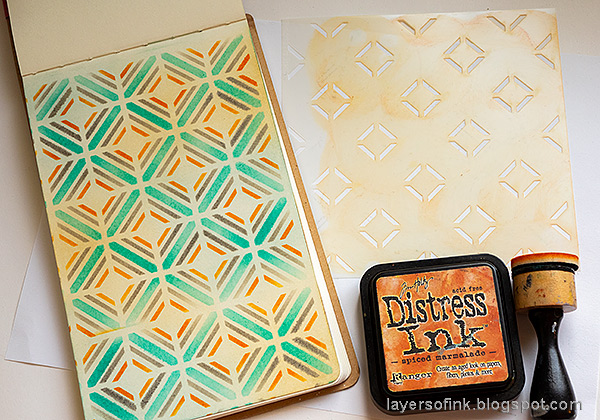
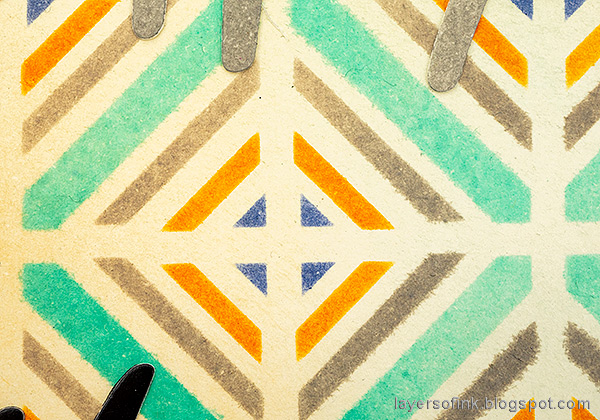
The Radiating Squares stencil set consists of four stencils. I thought it was easiest to start with the largest design. Ink with two shades of Distress Ink. It is easy to extend the design, but moving and lining up the stencil.
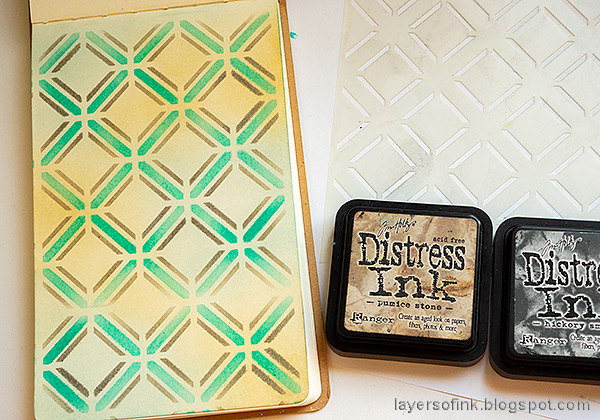
Pick the next size design and ink through the stencil with Pumice Stone and Hickory Smoke. It is easiest if you can line the stencil up to the edge of your project.
Continue building the background with the third stencil.
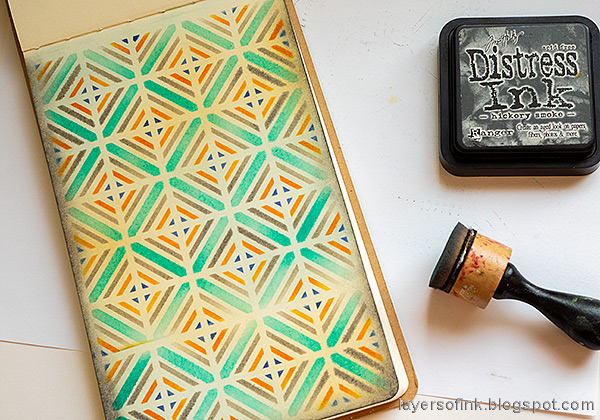
And finally the fourth stencil with the smallest design. I just loved seeing how the background came to life one stencil at a time. It is a great place to experiment with different color combinations.
Ink the edges with Hickory Smoke.
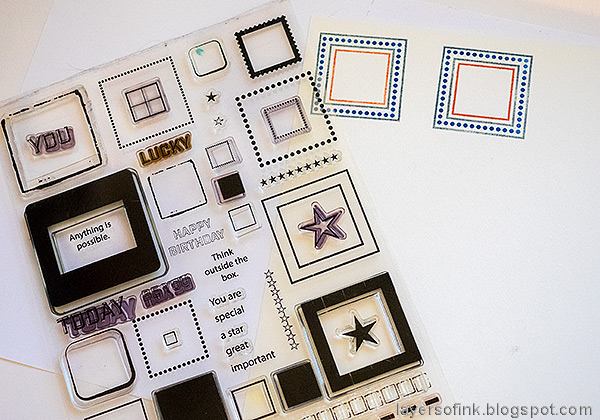
I used the Mix and Match Squares stamp set, from the Hello Beautiful release, since I thought it worked well together with the squares in the background. Stamp squares with various colors ink.
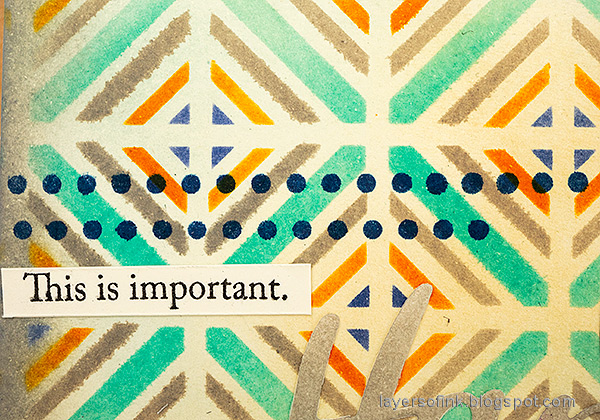
I also added a dotted border stamped with Simon Says Stamp Royal ink and stamped sentiments.
The Good Luck Charm release has Black Glossy Cardstock and I really like glossy cardstock, both for various techniques and for die cuts. Here I used it to die cut the title and the circles. Glossy cardstock adds a lot to die cuts and gives them a great finished look.
The black glossy cardstock also contrasts nicely with the matte background.
It is such fun to build the background with the four Radiating Squares stencils. You can of course also use just one or two colors ink, or just one or two of the stencils, for a different look.
Yesterday, I made a card with a fun stamping technique on black glossy cardstock using Good Luck Charm Wavy Circles Background Stamp, Black Glossy Cardstock, Card Corners and Dreamy Daisy Layers, if you want more inspiration. It is also a tutorial.
Don't miss all the inspiration along the hop. There are of course prizes to be won too, and at each stop on the hop SSS is giving away a $25 coupon, randomly drawn from those who leave a comment. The winners will be posted post on the Simon Says Stamp store blog on Wednesday, the 23rd of February.
Your next stop on the hop is Yana Smakula who will share beautiful inspiration with you.
Your next stop on the hop is Yana Smakula who will share beautiful inspiration with you.
Here are all the stops along the hop:
Anna-Karin Evaldsson (you are here)
For more Good Luck Charm inspiration remember to check out the Good Luck Charm gallery at Simon Says Stamp, and if you make something with products from the range, it is fun if you post it in the gallery too. There are galleries for all releases, and for the card kits, full of inspiration.
This is the first blog hop for the Good Luck Charm release, don't miss blog hop day number 2 tomorrow.
Thank you so much for taking the time to stop by here today!
Happy crafting!
Anna-Karin
Supplies:
* Please note: the links are affiliate links, for which I receive a small percentage of sales generated by the link, at no extra cost to you.
* Please note: the links are affiliate links, for which I receive a small percentage of sales generated by the link, at no extra cost to you.







Hi, Anna - Karin --
ReplyDeleteLove the first card and the second one took my breath away. You always have your finger right on the pulse of modern and cool!!
Lori S in PA
WOW - so pretty. I really like the colors you chose.
ReplyDeleteBeautiful ways to use these new products. Your ideas always inspire and take it to the next level!
ReplyDeleteSo lovely! I am thinking of trying out an art journal too and this was such wonderful inspiration!
ReplyDeleteYour stenciling is amazing!!! Love!
ReplyDeleteWonderful artsy look with geometric shapes.
ReplyDeleteMelissa
"Sunshine HoneyBee"
very cool cards! the stenciling is just perfect!
ReplyDeletelovely work - thanks for sharing how you made the wonderful backgrounds
ReplyDeletewow! What great designs.
ReplyDeleteLove the artsy geometric shapes
ReplyDeleteWonderful cards! The art journal is really awesome.
ReplyDeleteGorgeous cards! Love the color palette.
ReplyDeleteLove your color choice in the first card...very striking.
ReplyDeleteHI, those wavy circles remind me of moons on the horizon, so pretty. Thank you for sharing.
ReplyDeleteWhat a fun realease
ReplyDeleteThanks for showing us how the radiating squares stencil set works because I had no idea it was so fabulous. Love these cards!
ReplyDeleteYour designs are so eye catching, they'll definitely delight the fortunate recipients.
ReplyDeleteOh my these are fantastic cards, love your designs!
ReplyDeleteAwesome cards. So very creative in design elements and colors.
ReplyDeleteGreat cards with fabulous backgrounds!
ReplyDeleteFabulous! Thanks so much for showing each layer of the radiating squares stencil. It makes a great background.
ReplyDeleteFantastic cards! Love the colors…
ReplyDeleteThanks for sharing.
Wow!! Love the color schemes you went with!
ReplyDeleteWonderful use of the new stencils!!
ReplyDeleteBeautiful! love these new stencils and your colour combinations.
ReplyDeleteLove the geometrics.
ReplyDeleteGreat color choices.
thanks for sharing
txmlhl(at)yahoo(dot)com
Great cards. I love the colors and your style.
ReplyDeleteI love the bright colors!
ReplyDeleteGreat use of stencils. Thanks for sharing
ReplyDeleteThe muted look is amazing. I LOVE IT!
ReplyDeleteI love how stencils can take on such individual looks. Thanks for the inspiration.
ReplyDeleteLove the color combos! Pretty journal page and card!
ReplyDeletelovely projects!!
ReplyDeleteYour journal page is fabulous, but really love how you have used the Daisy die!!
ReplyDeleteyour color combination really catches my eye
ReplyDeleteLovely cards, I like the colors you chose.
ReplyDeleteHow FUN! Your colors and creations look AHMazing! Just Perfect!
ReplyDeleteLove these color combos. Very artsy and inspiring.
ReplyDeleteGreat cards! Thanks for sharing!
ReplyDeleteFabulous journal page and card!! Love the colors you used on both!
ReplyDeleteThese look really great, thanks for sharing the step by step tutorial!
ReplyDeleteWhat a beautiful journal page and card- love the colors!
ReplyDeleteThanks for sharing your art journal page - I love it with the stenciling! Hope to do some of this in mine.
ReplyDeleteThanks for showcasing the new stencils! I love them all!
ReplyDeleteGreat journal page! Love your use of the stencils.
ReplyDeleteI love your layered stenciling. Both the art journal page and card are WOW! projects.
ReplyDeleteYou are very talented.....these are both amazing!
ReplyDeleteThat sure ould be a beautiful card, the additions from the stamp set here and there are perfect! I love using book print indideca flower. I love these cards!
ReplyDeletelove it! thanks for the tips!
ReplyDeleteWow!!! These are Amazing!!! I was on the fence about the half circle stamp, now I NEED it!!! lol
ReplyDeleteLove the vintage look!
ReplyDeleteSo beautiful and inspiring! Thanks for sharing!
ReplyDeleteNice project shares. I like the combinations for the pages. The second page is my favorite.
ReplyDeleteYour project pages are beautiful and I love all the stencils in this release!!
ReplyDeleteGreat journal page, TFS!
ReplyDeletebeautiful!
ReplyDeleteI love how you inked the background of the first card before you did the stenciling! Your second card is spectacular! I love how the ink doesn't totally stick to the black glossy cardstock, such a cool effect!
ReplyDeleteLove those fun projects. Your journal page is so cool!
ReplyDeleteI really like the Radiating Square stencils too and your art journal page using them is beautiful!
ReplyDeleteFabulous designs you created.
ReplyDeleteYour mixed media style looks great on these cards, the stenciling is so versatile!
ReplyDeleteReally great backgrounds!
ReplyDeleteI love the distress look of your cards. Thank you so much for sharing your ideas.
ReplyDeleteLove your cards, Anna-Karin. Great backgrounds.
ReplyDelete