Hi crafters! If you are like me, you might have a big box or pile of scrap papers and today I am going to share a project that is perfect for scrap papers. In fact, the charm of this project comes to a large part from it being created from left-over pieces from other projects.
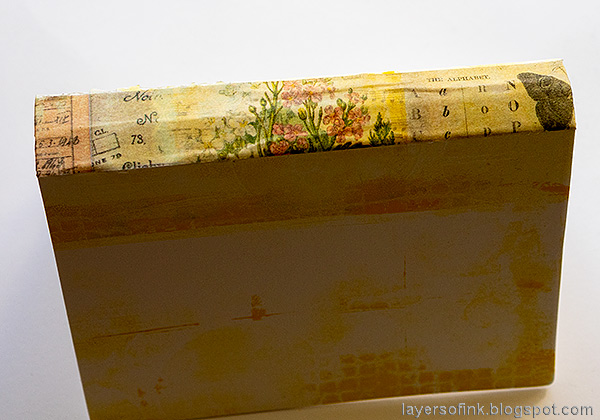
The Eileen Hull Inspiration Team is creating Junk Journals this week, a theme that can be interpreted widely. A junk journal is usually made up of various recycled papers and I decided to use only my own scrap papers. I have a lot of papers which are left-over from projects or where I simply tried out a technique or tested a color combo. I use them a lot. Even the paper on the cover comes from that folder. I also used the Simon Says Stamp Thoughtful Flowers stamp set, which I am very happy to have designed.
Start by die cutting Eileen's Notebook die from
mat board and from a piece of scrap paper. My scrap paper was a left-over from a gel printing session. Glue the paper to the mat board and let dry under a heavy book.
I picked out a pile of scrap papers in different colors. Since I use a lot of watercolor paper, most of them are watercolor paper. Some where tags where I tried techniques or where I hadn't been happy with the background.
The papers were cut into pages of different size, depending on the size of the scrap paper. The tags were simply folded in half.
Here are some more pages.
Color the flowers with colored pencils. I used
Prismacolor pencils and blended with a white pencil.
Punch five holes in the spine as shown here and thread with an elastic string.
Here you can see the binding from the outside. I tied the string through a button and then tied it again to form a closure.
I tied two beads which I found on my desk to the ends of the closure.
Arrange the scrap papers into two signatures and simply slip them under the elastic band. Later you can easily add more papers or move the various pages around. The tag on top comes from my
Sherlock Holmes Tag tutorial if you want to see how it was made.

Your journal is ready to be filled with thoughts and memories.
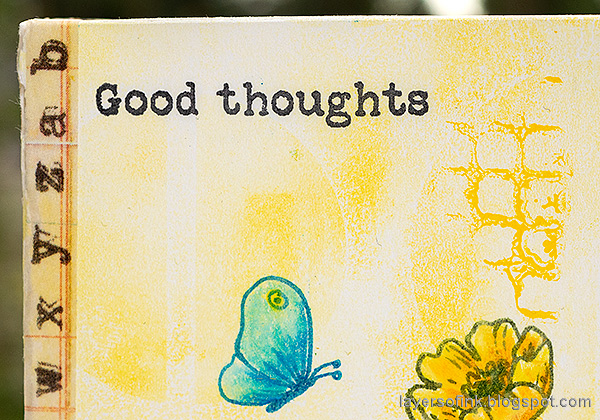
I added a thinner piece of Design Tape at the side of the spine. Stamp sentiments from
Thoughtful Flowers with black ink.
Stamp grass repeatedly with green ink.
The back of the journal was left simple, but you could add stamping there too.

The back of most of the pages is plain, leaving space to add color and writing later.
The page to the right was a test of colors and stamping for my
African Night Watercolor art journal page, with Darkroom Door stamps. I remember when each of these scrap papers were created, making them more special. Some have been in my scrap folder for a long time.
The
SSS Spring Flowers Background had been embossed in white and I tested a yellow and blue watercolor combo over it.
Stenciled and misted pages.
You might look at your scrap pieces in a new way. This little scrap piece almost looks like a landscape.
The bubble embossed paper comes from a gel printing session.
A simple landscape which was made when I was preparing an article for the Craft Stamper. I was so sad to learn that the Craft Stamper has now closed its doors. It was a wonderful magazine and I loved creating for it.
I haven't decided what to use this journal for yet. I might add small photos from this summer to it, and journaling about the summer.
Thank you so much for taking the time to visit my blog today! I hope the tutorial inspired you to use some scrap paper.
Happy crafting!
Anna-Karin
Supplies:
* Please note: the links are affiliate links, for which I receive a small percentage of sales generated by the link, at no extra cost to you.
Other supplies
Eileen Hull Sizzix Notebook L die


Great project! I love the yellow on the cover - such a happy color - and the sprinkle of flowers is so pretty! I love using up all of your watercolor extras for pages.
ReplyDeleteSo summery and pretty.
ReplyDeleteAlison x
Very interesting binding! took me a minute to figure it out! I'll have to try it! Is the elastic cord just from a craft store?
ReplyDeleteThank you so much!! I used elastic cord from a craft store. It's 1.2 mm thick. Works great for quick binding! / Anna-Karin
DeleteI just LOVE this! Wish I could figure out how you did the elastic though! Great way to use all of your art papers and the cover with the stamping is just FABULOUS!
ReplyDeleteso cool Anna-Karin! I love that you used all your scraps for the inside pages.
ReplyDeleteBeautiful! I’m getting more and more inspiration for my scrap journal 😊
ReplyDeleteAnna-Karin this is simply gorgeous! I love seeing all of the art you have filled your book with and also to hear what inspired it... you are so talented!
ReplyDelete