
Hello crafters! I hope your weekend was a good one. I took two nice long walks, and we went to a playground. The boys also did some fun, colorful gel sea animals.

At the Simon Says Stamp Monday Challenge Blog, we have a Rust It Up theme. I hope you will join us! And don't miss the rusty goodness created by our guest designer Claudia, with her blog Von Pappe II.

I made a tag with several fun and easy rust and patina techniques, and a mix of real metal and faux metal. The copper wire was found this weekend in a hardware store, when we were looking for something completely different. It's always fun to spot craft supplies in unexpected places.

Working on a tag, I applied embossing ink through Tim Holtz Scallop Shifter stencil. Sprinkle with Mixed Media Sea powder and emboss. Always be very careful when using a heat gun, so that you don't burn yourself. Never touch the melted powder until it has cooled down completely.
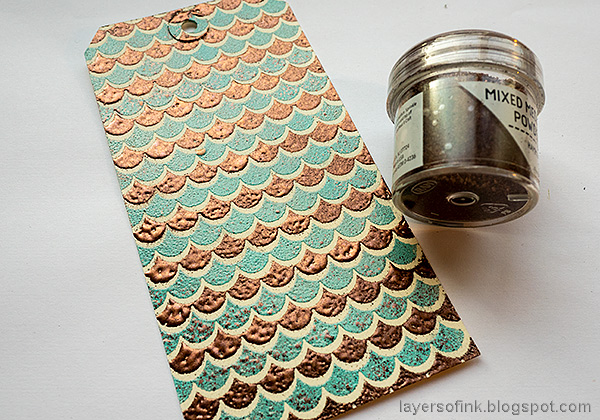
Clean the stencil, turn it over and line up, now covering the already embossed area. Repeat the process with Hammered Mixed Media powder.
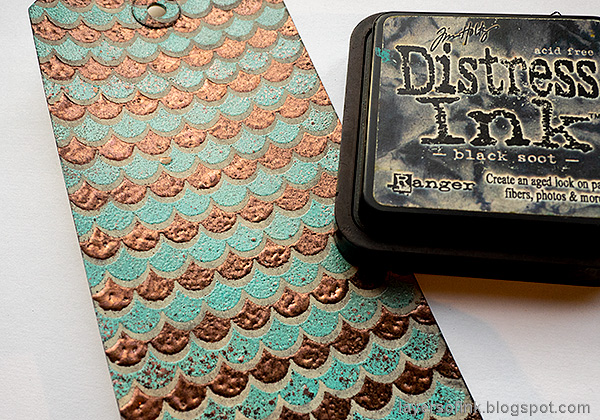
Ink the tag with Black Soot to grunge it up, or skip this step if you want a lighter look. Wipe the ink off from the embossed areas.

Ink the tag again with Antique Linen Distress Ink and emboss with clear powder. Repeat once or twice. Again, be very careful not to touch the powder until it has cooled down completely.

Die cut the large Faceted Heart from kraft core paper. Fold along the score lines and sand the edges. Assemble.

Add embossing ink to the heart, working one facet at a time. Sprinkle Hammered, Sea and Mint Chip powder on top. Continue to the next facet. When you are happy with the look, add some Black Soot paint to the edges.
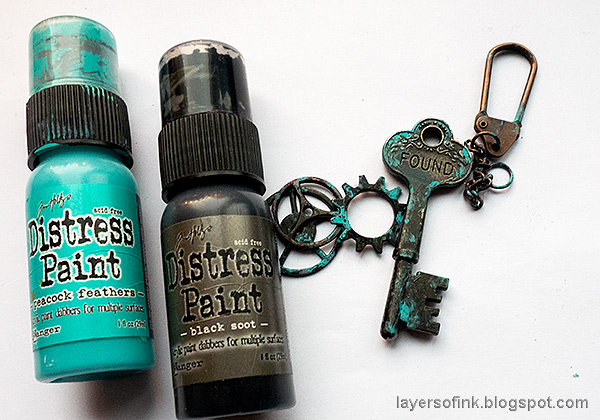
Age a bunch of metallic embellishments with black, turquoise and brown paint. Rub off some of the paint before it has dried completely.
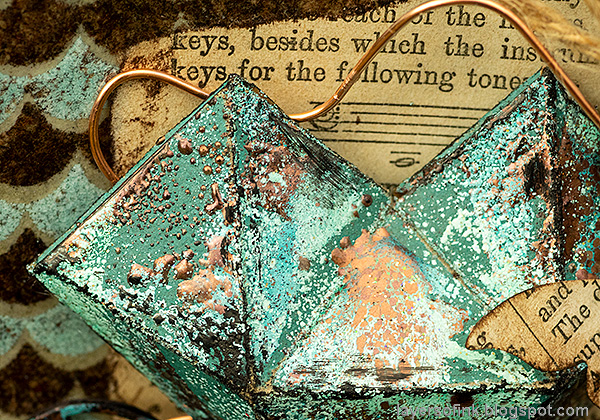
I layered the heart on top of an old dictionary paper, which happened to be about music. Here you can also see the texture of the heart better, and that not all the cardstock has been embossed.

The mix of embossing powders and ink on the background makes for a resin look that is a little hard to capture on photo. Since the scallops have been embossed with more layers of powder, they stand out slightly from the background.
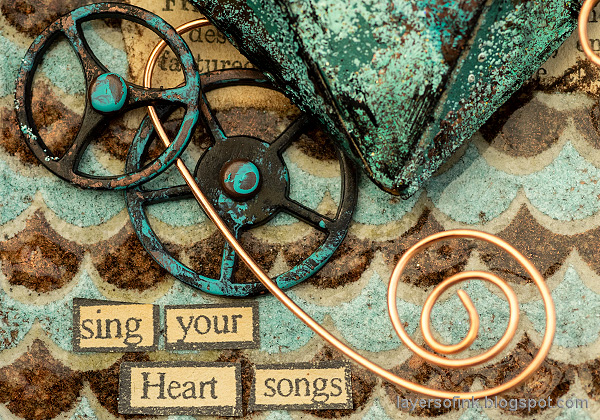
The wire was shaped with pliers. It could also have been distressed, but I liked the contrast created by the shiny wire. The sentiment stamp comes from Tim's Winged Things 1 set, and was stamped on leftover dictionary paper and cut out.
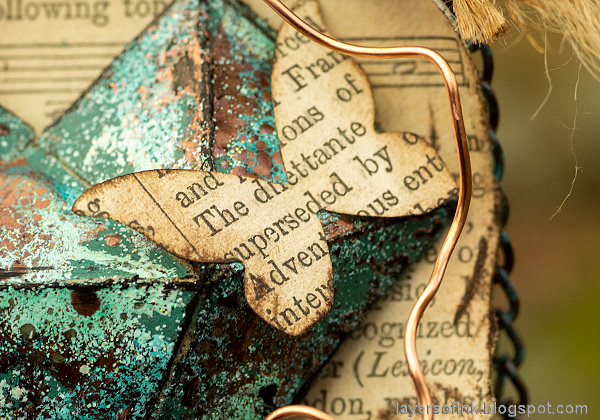
I die cut two butterflies with the SSS Butterfly Drift die, also from the old dictionary paper.

The key hangs from a Swivel Clasp which was attached to the tag by making a small hole and twisting the copper wire to make it look like two jump rings.

This tag has a lot of dimension, which you can see here, since the heart is pretty dimensional.

I hope you will join us this week in our Rust It Up challenge. As always, you have a chance to win a $50 gift voucher to do some fun shopping at Simon Says Stamp. You have until next Monday 8am Ohio time. 1pm UK time, 2 pm CET to join in.


Do you use Instagram? If so please add #sssmchallenge so we can see your entries there too.


Thank you so much for stopping by here today!
Happy crafting!
Anna-Karin
Supplies:
* Please note: the links are affiliate links, for which I receive a small percentage of sales generated by the link, at no extra cost to you.
* Please note: the links are affiliate links, for which I receive a small percentage of sales generated by the link, at no extra cost to you.
I really love and always admire your attention to detail and the beautiful colour schemes, Anna-Karin, and this beautiful tag makes no exception. Love everything about it - from the layered background to the patina-ed embellishments!!
ReplyDeleteClaudia x
This is gorgeous Anna-Karin. I love all the rusty crusty layers and colour combo. Perfection xxx
ReplyDeleteWow, what a stunning rusty tag! I love the embossed background and the way it all came together, the rusty elements are amazing 😀. Wishing you a happy and creative week! Hugs, Jo x
ReplyDeleteThis is absolutely gorgeous. I loe the colours and all your techniques. It is so eyecatching.
ReplyDeleteA fabulous tag... the background is amazing, but then that heart completely steals the show - brilliant rusty patina.
ReplyDeleteAlison x
LOVE this tag, Anna-Karin!! Such a gorgeous patina and design! hugs, Maura
ReplyDelete